Cauliflower Hummus

cauliflower tahini hummus dip
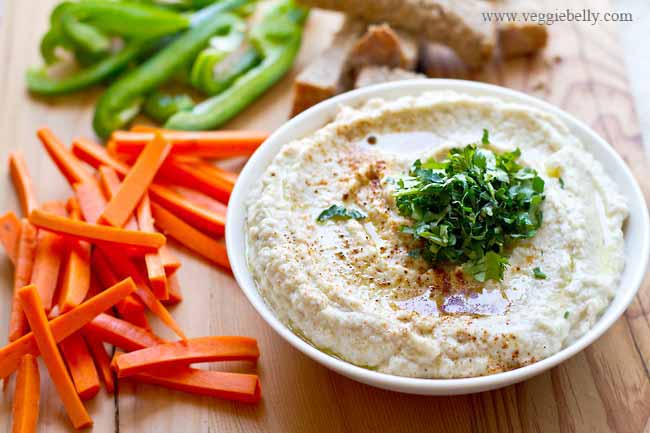
This creamy, yet light cauliflower tahini dip is like a hummus, except it uses cauliflower instead of chickpeas! I spice the dip with some ground cumin, coriander and lemon juice and then garnish it with a big sprinkling of chopped cilantro. This is a great, healthy dip to enjoy with vegetables and some bread or crackers.
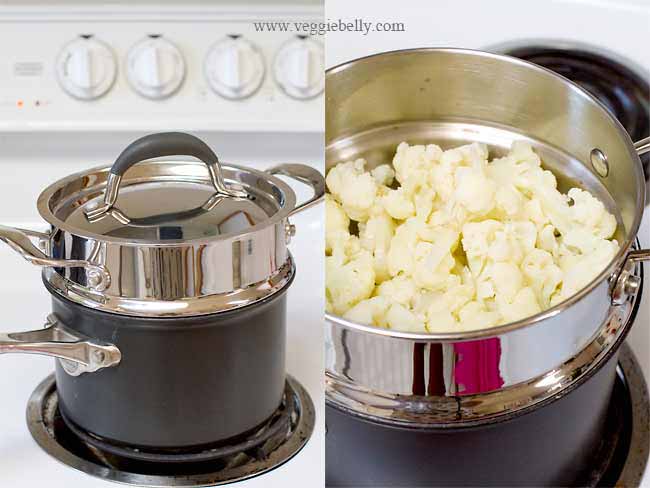
steamed cauliflower for dip
I like to steam the cauliflower, but you can also toss it in olive oil and roast the cauliflower before making this dip. Serve this hummus-style healthy cauliflower dip with vegetable crudités (carrot, celery, bell peppers etc) and warmed pita bread or crackers.

I use who coriander and cumin seeds, that I gently roast on a skillet and then powder in a spice grinder. There is nothing like freshly ground spices to make a hummus (or anything other dish) flavorful! But if you want a short cut, simple use ground coriander and ground cumin instead.
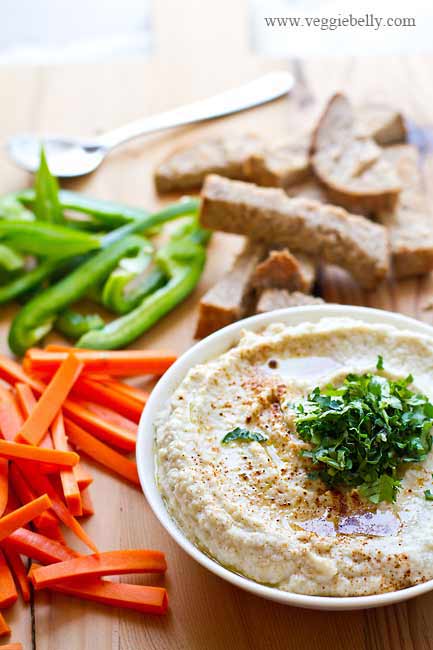
cauliflower tahini hummus dip

Cauliflower Hummus with Tahini Recipe

Serves 6 as a dip

Ingredients
1 lb cauliflower florets (about 1 small head of cauliflower)
1 tablespoon lemon juice
1 teaspoon coriander seeds. Substitute with ground coriander.
1 teaspoon cumin seeds. Substitute with ground cumin.
1/4 cup tahini
1-2 cloves of garlic, peeled
2 tablespoons olive oil
salt
2 tablespoon finely chopped cilantro or parsley

Method
1.Place the cauliflower florets in a steamer apparatus, cover and steam until the florets are very soft, about 15 minutes.
If you don’t have a steamer, place the cauliflower florets, along with 1/2 cup water in a saucepan. Bring to a boil. Then reduce heat to low, cover and simmer the cauliflower until it is very soft, about 10 minutes. If all the water evaporates before the cauliflower is soft, add 1/4 cup water at a time. If there is any water remaining in the pan at the end, remove the lid, crank up the heat to medium-high and let it boil away. Make sure the cauliflower is not water logged or too wet before proceeding

2.While the cauliflower is steaming, work on the spices. Place the coriander and cumin seeds in a small skillet. Toast on medium-low heat, shaking often until the spices are lightly golden and fragrant, about 5 minutes. Let the spices cool a little, then powder them in a food processor or mortar and pestle. If you are using ground coriander and cumin, skip this step and go to step 3.

3. Place the steamed, cooled cauliflower, and all other ingredients except the cilantro or parsley in a food processor, and blend into a smooth puree. If the dip is too thick, add water a few tablespoons at a time until your desired consistency is reached. If you want the hummus more creamy add more tahini at this point. Garnish with chopped cilantro or parsley.

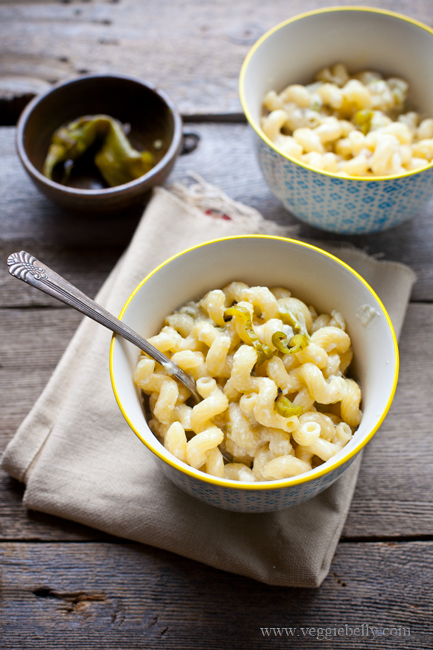
Hatch Chile Macaroni and Cheese

hatch chile macaroni and cheese
I roasted a big bunch of hatch chiles recently. So I’m using them to make macaroni and cheese. Hatch chiles are a type of green chile from New Mexico. If you don’t have freshly roasted hatch chiles, just go ahead and use canned green chiles. I love a spicy mac and cheese , and hatch chiles (or green chiles) are a great way to spice up macaroni and cheese. Feel free to use extra chiles if you like!
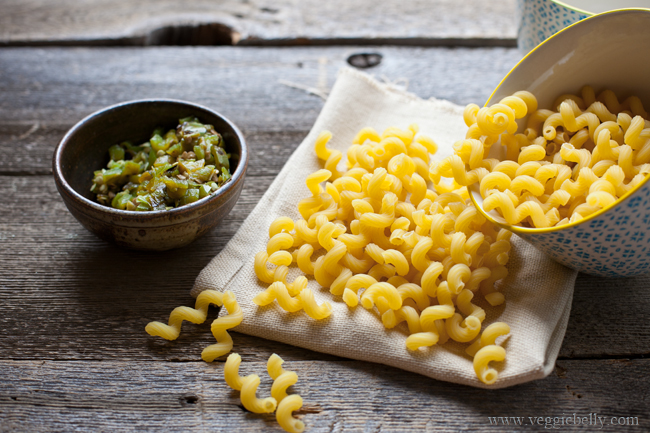
cavtappi pasta and hatch green chiles for macaroni and cheese
How to make the perfect mac and cheese

1. Make sure the pasta is al dente. That is, not over cooked. The pasta should have a little bit to it. Cook it 1 minute less than what the package says
2. Salt the pasta water. This is the only opportunity to give the pasta some salt and flavor.
3. Add cheese a little at a time to the sauce. Make sure a batch of cheese completely melts into the sauce before adding more. This will help the sauce get nice and silky.
4. Add the cheese on low heat. If you add cheese when the sauce is too hot, it will clump up.
5. Make sure the cheese is finely shredded, it will melt better.

Most mac n cheese recipes will have you sprinkle bread crumbs on top and bake the whole thing in an oven. I usually never have patience for that! So I mix the cheese sauce with the pasta and eat it right away!

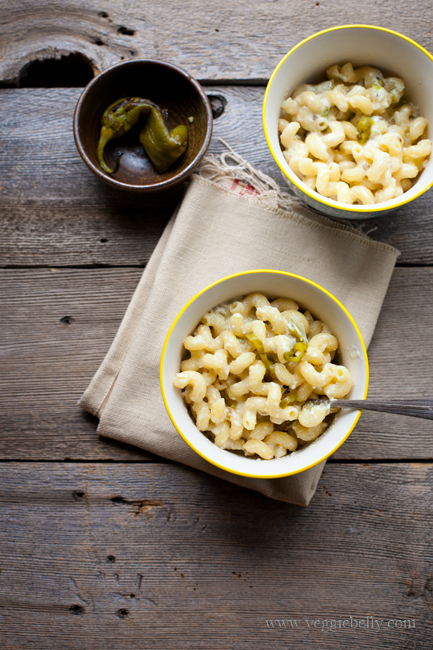
green chile macaroni and cheese
Hatch Chile Macaroni and Cheese

Ingredients
½ lb pasta (elbow macaroni, spiral or cavatappi)
2 tablespoons butter
½ an onion, chopped
1 ½ tablespoons flour
2 cups whole milk
1 1/2 cup shredded cheddar cheese
3/4 cup chopped roasted hatch chiles or green chiles. Freshly roasted or canned.

Method
1. Boil the pasta in plenty of salted water. When it is al dente, drain it and set aside. Make sure the pasta is not over cooked.
2. While the pasta is cooking, work on the sauce. Heat butter in a medium sauce pan. Add the onion and cook until it is soft, about 2 minutes.
3. Sprinkle the flour onto the butter and stir well. Cook on medium-low heat for about 1 minutes, stirring constantly. The flour should not brown. Now slowly pour in the milk, whisking constantly. Let the sauce cook and come to a boil while whisking it constantly.
4. When the sauce has thickened, reduce the heat to low. Add one small hand full of the shredded cheese. Stir until it is completely melted into the sauce. Now add another hand full of cheese and stir it. Keep adding all the cheese one hand full at a time and making sure it is completely incorporated into the sauce before adding more.
5. Fold in the cooked pasta, green chiles and salt. Increase the heat and cook just until everything is hot.

How to Skillet Roast Hatch Chiles (and Freeze for Later).

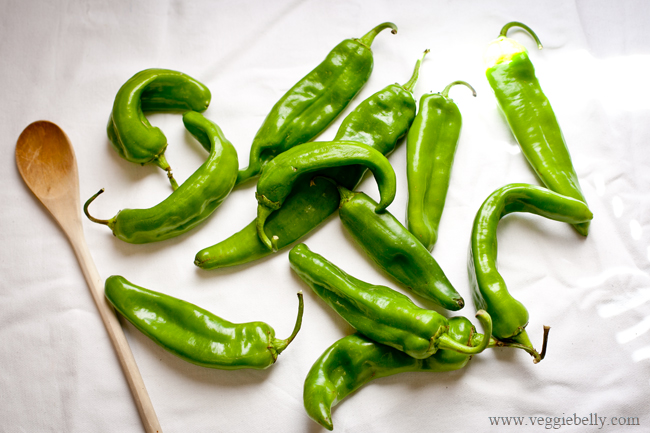
Hatch chiles ready for skillet roasting
Hatch chiles are a type of green chile from Hatch valley, New Mexico. They are in season now and I picked up several pounds on sale. I’ve home roasted the hatch chiles on a skillet and frozen them, so I can enjoy them year round. Hatch chiles are generally mild, although you may get a hot one every now and then. And they smell heavenly when roasting. My kitchen was filled with their smoky aroma all day. I use roasted hatch chiles for all sort of things – on burgers, in pasta, in stews, in quasadillas, eggs…the possibilities are endless.

Hatch chile season is short. So go buy some now and roast them right away; you wont regret it!
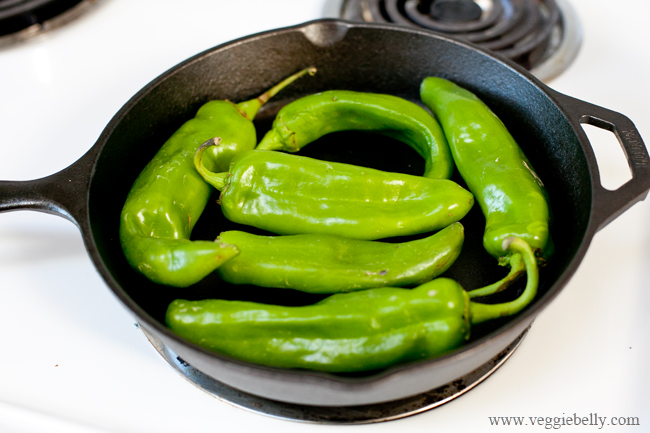
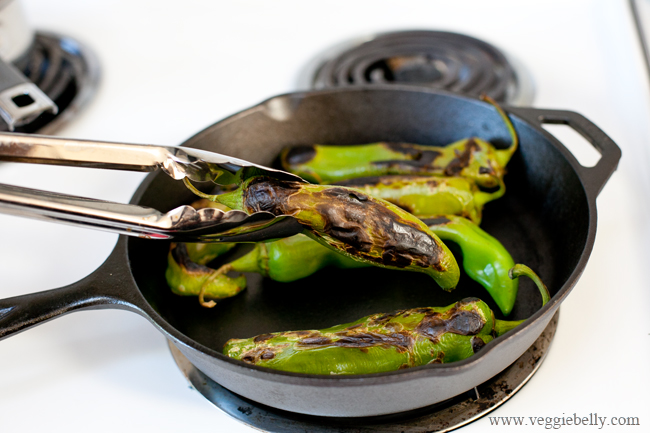
hatch chiles in a skilletI like to use a cast iron skillet for roasting Hatch chiles, because it is heavy and conducts heat evenly. But any heavy skillet will do.

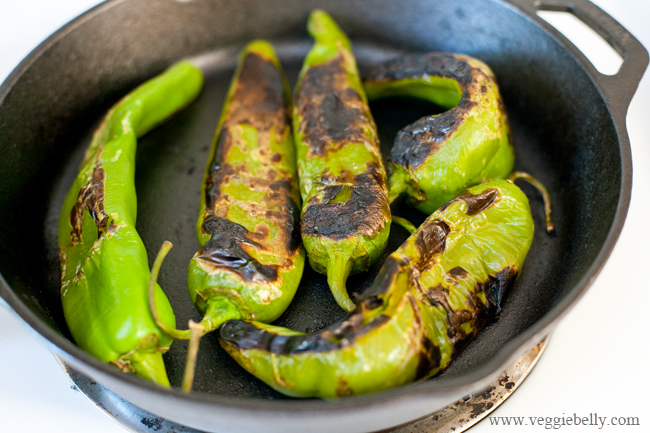
Roast the hatch chiles in a single layer until they are charred on both sides.

Make sure most the surface is charred.

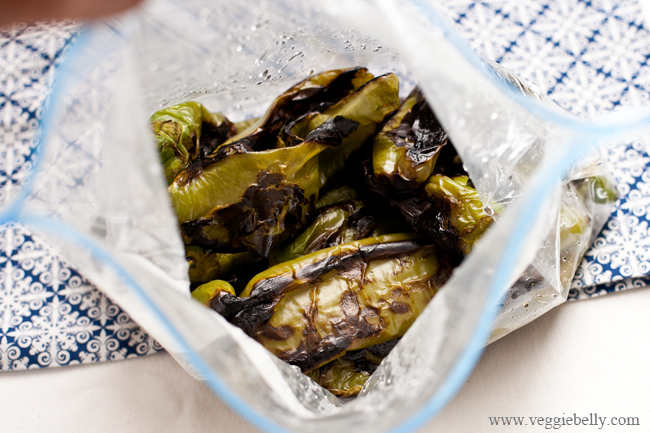
Steam roasted hatch chiles in a bagPut the charred chiles in a ziplock bag. Close the bag. The chiles will steam in the bag. And the steam will loosen their skins, making it easy for you to peel.

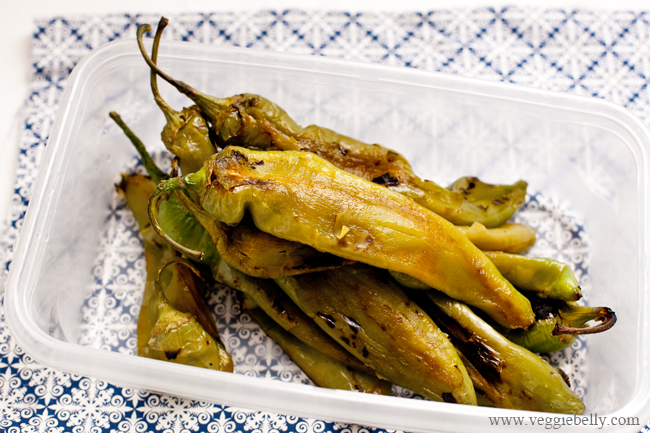
Roasted whole hatch chilesLet the chiles sit in the bag until the skins loosen and they are cool enough to handle. Then peel away and discard the skin. You will now have succulent, home-roasted Hatch chiles.

Should you seed roasted Hatch chiles or keep the seeds? That’s up to you. The seeds contain some heat. So if you want things to be mild, seed the chiles. To do this, cut the chile vertically in half. Scrape away and discard the exposed seeds. Now chop up the chiles.

I love the flavor and heat of hatch chiles seeds, so I keep all the seeds!

Once chopped, spoon the chiles into smaller freezer bags. (Make sure the chiles are completely cool before feezing!). Gently press out the air. Seal the bag well. Date and label the freezer bag, and place it in the freezer.

How to use Hatch chiles

Green Chile Breakfast Quesadillas from New York Times. A comforting, Santa Fe style brunch dish.
Hatch chile apple cobbler from Homesick Texan. Apples, cinnamon and chiles?! Yes please!
Hatch Chile Pesto from AZCentral. Full of fresh herbs and a great spicy twist to regular pesto.
 
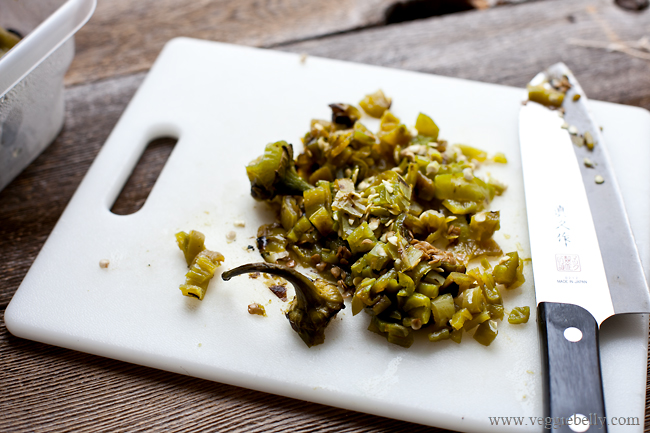
Roasted, chopped hatch chile

How to Roast Hatch Chiles in a Skillet

Ingredients
Hatch Chiles

Method
Select fairly straight chiles. The curved and twisted ones will be difficult to evenly char.
1. Heat a heavy bottom skillet on medium-high. Arrange the chiles in a single layer on the skillet. (You may have to do this in batches depending on how many chiles you have).
2. Let the chiles cook on medium-high heat until most their surface is charred and black.
3. At this point, flip the chiles over using tongs and let the other side char as well. If there are any large parts that are still green, use your tongs to gently press that part onto the surface of the skillet so that it gets some char.
4. When the chiles are well charred (its ok if there are little uncharred parts left), place them in a thick zip lock bag and close the bag. This will help steam the chiles and loosen the skin.
5. Keep putting the chiles in the zip lock bag as and when you are done roasting them.
6. Let the chiles steam in the closed Ziploc bag for about 15 minutes, or until the skins get lose and the chiles are cool enough to handle.
7. Now, using your fingers, peel away the charred skin and discard the skins. Place the peeled chiles on a plate or cookie sheet and let them cool completely.
8. Chop the cooled, roasted, peeled chiles. Place them in freezer bags and freeze for later.

Related Posts with Thumbnails