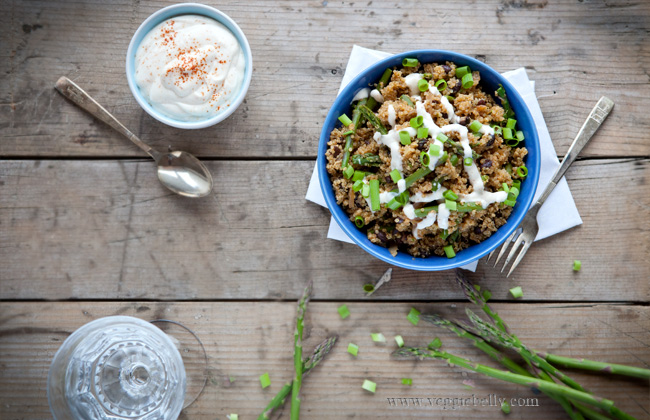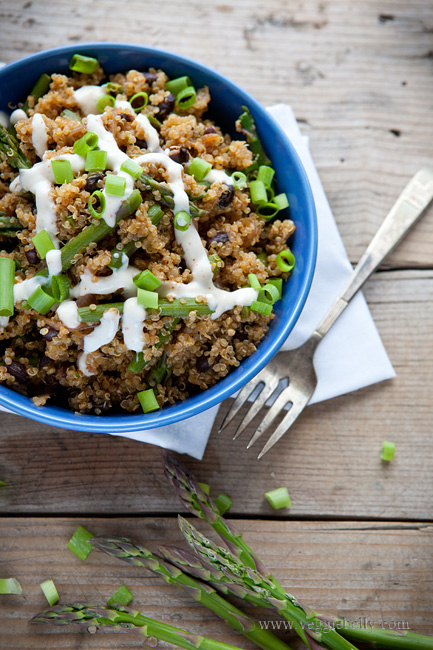
Spicy Quinoa, Black Bean and Asparagus Bowl Recipe

Who doesnt love an easy, healthy quinoa salad! This spicy quinoa, black bean and asparagus recipe is a variation to quinoa salad. Its served veggie bowl style, with toppings of your choice and a dollop of sour cream.

You can use pinto beans or chickpeas instead of the black beans if you like. The recipe says 1-2 chipotle peppers; use them according to your taste. For an extra spicy kick, I also add some paprika, but its totally optional.

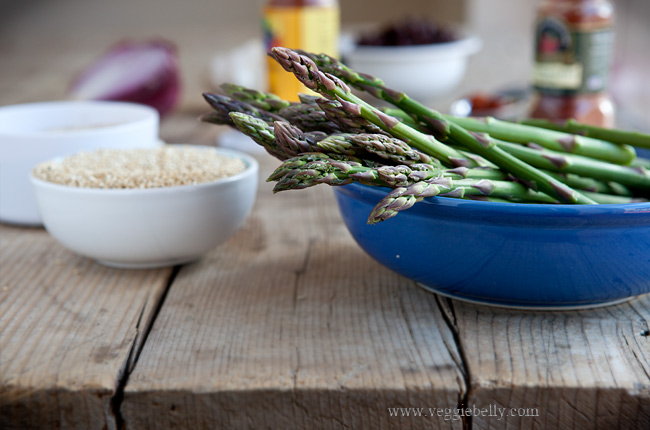
Select slim, tender asparagus, they will cook quicker. If you use thicker asparagus, make sure you cut them smaller.

Spicy Quinoa, Black Bean and Asparagus Bowl Recipe

serves about 4

Ingredients
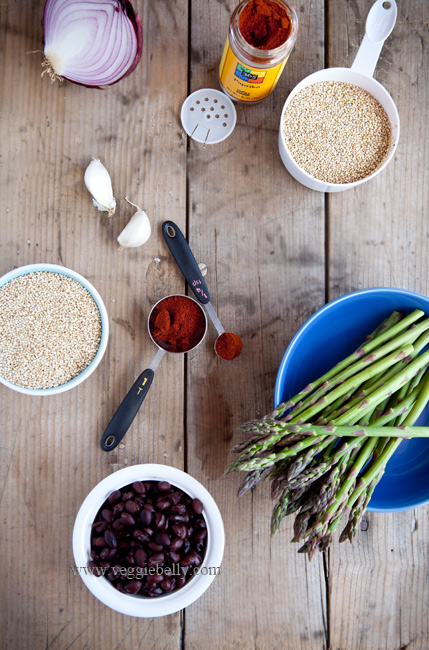
1 tabespoon olive oil
1/2 a red onion, peeled and sliced thin
1 red pepper, sliced
3 cloves garlic, minced
1 1/4  cups quinoa
½ teaspoon paprika, optional
1-2 chipotle peppers in adobo sauce, minced
1 teaspoon dried oregano
30 thin asparagus spears (about 8oz), each cut into three pieces
One 15 oz can of black beans, drained and rinsed (about 1 ½ cups)
1 cup sour cream, I used low fat

Method
1. Heat oil in a saucepan and add onion, red pepper and garlic. Saute on medium till the onion and pepper is soft.
2. Add the quinoa, paprika if using, chipotle peppers and oregano. Stir for about 30 seconds.
3. Add 2 1/2 cups water and salt to the quinoa. Let it boil. Then reduce heat to low, cover with lid and let it simmer for about 12 minutes.
4. Two minutes before the quinoa is done (at approximately the 10th minute), add the asparagus to the pot, cover again and let the quinoa and asparagus cook for about 2 more minutes.
5. Removed lid, add black beans, and fluff the quinoa with a fork.
6. Serve with a dollop of sour cream and any of the other toppings below.

Optional toppings  – pick what you like
Chopped tomato
Sliced avocado
Chopped green onion
Diced mango
Sliced Olives
Shredded pepper jack cheese or cotija cheese
Chopped cilantro or parsley or green onion
Chopped calnuts
Lime wedges

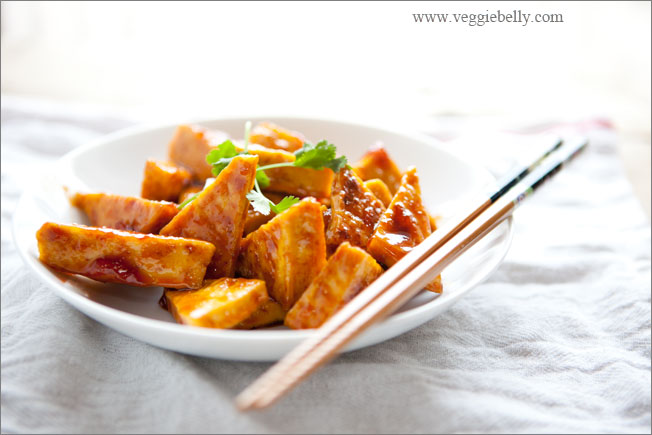
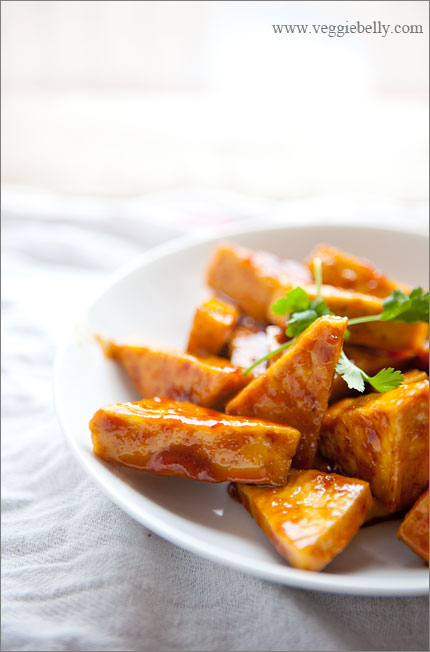
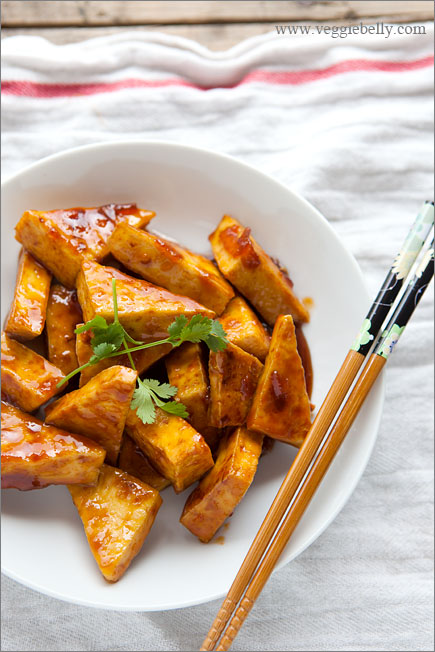
Hot and Sweet Marmalade Glazed Tofu

On a busy weeknight, this is my go to dish. Its quick and easy to make if you have pressed tofu lying around. I like to serve this hot and sweet marmalade glazed tofu with some steamed broccoli and brown rice for a complete meal.

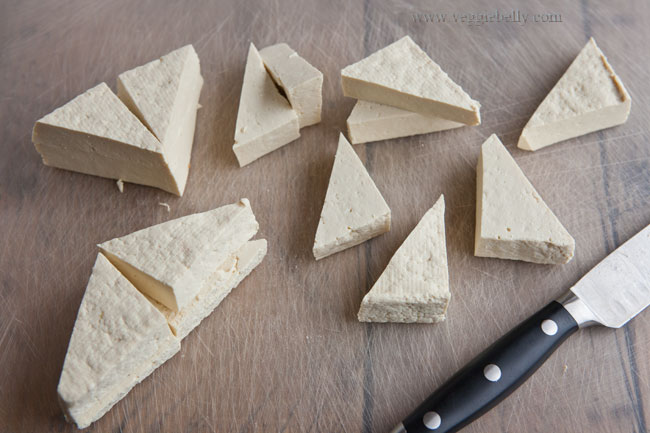
If you are not a tofu fan, but want to start incorporating some tofu in your meals, this is the perfect dish to start with. The glaze is sweet, spicy, and coats the tofu beautifully. I like to cut the tofu into small triangles (a method I learned from Vegan Yum Yum). The thinner you cut the tofu, the better results you will get with this recipe.

I originally posted this recipe a long time ago as sticky orange tofu thins. This continues to be one of my most popular posts, so I thought I should repost it, with updated photos. Checkout the old post to see what rubbish my photos were!

My original recipe requires you to slice the tofu as thinly as you can, that way you get to enjoy more of the orange glaze with every bit of tofu.

Hot and Sweet Marmalade Glazed Tofu Recipe

Inspired by this recipe from Vegan Yum Yum
Serves about 2

Ingredients
one 15 oz package of firm tofu, drained and pressed
A few drops of oil
For the glaze
4 tablespoons soy sauce
4 tablespoons orange marmalade. Substitute with brown sugar
1 1/2 tablespoons lemon juice
1 tablespoon or to taste sriracha or any other hot chili sauce
1 tablespoon chopped mint or cilantro for garnish

Method

  1. Slice the tofu into small triangles. The thinner you slice the tofu the better
  2. Whisk together the marmalade, soy sauce, lemon juice and sriracha and set aside
  3. Heat a few drops of oil and large, flat non-stick skillet. Place the tofu slices on the pan in a single layer. Don’t over crown the pan, do this in batches if needed.
  4. Cook the tofu on medium heat, till it is browned on both sides. Gently press on the tofu using the back of a wide spatula to release any excess water, as the tofu cooks.
  5. When the tofu is browned, reduce heat to low and pour the glaze all over the tofu
  6. Let the glaze bubble and thicken, while stirring gently and flipping the tofu slices. This will happen quickly, so make sure you keep the heat on low to prevent the marmalade from burning. When the glaze has thickened and the tofu is well coated, about 1 minute, turn off the heat.
  7. Garnish with chopped mint or cilantro
  8. Serve with steamed broccoli and brown rice

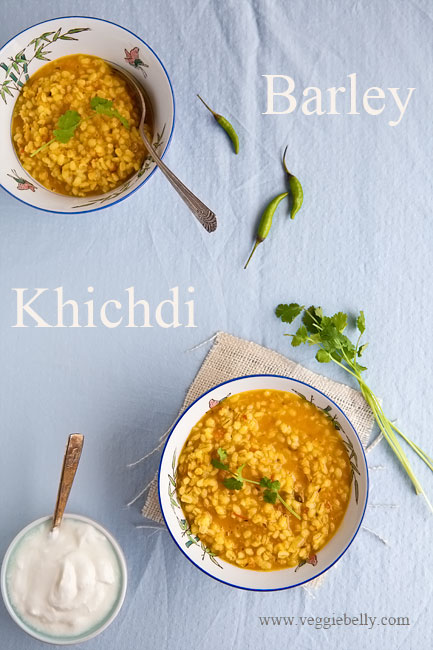
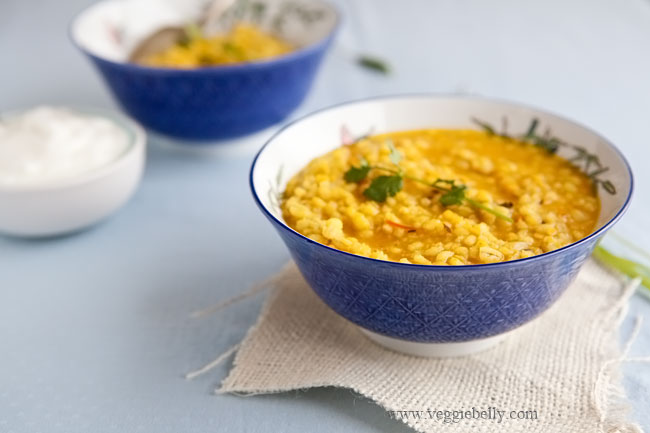
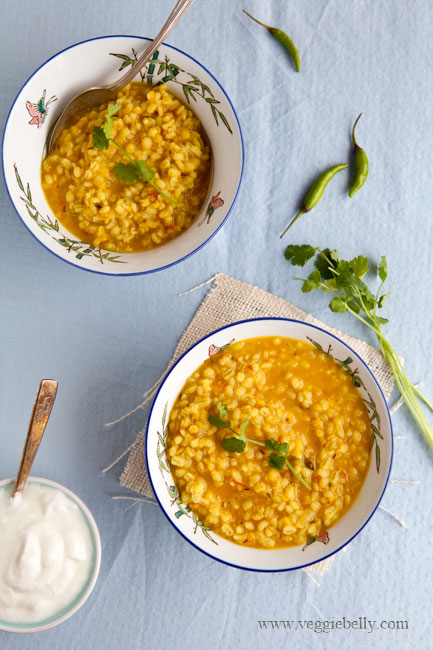
Barley Khichdi Recipe

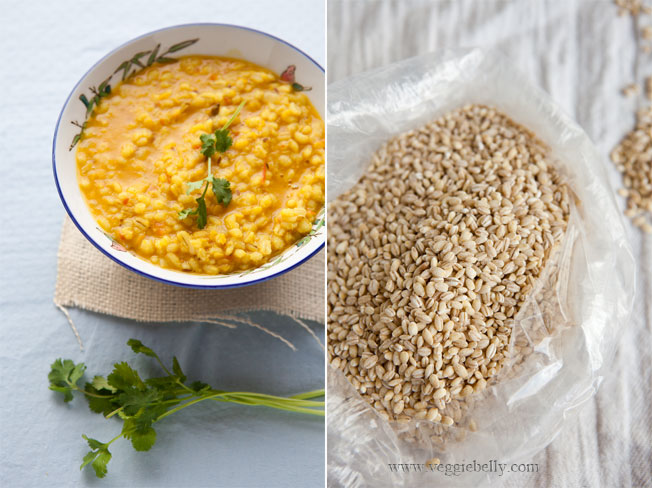
When I want a quick, comforting meal with no fuss, I turn to this barley khichdi. A traditional Indian khichdi is made with rice, moong dal (yellow mung beans) and turmeric and is cooked to a risotto like consistency. I use barley instead of the rice to create a curried Indian barley khichdi. This vegetarian barley khichdi is tasty, easy to make and will please the whole family! Plus, you can easily cut out the ghee and use oil instead to make this khichdi vegan.

I recommend you use pearl barley in this recipe. Pearl barley cooks quicker than the non-pearled kind.  What’s the difference between pearl barley and hulled un-pearl barley? Hulled barley has its outer husk on, so it takes longer to cook. Pearl barley has its outer husk removed, therefore it cooks quicker. If you use hulled barley for this recipe keep in mind you will need to give it more time and water to cook.

Add a handful of frozen mixed vegetables or a little cubed carrot and some peas if you wish. Also use less dal, according to your preference.  This is a very forgiving recipe. If you have a pressure cooker, feel free to cook this in a pressure cooker.

Barley Khichdi Recipe

serves about 2

Ingredients
1 1/2 tablespoons butter or ghee
¼ teaspoon cumin seeds
1/8 teaspoon asafetida, optional
1 green chili, slit. Optional
½ onion, minced
1 small tomato, chopped finely
¼ teaspoon turmeric powder
½ cup pearled barley
¼ scant cup yellow moong dal. Substitute with masoor dal
A squeeze of lemon, optional
Chopped cilantro for garnish

Method
1. Heat ghee in a medium sauce pan. Add the cumin seeds. When they sizzle, add asafetida and green chili. Stir for 30 seconds.
2. Then add onions. Sautee on medium heat till the onions are soft (don’t let them brown).
3. Add the tomatoes, and cook till they are soft.
4. Add turmeric, barley and moon dal. Stir for a few seconds.
5. Add 3 cups of water and salt.
6. Bring the water to a boil. Then reduce heat to low, put a lid on the pan, and let it simmer till the barley is cooked. I like the barley to have a little bite to it, so I cook it for about 20 minutes.  If you want the barley to be softer, cook it longer. During cooking, if the khichdi dries up, add water as needed, 1/2 cup at a time.
7. Taste the khichdi and adjust salt if needed. Turn off heat, and add a squeeze of lemon, if using. (Taste the khichdi first before adding lemon juice. If the tomatoes are tart enough you may not need the lemon. This is by no means a lemony dish.)

Serve hot with garnished with cilantro and yogurt on the side.

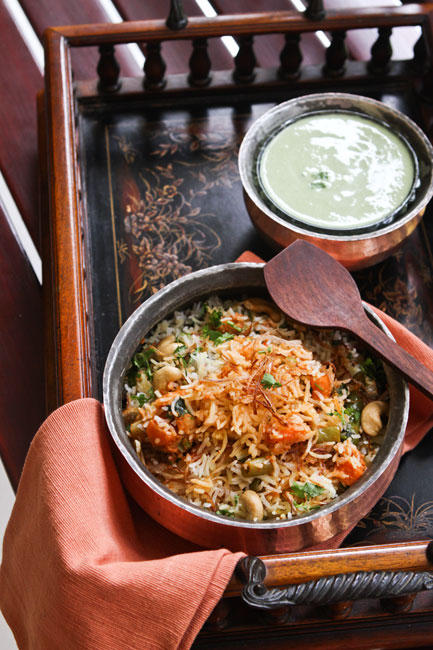
Mughlai Vegetable Biryani Recipe

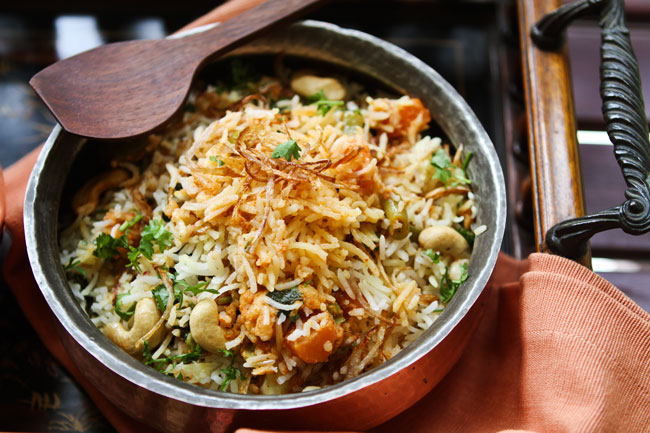
I imagine that 500 years ago Indian emperors ate like this. Steaming hot biryanis straight from the handi (a cooking vessel), scented with cinnamon, safron and nuts and served with a cool minty raita. Mughlai cooking originated in India around the 16th century, during the Mughal empire. Mughlai cuisine is rich and flavorful. It uses nuts, saffron and whole spices like clove and cardamom. Many Mughlai foods are baked in the oven in sealed pots (handi).

I learned how to make this vegetable Mughlai biryani from Veena aunty, a seasoned, passionate cook, and friend of my mother’s. (Have you seen my post on Veena aunty’s out-of-this-world paneer parathas?!) This vegetable Mughlai biryani recipe takes a bit of time. But all the hard work in the kitchen will be well worth the end result – a biryani that is fragrant, flavorful, and filling.

Mughlai Vegetable Biryani Recipe

Serves about 8
For the rice
Ingredients

2 cups long grain basmati rice
2 tablespoons salt
1 tablespoon lemon juice

Method
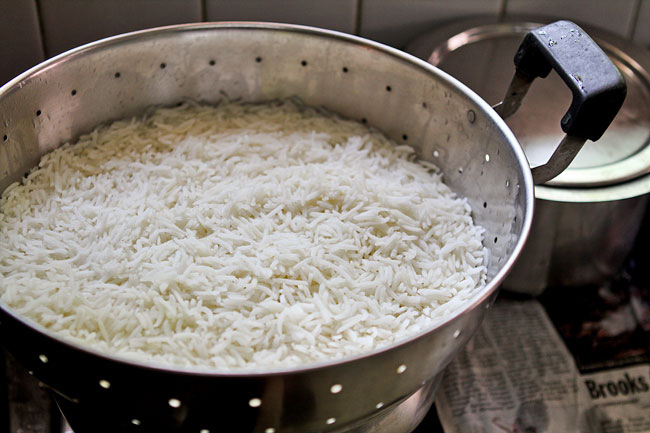

1. Wash and drain the rice. Bring 8 cups of water to a boil in a large saucepan. When the water boils, add the rice, salt and lemon juice. Stir gently. When the water boils again, reduce heat to low. Simmer the rice, uncovered for about 8 minutes, or till the rice is about 3/4th cooked.

The grains must be swollen, but they must still be a little chewy. If the rice is crunchy it needs to cook more. If the rice is soft, you have over cooked it.

Drain the rice in colander. Gently wash it in cold water. Let it drain well. Then spread the rice out on a large platter to cool completely.

For the vegetables
Ingredients

½ cup fresh beans, chopped
½ cup green peas
1 cup carrot, chopped into small cubes
1 cup cauliflower cut into small florets (about 12 small florets)

Method
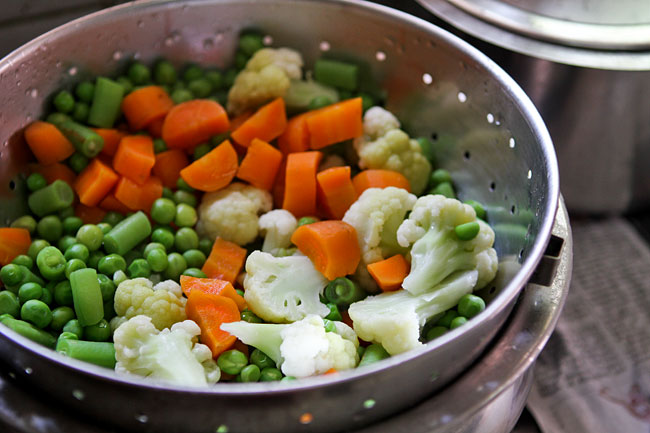
1. Boil plenty of water in a large pan. Add the beans, peas and carrots. Boil for 2 minutes.  Add the cauliflower, and boil 2 more minutes. All the vegetables must be a little crunchy and half cooked.
2. Drain the vegetables well, and wash in cold water to stop the cooking process. Drain again and set aside.  Alternatively, skip using fresh vegetables altogether and use 3 cups of frozen, thawed mixed vegetables instead (no need to boil in water)
For the masala
Ingredients
1 tablespoon cashewnuts
½ tablespoon khus khus (white poppy seeds)
1 tablespoon fresh grated coconut
1/3 cup vegetable oil
2 small onions grated (about ½ cup when grated)
½ bay leaf
1 thin piece of cinnamon
4 cloves
2 cardamom pods
1 teaspoon ginger paste
1 teaspoon garlic paste
2 medium tomatoes, pureed in a blender
½ cup full fat yogurt
1 teaspoon garam masala
2 teaspoons chili powder
¼ teaspoon cumin powder
For layering
½ cup chopped cilantro leaves
½ cup chopped mint leaves
½ teaspoon saffron dissolved in ½ cup warm milk
2 tablespoons ghee

Method
1. Grind the cashew, khus khus and coconut into a smooth paste, using as little water as possible. Set aside.
2. Heat oil in a large skillet. Add grated onions, and cook on low heat till the onions are brown, about 10 minutes.
3. To the onions, add the bay leaf, cinnamon, cloves, and cardamom. Crank up the heat to medium and stir for about 1 minute or till fragrant.
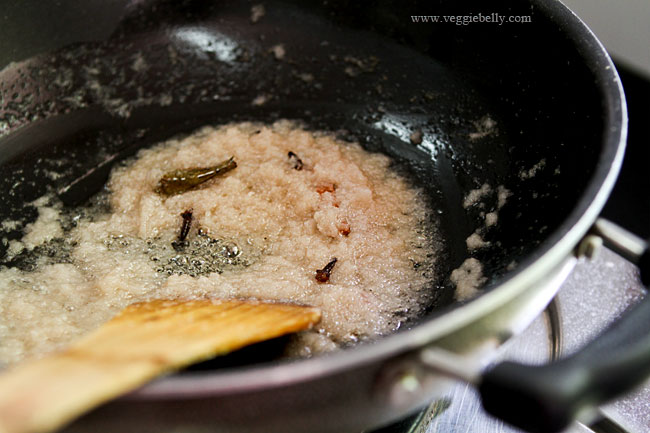
4. Add the ginger and garlic pastes. Stir and let it cook for about 30 seconds.
5. Add the coconut, khus khus, cashew paste. Stir another 30 seconds.
6. Add pureed tomatoes and cook for about 4 minutes. Remove the skillet from the heat.
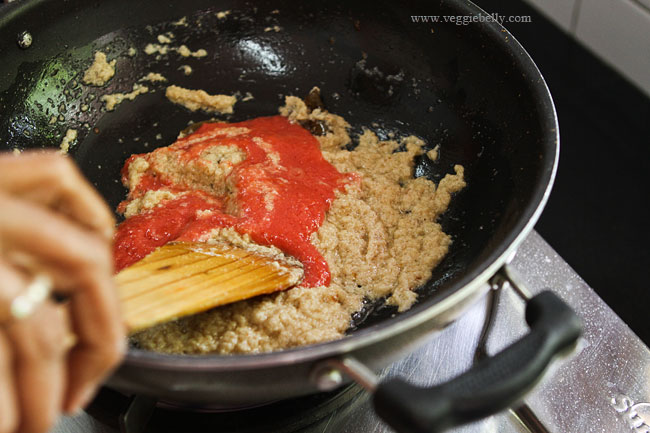
7. Add yogurt and mix well. Moving the skillet away from the heat when adding yogurt will prevent it from curdling.
8. Return the skillet to the stove. Turn heat to low, and add garam masala, chili powder, and cumin powder. Stir for 1 minute.
9. Now add the reserved vegetables and salt. Cook for 10 minutes or till the vegetables are almost done. Add ½ cup water, and simmer another 3-5 minutes.
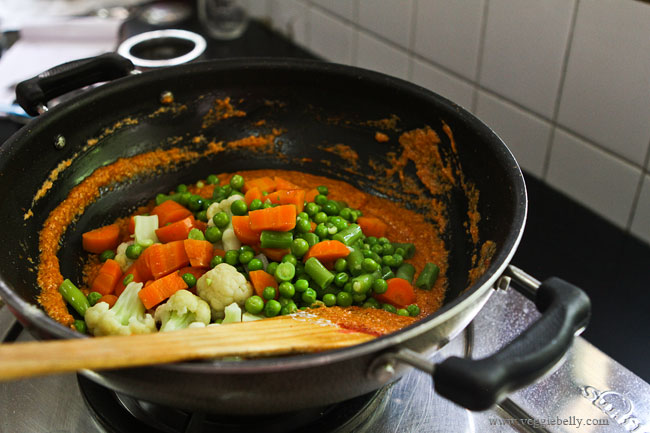
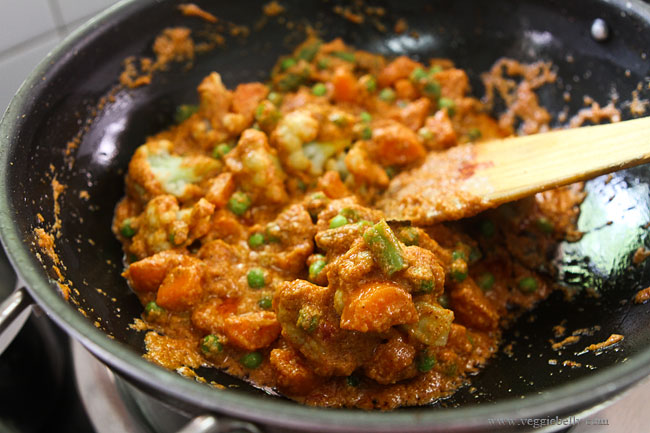
10. Taste the gravy and adjust salt if needed. Remember: this gravy will be spicy, but when you add the rice to it later, everything will balance out.
11. Now you are ready to layer the biryani. Take a large baking dish. Lightly oil the inside.
12. Layer everything in this order – half the rice, half the chopped cilantro, half the chopped mint, all the vegetables and gravy, remaining half of the rice, saffron dissolved in milk, remaining half the cilantro and mint. Drizzle the top with ghee.
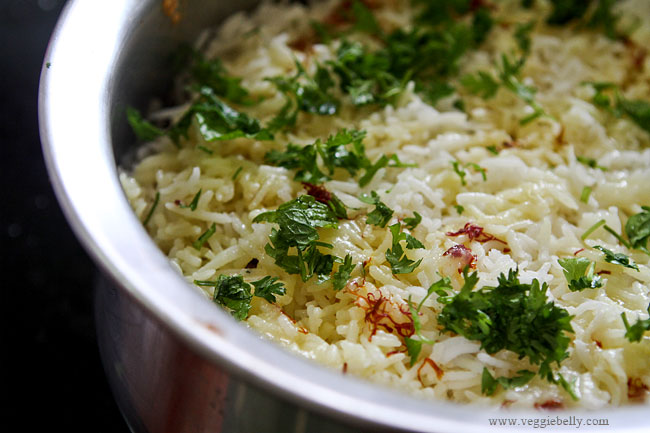

13. Cover the baking dish and bake in a 350f oven for 15 minutes or till the rice is cooked through but not muchy. Turn the oven off, and let the biryani sit in the hot oven another 10 minutes.

If you dont want to bake the biryani in the oven, layer everything as above in a deep saucepan. Cover tightly with a lid, and set it on the stove top. Cook on low heat for about 10-15 minutes or till the rice is cooked through but not mushy.

For topping
Ingredients
2 medium onions
8 cashewnuts
Oil for deep frying

Method
While the biryani is baking, work on the toppings.

1. Using a mandolin, slice the onions very thinly. If using a knife, make sure the knife is sharp and slice the onions as thinly as you can into strips.
2. Heat oil and deep fry the onion strips, a little at a time. Don’t over crowd the oil. When the onion turns light brown, remove from oil and drain on a paper towel. The fried onion will crisp up as it drains.
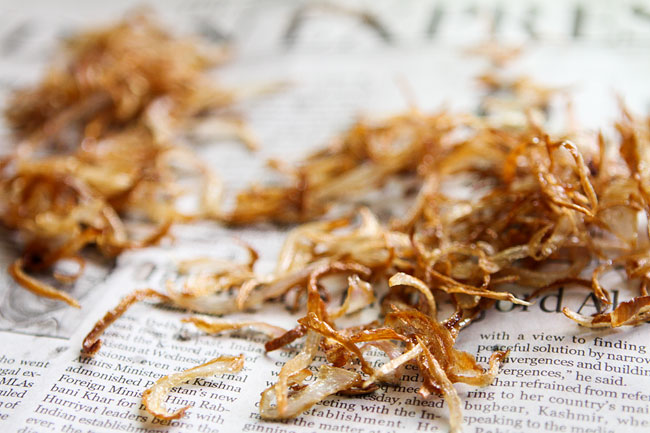
3. Then fry the cashewnuts till lightly golden.
4. When the biryani is done, top with the fried onions and cashewnuts.
Serve biryani hot with raita or yogurt.
Broccoli Paratha – a Step by Step Recipe

I make parathas often – they are a delicious, substantial meal and you can fill them with lots of different things. I usually make the traditional paneer parathas or aloo (potato) filled parathas. But lately I’ve been experimenting with different types of fillings. These broccoli parathas are a recent favorite.

Broccoli Paratha Recipe – a Step by Step

Makes 8 parathas

Ingredients for the dough
2 cups whole wheat flour (atta)
½ teaspoon salt
1 cup warm water. You wont need all of it.
¼ teaspoon oil

Ingredients for the filling
1 lb broccoli crowns (without stalks)
¾ cup finely chopped cilantro leaves
½ teaspoon scant garam masala
1/8 teaspoon ajwain (carom) seeds. Substitute with jeera (cumin) seeds
1 green chili, finely minced. Use more or less according to taste.
Salt

More flour for rolling
Oil for frying the parathas

Method

  1. Place the flour and salt on a clean surface
  2. Make a well in the middle of the flour
  3. Sprinkle water in the well a little at a time, mixing the dough with your fingers after each sprinkle. Soon the dough will start to come together and look somewhat like scrambled eggs.
  4. At this point start kneading using the base of your palm.

5. If the dough is too tight, sprinkle more water while kneading. Gather all the loose flour around while kneading.

6. When the dough forms a slightly soft, elastic, non-sticky ball, stop kneading
7.  Drizzle ¼ teaspoon of oil over the surface of the dough and spread it evenly
8. Cover the dough with a damp kitchen towel, and let it rest for about 30 minutes. Remember – flours differ in their elasticity, and some doughs may need to be rested more than others

9. While the dough is resting, working on the filling. Grate the broccoli using the finest side of a box grater. You need about 2 cups of grated broccoli. Do not grate the stems. If your broccoli is wet, make sure to dry it very well before grating.

10. Place the broccoli in a bowl, and add the cilantro, garam masala and ajwain. Mix gently. Add salt to the broccoli filling only in the last minute, otherwise the filling will become soggy.

Note: There are several recipes that recommend you salt the grated broccoli first and then squeeze out the excess water, before proceeding with adding the spices. I’ve tried this method, and there wasn’t much moisture to squeeze out of the broccoli, so I skip this step in this recipe.

However, if you are not experienced with making parathas, it may get a little tricky to roll out these parathas. This is where salting and squeezing the broccoli will help. The salt pulls out the moisture in the broccoli. When you’ve squeeze out all the water, the filling becomes easier to work with.

But I didn’t salt the broccoli. Instead, I added salt in the last minute, so that the broccoli didn’t have much of a chance to let out water. I also worked quickly while filling and rolling.

11. When the dough has rested, knead it gently once more

12. Divide the dough into 8 equal parts. Roll each one into balls. Keep them covered with a damp towel
13. Pour out about ½ cup flour for dipping and rolling. Take one dough ball, and flatten it with your fingers. Then dip it into the flour
14. Gently roll out the dough into a 3 ½ inch round

15. Add salt to the broccoli filling, and mix well. Taste the filling and adjust salt if needed. Place 2 tablespoons of the broccoli filling in the center of the dough. If you haven’t made parathas before, use less filling, it will make it easier to seal and roll

16. Using both your hands, gently bring up the edges of the dough
17. Then gather the edges over the filling. Compact the filling down with your fingers if you need to
18. Now pinch the edges together to seal

19. Gently flatten the parathas using your fingers

20. Dip it in some flour
21. Using a gentle touch, roll out the parathas, sprinkling more flour if it sticks
22. Roll out the paratha into about a 5 inch round

23. Heat a heavy bottom pan on medium heat. Place the rolled out parathas on the pan. Cook till light brown spots appear on one side. Flip the parathas and let brown spots appear on the other side. Then increase heat to medium-high, drizzle about ¼ teaspoon oil over the parathas and cook till golden, about 30 seconds.

Serve hot with yogurt or raita and pickles.

Need more paratha making tips? See this post.

Triple Smoky Mac and Cheese Recipe from Herbivoracious Cookbook and a Giveaway

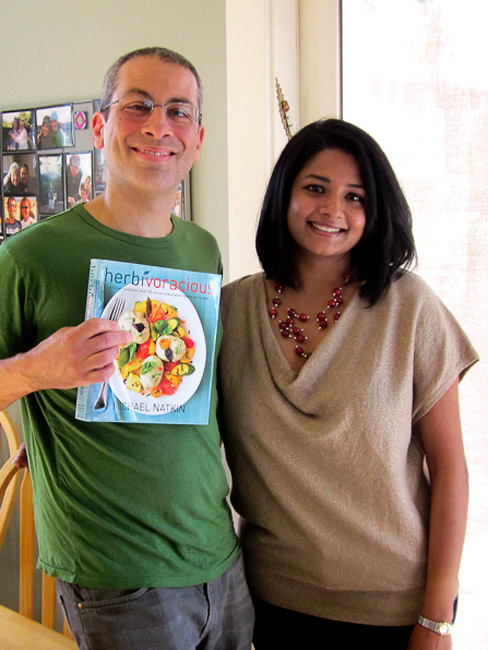
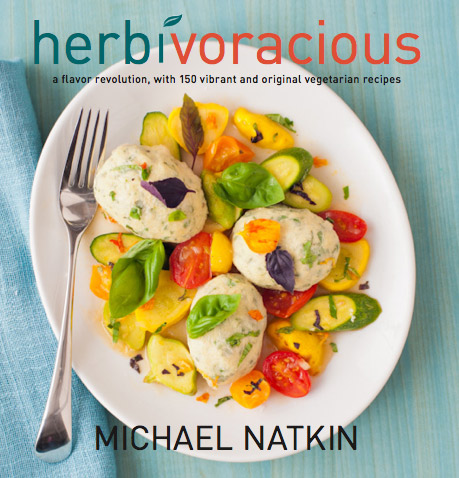
When I received a review copy of my friend Michael Natkin’s new cook book Herbivoracious: A Flavor Revolution with 150 Vibrant and Original Vegetarian Recipes, I was so thrilled and so hungry. Thrilled because Michael is my favorite vegetarian blogger and his site is full of creative vegetarian recipes. Hungry because Michael’s book is one of the best vegetarian cookbooks around, and all the recipes look delicious. Whether you are a vegetarian or an omnivore, you are going to love this book. And it has plenty of vegan and gluten-free recipes as well.

Michael and I, with Michael holding the very first copy of his cookbook! Exciting!

Michael has been a vegetarian since he was 18. When his mother fell sick, he started cooking her macrobiotic meals at home. Since then, Michael has been a devoted vegetarian. And his passion for food is so evident in his uber successful blog, Herbivoracious (same name as the cookbook!).

The blog is an encyclopedia of information, filled with recipes and tips. How does polenta with pan roasted porcini, tomato confit and chevre sound to you?! My personal favorite Herbivoracious blog recipe is the chickpea, spinach and tomato soup – simple yet packed with flavor.

When I received Herbivoracious, the cookbook, I had great trouble deciding what recipe I should make for this post. The chickpea and olive tagine with ras el hanout ( a North African spice mix) sounded yummy. As did the blackbean soup with orange jalapeno salsa, 10 minute chickpea salad with feta and basil, grilled tofu and pepper tacos, red curry delicata squash, and..well..pretty much all the recipes in the book!

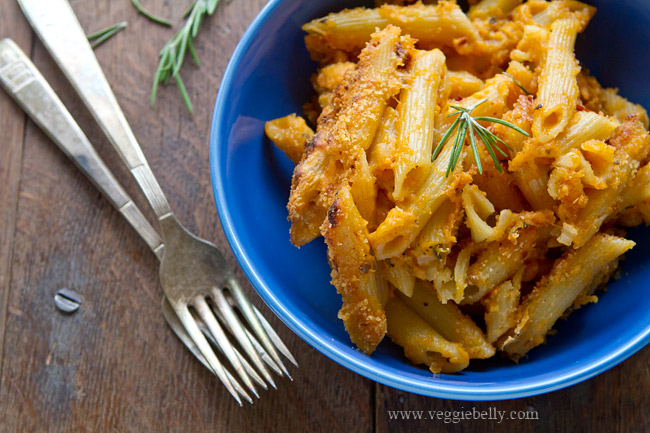
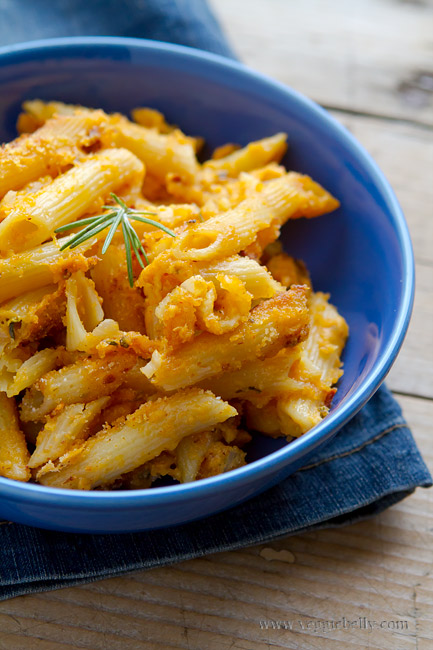
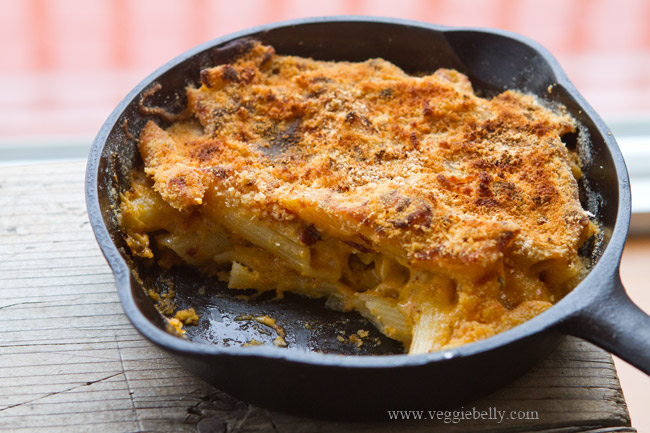
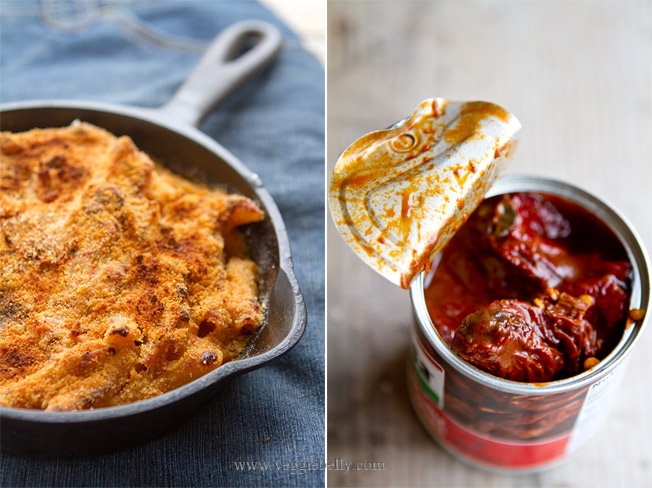
I finally decided to make the triple smoky mac and cheese. Because its cheesy, spicy and comforting – exactly what I needed on a cold, wet Portland evening. It’s the best mac and cheese I’ve had. It was easy to make, and tasted like it came from a high end restaurant. Meat lovers are sure to love this vegetarian mac and cheese. It has so many great smoky flavors going on, my husband thought it had bacon in it! Michael says you can either use smoked cheddar or smoked mozzarella in this recipe. The smoked cheese, plus smoked paprika and chipotle peppers make this mac and cheese wonderfully smoky.

Enjoy Michael’s recipe, and then make sure you enter the giveaway. The book will be out in May and the publisher, Harvard Common Press will send out a copy to one lucky winner as soon as Herbivoracious is published! You can also get your own copy on Amazon through this link Herbivoracious: A Flavor Revolution with 150 Vibrant and Original Vegetarian Recipes

Triple Smoky Mac and Cheese Recipe

A recipe from Herbivoracious Cookbook. Reproduced with permission.
Serves 6 to 8

Ingredients

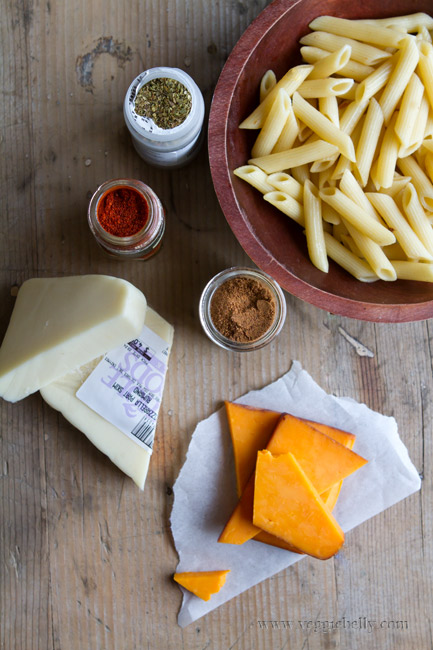
1 pound elbow macaroni (Sala’s note: I used penne because thats what I had on hand)
6 tablespoons (3⁄4 stick) unsalted butter
1⁄4 cup all-purpose flour
4 cups whole milk
Half an onion, finely diced
1 tablespoon smoked paprika
1 teaspoon fresh rosemary leaves, minced
1 canned chipotle chile in adobo sauce, minced, or
1⁄4 cup Frontera brand chipotle salsa
1 teaspoon dried oregano
1⁄4 teaspoon nutmeg (preferably freshly grated)
8 ounces smoked cheddar, grated, or substitute regular cheddar if you can’t find smoked cheddar
8 ounces mozzarella (substitute smoked mozzarella if you’re using regular cheddar), grated
Kosher salt
1⁄2 cups Homemade Bread Crumbs made with 2 cloves minced garlic added. Recipe in the book.

Method

1. Bring a large pot of salted water to a boil. Boil the macaroni according to package directions, draining when it is just becoming aldente. This will bake more in the oven, so don’t overcook it. Drain, transfer it to a bowl, and toss with 2 tablespoons of the butter.

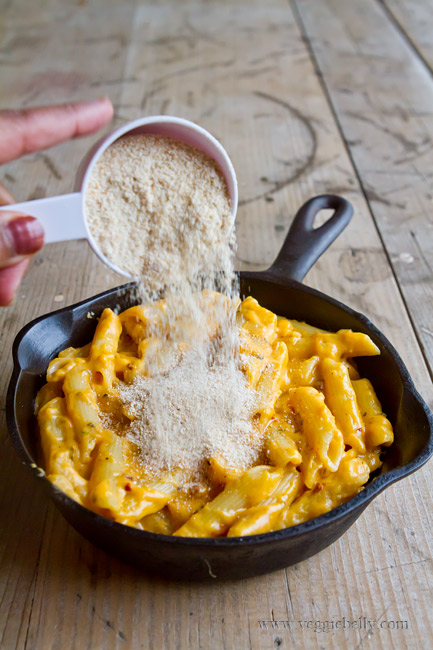
2. Preheat the oven to 350°F and grease a 9 x 13-inch baking dish. (Sala’s note: I baked the mac and cheese in a cast iron skillet instead of a baking dish)

3. Melt the remaining 4 tablespoons butter in a medium saucepan over medium-low heat. Sprinkle in the flour and whisk pretty constantly for 3 minutes. Whisk in the milk. Add the onion, smoked paprika, rosemary, chipotle, oregano, and nutmeg. Bring to a gentle simmer and keep cooking, whisking occasionally, until the sauce begins to thicken, about 5 minutes.

4. Reduce the heat to low. Whisk in the grated cheeses, a handful at a time, stirring each addition of cheese until melted. It is important to do this gradually, to avoid graininess.

5. Taste the sauce and adjust the seasoning to your preference. It will probably need just a little salt, depending on the cheeses. Add more chipotle if you’d like it hotter. Remember that the sauce should be pretty intense, because it needs to flavor a full pound of pasta.

6. Stir the macaroni into the sauce. Pour the macaroni into the baking dish. Scatter the bread crumbs evenly over the top.

7. Bake until you can see bubbling around the sides and the bread crumbs are nicely browned, about 30 minutes. Let the dish rest for 5 to 10 minutes before serving.

***********************

A Chance to Win Michael’s Herbivoracious Cookbook!

Be One of the First to Receive a Copy!

The awesome people at Harvard Common Press are giving away a copy of Herbivoracious to one lucky Veggie Belly reader!

To enter the contest, just leave a comment and tell me why you’d like to be the one to win this book.

Contest ends Wednesday, April 4th 2012. US & Canada shipping only.

One randomly picked lucky winner will receive a copy of this book when it is published in May!

THIS GIVEAWAY HAS ENDED! The randomly picked winner is comment #7, Cat!

Ghee and Curry Leaf Pasta Recipe

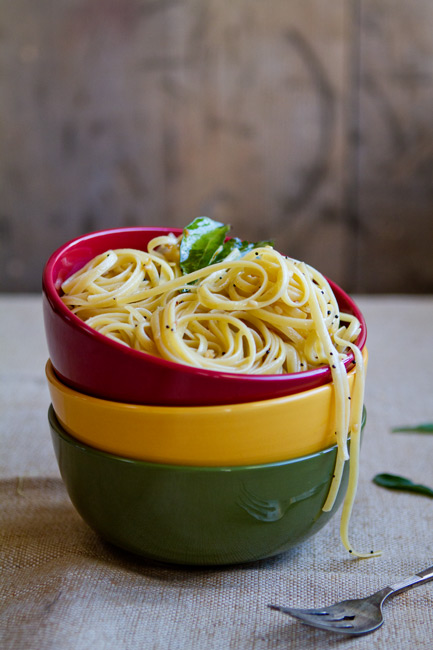
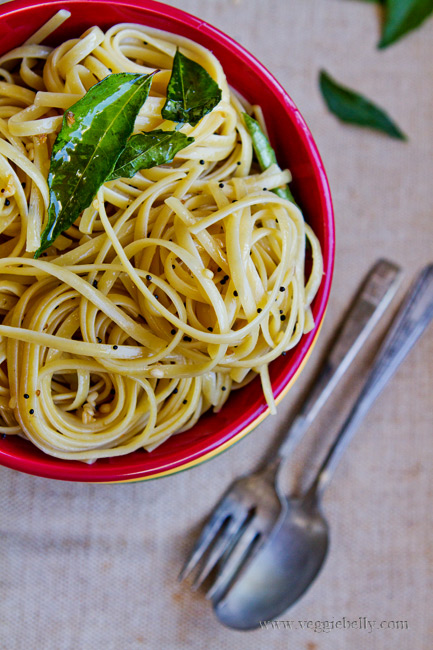
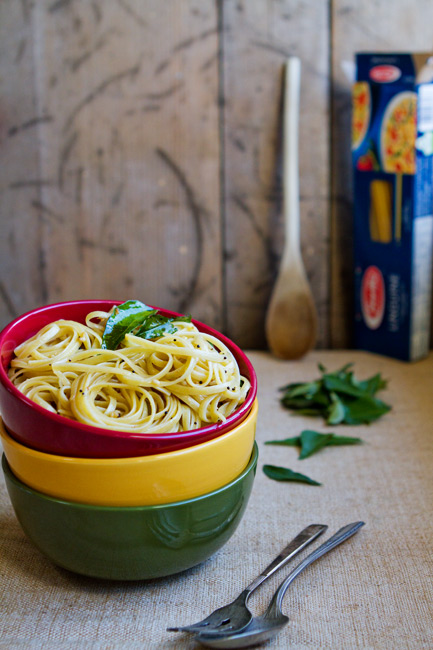
In my last post  I showed you how to make home made ghee. In this post, I share how to use all that delicious ghee – pasta with curry leaf and ghee! I am a pasta lover and a ghee lover, and this is the recipe I created to get my pasta fix and ghee fix all in one recipe.

There is a big difference between making pasta with butter and pasta with ghee. Ghee will give the dish a rich, nutty flavor that butter wont. However, if you don’t have ghee but want to try this recipe, use half butter and half oil instead of the ghee; it wont taste the same as ghee, but it will still be delicious!

This ghee and curry leaf pasta is very mild tasting, and easy to make. Children will love this dish. It also makes a great office lunch to pack, with some steamed vegetables tossed in. For extra flavor, add a teaspoon of ginger garlic paste when tempering the mustard seeds.

You can use any tadka (the whole spices you add to the ghee) items you like – cumin seeds, fennel seeds, green chilis, urad dal, will all taste great.

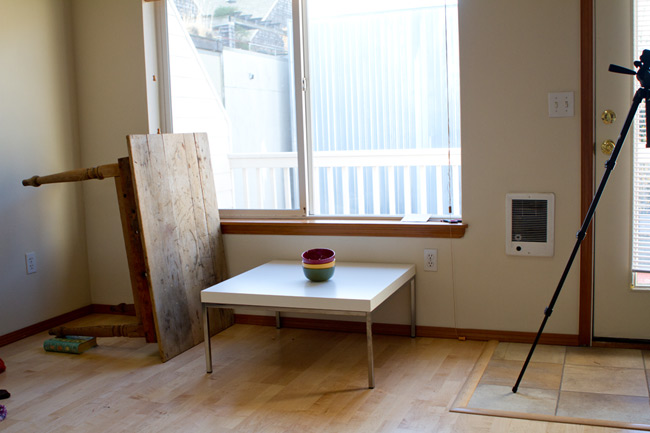
When I was shooting this dish, I wanted a natural, rustic looking background to offset the colorful bowls with pasta. I didnt have anything large enough that will make a convincing background. So heres what I did..

I have a shabby chic table I picked up at an antique store in Spokane, WA. I’ve enjoyed using it in many of my food photos  like my thanksgiving tofu skin roulade, or in the photos of my dal fry mix in a jar. For these pasta photos, I flipped the table and set it behind my bowl of pasta. This created the natural looking background I wanted.

Ghee and Curry Leaf Pasta

Serves about 4

1 lb dry pasta such as linguine, macaroni, spaghetti or bow tie
3 tablespoons liquid ghee
½ teaspoon black mustard seeds
1/8th teaspoon asafoetida
8 curry leaves
salt

Bring plenty of water to boil in a large pot. Add a generous amount of salt to it. Add the pasta and stir. Cook uncovered, till the pasta is al dente (still has a bite to it; is cooked, but not completely soft), about 8 minutes.

Drain the pasta and set aside.

In the same pot or a large wok (non stick is best), heat the ghee, and add mustard seeds. (For extra flavor, add a teaspoon of ginger garlic paste at this point). When they pop, add asafoetida and curry leaves, and stir 30 seconds or till the curry leaves are fragrant.

Add pasta and salt, and toss well. Serve warm.

Dal Fry Mix in a Jar. Homemade Holiday Gift Ideas for Vegetarians

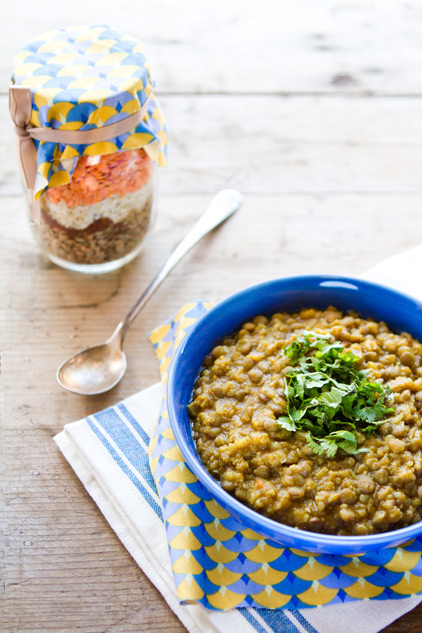
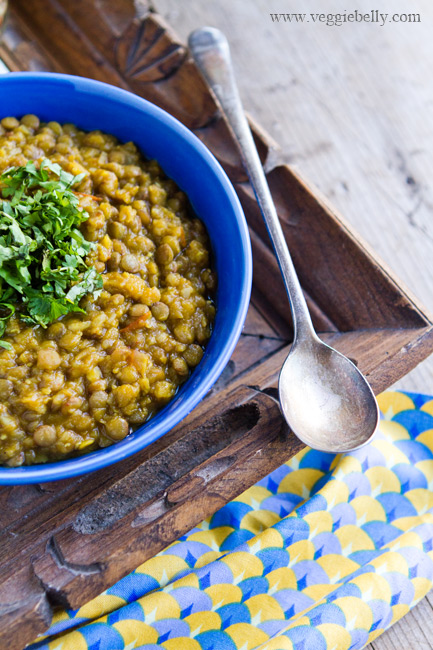
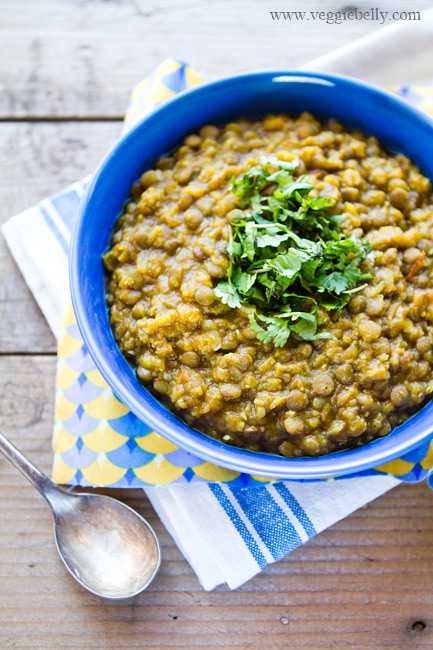
Dal fry is a typical Indian lentil dish (and popular on restaurant menus) made with cumin, turmeric, onion, tomato, garlic and lentils. I’ve simplified the recipe and turned it into a holiday gift mix in a jar. If you have friends and family who are vegetarian or Indian food lovers, they will be delighted to receive this as a Christmas gift! And you will love making this gift – its easy, fun, vegetarian, vegan AND cheap!

This dal fry mix in a jar was my Christmas present for a dear friend S, who is a new mother and is running her own business. You can imagine just how busy she must be! I figured a tasty dal mix in a jar, that she can make with almost no effort at all will be the perfect holiday gift for a busy mom like her.

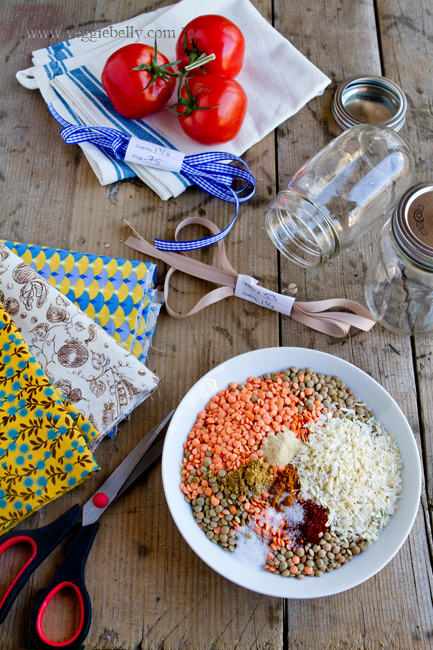
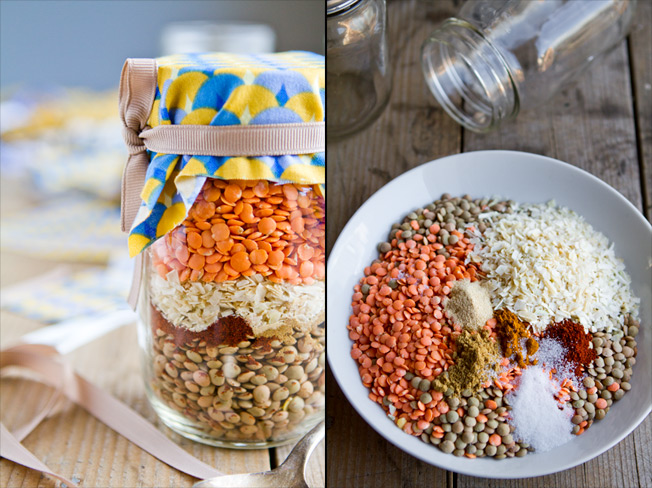
l’ve used a combination of red lentils (masoor dal) and green lentils. Make sure you use the flat round green lentils from the bulk section of the grocery store. Dont use whole Indian green lentils (green moong dal) because it takes longer to cook. You can substitute the green lentils with yellow letils (yellow moong dal).

Caramelized onions is a common flavor base for Indian curries. To emulate some of that flavor, I use dried onion flakes in this recipe. They give the lentils a great, deep, slow cooked taste. You can find dried onion flakes in the spice section of the grocery store or in the bulk section.

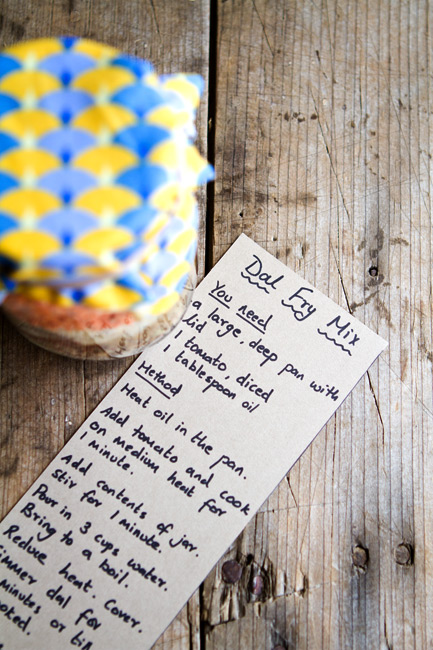
Writing (or printing) out the recipe/instruction card for this mix is your chance to really personalize the gift. I like to make my instruction cards humorous – like adding inside jokes, cartoons etc. The point is to get funny and creative with the instruction cards!

For another homemade holiday gift idea for vegetarians, take a look at my cajun dirty rice mix in a jar.

Dal Fry Mix in a Jar Recipe

makes 1 jar

For the gift jar
One 1 pint jar
a 5″x5″ piece of fabric
a thin rubber band
some ribbon
Cardstock or any thick paper for writing instructions

Ingredients
¾ cup green lentils (not green moong dal)
¾ cup red lentils
4 tablespoons dry onion flakes
1 ¼ teaspoon garlic powder
¼ teaspoon turmeric powder
1/2 teaspoon chili powder
½ teaspoon cumin powder
½ teaspoon salt

Pour the green lentils into the jar first. Then add onion flakes, garlic powder, turmeric, chili powder, cumin, and salt. Then pour in the red lentils.

If there is a gap between the top layer and the lid, crush a kitchen towel and stuff it into the gap. This will prevent the lentils and spices from moving around, and will preserve the pretty layers in the jar.

Seal jar tightly. Cover the lid with the fabric square. Place a rubber band over the fabric to secure it around the neck of the jar. Tie a ribbon in a bow around the neck of the jar, hiding the rubber band.

Write or print out these instructions on a thick piece of paper and attach to gift jar:

“You will need:
A large, deep skillet with a lid
1 medium tomato, chopped
1 tablespoon oil

Heat the oil in the skillet. Add tomatoes, and sauté on medium heat for about a minute. Add the contents of the jar, and stir for 2 minutes.

Pour in 3 cups of water. Bring to a boil. Reduce heat to low and cover the pan. Simmer the dal for about 20 minutes, or till cooked. Add more water while cooking, if needed.

Serve hot with steamed rice.

Serves 4″

Pierce a little hole in the upper corner of the instructions paper, and tie it to the ribbon. Or place the instructions against the jar, and tie it around the jar using ribbon or a rubber band.

Related Posts with Thumbnails