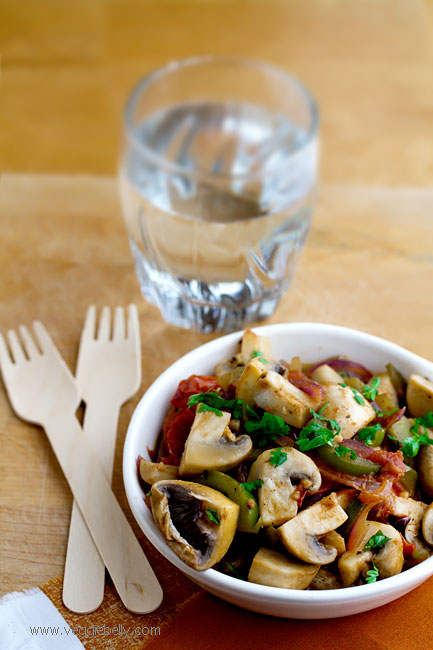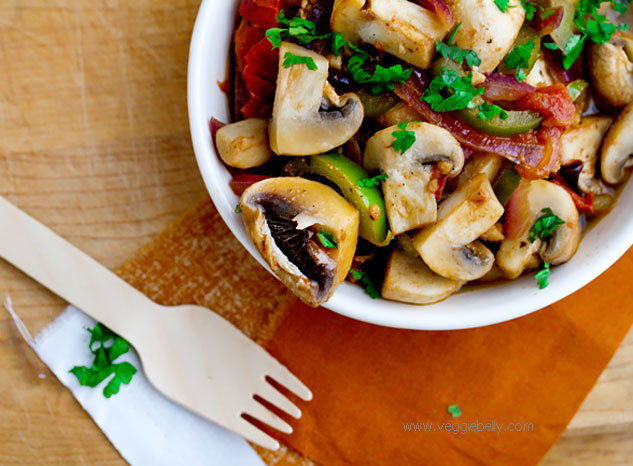
Ethiopian Mushroom Sauté or Ingudai Tibs

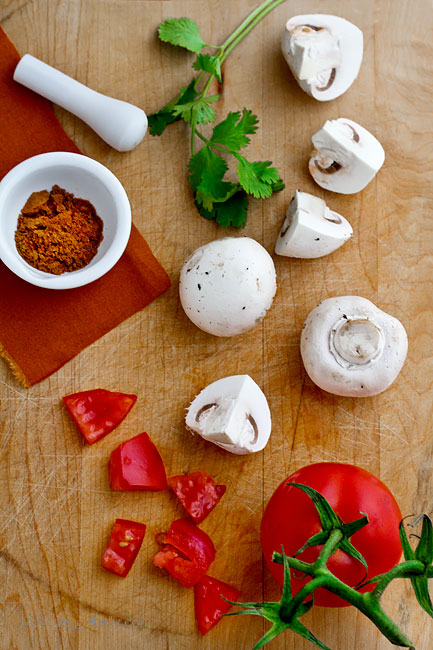
Ingudai tibs or Inguday tibs is an Ethiopian mushroom sauté that is simple to make but tastes wonderfully complex. Ingudai means mushroom and tibs means to saute.


Traditional tibs recipes use an Ethiopian spice blend called berbere. My berbere recipe is here.


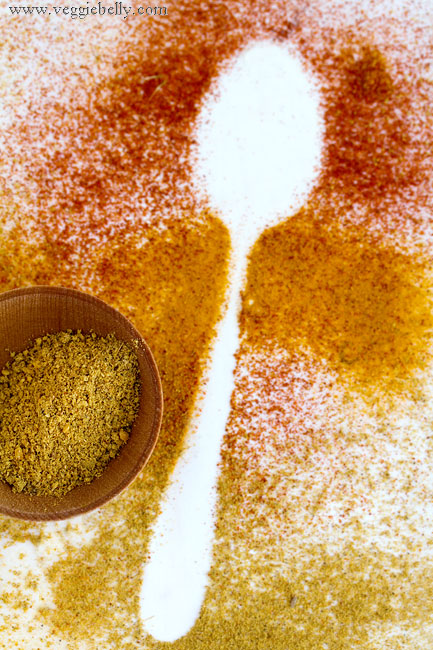
If you can’t find Ethiopian berbere spice for this recipe you can make your own berbere. Or you could get away with substituting Berbere with Indian garam Masala and a little cayenne or paprika. Take a look at the spices in Ethiopian berbere powder and Indian garam Masala powder.

Ethiopian Berbere    Indian Garam Masala
Coriander                           Coriander
Cumin                                  Cumin
Cinnamon                          Cinnamon
Cloves                                 Cloves
Cardamom                        Cardamom
Pepper                                Peppercorns
Nutmeg                              Nutmeg
Fenugreek
Cayenne pepper or paprika
Ginger
Garlic

The spices are almost the same, expect for the added fenugreek, cayenne or paprika, ginger and garlic in berbere. If you used equal amounts of garam masala and cayenne or paprika, you will get pretty close to Berbere flavor ( not traditional, but still tasty).

This mushroom ingudai tibs recipe on mushroom info by Ethiopian restaurant chefs uses portobello mushrooms and sounds delicious.


Ethiopian Sautéed Mushrooms with Onions and Peppers or Ingudai Tibs Recipe

serves about 6 as a side dish

2 tablespoons clarified butter or olive oil
1 large green pepper, cut into strips
1 large red onion, cut into strips
2 medium tomatoes, diced
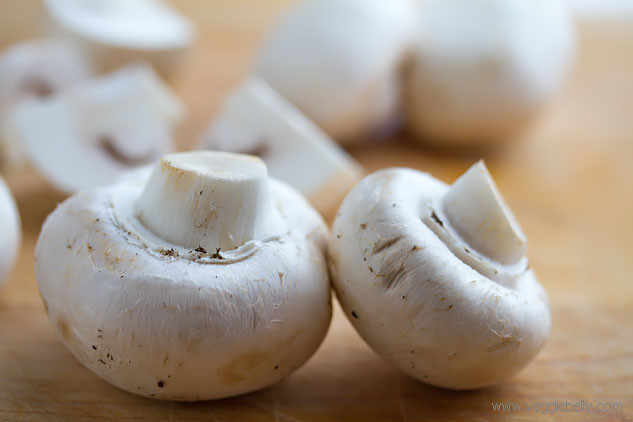
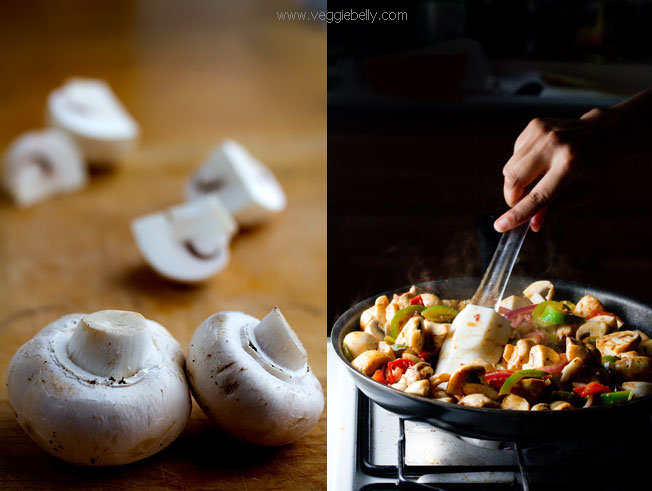
1 lb button mushrooms, cleaned and quartered

for the spice mix  (Awaze sauce)
2 teaspoons Ethiopian berbere (substitute with 1 teaspoon garam masala + 1 teaspoon paprika)
2-3 garlic cloves, minced
1 teaspoon white wine (substitute with lemon juice)

Heat butter or oil in your largest skillet. Add onions, peppers and tomato. Cook on medium high heat till the vegetables have softened a little, about 4 minutes. Then add mushrooms. Crank up heat to high. Mix all ingredients for spice mix and add to the mushrooms.  Sauté on high for about 3 minutes or till mushrooms are done. Add salt at the end. Garnish with cilantro or parsley. Serve with rice, bread or Ethiopian Injera.

How to take food photos with a bright, white, seamless background

I like taking food pictures on a seamless, bright, pure white background so that they look sunny and clean. “How to take food photos on a white background?” is the one question I get asked the most, so here is my set up and how I do it..

 What you’ll need

-         The food you are going to photograph
-         Background - large white foam board, white bed sheet or table cloth or white card board
-         Bounce or reflector – another piece of white foam board, or card board wrapped in aluminum foil
-         A camera with manual mode on a tripod. If you dont have a tripod, try using a higher ISO setting.


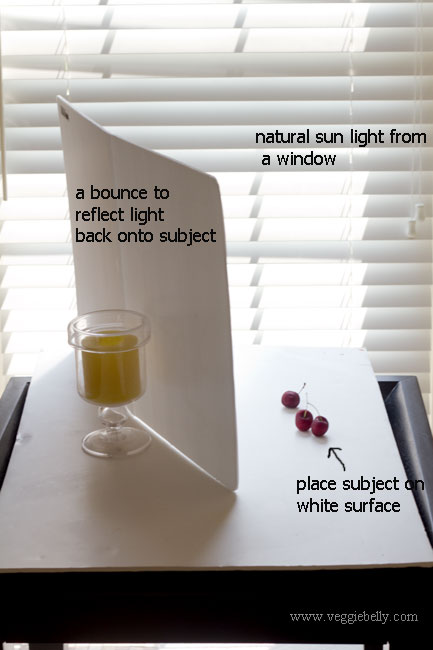
Choose a window with good sun light. This window is in my living room where I get plenty of sun light. I left the blinds closed, because the sun was very sharp, and I got plenty of light for this shot even with the blinds down. Remember, you don’t want direct sunlight falling on your subject.

If you feel the window light is too harsh, drape a white bed sheet over the window to mellow and diffuse the light.

Place a table close to your window. Place a white foam core, white card board or white bed sheet on the table.

My basic food photography set up with natural light

For a seamless white background for you pictures, I use a large white surface. Anything will do – white foam board, or cloth.

A bounce or reflector is just a piece of white material that is used to reflect light back on to the subject. A bounce or reflector will fill any shadows and lighten dark areas on your shot. Use a piece of white foam core or white card board. For a stronger bounce, you could also use a piece of card board that has been wrapped with aluminum foil.

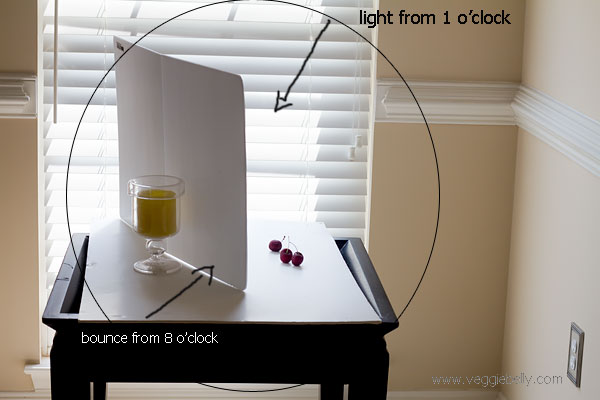
Natural lighting for food photography and light placement

Think of your whole set up as a clock. You are standing with your camera at around 6 o’clock. You want the light coming any where from 9 o ‘clock or 3 o’clock. And the bounce should be on the opposite side of the light. Here, the light source (window) is around 1 o’clock and the bounce is placed at around 8 o’clock.

Now, put your camera in manual mode. Read your camera’s instruction book to learn how to use manual mode; its easier than you think!

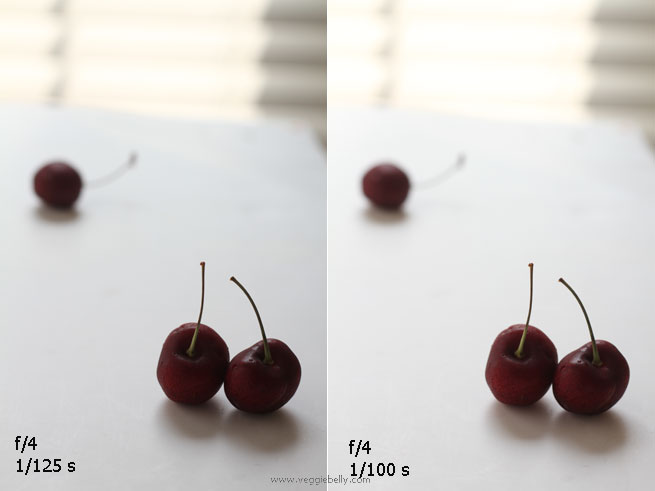
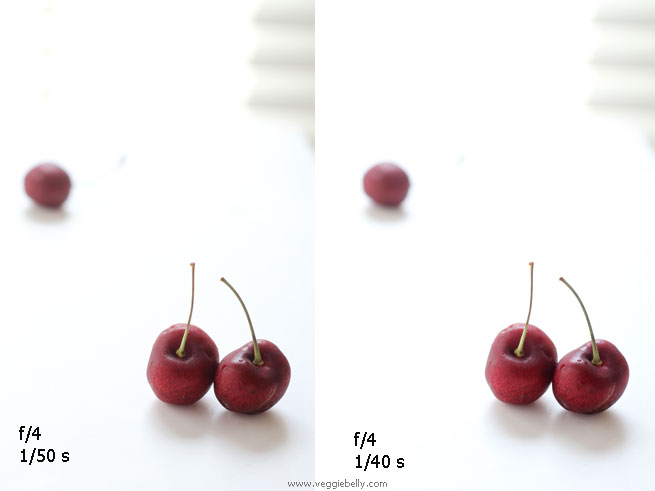
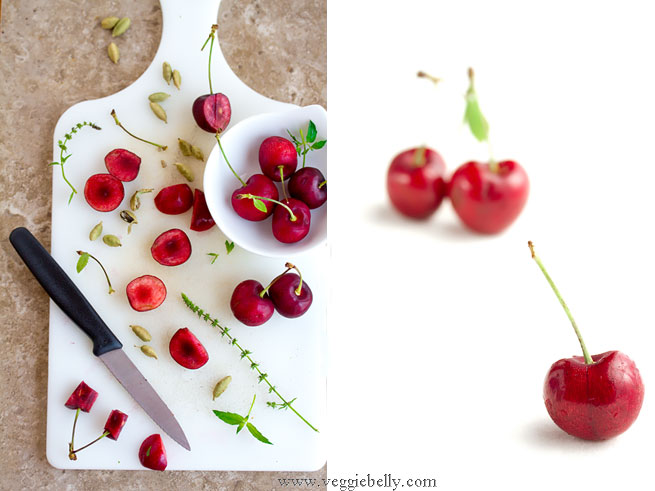
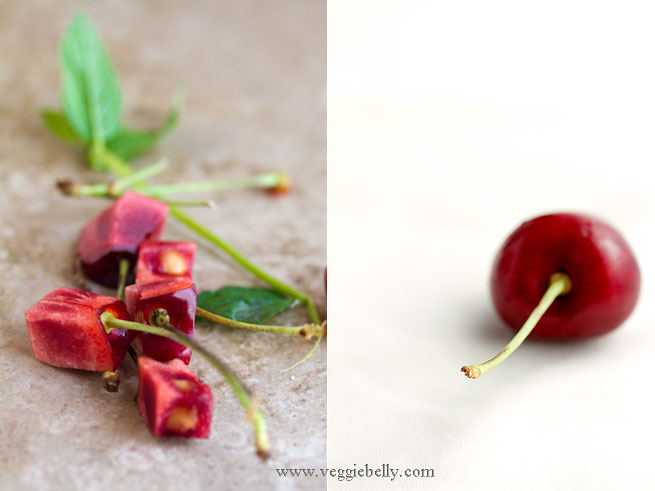
For the cherry shots, I picked an aperture setting of f/4 on my canon 50mm 1.8 lens. An aperture setting of f/4 lets me keep the front two cherries sharp and clear while throwing the cherry in the back out of focus.

Keeping the aperture setting constant at f/4, lets try shooting with different shutter speeds. Read your camera manual to see how you can change aperture and shutter speeds.

Exif info for photos below:
lens: Canon 50mm 1.8
aperture: f/4 for all photos
shutter speed: varying; look at pictures below
ISO: 200 for all photos

Keeping aperture value at f/4, lets start experimenting with shutter speed. At a shutter speed of 1/125 seconds, there isnt enough light. The picture is dark. Lets reduce shutter speed to 1/100 seconds. A little better, but still dark.

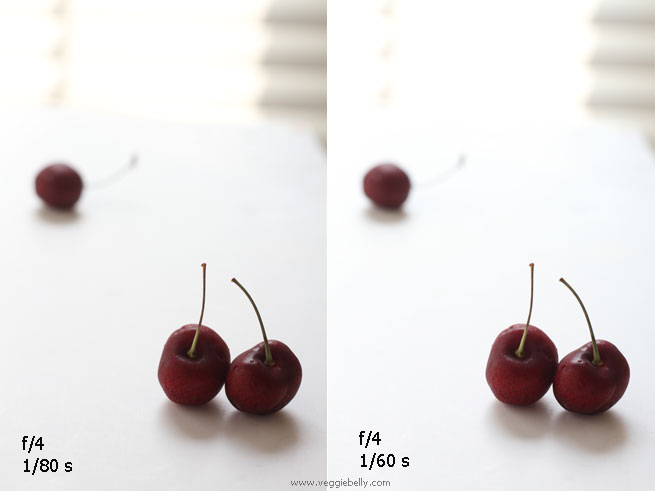
Lets try reducing the shutter speed even more, so that the camera lets more light in. Look at the picture with 1/60 seconds shutter speed. The white background is starting to look nice and bright. But the cherries are still a bit dark.

Notice how things are starting to look crisp and bright at 1/50 or 1/40 seconds shutter speed? This is what you want.

But at sutter speed 1/40 seconds, we are entering camera shake territory. Any lower, and my pictures will be shaky. This is where a tripod is useful, to stabilize the shot.

Now you make a creative decision. We have achieved a white enough background. Do you want it even brighter? I did. So I lowered the shutter speed one more increment, to let more light in.

At aperture value f/4 and shutter speed 1/30s I am satisfied with the brightness of the image. How bright or dark you want it is your own creative decision.

More..

- Tips on food photography by Helen of Tartelette
- Learn food photography blog by Neel
- Food photography tutorial series by White on Rice Couple
- Food photography setup on Steamy Kitchen
- Food photography setup series by Wrightfood
- Lara Ferronis ‘still life with’ food photography

Have you tried replicating this shot? If so, share a link to your pictures in the comments section below!

Fresh Cherry Cardamom Pie

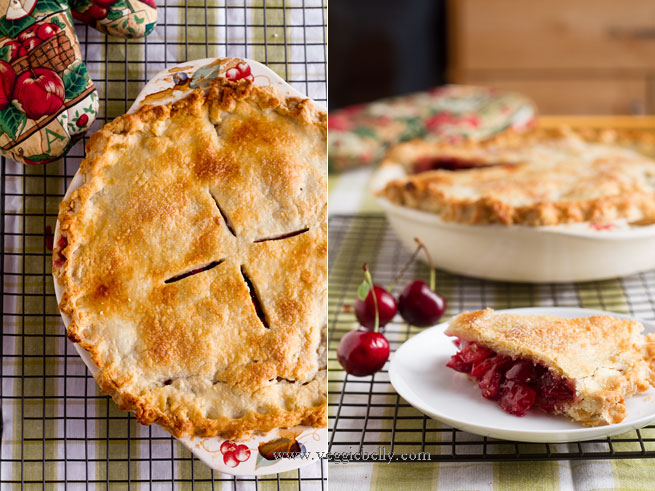
Take the everyday, all-American cherry pie, add some cardamom to it, and turn it into an exotic flavored pie. The cardamom scented filling is easy to make – just mix cherries, lemon juice, suagr, corn starch, and cardamom. 

I dont have a cherry pitter, so I just cut around the pit with a knife.

I made Ina Garten’s pie crust recipe which is buttery, flaky and delicious. You can keep things simple and use a store bought pie crust. However, keep in mind that most store bought pie crusts, pie shells, and pie dough are not vegetarian, they may contain lard. The only vegetarian pie crust I’ve seen is Mrs.Smith’s pie shells.

Here is a cherry pie recipe on joy of baking using some kirsch (a type of cherry liquor) on the filling – a great idea! This baked fresh cherry pie recipe on all recipes  also sounds delicious. If cherries arent in season and if you want a more fall time recipe, 6 bitter sweets blog has a lovely apple cherry pie recipe

Notes

- make sure the butter, shortening and water for the pie crust are very cold, this is what makes a flaky crust

- if you are not crazy about cardamom in the pie filling, use almond extract instead

- you can make the same recipe with apples instead of cherries

- if you dont want to use shortening, try this all butter pie crust recipe from simply recipes 

- Vegan yum yum has a vegan pie crust recipe using Earth Balance

Fresh Cherry Cardamom Pie Recipe

serves about 8

for cherry pie filling
4 cups pitted sweet cherries
6 cardamom pods
4 tablespoons cornstarch
2 tablespoons lemon juice
a pinch of salt
3/4 cup sugar
1/4 teaspoon vanilla extract or a few drops of rose essence

other
1 recipe (two 10 inch crusts) home made pie crust (see recipe below) or store bought pie crust
1 egg, beaten with a teaspoon of water
1 tablespoon sugar to sprinkle on top

Pre-heat oven to 400f.

Place pitted cherries in a large bowl. Smash the cardamom pods using the back of a wooden spoon. Remove the little seeds from inside the cardamom pods. Place these seeds in a coffee grinder or mortar and pestle and grind to a powder. Add cardamom powder and all other ingredients for filling to the bowl, mix well. Refrigerate while you work on the pie crust. See pie crust recipe below.

Place one pie crust on a 10 inch pie dish. Pour the cherry filling into the dish. Place second pie crust on top. Cut away over hanging bits. Tuck edges in. Crimp the edges to seal.  Make a few slits on top to vent steam. Brush the top with the beaten egg wash. Sprinkle sugar all over. Cover the crimped edges with a strip of foil to prevent from burning. Place on a baking sheet and bake till the crust is golden, 50 minutes to 1 hour. Remove foil half way through baking.

Ina Garten’s Pie Crust recipe

makes two 10 inch crusts

12 tablespoons ( 1 1/2 sticks) very cold unsalted butter
3 cups all purpose flour
1 teaspoon salt
1 tablespoon sugar
1/3 cup very cold vegetable shortening
1/2 cup ice cold water
Ina uses a food processor. I used a pastry cutter and my hands.

Place a large bowl in the freezer for about 30 minutes. Cut butter into small cubes. Add all ingredients except water to the cold bowl. Using a pastry blender, mash the butter and shortening. Dont over do this, stop when the butter is pea-sized. You could also take hand fulls of the flour mixture and rub it in both your hands to form a coarse dough.

Add cold water to dough and gently mix just until it forms a crumbly ball. Wrap the dough ball in plastic wrap and refrigerate for 30 minutes.

Take out the dough and divide into 2 portions. Roll out each portion on a well floured surface. Proceed with cherry pie recipe above.

Pineapple Rasam and Tender Coconut Rasam (South Indian Soup)

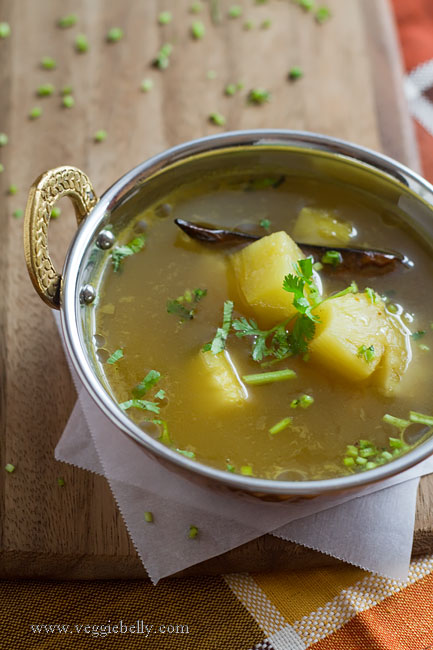
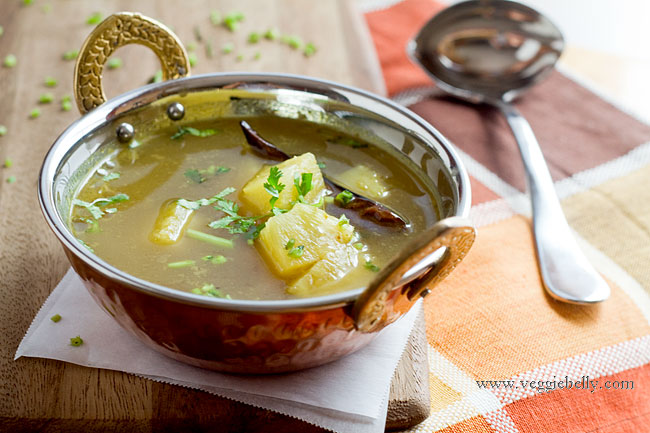
When I called my grandmother to get a pineapple rasam recipe, the culinary genius she is, suggested that the same recipe will also work with tender coconut. So here you have it – a pineapple rasam recipe and a tender coconut rasam recipe.

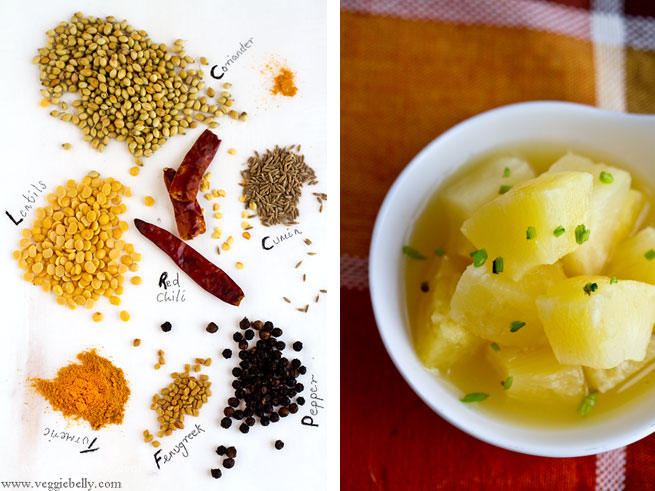
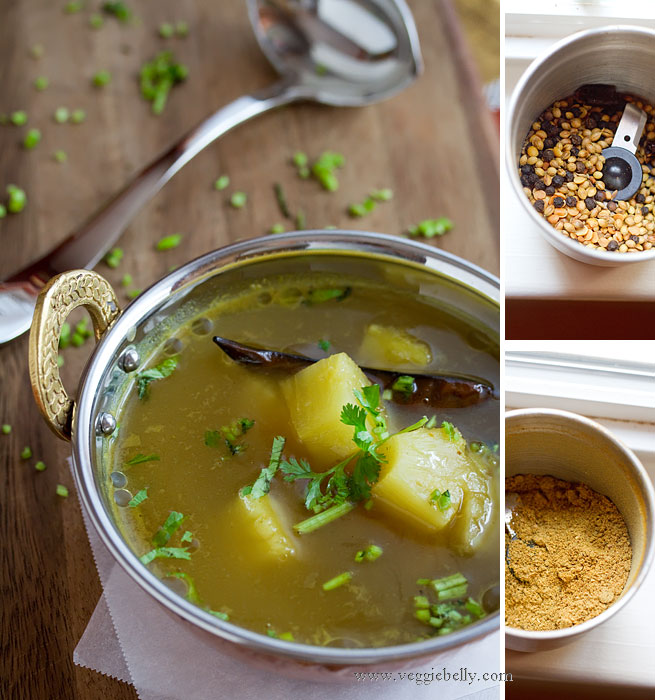
Roast and grind these ingredients for rasam spice powder & cook with sweet juicy pineapple

Rasam, also called charu or saaru, is a spiced, thin soup from South India. You can buy rasam powder at any Indian store; but I like home made rasam podi or powder better. Once you’ve made it, it will keep for months in an airtight container.

Serve rasam with rice or in cups like soup. There are several rasam recipes on the internet, the basic spices are the same, proportions and other additions vary according to family and region. This pineapple rasam recipe on Jugalbandi looks great, as does this pineapple rasam recipe on Veg Inspirations, Samayal Arai blog also has a pineapple rasam recipe.


If I want a sweet and savory rasam, I always turn to pineapple. I havent tried my grandmother’s idea of adding tender coconut pulp and coconut water to rasam; but I love the idea and if any of you try the tender coconut variation (see below) I’d love to hear how it turned out.


Pineapple Rasam Recipe

Serves about 4

for tempering
½ teaspoon ghee or clarified butter or oil
¼ teaspoon black mustard seeds
1 dried red chili
A pinch of asafoetida
A few curry leaves

for rasam
a small lime sized ball of tamarind pulp (about a tablespoon)
5 cups water
1 ½ tablespoons rasam powder (recipe below)
1 cup pineapple chunks (I used canned; make sure you buy pineapple chunks in 100% pineapple juice)
½ cup pineapple juice (from pineapple chunks can)
2 tablespoons chopped cilantro
Salt

Heat ghee or oil in a deep pot. Add mustard seeds. When they start to pop, add all other tempering ingredients. Cook for about 30 seconds.

Soak tamarind in 1 cup hot water for 5 minutes. Squeeze the tamarind with your hands, extracting the juices.

Add tamarind juice, 5 cups water and rasam powder to the pot. Boil for about 7 minutes. Add pineapple chunks, pineapple juice, cilantro and salt and boil another 5 minutes.

Serve hot with rice or drink like soup.

Rasam Powder or Rasam Podi Recipe

makes about ¼ cup

for dry roasting
2 tablespoons whole coriander
½ tablespoon cumin seeds
½ tablespoon peppercorns
¼ teaspoon fenugreek seeds
1 tablespoon toor dal or yellow lentils

for oil roasting
Few drops of oil
1 dried red chili, torn into small pieces (this will yield a mild rasam powder, use more chillies if you want it hot)

other ingredients
1/8 teaspoon asafoetida
1/2 teaspoon turmeric powder

In a small skillet on low heat, roast all the dry roasting ingredients one by one for about 1 minute each or till the spices are fragrant and turned color slightly. Place each ingredient in a coffee grinder as you finish roasting.

In the same pan, heat a few drops of oil, and roast the red chili for about 30 seconds. Add to the coffee grinder.

Add asafoetida and turmeric to the coffee grinder. Grind everything to a fine powder. Store in an airtight container. Rasam powder will keep for several months.

Tender Coconut Rasam Recipe

Use the pineapple rasam recipe above. But instead of pineapple chunks, use tender coconut pulp. Instead of pineapple juice, use tender coconut water. Add these right at the end of cooking.

A Different Way to Serve Fresh Watermelon. Watermelon ‘Cake’

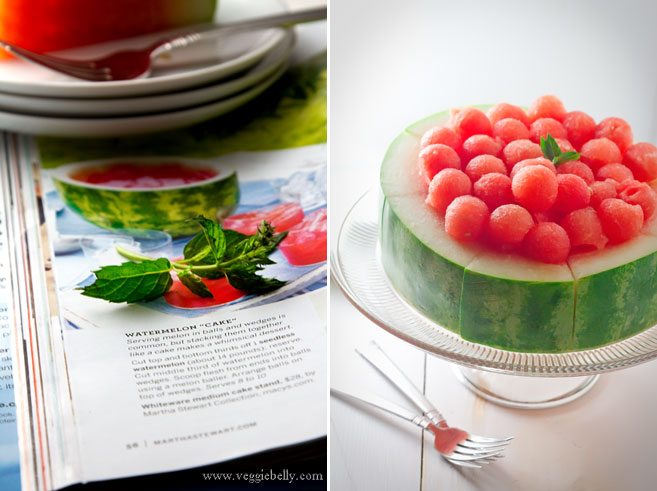
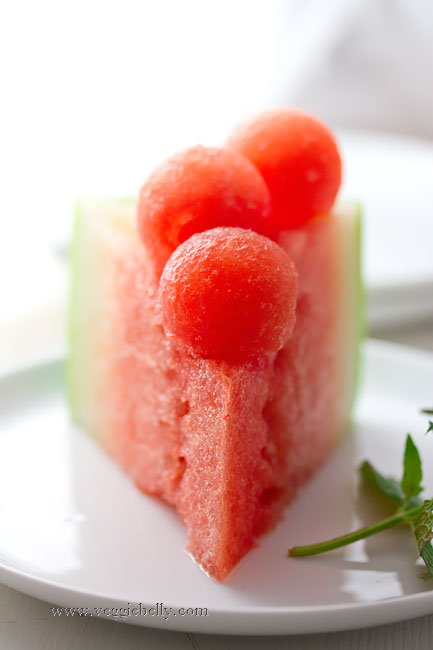
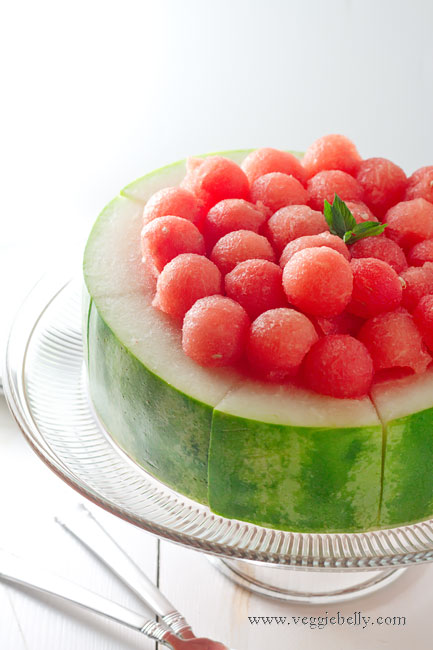
I saw this watermelon cake idea in the August issue of Martha Stewart Living magazine. This is a cute, fun, unique way to serve fresh watermelon. And I’m not the only one who excitedly tried this; checkout ‘messy thrilling life’ blog who also tried Martha Stewart Living Magazine watermelon cake. Thankyou Martha!

Martha Stewart Living Magazine serves the watermelon cake plain, thats what I’ve done too. But if you want to jazz it up, here are some suggestions:

- sprinkle a little lime juice or lime zest on top

- top with chopped basil or mint

- sprinkle some feta cheeseand balsamic vinegar over the watermelon “cake”

- drizzle a little tequila or rum or cachaca

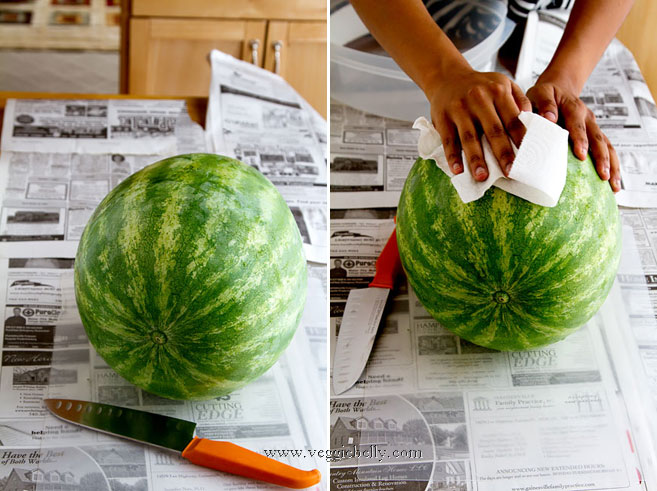
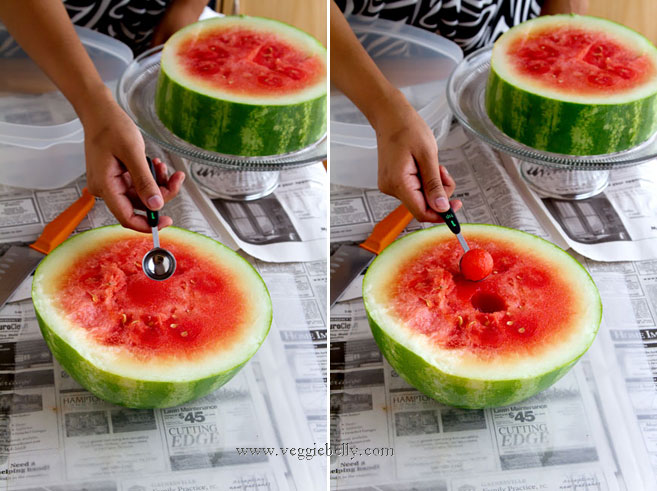
 Wash and wipe a seedless watermelon.  

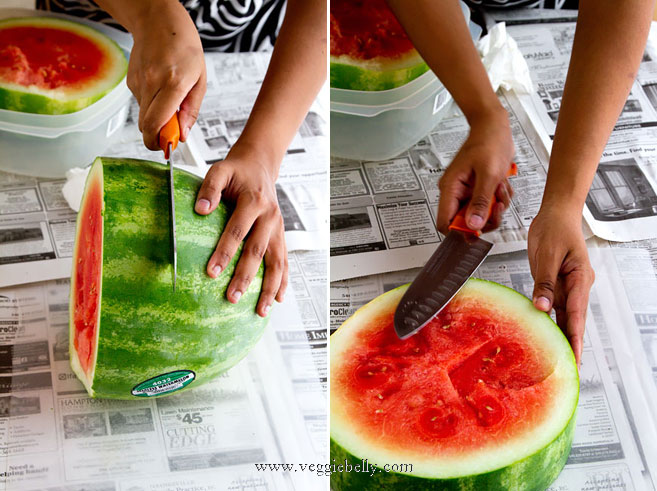
Lay it down horizontally. You need to cut about 2 inches from the center of the watermelon (the middle third of the fruit). Using your largest knife, cut away one thirds from the end.

Cut about one thirds from the other end. Level off the middle third if needed.

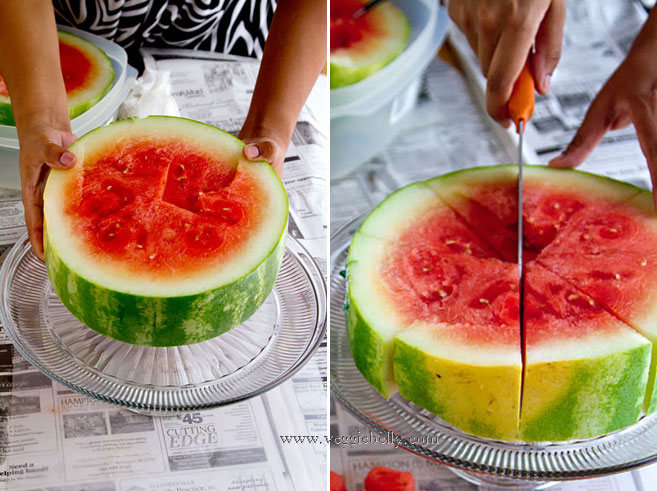
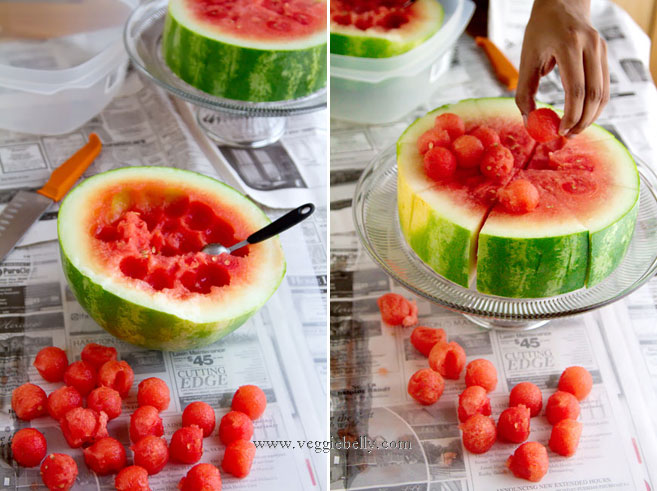
Lay the middle third (the watermelon ”cake”) on a serving platter. Cut it into 8 wedges.

Now take the two ends of the water melon. Using a melon baller or any rounded spoon (I used a measuring teaspoon) scoop out balls of watermelon.

Now arrange these balls on top of the water melon ‘”cake”. Garnish with mint. Cover and refrigerate till ready to serve. Use any leftover watermelon and scraps for juice.

This will serve about 8, with left over bits of watermelon from the cut ends.

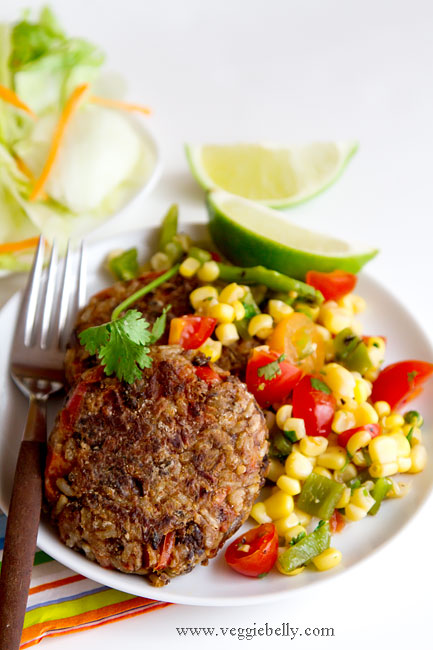
Southwestern Black Bean and Brown Rice Burgers with Roasted Poblano Sweet Corn Salsa

Please make this recipe, its incredibly delicious. Thats all I can say. I was going to make this recipe and freeze half of it, but we’ve eaten it all. The brown rice in this burger is filling and adds great, chewy texture. The black beans are luscious and creamy. And taco seasoning in the patties takes this to a whole new level of yumminess. Pair the burgers with my chilled sweet corn and roasted poblano salsa and you will be in heaven. Make this NOW!!

Also check out Alanna’s black bean burger recipe, and this southwestern brown rice and black bean burger recipe on feed the moose.
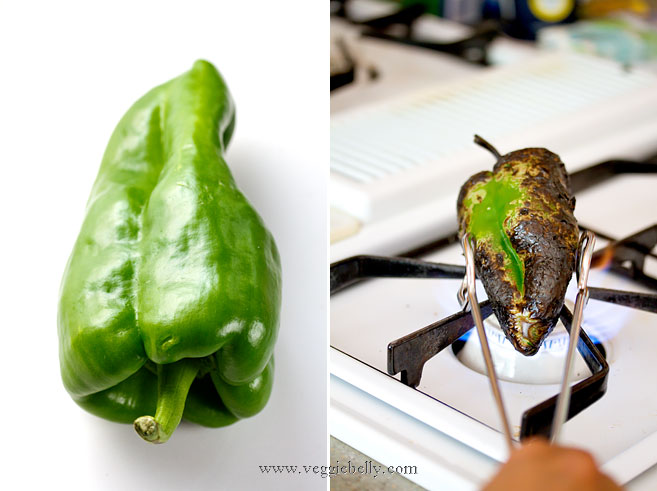
To roast poblanos, place them over an open flame. Keep turning till they are charred all over.
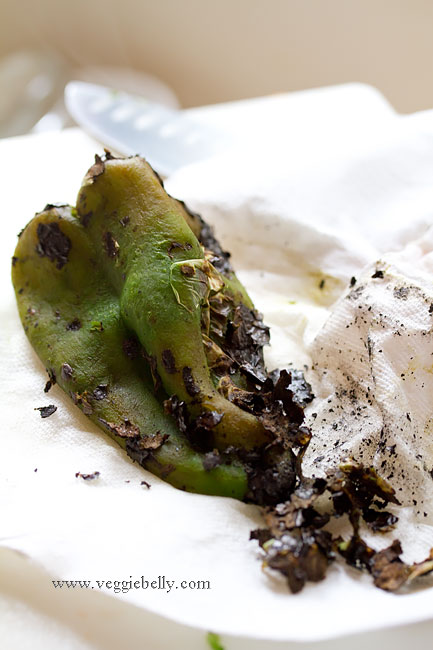
Keep roasted poblano wrapped in foil for about 5 minutes. Then using a paper towel, wipe off the charred skin. Roasting poblanos gives them great flavor which is wonderful in this roasted poblano sweet corn salsa.
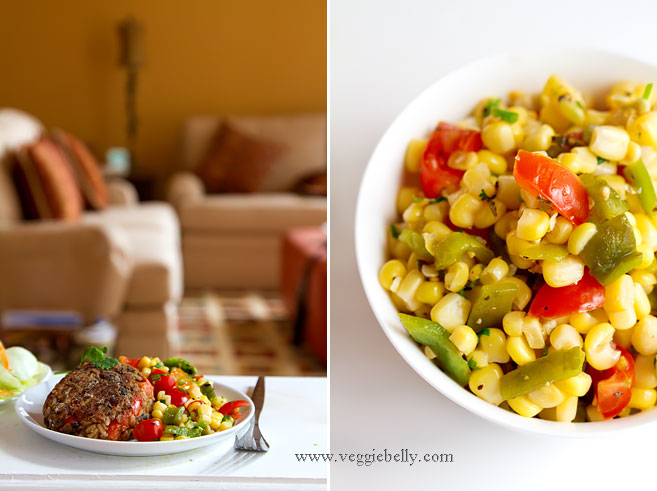
Serving suggestions for vegan southwestern black bean and brown rice burger patties:

Serve with your choice of chipotle mayonnaise, avocado slices, sour cream, ketchup, barbeque sauce, tomato slices, red onion, pickled jalapeno, lettuce, lime wedges, roasted poblano and sweet corn salsa ( recipe below)

- as a southwestern veggie burger with toasted burger buns

 - as a sandwich with bread slices
- as a tortilla wrap
- in pita bread pockets
- my favorite – in a salad with shredded lettuce, carrots, roasted poblano and sweet corn salsa (recipe below) and my cumin vinaigrette recipe
- lettuce wraps- serve burger patties and salsa with large, un-cut pieces of iceburg lettuce
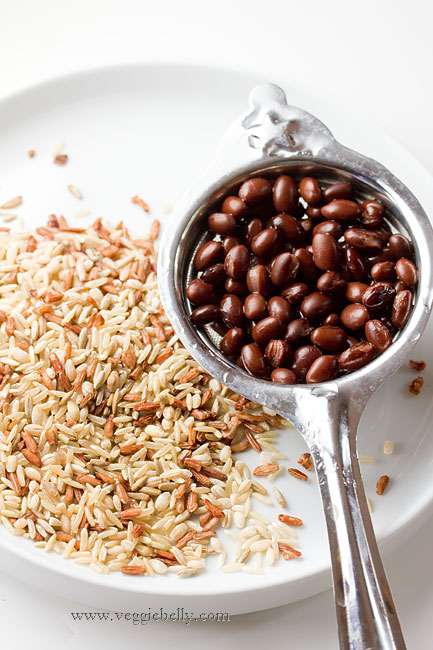
I like RiceSelect brand’s Royal Blend brown and red rice for this recipe. Its nutty, chewy, and just perfect.
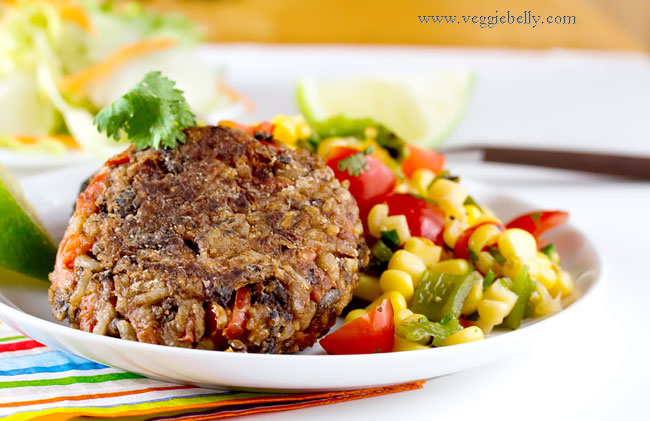
Vegan Southwestern Black Bean and Brown Rice Veggie Burger Patties Recipe

makes 8 patties

1/2 cup brown rice, uncooked. I recommend RiceSelect Royal Blend brown & red rice
One 15 oz can black beans

sauté
1/2 tablespoon olive oil
1 small onion, diced
1 small red (or green) bell pepper, diced
2 cloves garlic, minced
1 tablespoon store bought taco seasoning (substitute with 1/2 tablespoon cumin powder + 1/2 tablespoon paprika or red chile powder)
salt

to cook the patties
1 tablespoon corn starch
6 tablespoons olive oil

In a large pot, bring plenty of water to boil. Generously salt the water. Add brown rice and cook uncovered till the rice is done, about 20 minutes. Rice should be cooked through, but still chewy and not mushy. When done, drain the rice, run some cold water over it to stop the cooking. Make sure the rice is drained very well before using. Spread it on a kitchen towel to absorb moisture if needed.

Drain the canned black beans. Again, make sure it is drained very well.

While the brown rice is cooking, work on the satueeting. Heat a large non-stick skillet with the oil. Add onion and red pepper. Cook till onions are soft. Add garlic, stir for about 30 seconds. Add taco seasoning and drained black beans. Stir on high heat for about a minute. Turn off heat. Add salt (remember store bought taco seasoning already has some salt).

Using a potato masher or fork, mash the black bean mixture. Mash roughly, so that some black bean pieces remain. Add cooked, drained brown rice. Using a spatula, mix everything together. Taste and adjust salt and taco seasoning.

When the black bean brown rice mixture is cool enough to handle, divide it into 8 equal portions. Dust your hands with corn starch and make 8 balls. Flatten the balls down to shape into burgers. Dust a little corn starch on the patties; not too much, just a sprinkle. (You can freeze the patties at this point in a single layer in air tight containers).

Heat about 1 tablespoon oil in a non-stick skillet.  Place 2 burger patties on the skillet. Cook for 1-2 minutes on medium-high heat on each side. Remove when a crispy golden crust forms on both sides. Add more oil to the skillet and fry up 2 more patties at a time. Repeat till all patties are cooked.

Roasted Poblano and Sweet Corn Salsa Recipe

 enough to serve with about 4 burgers

1 poblano pepper (substitute with bottled roasted red pepper or sauteed jalapenos or canned New Mexican green chile)
1 can drained sweet corn
1 cup chopped tomatoes
zest of 1/2 a lime, optional
2 tablespoons lime juice (juice of about 1 large lime)
1-2 tablespoon chopped cilantro
salt and pepper

Roast the poblano pepper over an open flame either on your stove or an out door grill. Char the pepper on all sides. Then wrap it in foil and let it sit for about 5 minutes. When the pepper is cool enough to handle, open the foil and peel off the charred poblano skin. Wipe off any remaining charred skin with a paper towel. Remove the seeds inside. Dice the roasted poblano.

Mix together the roasted poblano and all other ingredients. Refrigerate till ready to serve.
Easy Potato Curry (Dry)

The secret to this easy, vegan potato curry is Baba’s curry powder. Its a Malaysian made curry powder, and you can buy it online or possibly at a Asian/Malaysian foods store. My pantry is never without Baba’s meat curry powder and Baba’s fish curry powder.

Photo from www.babas.com.my

I highly recommend Baba’s curry powders. Although they are meant for meat, the curry powders themselves contain no meat and they are fantastic to add to vegetables, curries and lentil dishes.

Baba’s meat curry powder Ive used in this recipe contains coriander, fennel, cumin, cinnamon, cardamom, star anise and cloves.


Substitute Babas curry powder with sambar powder or any yellow curry powder. How much you will need to use depends on the brand and how spicy it is.


Notes:

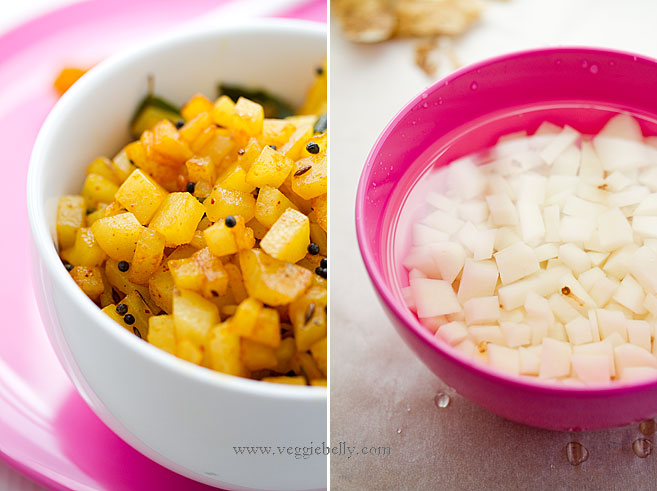
- When chopping potatoes, keep them in a bowl of water to prevent them from discoloring

- If the curry gets too dry while cooking, sprinkle a little water

- Potatoes will cook sooner if you cut them into smaller cubes

Easy, Vegan Potato Curry or Potato Masala or Potato Poriyal Recipe

serves about 2

1 large potato (about 1 1/2 cups when cut into small cubes)
2 tablespoons vegetable oil
1/8th teaspoon black mustard seeds
1/8th teaspoon cumin seeds
1/2 teaspoon urad dal (black gram)
a pinch of asafoetida
1 dried red chilli, or according to taste
a few curry leaves, optional
1-2 teaspoons Baba’s meat curry powder or sambar powder or any yellow curry powder (how much curry powder you’ll need depends on the brand you use)
salt

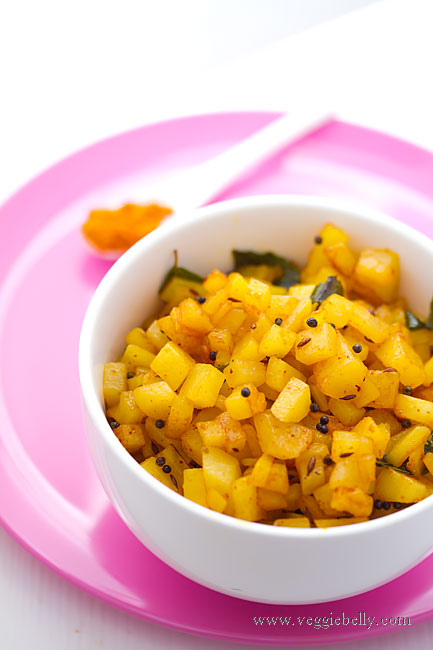
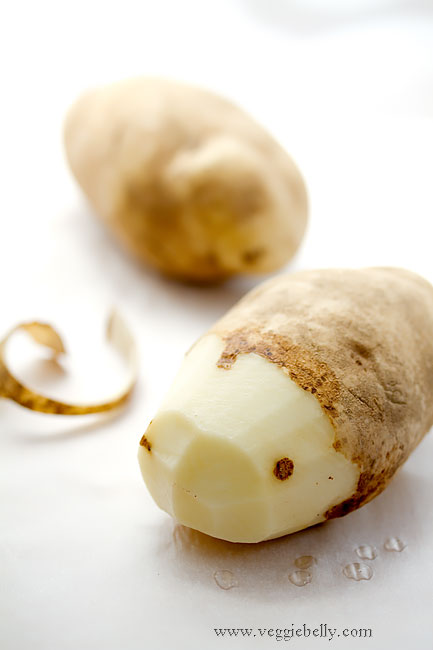
Peel and cut the potato into small cubes. Heat a non stick wok with the oil and add mustard seeds. When they pop, add cumin seeds. When they start to sizzle, add urad dal, asafoetida, red chili and curry leaves. Cook about 20 seconds or till fragrant. Add the cubed potatoes, curry powder, 2 tablespoons water and salt. Cook on medium heat till the potatoes are cooked, about 6 minutes.

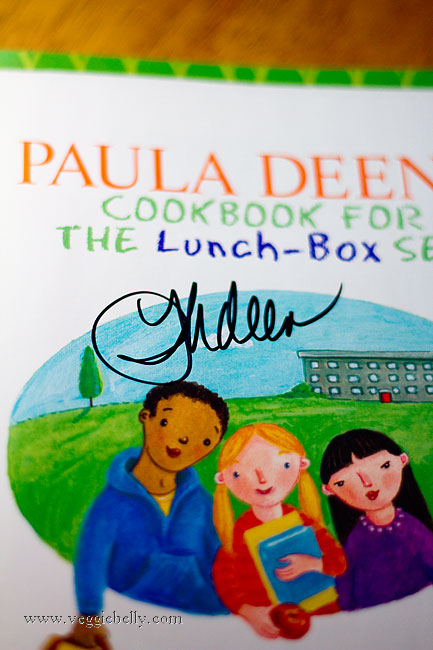
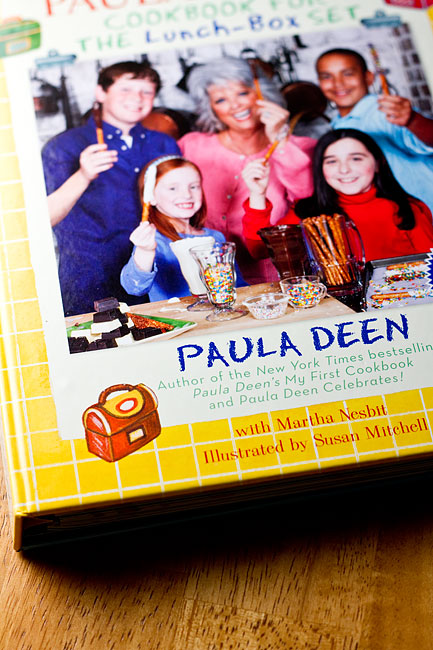
We have a winner! Win a Signed Copy of ‘Paula Deen’s Cookbook for the Lunch-Box Set’


Update: this giveaway has ended.

The winner is…Nags, comment #17 !!

Nags, please email me your address! (veggiebellyATgmailDOTcom)


we waited 2 hours at a book signing to get this signed!

I get a lot of requests for kids recipes. Since we dont have kids, I rarely make childrens food, unless its to feed the kid in me. So Im giving away a signed copy of Paula Deen’s Cookbook for the Lunch-Box Set.

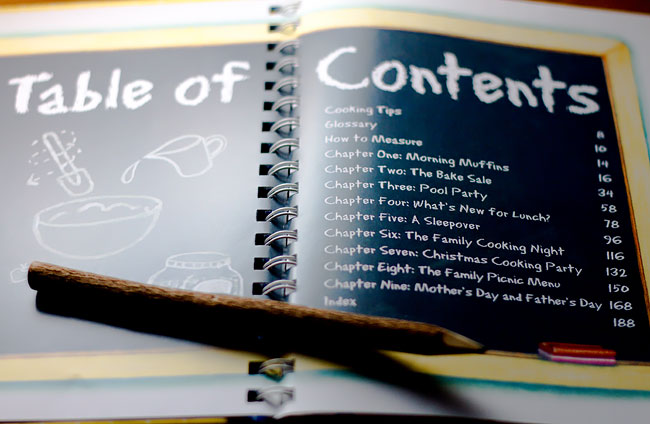
The book has lots of delicious recipes for lunches, pool parties, sleepovers, family picnics, bake sales etc (not all recipes are vegetarian). 

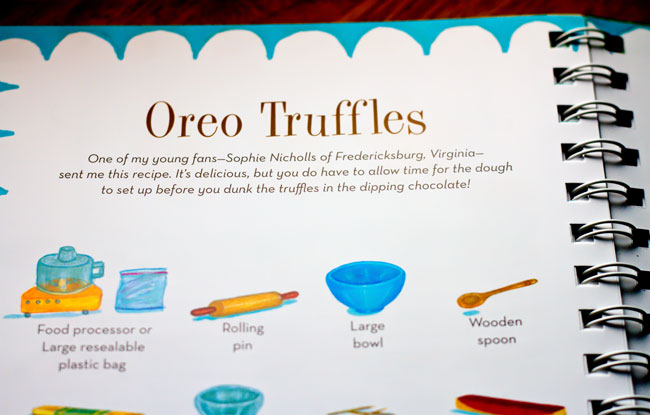
The book is spiral bound and full of pictures and illustrations so kids can follow along.

To win Paula Deen’s Cookbook for the Lunch-Box Set signed by Paula,

all you have to do to is one or more of the following:

- Leave a separate comment here saying whats your favorite dish or recipe to feed kids, or the kid in you
or
- ‘Like’ Veggie Belly on Facebook, then leave a separate comment here saying you did
or
- Follow Veggie Belly on Twitter, then leave a seperate comment here saying you did

Do all 3 and you will have 3 chances to win!
If you are already following Veggie Belly on Twitter and Facebook, just say so in your comment.

Deadline: 9pm EST Saturday, July 31st 2010
One random winner will be picked on Saturday, July  31st 2010

I will ship the book anywhere in the world!

Good luck y’all!

Related Posts with Thumbnails