Omelette Rollups or Roulade with Smoky Fried Potatoes, Cream Cheese and Watercress


Here’s a recipe inspired by the Spanish frittata — I kept the potato which is traditionally used in a frittata, but I take it in a totally different direction. This roulade or roll up is a stuffed omelette with smoked paprika, fried potatoes, peppers and water cress. You can make this the previous day of a party and just cut it up and serve the day of. This is a great make ahead appetizer for entertaining!

Use any vegetables or cheeses you like. I enjoy the peppery bite of watercress with the creamy cheese. The orange bell pepper adds color, and the fried potatoes make these omelette pinwheels fun and filling.

(almost) Step-by-step instructions for omelette rollups

- Place cooked omelette on a large pice of cling film. Cling film must be about twice as long and wide as the omelette
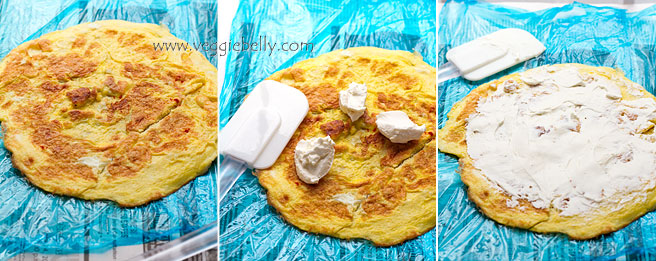
- Let omelette cool completely
- Once cool, gently spread cream cheese over the omelette. Dont spread cream cheese all the way to the edges of the omelette. Leave a little space for the filling ooze out when rolling

- Place a single layer of watercress leaves over the cream cheese
- Then arrange julienned peppers and fried potato sticks alternatingly. Place them horizontally. They should be in a single layer.
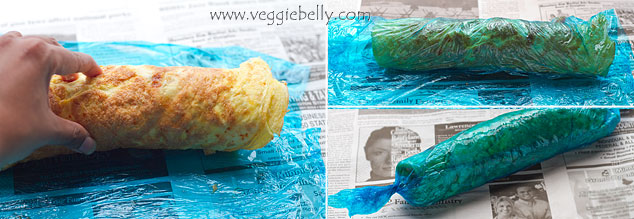
- Pick up the end of the omelette thats closest to you and begin rolling

- Roll gently, but tightly. Take care not to tear the omelette. You will now have an omelette ‘sausage’
- Now pick up the cling film that the omelette is on, and roll the omelette ‘sausage’ to make a package. Make sure you wrap and roll the cling film tightly over the omelette ‘sausage’
- Twist the ends of the package

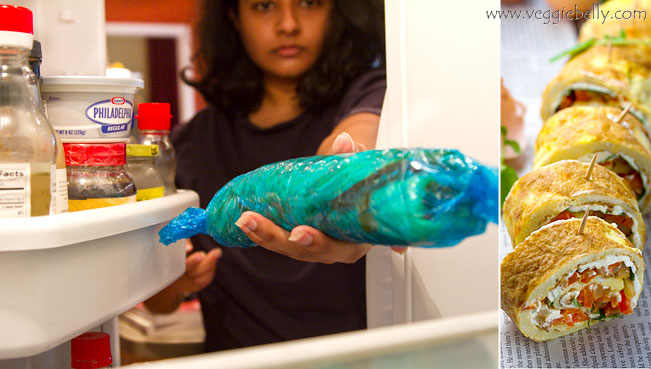
- Place in the fridge for about 30 minutes. This will make the roulade easier to cut
- After 30 minutes, take out the package from the fridge. Carefully remove cling film.
- Place 6-8 tooth picks at regular intervals on the omelette roll.
- Using a sharp knife, cut inbetween each tooth pick, to get spiral shaped omelette pinwheels
- Serve at room temperature 

How I took the ‘inside the fridge’ photo above

I cleared out a section of the fridge and placed my camera inside the fridge, facing out. You need a remote trigger for your camera and a reasonably wide angle lens to do this (focal length for this was 34mm).

It took a few test shots and changing the setting to get the exposure right. Then its easy, I just opened the fridge, and clicked the remote as I was placing the roll up inside the fridge.

If you dont have a remote for your camera, set your camera on the self timer.

You can do this from inside the oven too (make sure the oven is not on!). 

Notes & Tips

- Omelette must be completely cool before rolling
- Cream cheese must be at room temperature, this will make it easier to spread
- Dont over cook the omelette. Cooking on high heat or for too long will make your omelette dry and you will risk tearing it while rolling
- Make sure the omelette is not too thick, or it will be difficult to roll. A 12 inch diamater pan is perfect for a 6 egg omelette
- If you find cooking and flipping over a 6 egg omelette is difficult, make 2 roulades instead. Use a 6 inch pan and make two 3 egg omelettes. This way, they will be easier to handle and flip over, compared to a large single omelette

Omelette Rollups or Roulade with Smoky Fried Potatoes, Cream Cheese, Bell Pepper and Watercress Recipe

serves about 3-4 as an appetizer

For the omelette
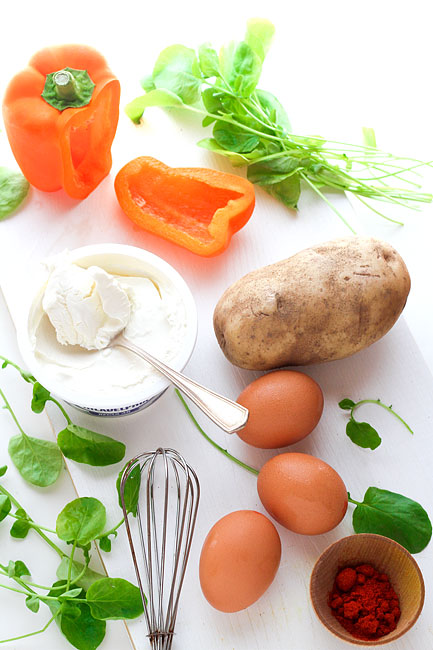
6 large eggs
1/8 teaspoon of smoked paprika (substitute with chilli powder, regular paprika or cayenne)
salt
non-stick spray or olive oil

For the smoky potatoes
2 tablespoons olive oil
1 small potato
a pinch of smoked paprika, use more if you like it spicy
salt

Other ingredients
6 tablespoons cream cheese, at room temperature
1/2 green or red or orange pepper, julienned
1/2 cup watercress leaves loosely packed

Make the omelette: Whisk the eggs, smoked paprika and salt. Heat a 12 inch diameter nonstick skillet and spray with non-stick spray or 1 tablespoon olive oil. Pour the egg mixture into the pan and cook on medium heat till the underside of the omelette is slightly golden. Carefully flip the omelette over and cook the other side till done. Using a large spatula, trasfer the omelette to a large sheet of cling film. Let omelette cool completely.

Make the potatoes: While omelette is cooling, make the smoky potatoes.  Scrub the potato clean. Leave skin on. Cut the potato into batons. Heat olive oil in a pan and add the potato sticks in a single layer. Fry the potatoes till golden. Remove cooked potatoes onto a paper towel and sprinkle with smoked paprika and salt.

Make the rollup: When the omelette is completely cool. Spread the cream cheese over the omelette. Then arrange the water cress leaves in a single layer. Place the pepper juliennes and smoky potato sticks over the watercress layer. Make sure the peppers and potato only form a single layer. Gently roll omlette. Wrap the omlette roll in cling film, gently but firmly. Place the package in the fridge for 30 minutes. Then cut into pinwheel pieces.

For detailed step-by-step instructions and photos see post above.

Chickpea Flour and Swiss Chard Savory Crepes with Mint Ginger Raita (Besan ka Cheela or Chilla)


Chickpea or Garbanzo flour is a staple in Indian households, because its so quick to cook and versatile. Back home in India, when those unexpected visitors dropped in, chickpea flour always came to the rescue. We’d make a batter of the flour and water, dip some potatoes in it and deep fry them for quick, yummy bajjis or fritters for the unannounced guests. Or, we’d make a thinner batter with the chickpea flour, throw in some spices and make golden, crispy crepes. When cooked, chickpea flour (besan) has a beautiful creamy texture and a nutty flavor. Its chock full of protein too.  

I added some shredded, wilted swiss chard to the crepe batter for extra nutrition. You could add any greens you like. The shredded chard in the batter does make it a wee bit difficult to spread around in the pan. But once youve made one crepe, you’ll get the hang of it. Just make sure you spread the batter as thin as you can.

For a simpler method, dont add the chard to the batter; instead, cook the crepes without swiss chard, then place the wilted chard (or any other filling) over cooked crepes, and roll them up.

As far as savory crepes go, this Indian style garbanzo flour crepe is one of my favorites. Its quick, filling, gluten free and vegan friendly (think of these as vegan omelettes!).  And you can customize this dish however you like. Change up the spices or fill the crepes with spiced potatoes, sauteed mushrooms or whatever left over vegetables you have on hand

I like to serve these crepes with an easy mint and ginger raita (recipe below). But you can serve it with pretty much any chutney you like. Mint chutney, coriander or cilantro chutney, coconut chutney, date-tamarind chutney will all be great. Or try this with store bought mango chutney.

Chickpea Flour and Swiss Chard Crepes with Mint Ginger Raita (Besan Ka Chilla or Cheela) Recipe

serves about 2

4 large leaves of swiss chard (1 1/2 cups when shredded)
1/2 teaspoon vegetable oil
1/2 teaspoon cumin or carom (ajwain) seeds

1 cup chickpea flour (also called garbanzo flour or gram flour or besan)
1 1/4 cup water
1/2 teaspoon ginger paste
1/2 teaspoon garlic paste
1/2 teaspoon turmeric powder
1/8 teaspoon asafoetida
1/8 teaspoon baking powder, optional
1 green or red chilli finely chopped
salt
Oil for cooking crepes

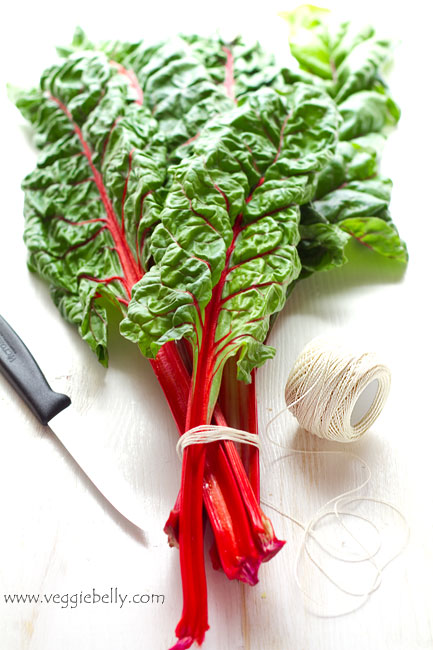
Removed and discard the stems from swiss chard leaves.  Stack the swiss chard leaves and roll them tightly. Chop the roll into fine shreds. You should have about 1 1/2 cups of shredded swiss chard.

Heat oil in a small non-stick pan, add cumin or carom seeds. When they start to sizzle, add shredded swiss card and 1/2 teaspoon water and toss on medium heat till the swiss chard has wilted to half its original volume. This will take about a minute. You should now have about 3/4 cups of wilted chard.

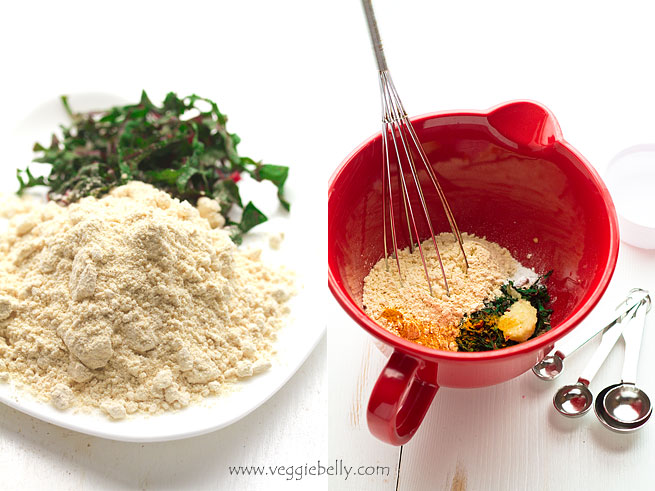
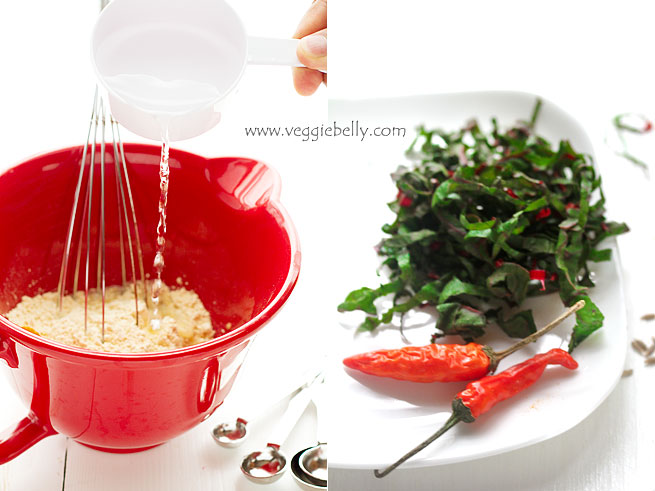
In a mixing bowl, add the wilted swiss chard, and all other remaining ingredients except oil. Whisk till everything is combined. The batter should be slightly thinner than pancake batter and should be easily pourable. If the batter is too thick, add more water.

Heat a non-stick pan. Pour a ladle of batter on the hot pan. Using the ladle or back of a spoon, spread the batter around to form a thin crepe. Drizzle about 1/2 teaspoon oil over the crepe. Cook on medium heat for about 1 minutes or till the bottom side is golden and sides start to crisp. Using a spatula, flip the crepe over and cook the other side till golden. Serve hot.

Ginger Mint Raita
makes 1 cup

1 cup yogurt (I recommend Greek yogurt)
1/2 tablespoon minced ginger
2 tablespoons mint leaves loosely packed
Chaat masala to taste or salt

Place all ingredients in a food processor. Blend till smooth. Serve chilled.

Lentil Drop Curry or Moong Wadi/Mangodi Curry


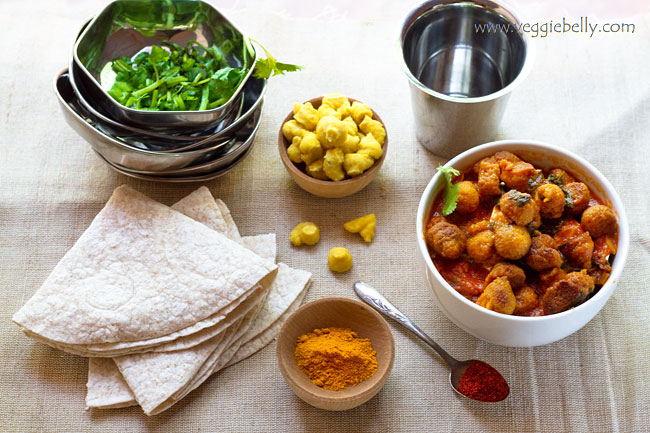
Whoever invented moong vadis is a genius. These little ‘drops’ or nuggets of dried lentils cooked in a curry, are filling and tasty. Also called Mangodi in parts of India, moong wadis are extremely versatile, you can use them in curries, soups or mashed up in chili. Because the lentils are ground up and dried, they have a great meaty texture when cooked. Moong wadis or mangodis are superb soy-free meat substitutes

How to use Moong Wadis

- Always shallow fry or deep fry wadis till golden before using
- Add to tomato based curries along with any vegetable you like (potato is traditional)
- Add fried moong wadis to yogurt based curries like kadhi or mor kulambu
- In the winter months I add extra water to this recipe and turn it into curried lentil drop soup. I serve the soup with a dollop of sour cream or greek yogurt
- Use fried moong wadis in vegetarian and vegan chili recipes instead of immitation soy based ‘meats’

How moong wadis are made: Moong dal and spices are soaked and ground into a paste. Little drops of this lentil dough are then piped onto a baking sheet or other surface and sun-dried for 2-3 days or untill hard. You can store these in an airtight container for several months. See this post for a recipe. I dont bother making moong wadis, I just buy them at the Indian store.

Lentil Drop Curry or Moong Wadi/Moong Vadi/Mangodi Recipe

serves about 6

4 tablespoons vegetable oil
2 cups moong wadi from the Indian store

1 tablespoon vegetable oil
1/2 teaspoon cumin seeds
1 red or green chilli chopped, optional
1/8 teaspoon asafoetida
1 small onion, finely chooped
1/2 tablespoon garlic paste
1/2 tablespoon ginger paste
1/4 cup tomato puree or 2 tablespoons tomato paste
1 teaspoon coriander powder
1/2 teaspoon turmeric
1/2 teaspoon red chilli powder, optional
Juice of 1/2 a lime or according to taste, optional

Heat 4 tbsp vegetable oil in a medium pot. Add the moong wadis to the oil. Fry on medium heat till the wadis are golden brown. Remove the wadis from the pot using a spoon and set aside. In the same pot, heat 1 tbsp oil.  Add cumin seeds and let them sizzle about 20 seconds or till fragrant. Then add chilli if using and cook another 15 seconds. Add asafoetida.

Immediately add chopped onion and cook till onions are soft, about 2-3 minutes. Then add garlic and ginger pastes. Cook, stirring for another 2 minutes. Pour in the tomato puree, add coriander powder, turmeric and red chilli powder if using. Let the gravy simmer for about 2 minutes. Then add the fried moong wadi along with 5 cups of water.

Bring the curry to a boil. Then lower heat, place a lid on the pot and let it simmer for about 20 minutes or till the moong wadis have plumped up and dont taste raw anymore. Taste the curry and add lime juice according to taste. If the gravy is too thick, add more water.

Serve hot with rice, bread, rotis or tortillas.

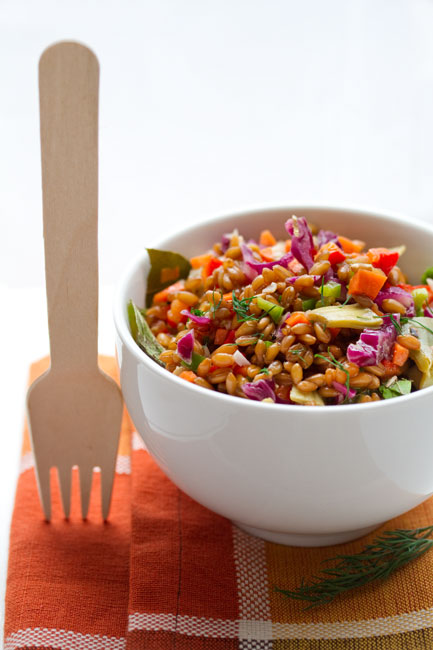
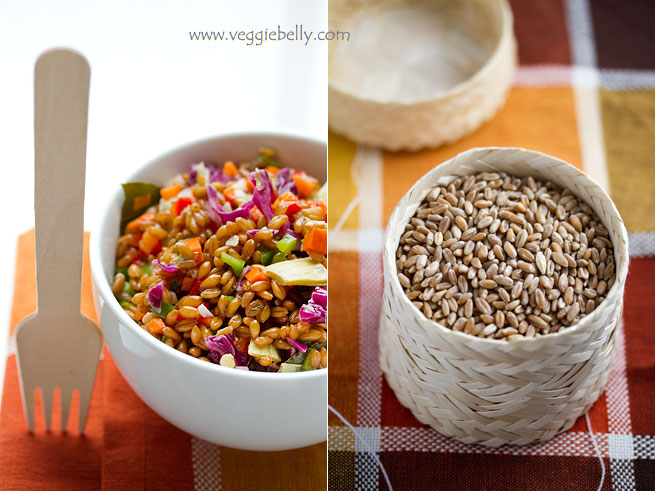
Wheat Berry Confetti Salad with Artichokes, Peppers, Dill and Mint

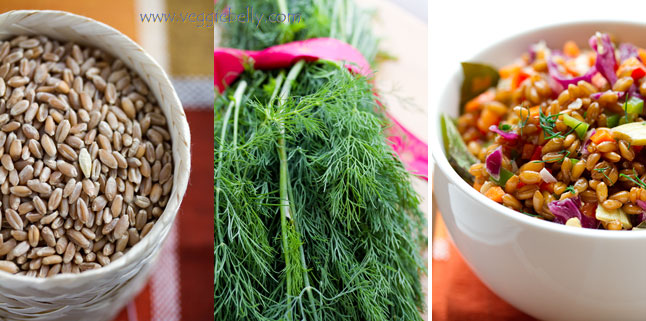
Wheat berry is the whole wheat kernel containing the wheat germ and wheat bran.  Wheat berries have heaps of fiber and protein. They have a sweet, nutty flavor and a chewy texture. They are tasty, easy to make and good for you. I buy wheat berries at Whole Foods. This recipe has a great confetti of color from all the different vegetables. Not only is this a colorful, healthy salad, its also vegan!

How to cook wheat berries

- Boil wheat berries in salted water and drain when done

- They will take anywhere between 1 to 2 hours to cook. I usually cook mine for about 1 1/2 hours.

- After one hour, start tasting the wheat berries. Turn off heat and drain when they are done to your satisfaction.

Wheat Berry Confetti Salad with Artichoke Hearts, Roasted Red Pepper, Green Pepper, Purple Cabbage, Yellow Sweet Corn, Dill and Mint Recipe

serves about 4

1 cup hard wheat berries
1-2 dried bay leaves
10 cups water
4 tablespoons olive oil
1-2 cloves garlic, finely minced
2 tablespoons white wine vinegar
1 teaspoon brown sugar
salt and pepper
1 large artichoke heart (bottled or frozen), chopped
1/2 cup chopped roasted red peppers
1/2 cup chopped green peppers
1/4 cup shredded purple cabbage
1/4 cup canned sweet corn, drained
1/2 tablespoon chopped fresh mint
1/2 tablespoon chopped fresh dill

Place the wheat berries, bay leaf, and water in a large pot. Salt the water generously. Bring to a boil. Then reduce heat to medium. Place a lid on the pot and crack the lid open to let steam escape. Let the wheat berries boil for about 1 1/2 hours or till done. After an hour of cooking, start checking the wheat berries for doneness. Remove from heat when wheat berries are done to your liking. Drain and set aside.

In the same pot, heat olive oil. Add the minced garlic and let it sizzle for about 20 seconds. Turn off heat and let the oil cool a little. Then stir in white wine vinegar, brown sugar, salt and pepper. Add cooked wheat berries to pot and mix well. Then add all other ingredients and mix well. Serve at room temperature. This salad will taste better if left in the fridge overnight.

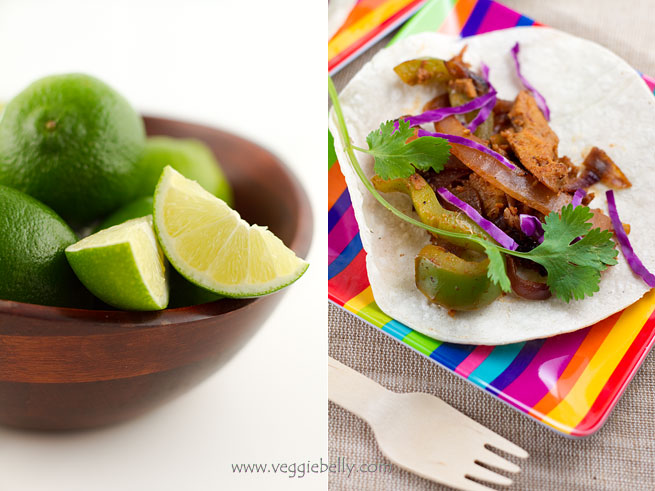
Chipotle Spiced Seitan Tacos

This recipe is a vegetarian and vegan version of a Food & Wine magazine recipe for chile spiced skirt steak tacos. I found the recipe on the Bitten Word site- my new favorite blog by fellow Washington DC bloggers!

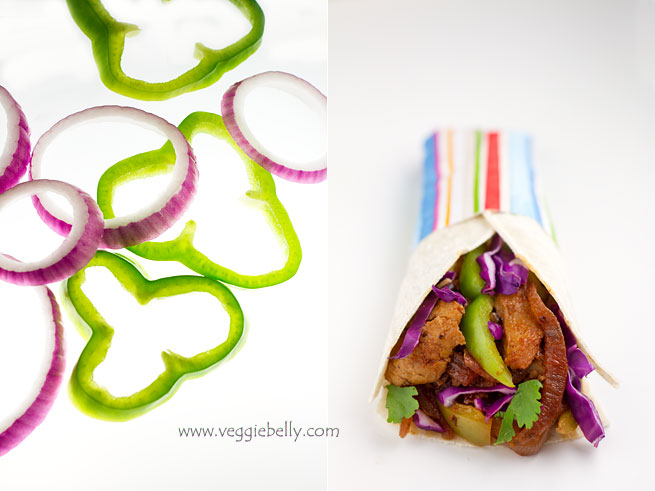
I used seitan (Westsoy brand)  instead of the meat and added some onions and green peppers to bulk it up.  I made some changes to the original taco seasoning recipe — I used more chipotle powder. I didnt use ancho chile powder because i didnt have any. I also cut out the black pepper because I didnt think it added much to the taco seasoning. The original recipe calls for onion powder, but because i was using a lot of fresh onions, I left out the onion powder. 

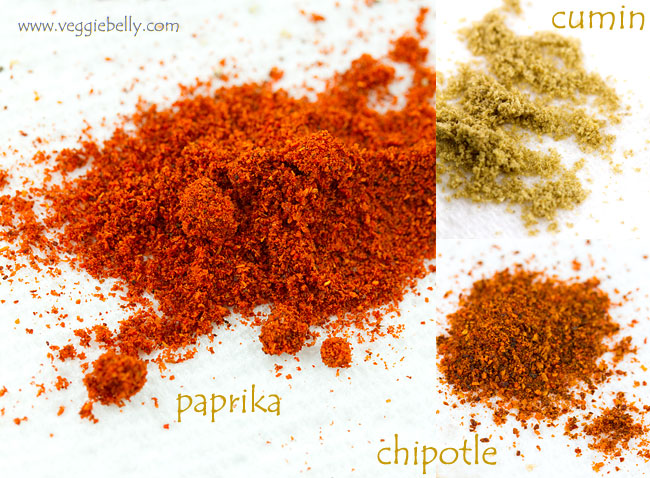
Non-vegans can serve this taco with shredded cheese and sour cream. But these tacos were so tasty thanks to all the paprika, chipotle, cumin and other spices that I didnt miss the cheese or sour cream. Enjoy with a good, cold mexican beer.

Chipotle Spiced Seitan Tacos Recipe

adapted from this Food & Wine magazine recipe found on The Bitten Word blog
makes about 8 tacos

for taco seasoning
1 teaspoon chipotle chile powder
2 teaspoons sweet paprika
1 teaspoon ancho chile powder (i left this out)
1 teaspoon garlic powder
1 teaspoon light brown sugar
1/4 teaspoon ground cumin
1/4 teaspoon ground coriander
3/4 teaspoon salt
1/4 cup fresh lime juice

for the filling
2 tablespoons oil
1 large red onion, cut into strips
1 large green pepper, cut into strips
8oz  seitan

8 corn tortillas, warmed
Pico de gallo, Guacamole, lime wedges, chopped cilantro and shredded red cabbage for serving

In a small bowl, whisk together all ingredients for the taco seasoning and set aside. In a wok, heat oil and add onions. Cook on medium heat till the onions are soft and caramelized, about 7 minutes. Then add green pepper strips, seitan, mixed taco seasoning and saute for about 2 minutes.

Serve with warm tortillas, pico de gallo, guacamole, and shredded red cabbage.

Chive Blossom Tempura Salad

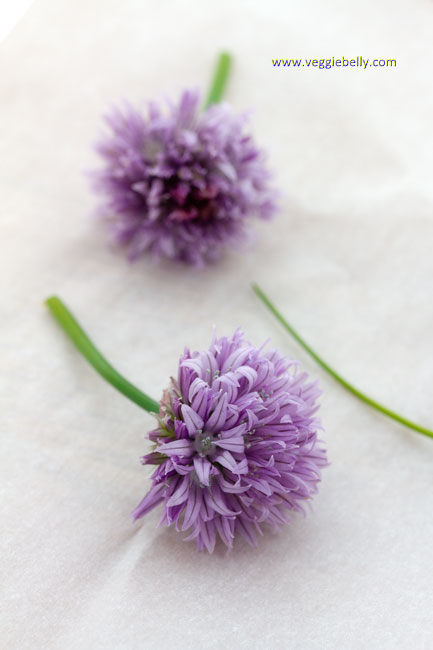
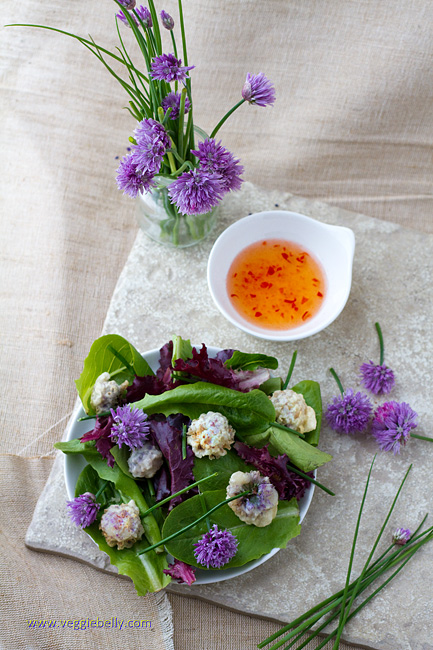
My dear friend Siva is the most passionate foodie I know. He goes on amazing eating trips and comes back with a head full of ideas. One such idea is this chive blossom tempura. When I returned home with a beautiful bunch of  blooming chives from the Dupont circle farmers market , I asked Siva what he suggests I do with them. Tempura was his answer. This tempura is easy to make, tastes great, and the batter is eggless. Serve this tempura by itself or on a salad. Thanks Siva!

Notes:

- If you dont have chive blossoms, just use fresh chives. Chop the chives and mix it with the tempura batter. Then fry small spoon fulls of this batter. Eat these chive fritters with dipping sauce or over  salad

- Use your favorite tempura dipping sauce. Mine had vinegar, chillies, sugar and soy sauce. I use this sauce for dipping the tempura and also as a salad dressing

- Make sure the club soda/soda water/seltzer you use for the tempura batter is ice cold. I add some ice cubes to make it extra cold, and then measure the liquid out

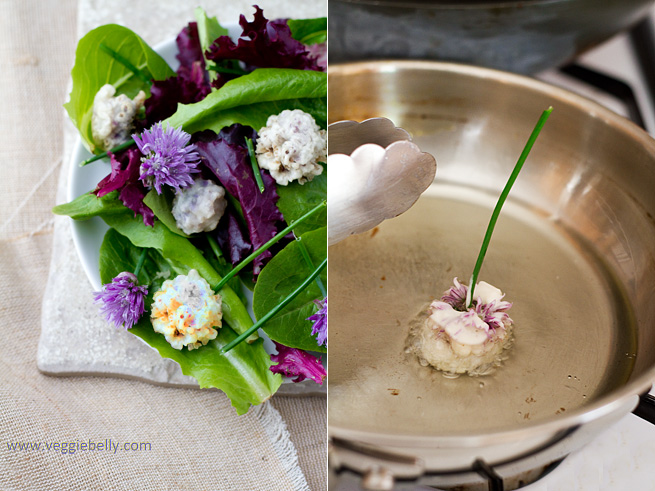
- If you are serving this as a tempura (without the salad), you may want to leave a little of the stem on the chive blossom for great presentation. See photo below. Holding the stem, dip the flower in the tempura batter. Then fry the flower part only, while holding on to the stem using tongs.


Chive Blossom or Chive Flower Tempura Salad Recipe

Serves about 2

One bunch of chive flowers (about 16 flowers)
1/2 cup flour
1/2 cup ice cold club soda or seltzer or soda water
a pinch of baking powder
Salt & pepper
Vegetable oil for shallow frying
Store brought tempura dipping sauce
3 cups salad leaves of your choice (dont use strong tasting ones like arugula)

Cut the chive flowers from the stems. Chop up the stems and reserve.

Make the tempura batter by gently mixing together flour, soda water, baking powder, salt and pepper. Dip a chive flower into the batter and shallow fry till crisp and golden on all sides. Repeat with all chive flowers, a few at a time. Drain the tempura on paper towels. Arrange tempura over salad leaves. Garnish with chopped chive stems. Serve with your favorite tempura dipping sauce.

Grilled Portobello Mushroom, Roasted Red Pepper and Mozzarella Sandwich or Burger

I received the below facebook message one day from my friend, Aditya. Being the great mushroom aficionado that I am, how could I have posted all  but one portobello recipe on this site?!  Ive featured other mushrooms on Veggie Belly, like the shitake mushroom soup, morel mushrooms over polenta, beech mushroom flat bread, and my recent morel mushroom pasta with fiddleheads. But the mighty, meaty portobello has been in all but one recipe on veggie belly. I defenitely had to remedy that!

Aditya, this one is for you  ♥ 

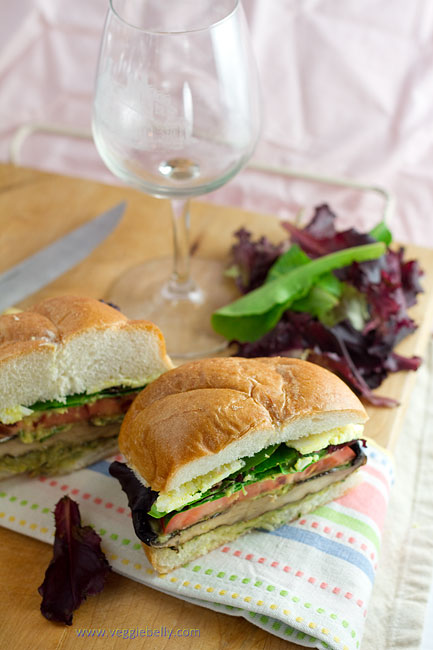
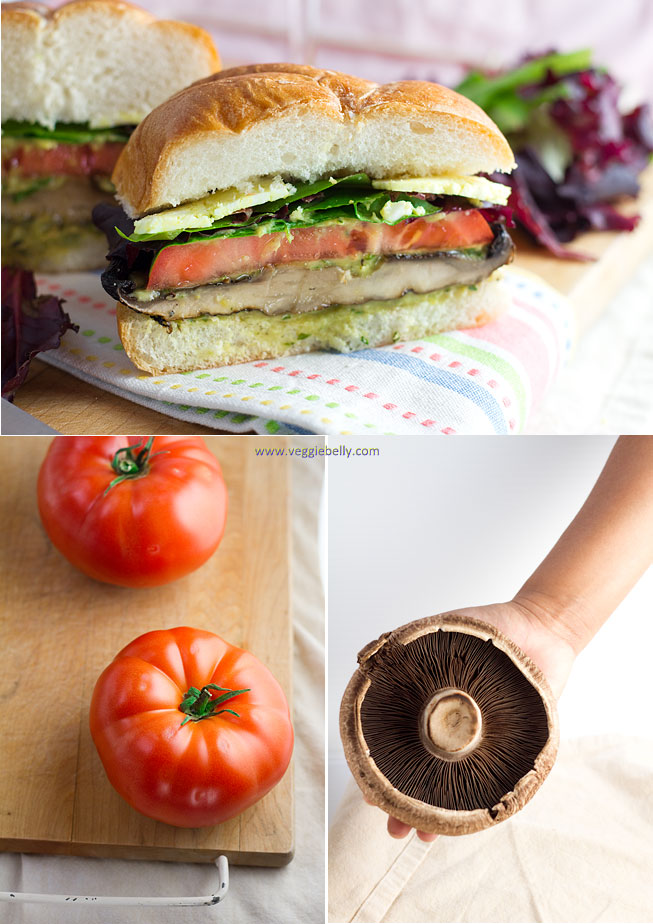
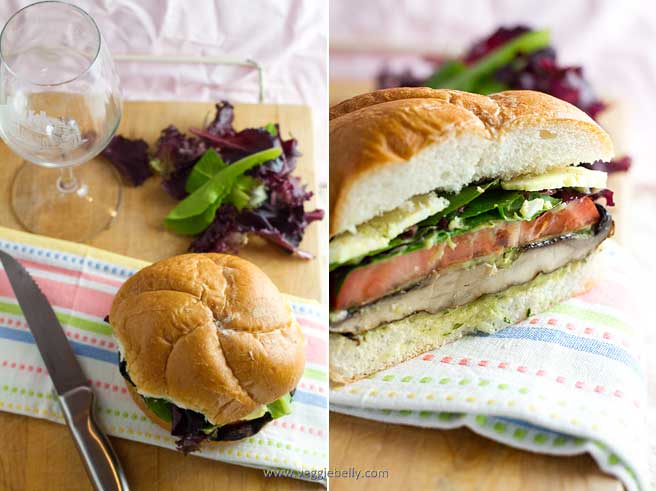
These portobellos were larger than the palm of my hand! But they turned out to be the perfect size for these sandwiches/burgers; they shrunk just enough while cooking on the grill, to fit in the kaiser roll. Portobello or portabella mushrooms are delicious in burger style sandwiches because they are meaty in taste and texture. They are often called the ‘steak of all mushrooms’! They also take to grilling very well. I used beefsteak tomatoes in this sandwich, again, for their meaty texture. But any tomato will do.

Grilled Portobello Roasted Red Pepper and Mozzarella Sandwich/Burger Recipe

makes 4 sandwiches

4 large portobello mushrooms
2 tablespoons olive oil
1-2 tablespoon balsamic vinegar
1/2 teaspoon italian seasoning
salt & pepper
4 kaiser rolls or burger buns or 8 slices of any other loaf bread
2-4 tablespoons mayonnaise or my white bean asparagus hummus
2 tablespoons chopped fresh basil
4 slices beefsteak tomato
4 slices fresh mozzarella (or whatever cheese you like)
4 large pieces of store bought, jarred roasted red pepper
1 cup salad leaves or lettuce of your choice

Heat an outdoor grill to 400f.

Wipe the mushrooms clean. Using a spoon, scrape off the gills from the mushrooms. Whisk together olive oil, vinegar, italian seasoning, salt and pepper. Brush the olive oil and vinegar mixture all over the mushrooms.

Place the mushroom caps on the grill and grill about 2-3 minutes on one side. Flip the mushroom caps, and grill another 2-3 minutes. (If you like your cheese melted, place cheese slices on portobello caps (gill side) after you have flipped them). Remove grilled mushrooms to a plate, and cover to keep warm. If you are not using an outdoor grill, broil the mushrooms in the oven; about 3-4 minutes (or till browned a little) per side.

Cut the bread roll in half. Spread some mayonnaise or my white bean asparagus hummus  on both halves. Sprinkle some basil on top. On the bottom half of the bread roll, arrange the grilled portobello mushroom, tomato slice, mozzarella slice, and roasted red pepper. Top with lettuce or salad greens. Place the other bread slice on top. Secure sandwich with a toothpick. Serve with a side of soup or salad and fries or chips.

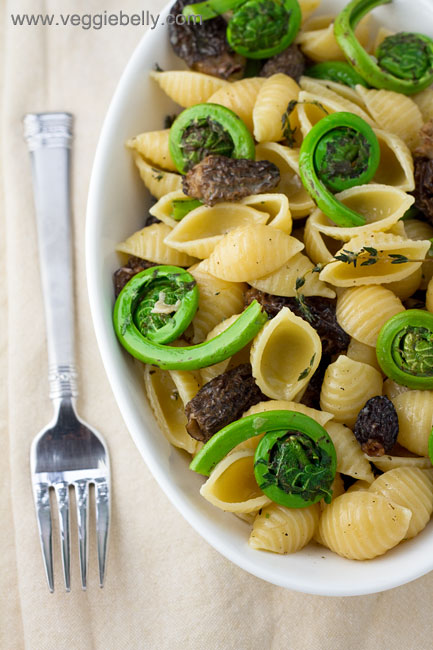
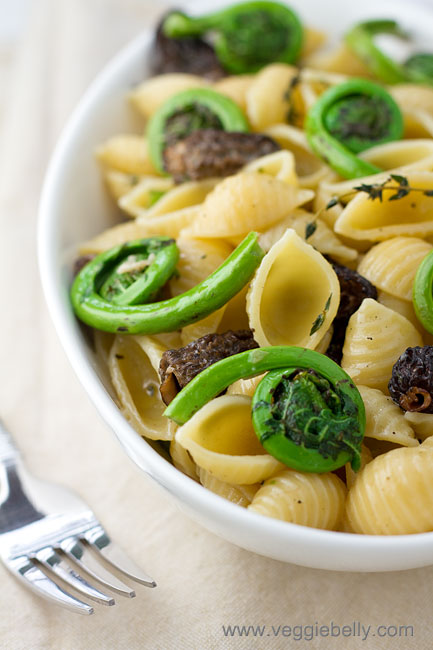
Fiddlehead Fern and Morel Mushroom Pasta


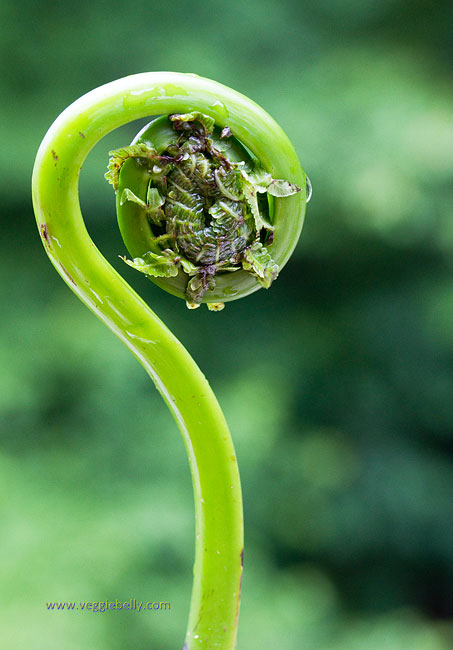
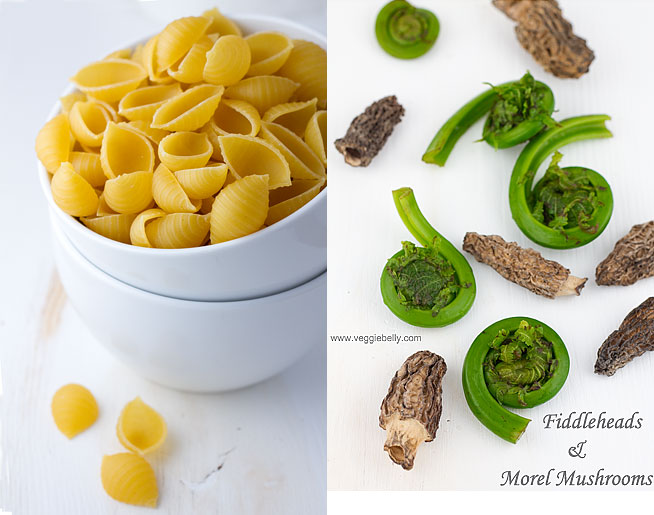
Fiddleheads are young, coiled fronds of the Ostrich Fern. They appear during a short window in the spring and are usually foraged. They have a very mild flavor and a pleasant crunch. To me, they taste somewhat like broccoli stems. Fiddleheads taste great with morel mushrooms. Both fiddleheads and morels come into season at the same time; so it makes sense to use them together. The bright delicate flavor of fiddleheads paired with the earthiness of morels is just exquisite.

Fiddleheads remind me of the beauty of natures creations. These are bright green coils of fern with the delicate flavors of spring tucked into their gorgeous spirals. Dont add too many herbs or spices to fiddlehead dishes; just let their flavor shine through.

How to cook and store fiddleheads

- Remove any brown stuff and dirt on the fiddleheads. Trim the ends

- Wash them throughly in cold water

- Fiddle heads taste best when blanched in salted waterfor 2-4 minutes or until they are tender but crisp. Use blanched fiddleheads in pasta or lightly saute them in butter

- Instead of boiling, fiddleheads can also be steamed till they are crisp-tender

- Blanched/steamed fiddleheads can be patted dry and frozen

- Don’t eat fiddleheads raw, they can make you sick!

- Consume fiddleheads immediately after your purchase or foraging trip. They don’t keep very well

- If you must store fiddleheads, wrap them loosely in a plastic bag and refrigerate them. Use within one day

Fiddlehead Fern and Morel Mushroom Pasta Recipe

serves about 3-4

1/2 oz dried morel mushrooms
3 oz fiddlehead ferns (about 18-20 pieces), washed well
1/2 pound pasta
3 tablespoons butter or olive oil
2 cloves of garlic, chopped
2 sprigs of thyme
1/4 cup heavy cream (recommended) or milk
salt and pepper

Boil water in a small pot, add dried morel mushrooms to boiling water. Immediately turn off heat. Cover and let the mushrooms soak for about 15 minutes. After 15 minutes, drain and squeeze excess liquid from the mushroom. Reserve about 1/4 cup of the mushroom soaking liquid.

In another pot, boil more water, add fiddlehead ferns and boil for about 2 minutes. Then remove from water and submerge in a bowl with cold water and ice cubes. This will stop the cooking process and keep the fiddleheads crisp and green.

Cook the pasta in plenty of salted water till pasta is al-dente. Don’t overcook pasta.

While pasta is cooking, heat a skillet and add butter or olive oil. Add chopped garlic, thyme, and drained morel mushrooms. Cook till morels are soft. Add drained fiddleheads, cream, and 2 tablespoons of mushroom soaking liquid. Cook on low heat for about 1 minute. Add salt and pepper. For a thinner sauce, add more mushroom soaking liquid. Add the boiled pasta and toss.

Related Posts with Thumbnails