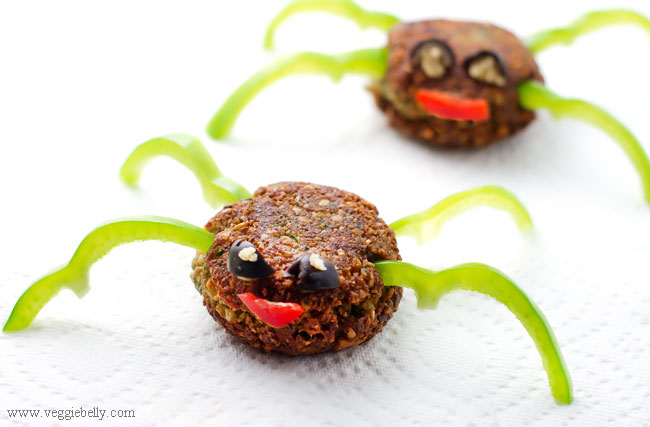
Halloween Falafel Spiders

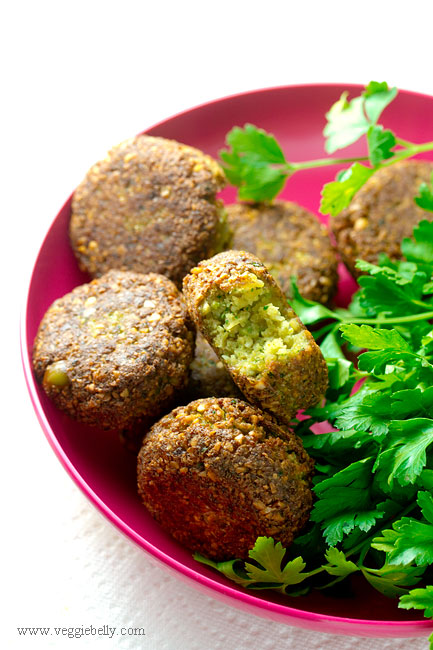
Whether you make these scary falafel spiders for Halloween or make just the falafel patties for a party, you will never go out for falafel again. Other than the soaking and frying, these homemade falafels are an easy, delicious vegan treat and so worth the effort. I always make extra and freeze the dough.

How to make falafel

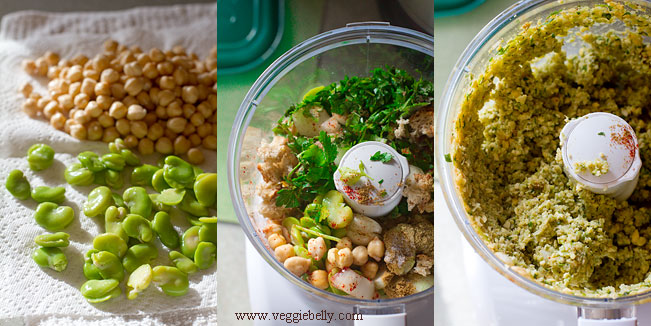
Drain soaked chickpeas and defrosted fava beans. Place them in a food processor along with onion, garlic, cilantro, parsley, cumin, coriander, chili powder, crumbled bread and baking powder. Grind to a coarse dough.

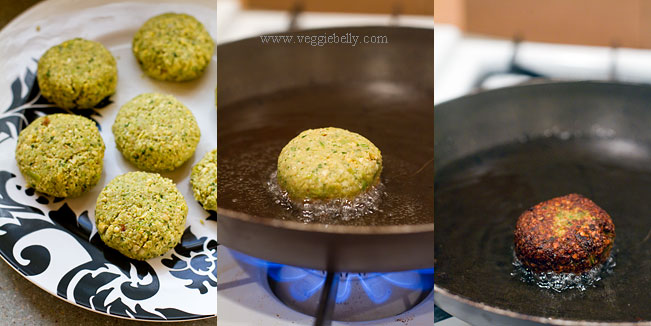
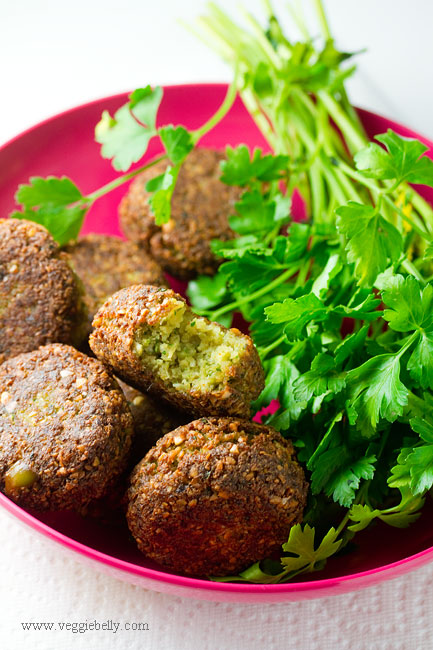
Form the falafel dough into balls, and flatten each ball a little. Fry in hot oil till golden. Flip the falafel gently and brown the other side.

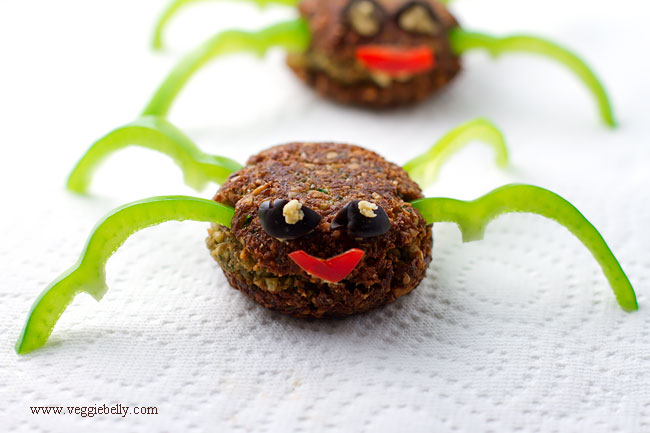
How to make scary falafel spiders – a vegan halloween idea

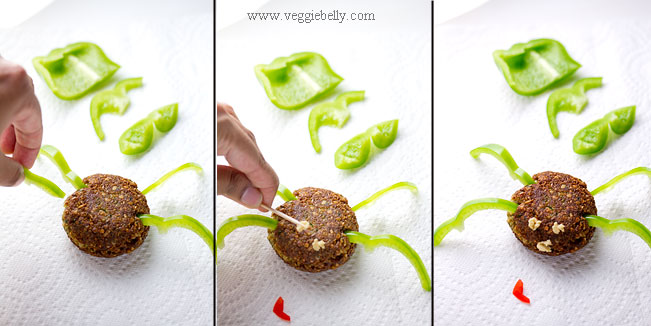
Insert green pepper strips for spider legs. Apply hummus or cream cheese using a toothpick where the eyes and mouth should be. Stick olive pieces for the eyes and red pepper strip for the mouth.

Boo!

Note: Egyptian style falafel uses fava beas (also called broad beans). I love fava beans in falafel, but I also enjoy the texture of the soaked chickpeas. So I use 2/3rds chickpeas and 1/3rd fava beans in this falafel recipe.

I use frozen, shelled fava beans. If you cant find this, use ¼ cup dried, shelled fava beans and soak them over night along with the chickpeas. If you cant find or dont like fava beans, simply use 1/4th cup extra of dried chickpeas.

Dont be tempted to use canned chickpeas, dried chickpeas or garbanzo beans that have been soaked over night are the best.

If you dont want to make these falafels into spiders, simply serve them with pita bread, hummus, tahini, tomato slices and lettuce.

More falafel recipes..
A favorite falafel recipe using chickpeas only on epicurious
An easy falafel recipe on the hummus blog
Arab levant falafel recipe using fava beans by Clifford Wright
Egyptian falafel recipe
Fava bean and chickpea falafel with sumac recipe by the amazing Meeta

Halloween Falafel Spiders Recipe

Makes 8 falafels

For the falafel
½ cup dried chickpeas or grabanzo beans
½ cup frozen, skinned fava beans, defrosted. Substtute with an additional 1/4th cup dried chickpeas.
½ small onion, chopped
3 garlic cloves, peeled
¼ cup (loosely packed) chopped cilantro
¼ cup (loosely packed) chopped parsley
½ teaspoon cayenne or chili powder (use less for milder falafel)
¾ teaspoon cumin powder
½ teaspoon coriander powder
¼ teaspoon baking powder
2 tablespoons crumbled stale bread
½ teaspoon, or to taste, salt

Oil for frying

Place the chickpeas in a bowl, and fill with water. Soak the chickpeas overnight (about 8-10 hours).

After soaking, drain the chickpeas well and place them on several layers of paper towels. Place the defrosted, skinned  fava beans on the paper towels as well. Dab the chickpeas and fava beans dry.

Place the drained, uncooked chickpeas, and the defrosted fava beans in a food processor. Add all other ingredients, except the oil,  to the food processor. Don’t add water. Pulse till it forms slightly coarse dough (see pictures above). Sprinkle a little water if the mixture is too dry. If it is too wet, add more bread pieces and pulse again.

Divide the dough into 8 equal parts. Form each part into a ball and flatten a little.

Heat oil in a skillet. Pour enough oil so that a falafel will submerge in oil half way (see pictures). When the oil is hot, test a small drop of falafel dough by dropping it into the oil. It should sizzle and float to the top of the oil. If it doesn’t sizzle and sinks, oil is not hot enough. If it gets too brown or black quickly, the oil is too hot.

Place the falafels, a few at a time, into the oil. When one side is browned, carefully flip the falafel and brown the other side. Remove to a plate lined with paper towels.

Serve falafels with hummus, tahini sauce, sliced tomatoes, lettuce, and pita bread.

For falafel spiders
8 falafels (recipe above)
1 small red pepper
2 medium green pepper
3-4 black olives
1 teaspoon hummus or cream cheese
A sharp knife
A tooth pick

Cut the red pepper in half, and remove the inner white membrane. Using a sharp knife, carve out a shape that looks like the spiders mouth. Cut out 8 mouths.

Cut each green pepper into 8 thin rings. Cut each ring into half. These are the spider legs.

Cut each olive into half lengthwise. Cut each half into 3 semi circles. These are the spider’s eyes.

Place a falafel on a serving platter. Take the green pepper legs and insert them into the sides of the falafels to look like spider legs.

Using a tooth pick, dot a little hummus or cream cheese where the eyes and mouth should be. The hummus or cream cheese will act as the glue. Then carefully place the olives for eyes and the red pepper for a mouth. Dot a little more hummus or cream cheese over the olive eyes.

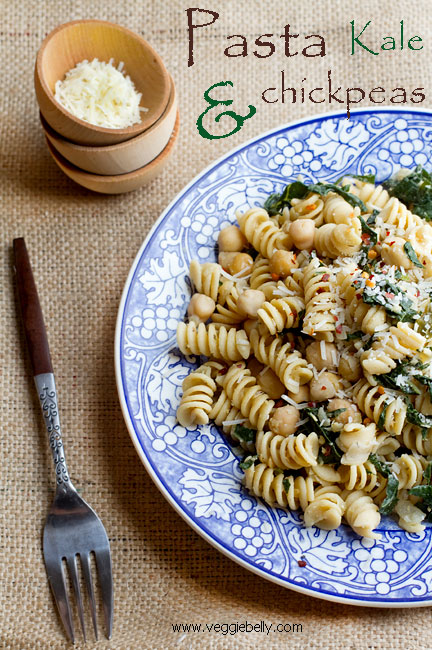
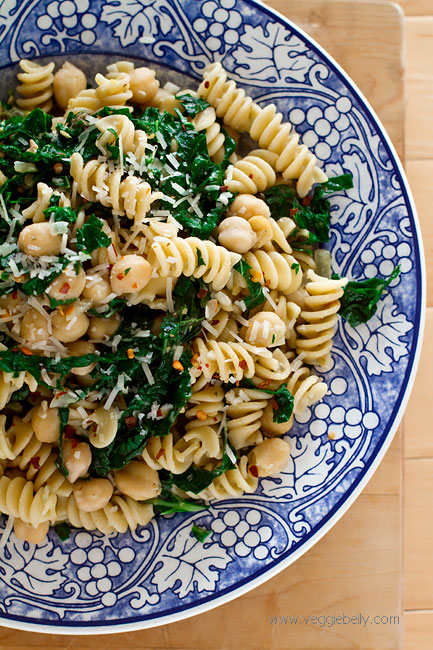
Tuscan Kale and Chickpea Pasta

Pasta e fagioli or pasta with beans is a traditional Italian dish. It is usually made with pasta and cannellini or white beans in a tomato sauce. I took inspiration from the pasta+bean concept and turned it into a hearty main dish of pasta, chickpeas and wilted kale.

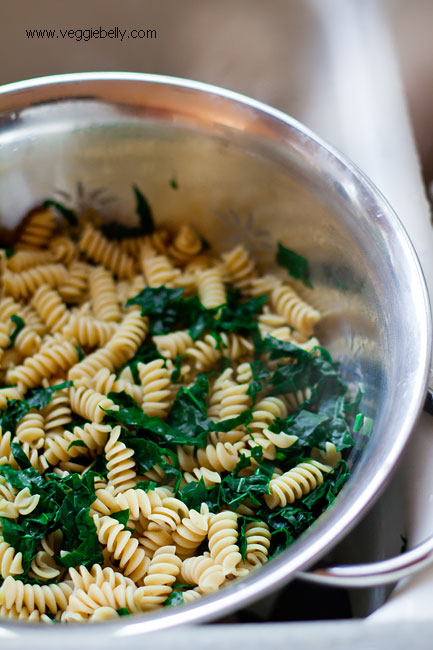
The easiest way to wilt the kale for this dish is to dunk it into the pasta cooking water just before you are ready to drain the pasta. Then drain the pasta and kale together. Add any kind of fresh greens you like. Vegans can simply leave out the parmesan in this dish.

This goes to Presto Pasta Nights hosted by the lovely Claire of Chez Cayenne.

Tuscan Kale and Chickpea Pasta

serves 4-6

One 14 oz box of whole grain pasta (I used Barilla whole grain rotini)
12 large leaves Tuscan kale or any other variety of Kale, about 2 cups when shredded

4 tablespoons olive oil
1 medium onion, diced
Crushed red peppers, to taste
4 cloves of garlic, peeled and minced
2 tablespoons bottled, pickled capers + 2 tablespoons caper juice      
2 cups of drained, rinsed, canned chickpeas
1/4th cup dry white wine, optional
1/2 cup water
½ cup grated parmesan cheese

In a large pot, bring plenty of water to boil. Generously salt the water. When the water reaches a rolling boil, add the pasta, and cook till pasta is al dente. Make sure pasta doesn’t over-cook.

While pasta is cooking, rinse the kale, and remove the tough ribs. Stack the kale leaves, roll up the stack, and cut into thin shreds. Set shredded kale aside.

Heat olive oil in a large skillet. Add onion and cook on medium heat till the onion softens, about 5 minutes. Then add crushed red pepper, and garlic. Cook 30 seconds. Add capers, caper juice from the bottle, chickpeas and white wine, if using. Let the mixture boil.

When most the wine has evaporated, add the water. Cook on medium-low heat for about 2 minutes, while mashing some of the chickpeas. Add more water for a thinner sauce.  Stir in parmesan and turn off heat. Taste and add salt if needed. You may not need salt for this sauce because the capers and the parmesan are quite salty.

When the pasta is almost done, dunk the shredded kale into the pasta pot. Let the pasta and kale boil for about 10 seconds. Drain the pasta and kale.

Toss the drained pasta and kale with the chickpea mixture. Serve immediately with extra parmesan for sprinkling.

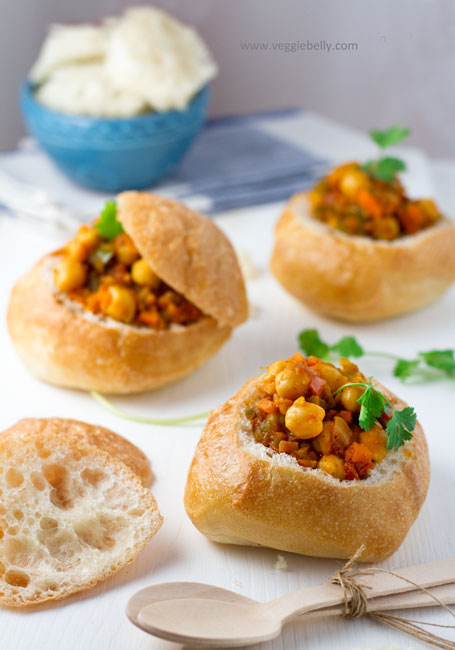
South African Bunny Chow – my vegetarian version with Chickpeas

South African cuisine is a titillating mix of Indian, British, Malay, Portuguese and Indonesian food. Every group of settlers has left its own mark on the country’s cuisine. Bunny Chow, also called ‘bunny’ is one of the Indian community’s contributions to South African cuisine. Indian immigrant laborers are credited with inventing this dish nearly 200 years ago. They used hollowed out loaves of bread to put their curries in – an easy way to transport their curries while working in sugar cane plantations. The concept of bunny chow is not unlike India’s own pav bhaji – bread eaten with curried vegetables.

Camps Bay in Cape Town

When I first heard about Bunny Chow from a taxi driver in Cape Town, I was intrigued. But this African street food is usually made with meat, and I couldn’t find a vegetarian version while I was in South Africa (I should have searched harder because the original bunny chow was vegetarian!). I was disappointed to say the least. When Meeta announced South Africa as the theme for her monthly mingle, I jumped at the opportunity to make a vegetarian bunny chow.

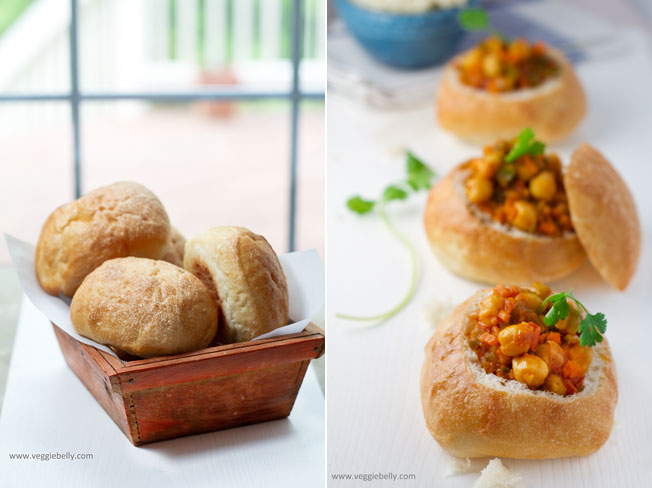
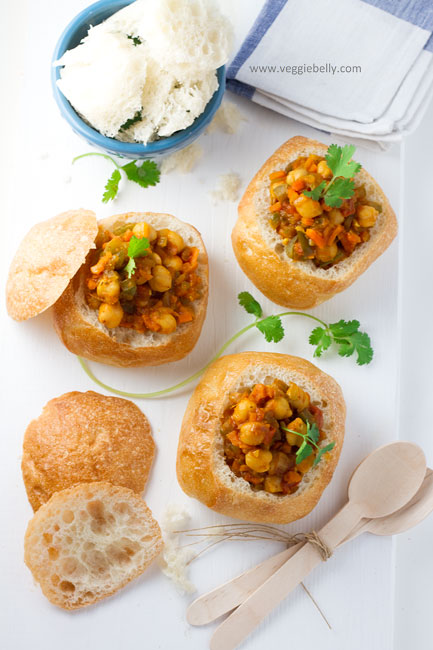
I used chickpeas as the filling. I also decided to go with a more elegant presentation and used mini ciabatta rolls, instead of the traditional white bread loaf. The mini rolls worked well, they looked cute, were easy to eat and reminded me of panera style bread bowls! The bread ‘bowls’ soaked up all the curry and got finger licking good!

Intrigued? Want to read more?

Cook Sister’s bunny chow recipe
Afar blog’s bunny chow recipe
Bunny chow etiquette

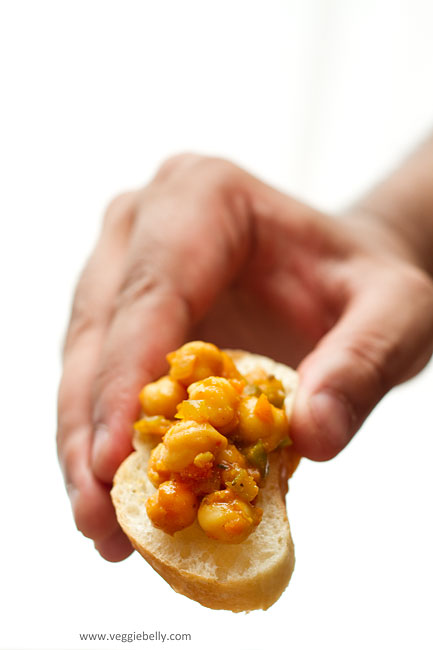
If you dont want to bother hollowing out bread or dont want use as much bread, you could serve the chickpea filling on top of slices of crusty bread – tapas style! But ofcourse, it wont be bunny chow anymore ;)

South African Bunny Chow with Chickpeas Recipe

makes about 6 mini bunnies

2 tablespoons vegetable oil
1 onion, finely chopped
1 tablespoon garlic paste
1 tablespoon ginger paste
1 carrot, diced (1/2 cups when diced)
1 small green pepper, diced (1/2 cup when diced)
1 large tomato, diced
1 tablespoon curry powder ( may need more or less depending on the brand)
1/2 teaspoon turmeric, optional
1/2 teaspoon paprika, optional
1 cup canned chickpeas, drained
2 teaspoons tomato paste
1-2 cups water
1-2 teaspoons lemon juice
salt
cilantro for garnish

6 mini ciabatta or other bread rolls (or 1-2 regular sized loaves of white or crusty bread)

Heat oil in a pan. Add chopped onions and cook on medium heat till the onions are brown. Then add ginger and garlic paste and saute 30 seconds. Add carrot, green pepper, and tomato and cook till the vegetables are soft. Now add salt, curry powder, turmeric and paprika if using, cook 1 minute on medium-high heat.  Add chickpeas, tomato paste, 1 1/2 cups water and bring to a boil. Stir to make sure tomato paste has dissolved. Boil for about 2 minutes. Add more water if the curry it too thick. Turn off heat. Taste,and add lemon juice according to taste.

Cut the tops off the mini bread rolls and gently scoop out the bread inside. Fill the bread ‘bowls’ with the chickpea filling. Garnish with chopped cilantro. Serve along with the scooped out bread for dipping.

If using larger sized loaves of bread, halve or quarter (depending on the size) the bread loaf. Scoop out the bread to form a bread bowl. Fill with chickpea filling. Be careful not to scoop out too much bread, your filling might leak out!

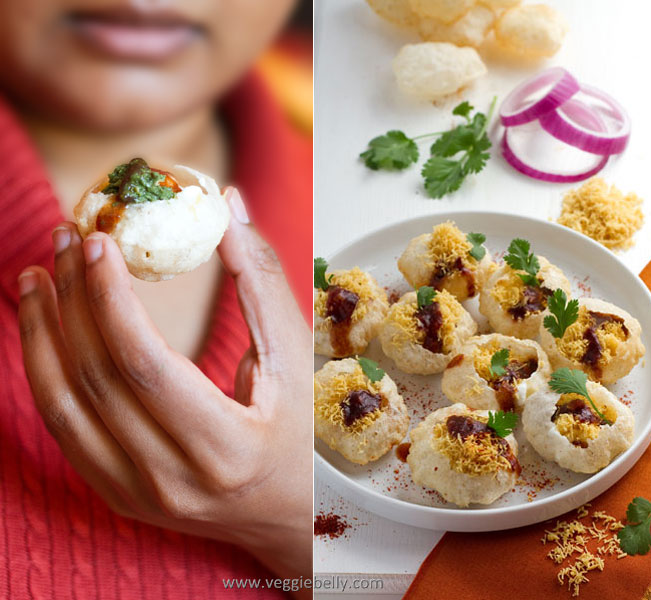
Sev Puri (Chaat) – Memories of an Indian Summer. My Guest Post for The Kitchn

This is my recent guest article on The Kitchn..

Chaat always brings back memories of carefree childhood weekends spent at my parents’ beach house in India. I’d walk over to the beach in the afternoon when the tide is low enough to pick sea shells. I’d return home with my pail full and stomach empty. A gorgeous bowl of chaat would be waiting for me  – crunchy, sweet, tangy, spicy, filling all at the same time. I’d sit on the verandah eating chaat, listening to the waves crashing near by and watching the kites sail over me.

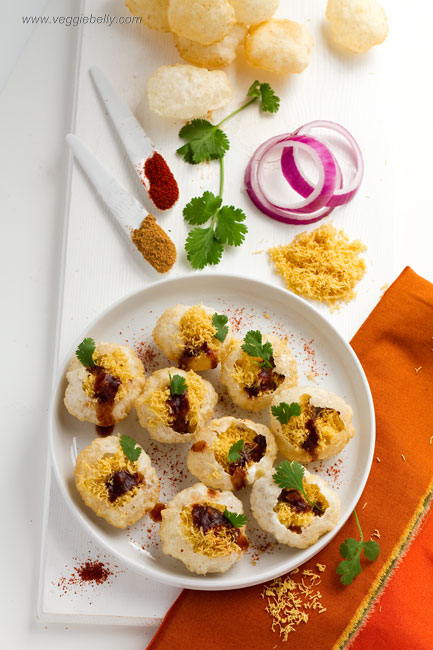
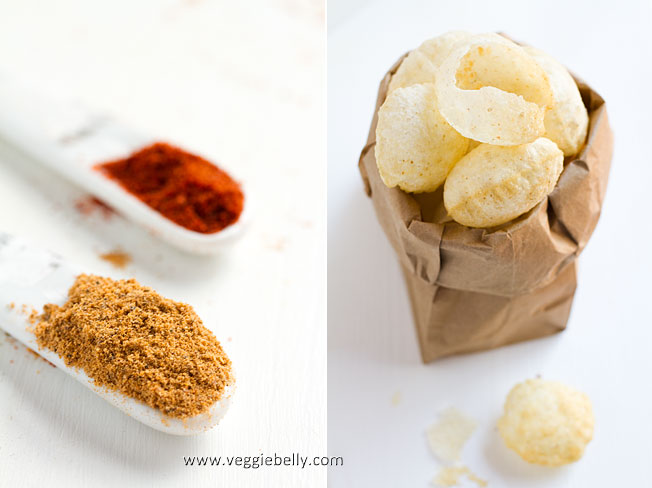
Chaat on weekends still transports me back to those balmy evenings in India. Sev puri is my favorite kind of chaat (‘chaat’ is a general name for this Indian street food; there are several variations). Sev puri are little puffed, fried rounds of dough (puri) stuffed with  crispy noodles (sev), potatoes, onion, yogurt, tamarind chutney and mint chutney. The whole thing is then finished with a sprinkling of amazingly zestful chaat masala – a blend of salt, red chilli, coriander, cinnamon, ginger, anise, pepper, cumin, cardamom, clove, mace, carom and dried mango.

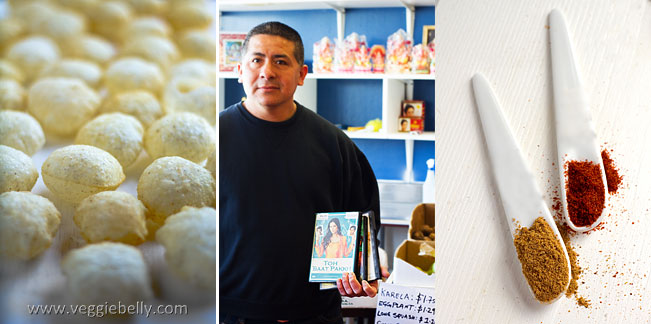
Above: Armando, the man who works at the local Indian store. He is El Salvadorian and his kowledge of Indian ingredients is encyclopedic. He watches all the bollywood movies and gets offended if they dont offer spanish subititles! Gotta love DC/VA!

You will need to make a trip to the Indian store for this recipe. You could attempt to make all the ingredients at home, but that would be time consuming. Why bother when you can buy the same thing at a store!

This is a basic recipe for sev puri; I encourage you to  be creative with it..you are limited only by your imagination. When pomegranates are in season, I like to sprinkle some on top for a colorful, refreshing sweetness. A little chunk of pineapple tucked into the sev puri is divine (toss the pineapple chunks in chaat masala for a delightful sweet-savory flavor).  To make these sev puris vegan, simply leave out the yogurt and use hummus, tahini or cashew butter instead. If you don’t have pani puris, try making this with tortilla chips instead; Scoops! will be perfect for this.

Finally, there is only one way to eat a sev puri – put the whole thing in your mouth! Don’t try to bite into it, just pop the whole thing in your mouth!

Sev Puri (Chaat) Recipe
Serves about 6

1 medium potato, boiled, peeled and diced
½ cup canned chickpeas, drained
3-4 tablespoons finely chopped red onion
40 pani puris* (fried rounds of dough)
½ cup yogurt
½ cup sev* (crispy noodles)
¼ cup date-tamarind chutney*
¼ cup mint chutney*
1 tablespoon Chaat Masala*
1/4 tablespoon red chilli powder or cayenne or paprika
A few sprigs of cilantro

*easily available at any Indian store

Mix together the boiled diced potato, chickpeas, red onion, ¼ teaspoon chaat masala and salt. Set aside. Gently poke a hole on one side of a pani puri. Make it large enough so you can stuff it with the potato mixture. Place some potato mixture inside the pani puri cavity. Top with about ½ tablespoon of yogurt. Sprinkle some sev on top of the yogurt. Then add date-tamarind and mint chutneys. Finish by sprinkling a little chaat masala and chili powder over the top.  Repeat with all pani puris. Serve immediately.

Grilled Zucchini Tagine

Ive finally made use of that tagine I bought in Morocco last year. My long time friend V, and I took a trip to Marrakech and the Sahara desert. The souks in Marrakech were an exotic labyrinth of shops and stalls. Thats where I bought this tagine. And thats where I found out V is an expert bargainer!

We walked into a tagine shop and V made the shopkeeper, a lanky teenager, pull out almost every tagine on his shelves. Exhausted, the kid sat down, anticipating a large sale. V bargained and bargained for her lovely green tagine. Then she bargained and bargained for my yellow one you see in the picture. After about half an hour of this, V simply walked out of the shop saying she didnt like any of the tagines!

The almost weeping shopkeeper/kid came running behind us. He gave us the tagines for less than a fourth of the original price!

My tagine recipe today is for V, the bargain queen :)

There is a little twist in this recipe; the zucchini is grilled. I saw Bobby Flay on Iron Chef America – battle zucchini – where he grilled up some zucchini and made a tagine out of it. Thats my inspiration for this dish. The grill marks make the zucchini look great.

Zucchini – 4
Onion – 1 large, diced
Garlic – 4 cloves
Cauliflower – 5-6 florets
Chick peas – 1 can
Saffron – pinch
Cumin – 1 1/2 tsp
Paprika – 1 tsp
Turmeric – 1/2 tsp
Parsley – 2 tbsp chopped
Lemon Juice – 1 tbsp
Water or stock – 1 cup
Oil – 1 tbsp
Salt

Wash and dry the zucchini. Trim the end. Slice it in two lengthwise. Brush some oil on the cut sides and grill on a very hot grill, just till you get the grill marks.

In the meanwhile, heat a large, heavy bottom pan. Add the oil and saute the onion till light brown. Then add the garlic, cumin, turmeric and paprika and saute one minute.

Arrange the grilled zucchini and cauliflower in the pan, sprinkle with salt. Pour in the water or stock and bring to a simmer. Simmer covered till the vegetables are tender, about 10 minutes.

Stir in the chick peas and saffron and simmer another minute. Turn off heat. Mix in lemon juice and parsley.

Serve with couscous or as our camel man served it in the Sahara desert – with crusty bread.

Related Posts with Thumbnails