Aloo Gobi Tart Recipe

..a guest post by Radhika of Food for 7 Stages

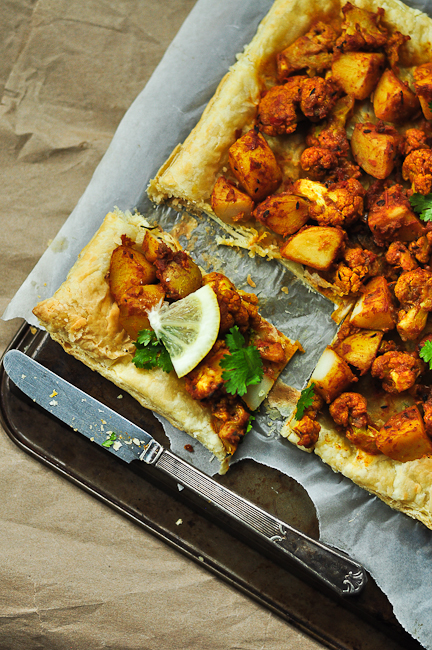
I have been reading Radhika’s mouth watering blog,  Food for 7 stages right since its inception. I am excited to invite her to guest blog today, because her recipe for aloo gobi (Indian potato and cauliflower curry) tart is ingenious. We usually eat al00 gobi with rotis, but radhika puts this classic curry on a puff pastry shell to make it a spicy, decadent meal.

And make sure you read my travel posts, about my vegetarian road trip across america part1 and part2

You need inspiration and then some motivation to pursue a task. When it comes to blogging I draw the inspiration from bloggers like Sala of Veggie Belly. Her eye candy pics, storytelling and her love for traveling makes me feel connected with her though I don’t know her personally. But that is what a good blog and good blogger do to you.

When I came to know that Sala was looking for bloggers to guest post whilst she was traveling across the country, I immediately wrote to her. And she graciously accepted my request to guest post in her beautiful blog. Though it is hard to express my gratitude through words, I thank Sala wholeheartedly for giving me this opportunity to write this guest post in Veggie Belly. 

The tree in front of my home warned us well ahead of time about the changing season. Though I am happy to see those bright orange leaves am not really prepared to face the  aftermath. The thought of unpacking the long forgotten boxes filled with our jackets and winter clothes makes me nervous. I couldn’t believe that one brutal winter can change my love for this season. However, I have to accept the fact and move forward. Before the temperature drops further I have to move all my plants indoor, paint our deck and rearrange my home. Sigh. 

As there is always a blessing in disguise, it is the right time to turn on my oven and get started with baking again. The nip in the air made me crave for something hot yet spicy and I got reminded of the gluten free fusion tart I baked few months ago. Though I was not very happy with the tart crust as the sweetness of almond meal was overpowering the better half seemed to like it. And Aloo Gobhi tart it is. This time I wanted to whip up something real quick and I didn’t have patience to make the tart crust from the scratch. Ding… The idea of using puff pastry popped in my mind and viola I had a delicious savory tart to share it with you all. Flaky buttery crust forms a perfect base for this spiced Aloo Gobhi Masala and I would never think of using another crust recipe. Yumm.
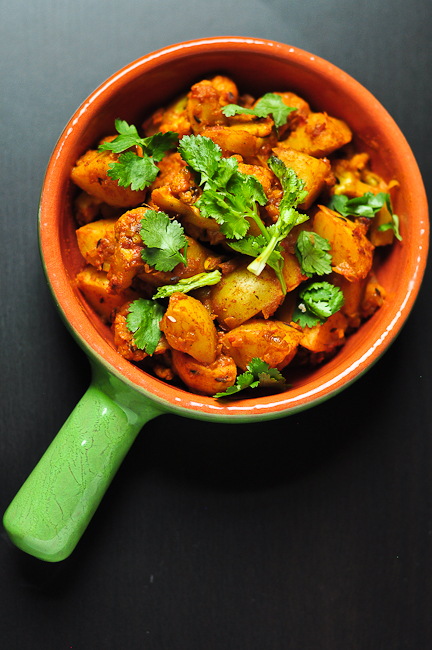
There are very few vegetables that marry well with each other. Cauliflower (Gobi) and Potatoes (Aloo) are the right candidates for this perfect marriage. When these two vegetables are blended together with the right spices they create wonders and Aloo Gobhi is one such popular dish from India. The very thought of combining this popular curry with flaky puff pastry makes me weak at the knees. If you are a savory lover like me, go ahead and make this Aloo Gobi tart. I am sure you will enjoy this fusion savory tart as much as my family did. 

Aloo Gobi Tart Recipe

serves 2-3

Ingredients
2 cup Cauliflower florets
2 Potatoes (medium size)
1/2 teaspoon finely chopped ginger
1/2 cup finely chopped Onion
1/4 cup finely chopped Tomato
3 teaspoon Canola Oil (or any cooking oil)
1/4 teaspoon Cumin Seeds / Jeera
2 Cardamon pods
1/4 teaspoon Turmeric Powder
1/2 teaspoon Chili Powder
1/2 teaspoon Kashmiri Chili Powder or red chili powder
1/2 teaspoon Cumin Powder
1/2 teaspoon Coriander Powder
1/4 teaspoon Garam masala
2 teaspoon Yogurt
2 cup + 4 teaspoon Water
Salt to taste
1 Puff Pastry Sheet (preferably Pepperidge farm), substitute with home made or store bought pie crust
1/4 tablespoon Butter (Optional)
2 tsp Dried fenugreek leaves / Kasuri Methi (Optional)

Method
 Preheat oven to 400 F.

Line a baking tray with wax/parchment paper or foil. Brush it with butter/oil. Place 1 frozen puff pastry sheet on it and allow it to thaw.

Wash cauliflower florets. In a sauce pan, add 2 cup of water, 1/2 tsp salt. Bring it to boil. Turn off and add the cauliflower florets. Let it stand for couple of minutes. This step will cleanse the cauliflower.

In another sauce pan, boil Potatoes until it is 95% cooked (fork tender). I prefer to steam the potatoes. I cut them into equal size chunks and put it in my steamer for 5-6 minutes.

In a wok/kadai, add oil. When it is hot add cumin seeds and allow it to sizzle. Add cardamon, finely chopped ginger. Add onion. Saute until it turns translucent, for 2-3 minutes on medium flame.

Then add tomato, 1/2 tsp salt and saute for another 3 minutes or until it becomes mushy. Add turmeric powder, chili powder, kashmiri chili powder, saute. Add 2-4 tsp water to prevent it from sticking.

Add cumin powder, coriander powder and saute. Add 2 tsp yogurt, potato and cauliflower. Mix well. Adjust salt as per taste.

Then add garam masala, mix and close the kadai with a lid and let it simmer for couple of minutes. This will allow the flavors to marry well. Do not forget to stir in between to avoid sticking to the pan.

Open the lid, if there is any liquid left cook for couple of minutes until the water evaporates. Turn off and allow it to cool.

Place the baking tray in oven and bake the puff pastry sheet for 10 minutes. Remove it from the oven and reduce the temperature to 350 F.

Spread the Aloo Gobhi Masala on the tart. Add few swirls of butter and bake for another 10-15 minutes.

Serve it hot.

Red Moong and Butternut Squash Eriserry Recipe – a Guest Post by Rose of Magpies Recipes

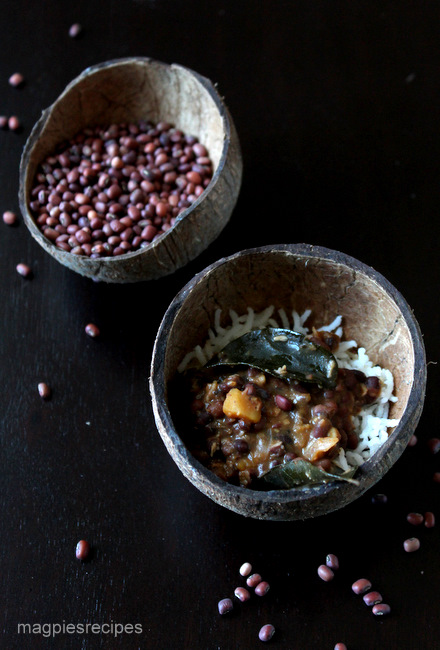
Greetings from the windy city! I am on a cross country road trip right now (posts and pictures coming soon!) and have stopped in Chicago for a day. I have enlisted some of my favorite bloggers to bring you their recipes, while I’m driving 3,000 miles cross country! The first post in my guest post series comes from Rose of Magpies Recipes. Rose is from the state of Kerala, and her blog is full of Kerala recipes cooked with love. I am a huge fan of malayali cooking, and this red moong and butternut squash eriserry (a curry with coconut) is one of my favorites. Take it away Rose!


I am a huge fan of Sala’s gorgeous photographs and wonderful writing as much as I am her warm wonderful personality. When I heard that she was going on a cross country road trip and was wanting guest posts for her awesome blog Veggie Belly,  I sent off a mail to her saying I would love to guest post for her lovely blog, although I have only a few days of packing left to do to head off to India myself! Yes am so excited and just cannot wait to be  home. Am especially longing to introduce my little monkey to my grandmother who is just waiting to meet her first great-grand son!

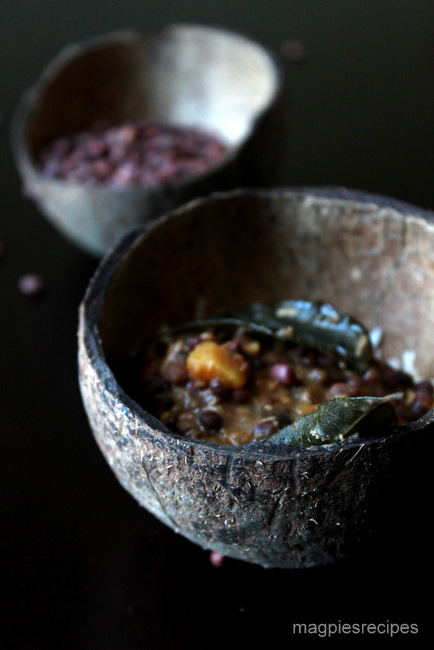
I was thrilled when Sala very kindly said she would love if I did. Thank you Sala! I hope you are enjoying your trip. Since Sala loves Kerala food, I am sharing one of my favourite everyday Kerala dishes, Red Moong and Butternut Squash in Coconut curry (Van Payar Mathanga Eriserry). It is a simple yet comforting and delicious. And perfect for the transition to the fall season, although here in California we still have a few weeks of intense summer left!

While I come from a Syrian Christian family of big meat eaters I also love my veggies and lentils and am married to a lentil lover as well. T can go for weeks on just cherupayar or dal and for everyday eating we are most happy with such simple fare.

Eriserry is a typical Kerala lentil dish and is often part of the Onam Sadhya or harvest festival that happens in the month of September. In Kerala it is usually made with a variety of pumpkin available there, although here I make it with squash or even sweet potatoes. Traditionally fresh coconut is ground into a paste but I use the convenient frozen shredded coconut that is easily available in most Indian grocery stores here. Of course there is a difference in taste but this makes it a very easy dish to make.

Red Moong and Butternut Squash Eriserry Recipe (Van Payar Mathanga Eriserry)

serves 4-6

Ingredients
1 cup dry red moong beans or cow peas  (van payar)
2 cups butternut quash peeled and chopped (you can also use sweet potatoes. But mathanga or Indian pumpkin is traditional)
1-2 tablespoons coconut oil or canola oil
1/2 teaspoon mustard seeds
1/2 teaspoon cumin seeds
1/4 teaspoon turmeric powder
1 teaspoon dried chilli flakes or 3/4 tsp chilli powder-3/4
4-5 curry leaves
1 medium onion, chopped
2-4 cloves garlic, sliced thin (optional)
1 cup coconut Milk
1/4 cup shredded coconut. Do not substitute desiccated coconut 
Salt to taste

Method
Wash the red moong beans or cow peas and leave to soak in water while you prepare the rest of the ingredients. You can also soak them overnight so that they cook faster.

Pressure cook the beans with 2.5 cups of water and salt until they start to become soft ( about 1 whistle and 7 mins on simmer). Once the pressure has released, open the pressure cooker and add the squash and cook for about 2 more whistles until the beans are soft and the squash is fork tender.

If you don’t have a pressure cooker, you can just cook beans and squash in a deep pot instead, but this will take longer.

Meanwhile in a seperate pan or skillet heat the oil and add the mustard seeds and cumin seeds and let them splutter
Now add the turmeric powder, chilli flakes and curry leaves and the chopped onion and garlic if using and stir occasionally until the onions are translucent and starting to turn brown.

Add the shredded coconut and saute until the coconut turns lightly golden.

Add this to the cooked beans and stir well to combine. Heat and let it come to a boil for about 5 mins. Reduce the heat to low and add the coconut milk and let it simmer for about 5 mins. Taste to check the salt and add more if required. Do not let it come to a boil after adding the coconut milk as the coconut milk will curdle.

Serve hot with rice, fried pappadam and pickle. For extra points, serve some sweet payasam for dessert!

Chettinad Meal Maker Curry Recipe

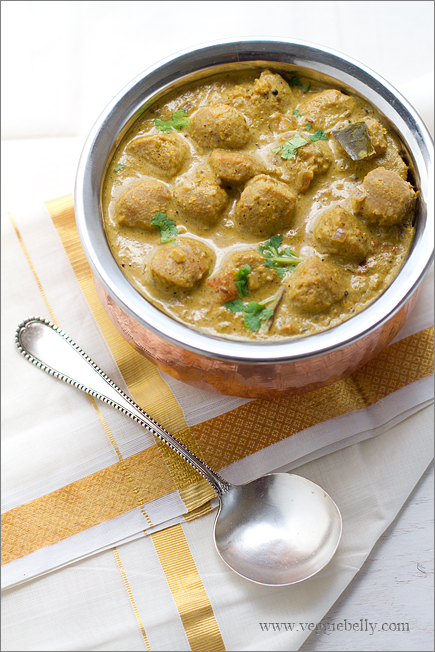
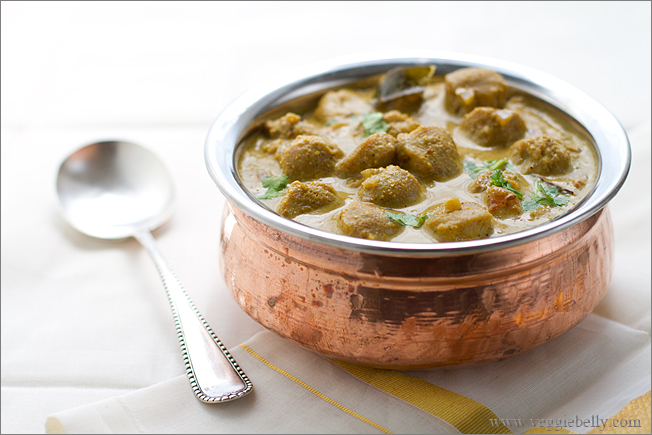
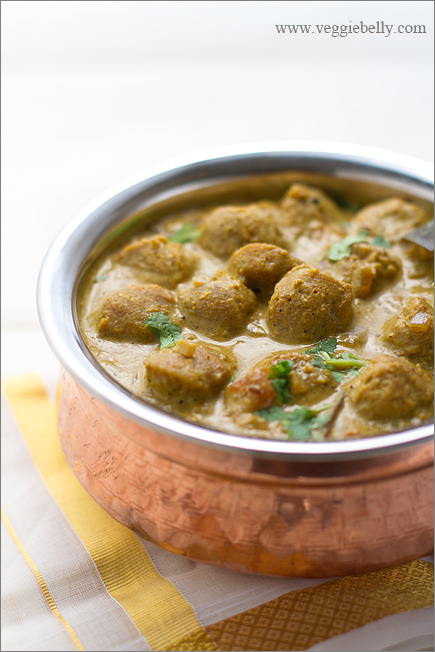
Chettinad is a region in South India where many of my ancestors come from. It is a dry, arid land inhabited by a devout and enterprising people. And the food is simply sensational. There is no greater pleasure than eating at a chettinad wedding! Chettinad cuisine uses an abundance of spices like cumin, fennel, fenugreek, star anise, poppy seeds, chillies, tamarind, shallots, coconut and curry leaf. This chettinad meal maker curry is inspired by my heritage.

Nemam Koil, our clan temple in Chettinad

Chettinad is famous for its palatial ancestral homes. This house in Kothamangalam is now Saratha Vilas hotel.

Chettinad homes are generally famed for their non vegetarian food. But you can easily enjoy the flavors of this region with this vegetarian, vegan recipe. Meal maker or Nutrella are Indian brands of soy protein that are quite meaty in texture. I used Indian meal maker in this recipe. Feel free to use any kind of dried soy chunk or granule product. TVP, TSP, soy chunks, soy granules, or even seitan will work.

This chettinad meal maker curry recipe is easily adaptable to different tastes, use only vegetables (cauliflower is nice) or adjust coconut milk however you like. You can use more or less chillies according to your preference.

Chettinad Meal Maker Curry Recipe

(A Spicy Curry using TVP, TSP, Meal Maker, Nutrella or Soy Chunks)
Serves about 4

Ingredients
1 cup dry soy chunks/Meal Maker/Nutrella/TVP/TSP*
1 tablespoon oil
½ teaspoon black mustard seeds
¼ teaspoon cumin seeds
6 curry leaves
1-3 green chillies, slit. optional
½ medium onion, chopped
3 garlic cloves, cut into slivers
2 small tomatoes, chopped
1 recipe masala powder, see recipe below
½ teaspoon ground turmeric
1 cup coconut milk
Salt

*Soy chunks like Meal Maker and Nutrella are easily available at Indian stores. TVP/TSP granules are available at the regular grocery store.

Method
Rehydrate the soy chunks (meal maker) or granules according to package instructions. This usually involves boiling a small pot of water with a little salt, boiling the soy chunks in it, then letting them soak in the boiling water (10 minutes for soy chunks, less for granules – read the box instructions). Drain the soy chunks or TVP granules, and squeeze out as much water as you can. Set the re-hydrated soy chunks or TVP granules aside, and proceed with the recipe.

Heat the oil in a medium saucepan. Add black mustard seeds and let them sizzle. Then add cumin and stir for 30 seconds. Add curry leaves and chillies, stir again. Then add onions, and sauté on medium-low heat for 3 minutes, or till the onions have softened. Now add the garlic and tomatoes. Continue to cook on medium-low heat till the tomatoes are very soft, about 6 minutes.

Add the ground masala powder (recipe below), turmeric, and salt, stir for a minute.

Add re-hydrated, squeezed soy chunks/meal maker/nutrella/TVP/TSP and pour in 2 cups water. Bring to boil. Continue boiling for about 5 minutes.

Pour in coconut milk and cook stirring for about 2 minutes. Taste the curry, if it is too spicy for you, add more coconut milk.

Garnish with chopped cilantro. Serve hot with rotis, chappatis, tortillas, or steamed rice.

For the masala powder
Ingredients
1 tablespoons coriander seeds
1/2 tablespoon cumin seeds
1/2 tablespoon fennel seeds
1 small dried red chili, optional

Method
In a small, heavy skillet on low heat, toast each of the ingredients one at a time. Roast each spice for about a minute, or till it lightly turns color and gets fragrant. Let the toasted spices cool a little. Then place in a coffee grinder and grind into a fine powder. Make sure there are no unground pieces.

Smoked Eggplant Curry


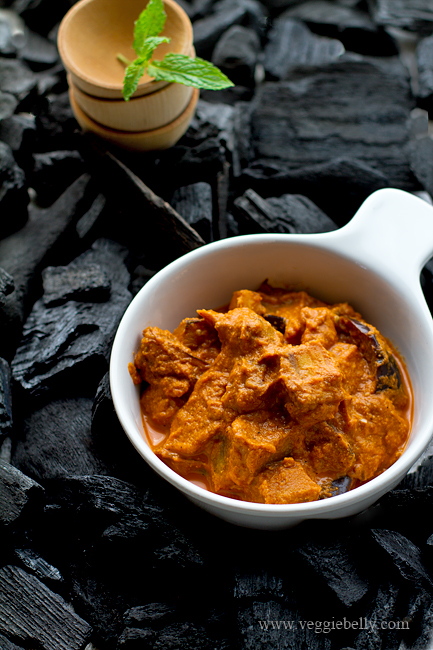
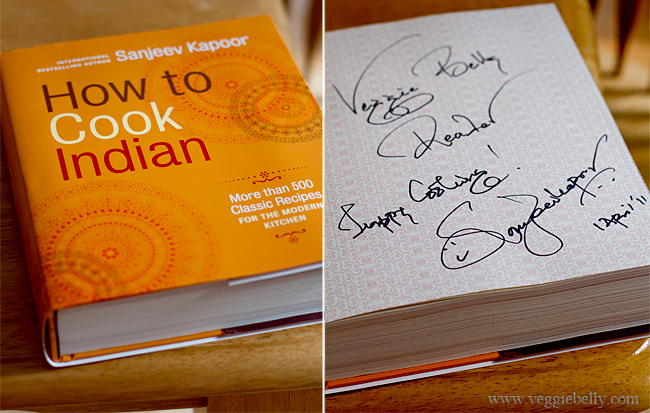
This is the easiest method to smoke something. I learned this method from Sanjeev Kapoor’s new book, How to Cook Indian (scroll to the bottom of this post for a chance to win a signed copy of the book!).

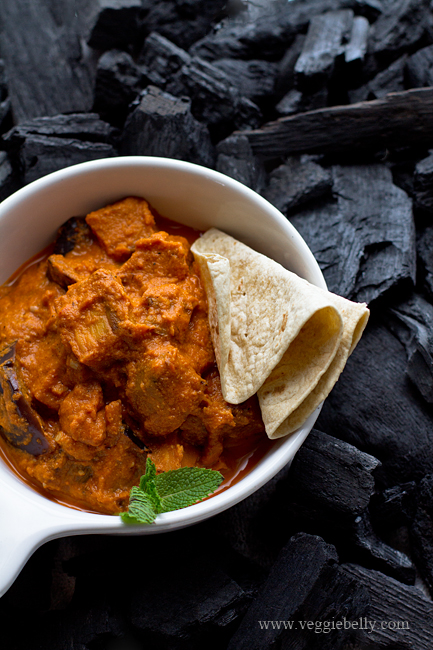
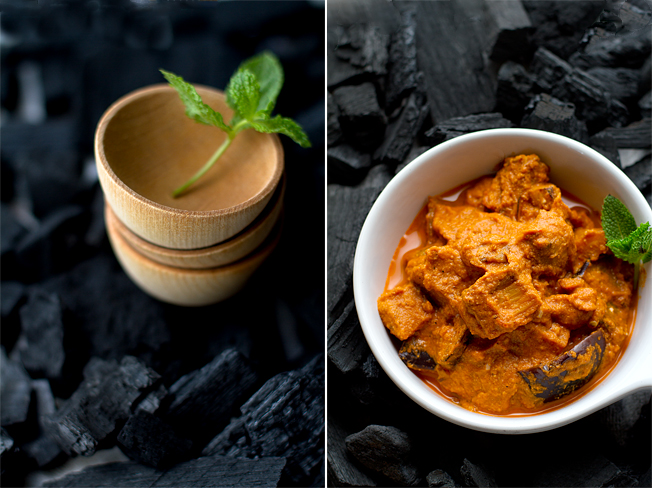
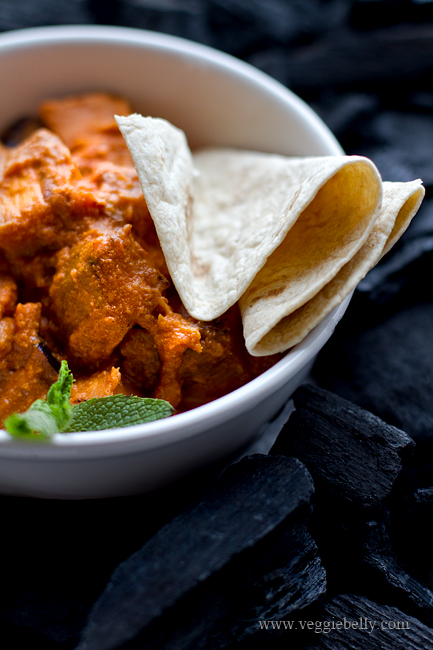
I was intrigued by Sanjeev Kapoor’s koyla (charcoal) chicken recipe in the book. He makes a chicken curry and then smokes it by placing a bowl with a smoking hot piece of charcoal in the curry. The smoke gets into the curry, making it all smoky and wonderful. I’ve adapted Sanjeev Kapoor’s smoked chicken curry by using eggplant and creating a great vegetarian smoked eggplant curry recipe.

How to smoke the eggplant curry

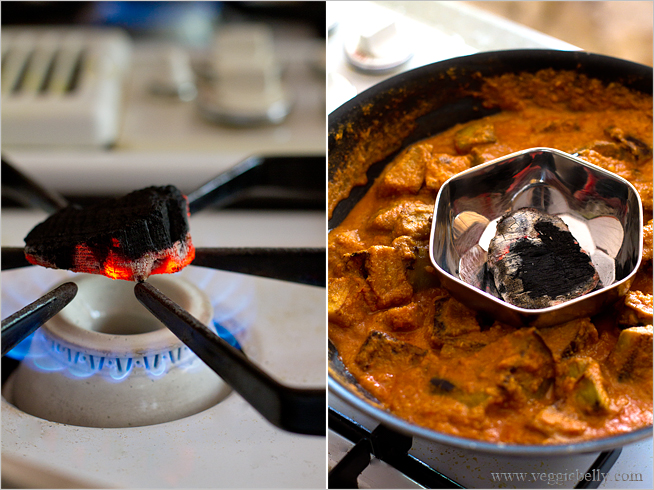
Heat charcoal till its red. Then put it in a small bowl, and place it over the curry.

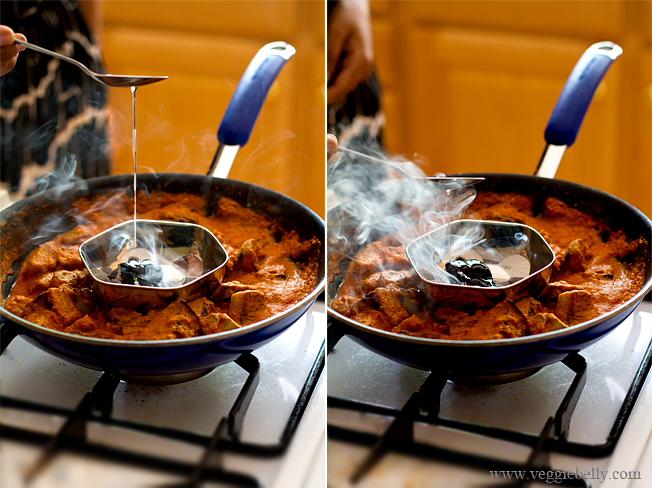
Pour a little oil over the hot coal. The coal will now give out smoke, that will flavor the curry.

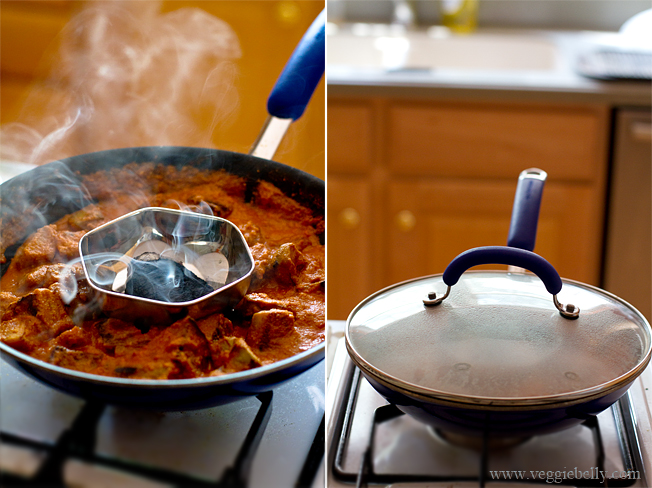
Cover the skillet to trap the smoke. Let it sit for a few minutes so that the smoke infuses the eggplant curry.

When choosing charcoal, make sure you buy all natural charcoal. Don’t buy anything that has chemicals or petroleum added to it or is ‘self igniting’.

Watch Sanjeev Kapoor making his smoked koyla chicken curry. His method of smoking and my adapted recipe will work well for zucchini curry, mushroom curry, or use paneer or mock meat in this recipe.

Smoked Eggplant Curry Recipe


vegetarianized from Sanjeev Kapoor’s Koyla Chicken recipe from his book, How to Cook Indian

Serves 2

3 medium tomatoes
6 whole cashewnuts
1 tablespoon butter, ghee or vegetable oil
½ lb American or Indian eggplant
1/2 teaspoon ginger paste
1/2 teaspoon garlic paste
1/4 teaspoon garam masala
¼ teaspoon or to taste, chili powder
1 teaspoon lemon juice, you may need more or less depending on how tart the tomatoes are.

For smoking the curry
1 lump of charcoal, about the size of a large lemon
1 teaspoon vegetable oil

Boil a medium pot of water, and drop the tomatoes in whole. When the tomato skins start to blister, drain them and let them cool a bit. Then peel the tomato skins and discard. Core the tomato. Place the skinned, cored tomatoes in a blender along with the cashew nuts and puree. Set this aside.

Cut the eggplant into 1 inch cubes. I peeled the skin first, but that’s optional.

 Heat butter, ghee or oil in a medium skillet. Add the eggplants, and let them brown a little on medium-high heat, about 4 minutes. Then add ginger and garlic. Stir on medium heat for about 2 minutes. Add the garam masala and chili powder and cook another 30 seconds.

Pour in the tomato puree and salt. Boil for 7 minutes or till the eggplant is cooked and the sauce has thickened a little. If the sauce gets too thick, sprinkle some water over it.

Turn off heat. Taste the curry and add lemon juice, if using.

Now comes the fun part – smoke the curry!

Hold a piece of charcoal, using tongs, over an open flame. You can do this on an open gas flame, or an outdoor grill. Heat it till it becomes red hot. (Be careful, the hot coal may give out sparks, turn on your ventilator or exhaust). Now you need to work quickly. Place the red hot coal in a small bowl.

Immediately place the bowl inside the skillet with the eggplant curry. Pour the oil over the coal, so that it smokes. Quickly place a lid over the skillet. Let the smoke from the charcoal infuse into the covered curry for about 6 minutes. The longer the charcoal bowl sits in the skillet, the smokier your curry will get.

Remove the bowl from the skillet, and discard the charcoal. Serve the smoked eggplant curry with rice, roti or naan.

**************************************************

This giveaway has ended, the winner is comment #65, Shil!

Win a signed copy of Sanjeev Kapoor’s new book,

How to Cook Indian!

This book has more than 500 classic Indian recipes for the modern kitchen.

To enter the giveaway:

Leave a comment below and tell me whats an Indian dish you havent tried at home yet, but would love to try and make.

Giveaway ends Friday June 3rd 9pm EST. One random winner will be picked.

I will ship anywhere in the world!

I met Sanjeev Kapoor at a book signing, and had an extra copy signed just for this giveaway. The signature says “Veggie Belly Reader, Happy Cooking! Sanjeev Kapoor :)

****************************** 


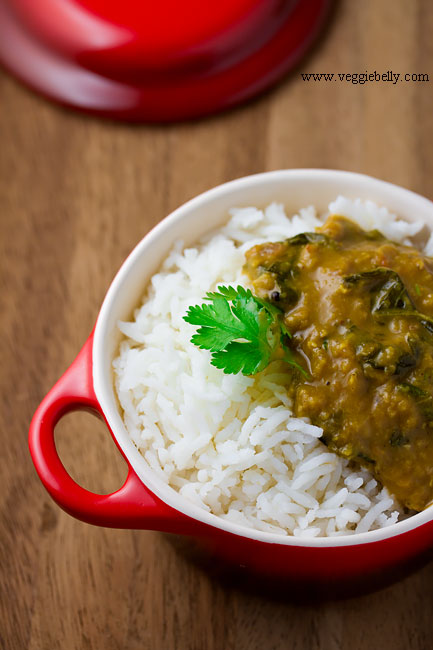
Creamy Spinach Dal (Lentil Spinach Curry)


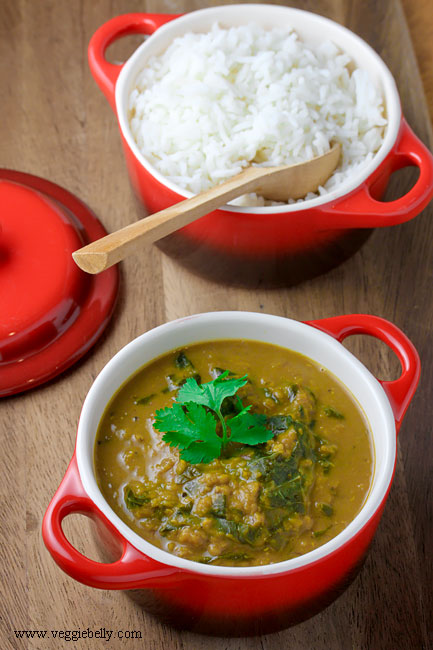
This wonderful bowl of palak dal or spinach dal curry is one of my favorite comfort food recipes for the winter. Just the smell of sizzling cumin, onion and garlic wafting through the house is enough to awaken anyone’s appetite. Serve this easy, filling dish with rice, rotis or bread.

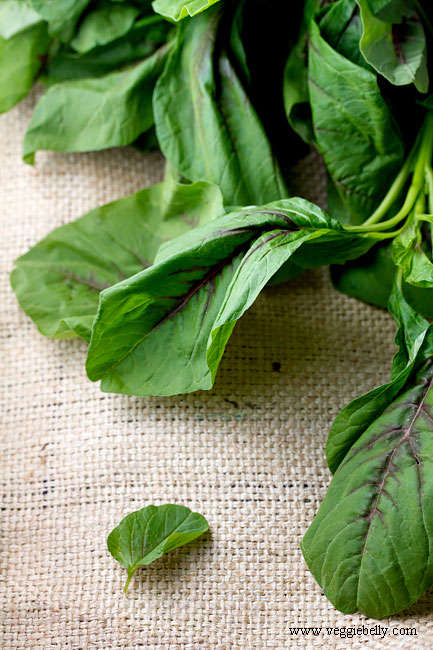
Red choy or red spinach tastes great in this recipe

Any kind of dal or lentils will work here. You can use red lentils (masoor dal) in this dish as well. I like yellow lentils or mung or moong dal. I often use red spinach (Asian red choy or choi) in this recipe. Red spinach tastes a lot like spinach, but has red colored veins, and takes just a bit longer to cook than baby spinach leaves.

Some more delicious spinach dal recipes..
Palak dal or spinach dal recipe from vahrehvah.com
Spinach dal recipe on Mahanandi
Spinach dal recipe using toor dal on Chow and Chatter
Spinach dal curry recipe on Spicy Tasty

Creamy Spinach Dal or Spinach Lentils or Palak Dal Recipe

Serves about 4

1 teaspoon vegetable oil
¼ teaspoon cumin seeds
1-2 green chilies, slit (optional)
1 small onion, peeled and chopped
2 garlic cloves, peeled and chopped
2 plum tomato, chopped
1 cup yellow lentils (moong dal)
¼ teaspoon turmeric powder
Salt to taste
2 tablespoon heavy cream
1 cup fresh, washed, baby spinach leaves or red choy leaves, packed tightly

Heat oil in a medium sauce pan. Add the cumin seeds. When they sizzle, add the green chilly if using, and stir 30 seconds. Then add onion, garlic, and tomato. Stir on medium heat till they are soft, about 5 minutes. Add the lentils and turmeric and stir 2 more minutes.

Pour 3 cups water and add salt to the lentils. Bring to a boil. Then reduce heat to a simmer. Place a lid on the saucepan and cook till lentils are done, about 15 minutes. Using the back of a wooden spoon, lightly mash the dal, so that the tomatoes and onion pieces are mashed into the lentils. Add the heavy cream and spinach leaves. Stir the spinach leaves into the dal till they wilt, about 1 minutes. Add more water to the dal, if needed.

Serve hot with rice, rotis or bread.

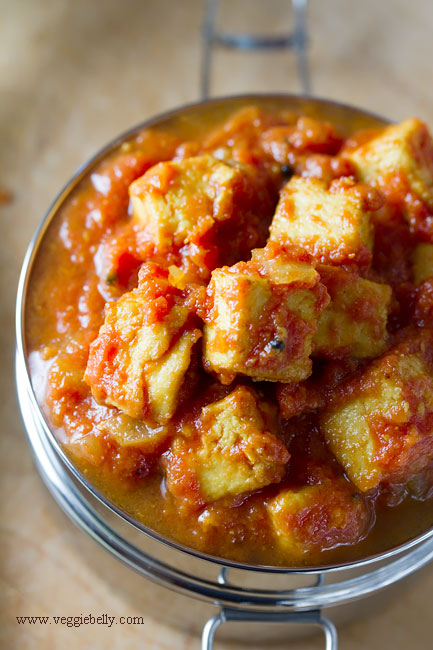
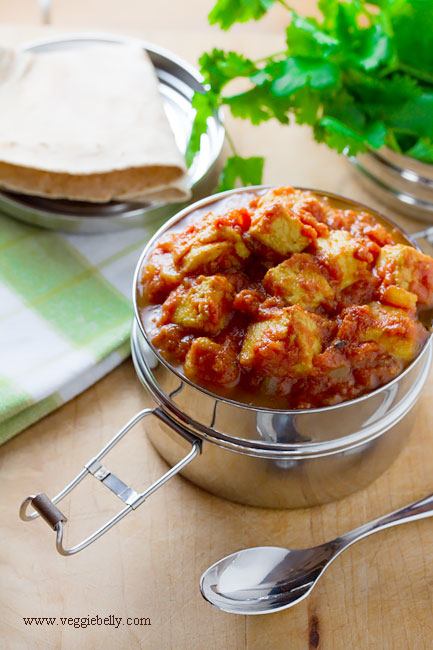
Paneer and Tomato Curry

What an amazing weekend it was! Three childhood friends visited me, and we spent the weekend chatting, catching up and having a great time (N, I am still thinking of your amazing  lychee martinis!).

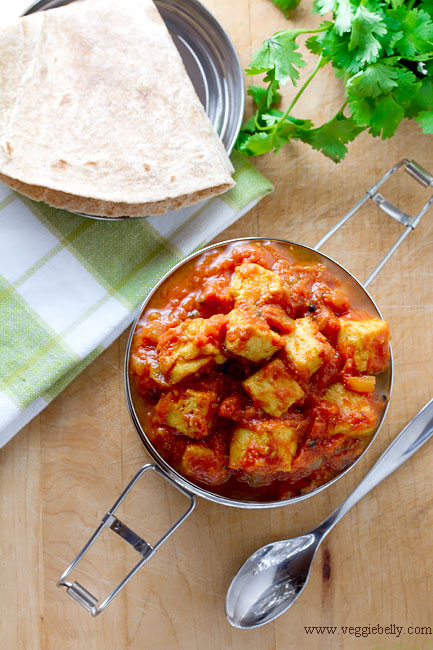
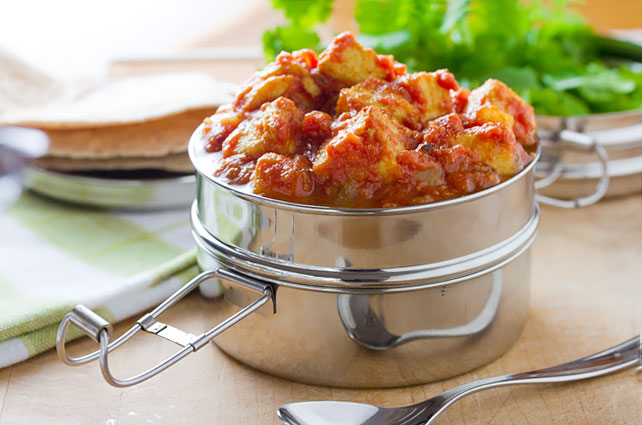
When my dear friend Santha wrote to me requesting this paneer tomato curry recipe, I was flooded with memories of school lunch times and all the wonderful food we used to share from our little tiffin carriers. I was somewhat famous for this curry back in school. I’d take this dish and rotis for lunch every Friday. And I always had to take extra because it was so popular with my classmates. So I decided to make this curry for my friends for our ‘reuinion’ weekend. 

Santha, this is for you ♥

Make sure you use ripe, juicy tomatoes. Canned tomatoes are ok, but you will get the best results if you use high quality canned tomatoes like Muir Glen or San Marzano.

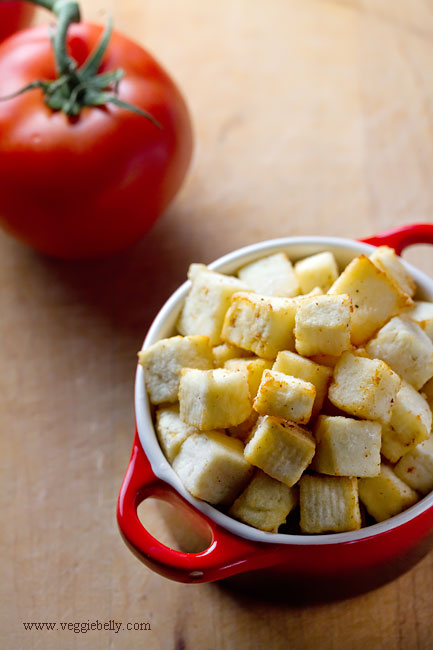
Paneer is an Indian cottage cheese, easily available at Indian stores. For this recipe, you can buy raw paneer and shallow fry it yourself, or you can buy pre-fried packaged paneer (which what I use). Nanak brand paneer is quite good.  Store bought paneer can be quite compacted and hard, so you need to soak it in hot water to soften it a bit.

Daily meals has a tomato paneer curry recipe using garam masala. Mahanandi blog has a paneer tomato recipe as well. Be sure to checkout Local eater blog’s delicious tomato paneer curry recipe from Madhur Jaffrey’s world vegetarian cookbook.

Paneer Tomato Curry Recipe

Serves about 10

For the tomato gravy
6 large, ripe, juicy tomatoes
1 tablespoon oil
¼ teaspoon black mustard seeds, optional
1/2 teaspoons cumin seeds
1 medium onion, chopped fine
½ teaspoon turmeric powder
1 teaspoon cumin powder
½ teaspoon or to taste, chili powder
Salt
1 tablespoon tomato ketchup. Use less if you want a less sweet gravy.

For the fried paneer
2 cups cubed paneer*
A large bowl filled with very hot, salted water

Make the gravy
Remove the core of the tomatoes. Quarter the cored tomatoes and place in a blender, along with 2 cups of water. Puree until the tomatoes have become a very smooth sauce. You should have about 8 cups of puree. Set this aside.

In a large saucepan, heat the oil. Add mustard and cumin seeds. When the mustard starts to splutter, add the chopped onion. Cook on medium-low heat till the onion is soft. Add turmeric, cumin and chili powders. Stir for a few seconds.

Then carefully pour in the pureed tomatoes. Bring the gravy to a boil. Then reduce heat and let the curry simmer on low heat for about 20 minutes or till the curry has reduced a little and you can no longer smell raw tomatoes. Add more water if needed.

Fry the paneer
While the tomato gravy is simmering, work on the paneer.

Fill a large bowl with very hot water. Add salt to the water, and set the bowl near you.

Heat oil in a pan and shallow fry the paneer cubes in batches.Flip the the paneer around so that all sides are lightly golden. Remove paneer cubes from the oil using a slotted spoon and place the fried paneer in the hot salted water. Be careful when doing this, the oil in the paneer will splutter when it hits the water.  Repeat this with all the paneer cubes. Let the fried paneer sit in the hot water for about 15 minutes.

*Use the above method if you are frying your own paneer. Alternatively, you could use store bought, pre-fried paneer. Simply open up the package and dunk it in the bowl with hot salted water. Let it sit for 20 minutes; then proceed with the recipe.

If you are using homemade paneer, soak it in the hot water after frying for only 10 minutes. (Store-bought paneer is harder and needs to soak longer).

When the tomato gravy is ready, drain the paneer cubes from the water, and add to the gravy.  Add salt to taste. Increase heat to medium, and let it cook for about 5 minutes.

Then stir in ketchup and turn off heat. Garnish with chopped cilantro.

Serve paneer and tomato curry with rotis or chapatis.

Easy Potato Curry (Dry)

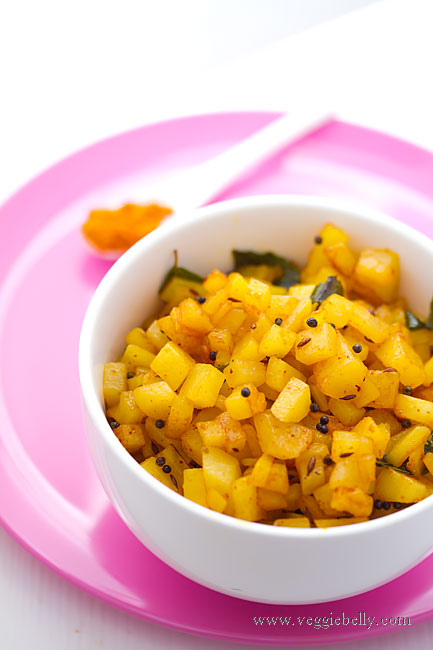
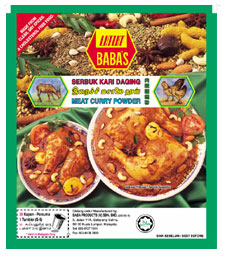
The secret to this easy, vegan potato curry is Baba’s curry powder. Its a Malaysian made curry powder, and you can buy it online or possibly at a Asian/Malaysian foods store. My pantry is never without Baba’s meat curry powder and Baba’s fish curry powder.

Photo from www.babas.com.my

I highly recommend Baba’s curry powders. Although they are meant for meat, the curry powders themselves contain no meat and they are fantastic to add to vegetables, curries and lentil dishes.

Baba’s meat curry powder Ive used in this recipe contains coriander, fennel, cumin, cinnamon, cardamom, star anise and cloves.


Substitute Babas curry powder with sambar powder or any yellow curry powder. How much you will need to use depends on the brand and how spicy it is.


Notes:

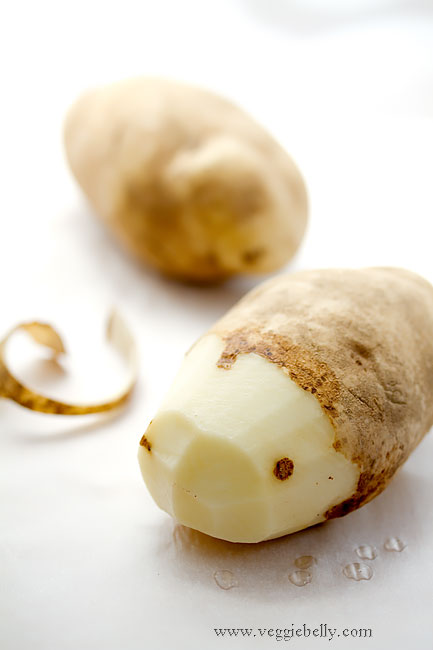
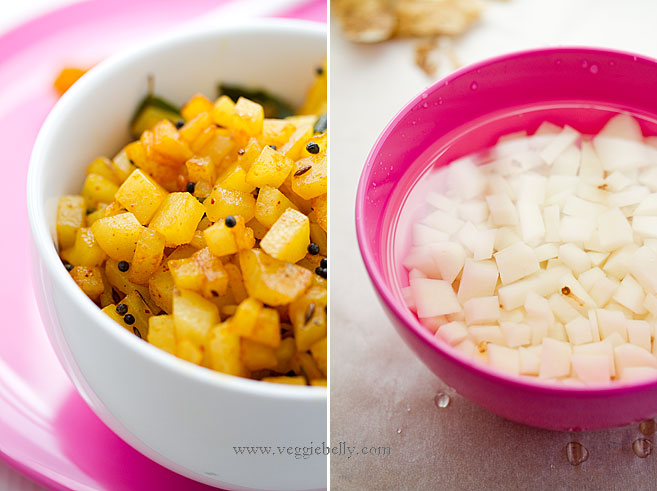
- When chopping potatoes, keep them in a bowl of water to prevent them from discoloring

- If the curry gets too dry while cooking, sprinkle a little water

- Potatoes will cook sooner if you cut them into smaller cubes

Easy, Vegan Potato Curry or Potato Masala or Potato Poriyal Recipe

serves about 2

1 large potato (about 1 1/2 cups when cut into small cubes)
2 tablespoons vegetable oil
1/8th teaspoon black mustard seeds
1/8th teaspoon cumin seeds
1/2 teaspoon urad dal (black gram)
a pinch of asafoetida
1 dried red chilli, or according to taste
a few curry leaves, optional
1-2 teaspoons Baba’s meat curry powder or sambar powder or any yellow curry powder (how much curry powder you’ll need depends on the brand you use)
salt

Peel and cut the potato into small cubes. Heat a non stick wok with the oil and add mustard seeds. When they pop, add cumin seeds. When they start to sizzle, add urad dal, asafoetida, red chili and curry leaves. Cook about 20 seconds or till fragrant. Add the cubed potatoes, curry powder, 2 tablespoons water and salt. Cook on medium heat till the potatoes are cooked, about 6 minutes.

Thai-Burmese Curry Noodles (Khao Soi). Thailand part 3.

Before I tell you about this amazing noodle dish I learned to make in northern Thailand, here are more pictures from my recent trip. (And in case you missed my previous Thailand posts, they are here and here).

A Thai Market Outside Bangkok

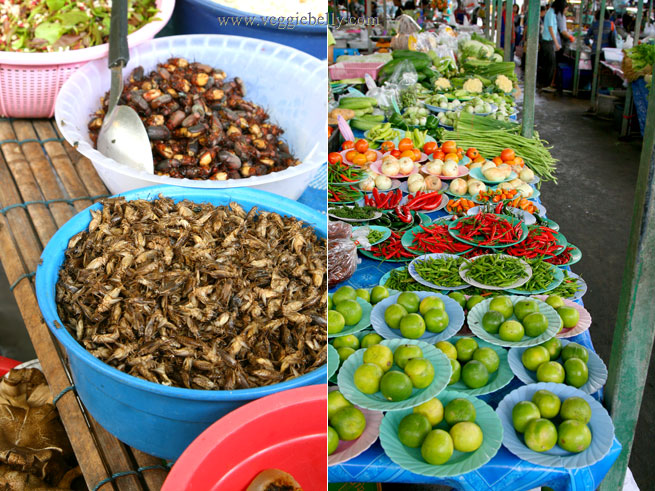
I visited several markets in Bangkok and Chiang Mai. The format seems to be pretty much the same everywhere – vegetable section, fruit section, then there are some bug vendors (yes, insects), rice vendors, fresh noodle vendors, dessert section and prepared foods section. Every single market I went to was extremely clean and organized.

This one was outside Bangkok, in the suburbs where I was staying with my uncle. So this market wasnt touristy, which is always a bonus.

Left: Sapodilla vendor. Right: My uncles wife Da, on her phone & buying guavas. Da showed me around here and so patiently explained everything and translated for me so I could communicate with the vendors 

Left: bugs and insects; I was feeling very Andrew Zimmern-ish.  Right: lime, red and green chillies


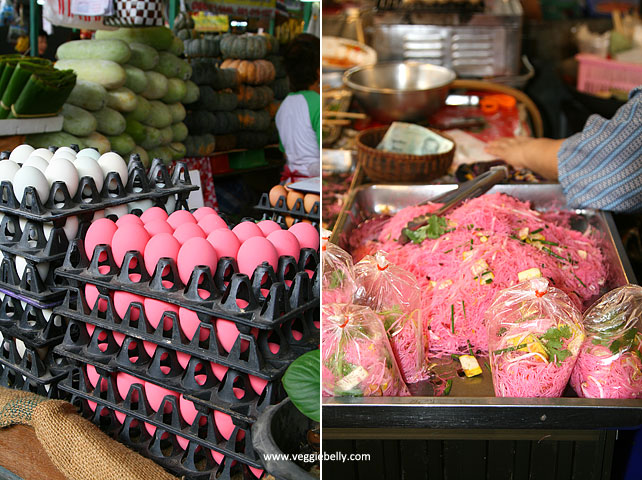
Pink preserved eggs (Chinese thousand year old eggs or century eggs) and pink noodles

Khao Soi Curry Noodles from Chiang Mai (Kow Swear or Khauk Swear in Burma)

Now lets travel up north to the cool mountains of Chiang Mai, Thailand. Chinese Muslim traders have greatly influenced this region’s cuisine. Their delicious, spicy noodle dish, influenced by Burmese cuisine, called Khao Soi was everywhere in this city. My favorite vegetarian Khao Soi is from Aum Vegetarian Restaurant. in Chiang Mai.

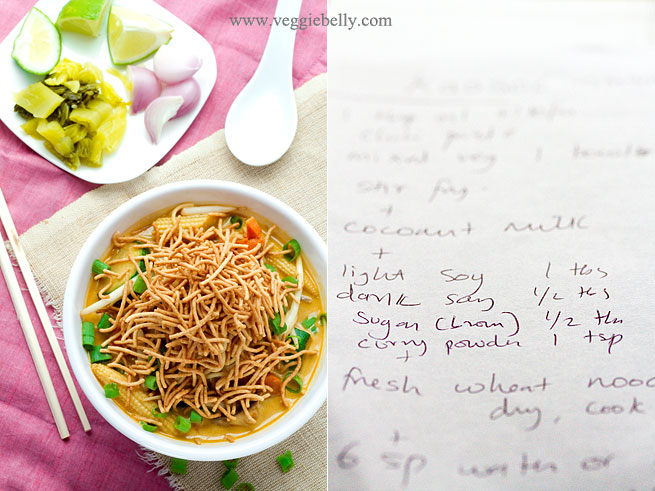
Left: Chiang Mai Aum restaurant’s Khao Soi topped with coconut cream. In the background, chilli paste, lemon iced tea, and British kid.    

Right: My home made version

When I took a Thai Vegetarian cooking class at May Kaidee’s, Duan the owner and instructor was kind enough to show me how to make Khao Soi, even though it wasnt on the class schedule. See this post  for more on Duan and the cooking class.

Khao Soi, also spelled Khao Suey or Khao Soy, is also eaten in Myanmar or Burma and Laos. The Burmese version of Khao Soi is called Kow Swear or Khauk Swear. From what I understand, the Burmese curry noodles, are also in a coconut milk broth, but use more Indian influenced spices like coriander and do not have the crispy noodle topping. Since both the the Thai and Burmese versions are quite similar, I’m sending this post off to AWED Burma, hosted by Kitchen Swathi 

Other Khao Soi recipes:

Khao Soi by the amazing Chez Pim
A Khao Soi battle between an American guy in Bangkok and a Thai girl in Iowa
A Khao Soi recipe from Rosas Yummy Yums
And then there is this whole blog dedicated to the quest for the perfect Khao Soi in New York city!
A recipe for the Burmese version – Kow Swear on We Are Never Full blog

The version I learned to make at the cooking class had shredded chinese cabbage, cauliflower, and tofu. Ive used shiitake mushrooms, baby corn, carrot, zucchini and beansprouts. But I highly recommend adding some pan fried or deep fried firm tofu to this.

If there is an Asian store where you live, that is best place to buy the specialty ingredients for this recipe. But you may be able to find fresh chinese noodles (not the dry stuff) at the regular grocery store. For the pickled mustard greens, you may have to make a trip to the Asian store (if you want to make your own, here is a good recipe).

All the amazing Khao Sois I had in Chiangmai were topped with crispy fried noodles – the best part! I didnt feel like deep frying, so I used store bought La Choy brand crispy Asian noodles.

Curry Noodles in Coconut Milk Broth or Khao Soi or Khao Soy Recipe

serves 2-3

1 tablespoon oil
1 cup chopped shiitake mushroom
1 medium zucchini, chopped
1 small carrot, chopped
1/2 cup chopped baby corn
1 tablespoon red curry paste
1 teaspoon curry powder or according to taste
1 tablespoon light soy sauce
1 teaspoon dark soy sauce
1 teaspoon brown sugar
1 cup coconut milk
1 cup water
2 cups fresh Chinese wheat based noodles or about 3 oz dried thin wheat based noodles
1 cup bean sprouts

Toppings and garnishes
1 cup store bought crispy noodles (I used La Choy brand)
2 shallots, chopped
1/4 cup chopped pickled mustard greens (available at Asian stores)
3-4 lime wedges
Chopped cilantro
Chopped green onion

Heat a large wok with oil. Add shitake mushroom, zucchini, baby corn and carrot and cook on high for about 2 minutes. Then add curry paste and curry powder. Toss to coat the vegetables. Add light soy sauce and cook about 30 seconds so the vegetables absorb the liquid. Then add dark soy sauce, brown sugar, and coconut milk. Let the curry simmer for about 2 minutes.

Then pour in water and bring back to a simmer. Taste curry and adjust soy sauce, and sugar to taste. 

Bring a large pot full of water to boil noodles. If using dried noodles, cook in boiling water till noodles are very al dente. If using fresh noodles, boil for about 1 minute. No matter what noodles you use, make sure not to over cook them. Drain well.

Add cooked noodles and bean sprouts to the curry broth. 

Serve Khao Soi in individual bowls, topped with crispy noodles. If you dont have store bought crispy noodles, increase the fresh or dry wheat noodles quantity in this recipe by 1/2 cup. If using dried noodles — deep fry this extra half cup of boiled, drained noodles in oil, till golden. If using fresh noodles, deep fry them as is. Then top Khao Soi with the fried noodles.

Serve with chopped shallots, pickled mustard greens, lime wedges and cilantro on the side.

Related Posts with Thumbnails