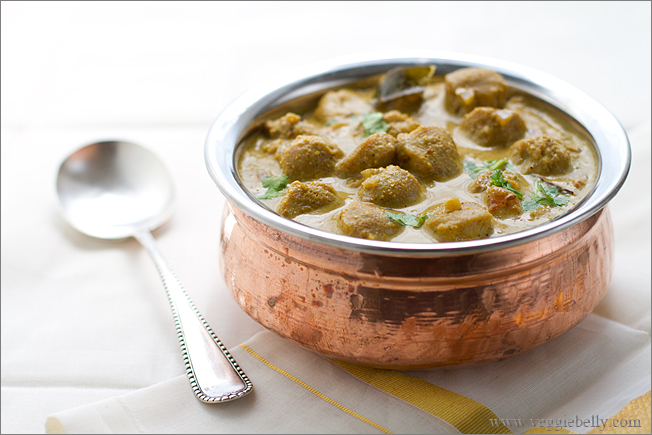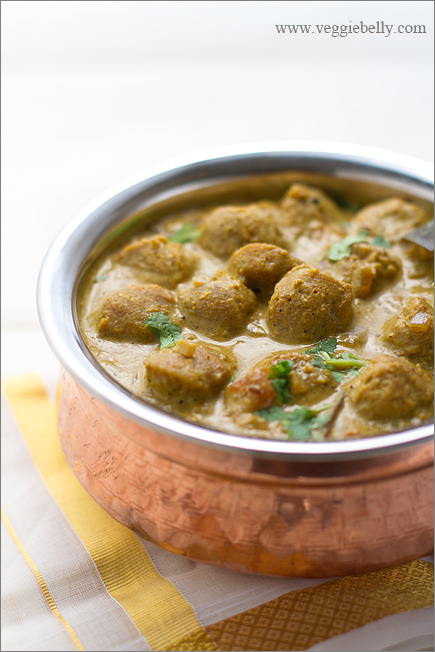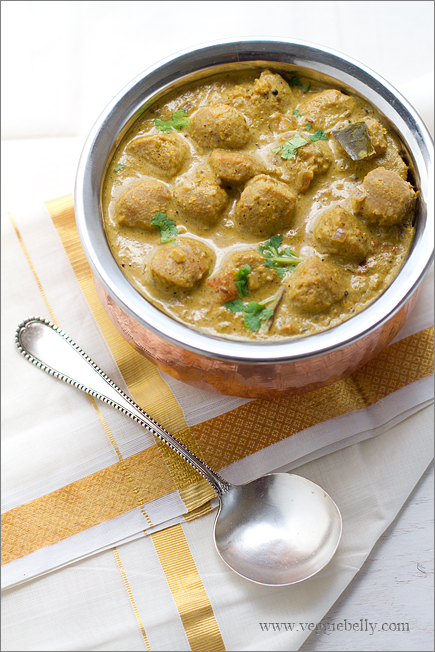
Chettinad Meal Maker Curry Recipe

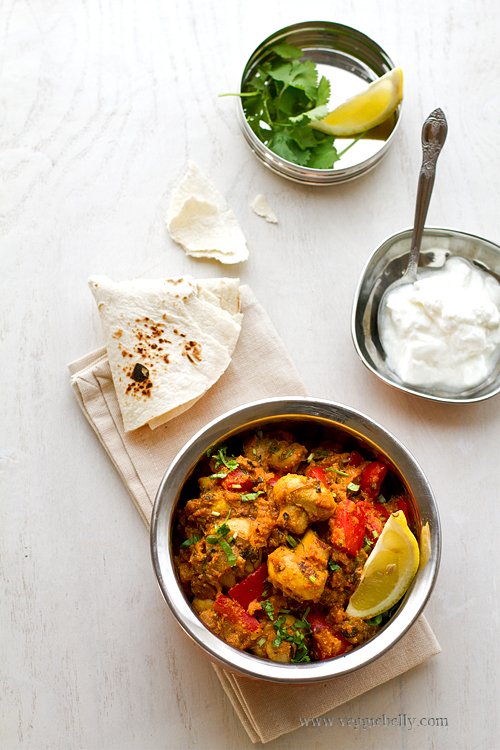
Chettinad is a region in South India where many of my ancestors come from. It is a dry, arid land inhabited by a devout and enterprising people. And the food is simply sensational. There is no greater pleasure than eating at a chettinad wedding! Chettinad cuisine uses an abundance of spices like cumin, fennel, fenugreek, star anise, poppy seeds, chillies, tamarind, shallots, coconut and curry leaf. This chettinad meal maker curry is inspired by my heritage.

Nemam Koil, our clan temple in Chettinad

Chettinad is famous for its palatial ancestral homes. This house in Kothamangalam is now Saratha Vilas hotel.

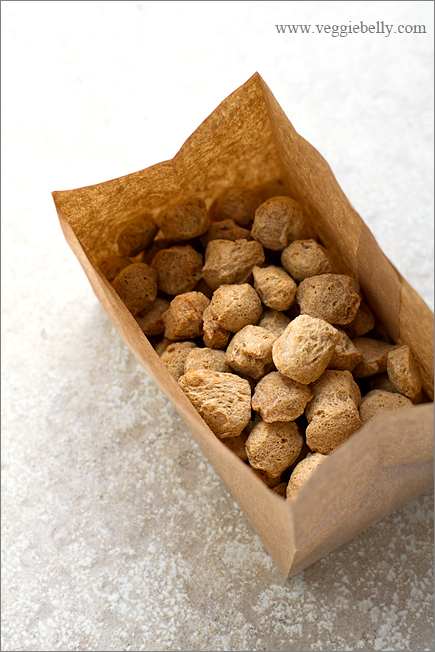
Chettinad homes are generally famed for their non vegetarian food. But you can easily enjoy the flavors of this region with this vegetarian, vegan recipe. Meal maker or Nutrella are Indian brands of soy protein that are quite meaty in texture. I used Indian meal maker in this recipe. Feel free to use any kind of dried soy chunk or granule product. TVP, TSP, soy chunks, soy granules, or even seitan will work.

This chettinad meal maker curry recipe is easily adaptable to different tastes, use only vegetables (cauliflower is nice) or adjust coconut milk however you like. You can use more or less chillies according to your preference.

Chettinad Meal Maker Curry Recipe

(A Spicy Curry using TVP, TSP, Meal Maker, Nutrella or Soy Chunks)
Serves about 4

Ingredients
1 cup dry soy chunks/Meal Maker/Nutrella/TVP/TSP*
1 tablespoon oil
½ teaspoon black mustard seeds
¼ teaspoon cumin seeds
6 curry leaves
1-3 green chillies, slit. optional
½ medium onion, chopped
3 garlic cloves, cut into slivers
2 small tomatoes, chopped
1 recipe masala powder, see recipe below
½ teaspoon ground turmeric
1 cup coconut milk
Salt

*Soy chunks like Meal Maker and Nutrella are easily available at Indian stores. TVP/TSP granules are available at the regular grocery store.

Method
Rehydrate the soy chunks (meal maker) or granules according to package instructions. This usually involves boiling a small pot of water with a little salt, boiling the soy chunks in it, then letting them soak in the boiling water (10 minutes for soy chunks, less for granules – read the box instructions). Drain the soy chunks or TVP granules, and squeeze out as much water as you can. Set the re-hydrated soy chunks or TVP granules aside, and proceed with the recipe.

Heat the oil in a medium saucepan. Add black mustard seeds and let them sizzle. Then add cumin and stir for 30 seconds. Add curry leaves and chillies, stir again. Then add onions, and sauté on medium-low heat for 3 minutes, or till the onions have softened. Now add the garlic and tomatoes. Continue to cook on medium-low heat till the tomatoes are very soft, about 6 minutes.

Add the ground masala powder (recipe below), turmeric, and salt, stir for a minute.

Add re-hydrated, squeezed soy chunks/meal maker/nutrella/TVP/TSP and pour in 2 cups water. Bring to boil. Continue boiling for about 5 minutes.

Pour in coconut milk and cook stirring for about 2 minutes. Taste the curry, if it is too spicy for you, add more coconut milk.

Garnish with chopped cilantro. Serve hot with rotis, chappatis, tortillas, or steamed rice.

For the masala powder
Ingredients
1 tablespoons coriander seeds
1/2 tablespoon cumin seeds
1/2 tablespoon fennel seeds
1 small dried red chili, optional

Method
In a small, heavy skillet on low heat, toast each of the ingredients one at a time. Roast each spice for about a minute, or till it lightly turns color and gets fragrant. Let the toasted spices cool a little. Then place in a coffee grinder and grind into a fine powder. Make sure there are no unground pieces.


Pineapple Semolina Pudding (Pineapple Kesari) Recipe

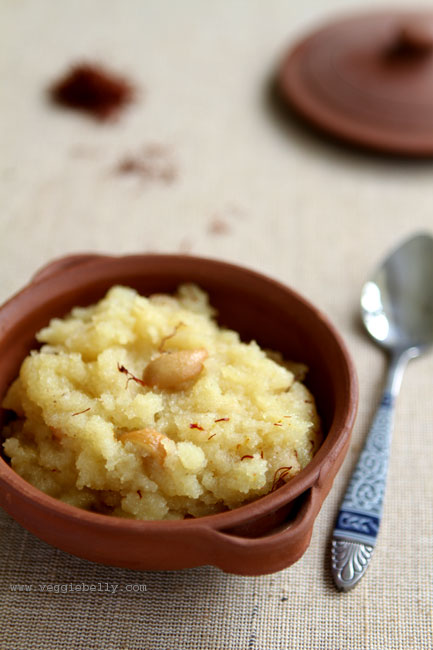
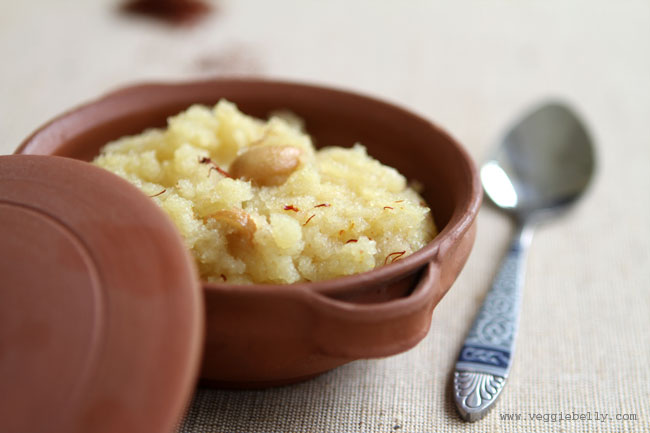
When I need a quick fix dessert recipe, I always resort to kesari – a semolina pudding with ghee, cashewnuts, and saffron. The ghee, nuts and saffron make this dessert exotic and special; but nobody will know you only spent 15 minutes making it!

I am delighted with this variation on regular kesari (also called sooji halwa). Pineapple juice adds a hint of fruity flavor to kesari, making it unique. Be sure you read my note on sugar** before you make this recipe.

Pineapple Semolina Pudding or Pineapple Kesari Recipe

serves about 8

Ingredients

4 cups fresh or canned pineapple juice*
1/4 cup + 2 tablespoons ghee
1/2 cup cashewnuts
1 cup semolina (rava or sooji)
1 cup sugar**
a pinch of saffron threads

* To make juice from fresh pineapple, blend 2 cups chopped fresh pineapple, with about 3 cups water to make a puree. Strain the juice, and measure out 4 cups.

**This will make a not-too-sweet dessert. If you want it sweeter, feel free to use more sugar, but keep in mind that how much sugar you need will vary slightly depending on how sweet your pineapple is. You may need to use less sugar if you are using canned pineapple juice.

Method

Heat a heavy bottomed wok or saucepan with 1/4 cup ghee. Add cashewnuts and fry on low heat till the nuts are golden. Using a slotted spoon, remove the the cashews from the ghee and place in a bowl.

Add semolina to the ghee. Stir on medium-low heat for about 3 minutes or till the semolina is toasted. Remove the semolina into a bowl. Wipe the pan clean.

Pour in pineapple juice and sugar. Bring to a boil. Boil for 1 minute. Reduce heat to low, and add the toasted semolina. Cook, stirring constantly on medium heat, till the pudding thickens – about 5 minutes. Cooking time will vary depending on how coarse your semolina is.

When the pudding starts to thicken, add 2 tablespoons ghee and stir. Remove from heat. Stir in fried cashew nuts.

Sprinkle saffron on top.

Paneer Paratha Recipe – a step by step

I am vacationing in India right now and enjoying some fabulous home cooked food. Every time I visit India, I ask my mother’s friend Veena aunty to teach me her amazing recipes. Veena aunty has such a love for cooking, you can taste the passion in her food. This time she showed me how to make her paneer paratha recipe. Paneer parathas are Indian flat bread stuffed with cottage cheese. You wont be disappointed with this paneer paratha recipe!

Paneer Paratha Recipe (Cottage Cheese Stuffed Flat bread)

makes 6-8 parathas

for the paratha dough

Ingredients
1 cup whole wheat flour (atta)
1/3 cup all purpose flour (maida)
1/2 teaspoon salt or to taste
1 teaspoon vegetable oil
1 cup water (you may not need all of it)

Method

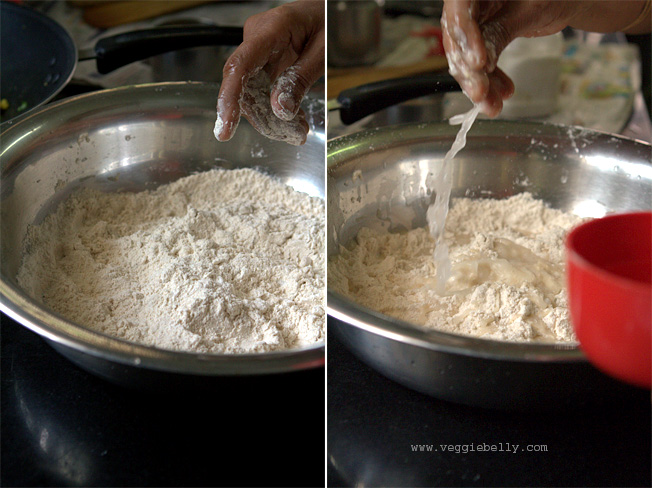
1. Combine the wheat flour, all purpose flour, salt and oil in a large bowl

2. Sprinkle a little water at a time till the dough binds together

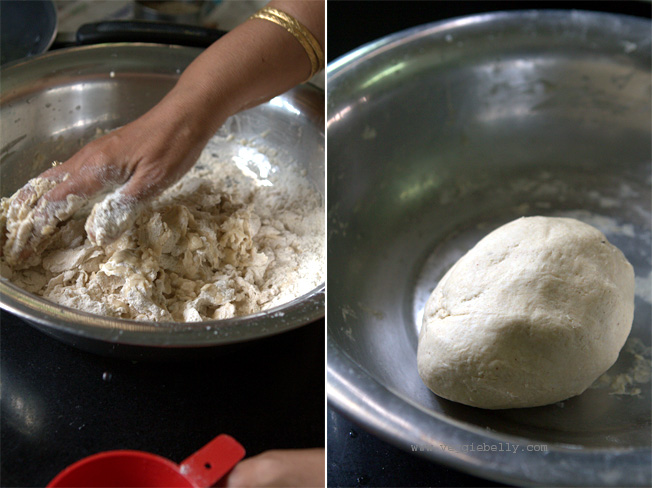
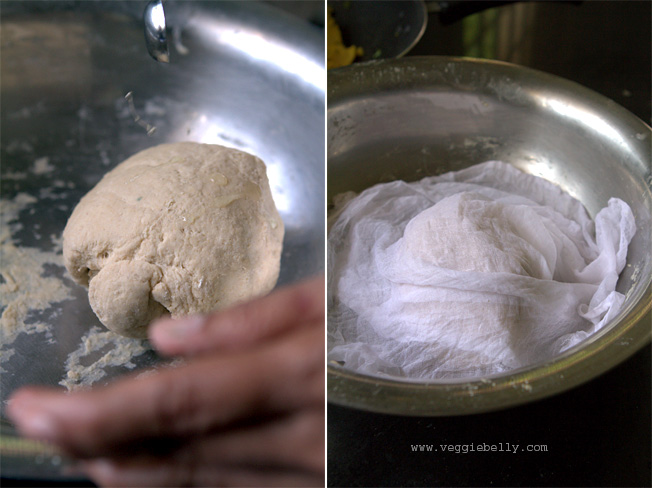
3. Knead the dough, sprinkling water, until it forms a soft, elastic ball

4. Make sure the dough isn’t too wet. If it gets too wet or sticky, add more flour

5. Knead the dough till it is smooth and elastic (think pizza dough)

6. Drizzle a few drops of oil over the dough ball, and spread it all over the surface

7. Cover the dough with a damp towel

8. Let it rest for 15 minutes. In the meanwhile, make the paneer filling

for the paneer filling

Ingredients
7 oz paneer, finely grated (about 1 1/2 cups when grated)
1 small onion, minced
3 tablespoons finely chopped cilantro
1/2 teaspoon garam masala
1/4 teaspoon turmeric powder, optional
1 green chili finely chopped or according to taste
salt

Method

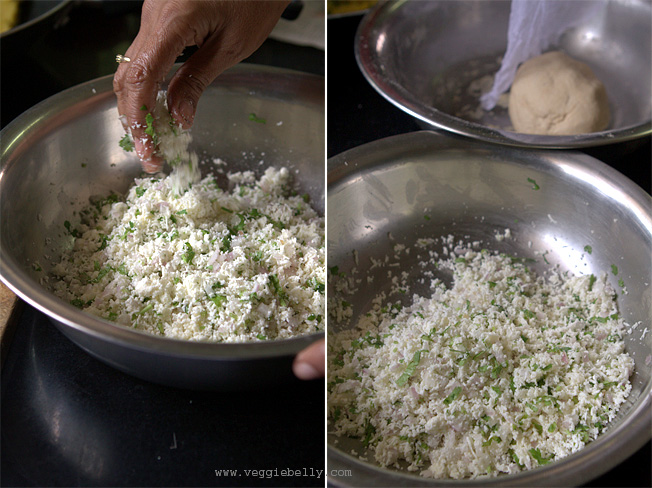
1. Combine all paneer filling ingredients in a bowl

2. Taste the filling and adjust salt and seasonings if needed. If you like it spicier, you can add more minced chilis or garam masala at this point

Make the paneer parathas

1. Keep a small bowl of wheat flour near you

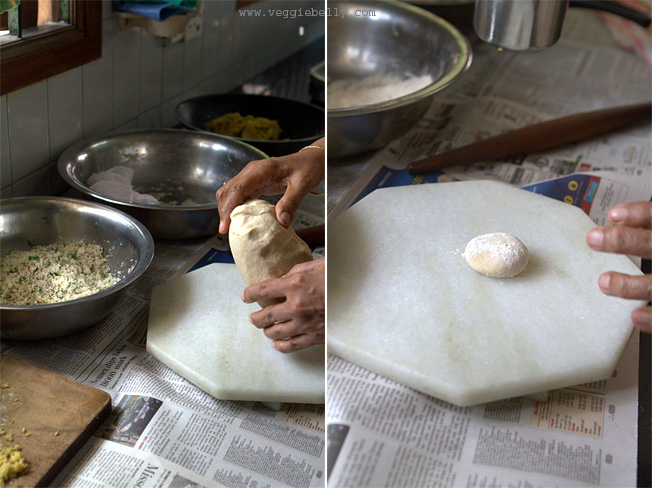
2. Remove the dough from the bowl, and knead it a few times

3. Divide the dough into 6 equal parts. If you don’t have much experience making parathas, divide the dough into 8 parts, so each paratha is smaller, and therefore easier to make.

4. Take one piece of the divided dough and form it into a ball

5. Dip the dough ball in wheat flour

6. Place it on a clean, flat surface for rolling

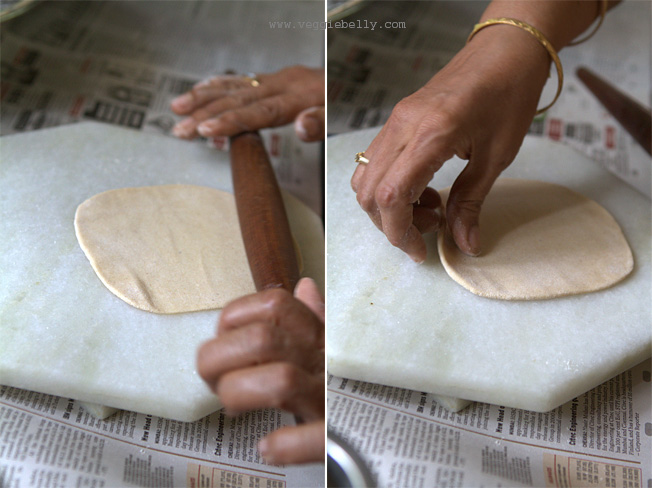
7. Using a rolling pin, roll out the dough into a round using a light touch

8. Turn the paratha 1/4ths of a turn each time you roll it. This will keep it round.

9. Sprinkle a little flour as and when needed.

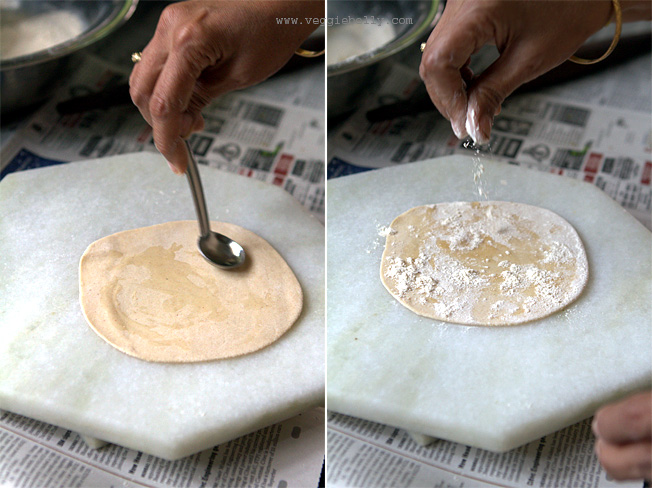
10. When the paratha is thin and even (see picture above), stop rolling, and spread 6 drops of oil

11. Sprinkle a little flour on the oiled side, dust off the excess flour

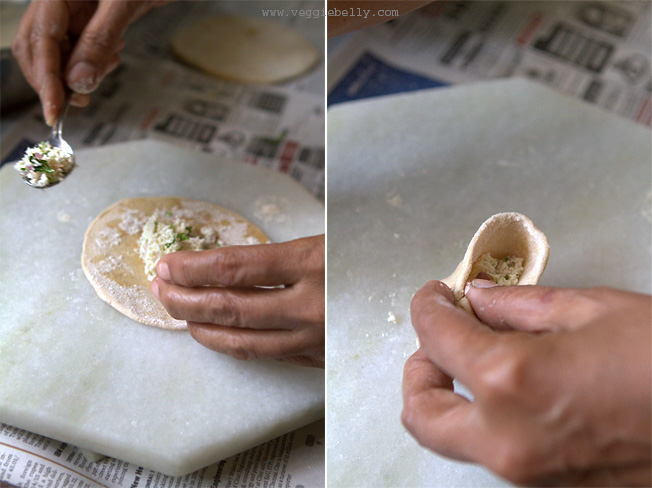
12. Place 2 tablespoons of the paneer filling in the center

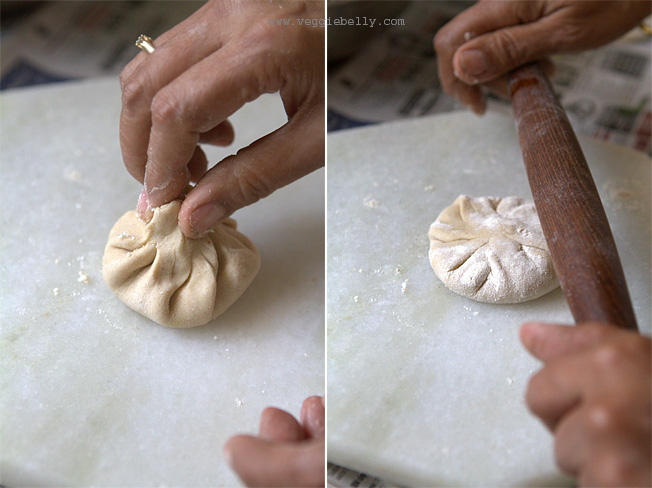
13. Gather the edges of the paratha and bring them up, and pleat them over the filling, to form a parcel. If you feel the parcel can hold more paneer filling, add a little more now

14. Pinch the top to seal the paratha

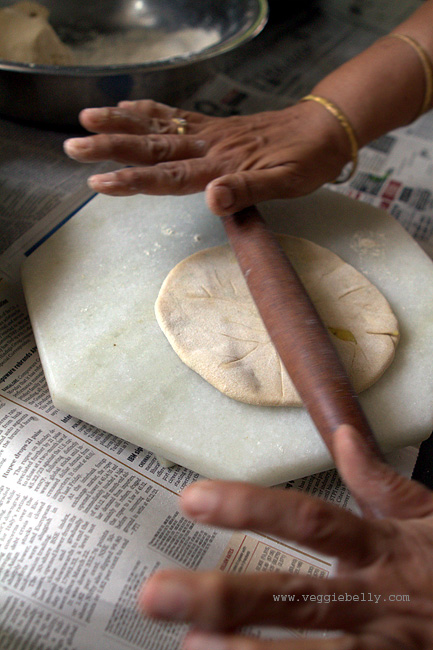
15. Dip it in flour, flatten it a little, and gently roll it using a rolling pin

16. Roll gently till the paratha is about 1/4 inch thick

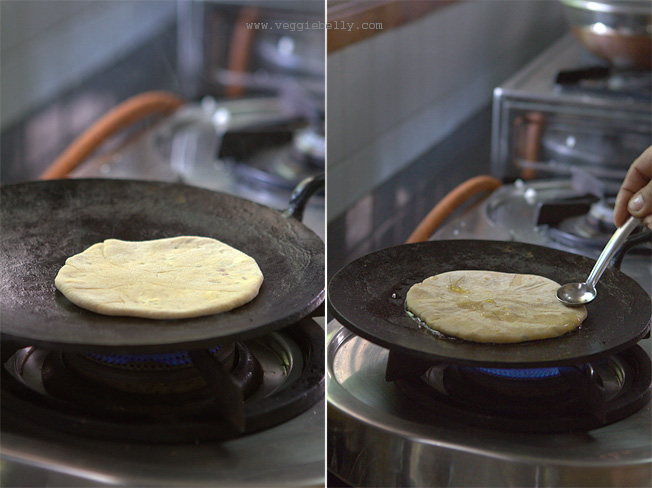
17. Heat a tava, or cast iron skillet on medium heat

18. Place the paratha on the skillet. Cook on medium heat till pale brown spots appear on the under side

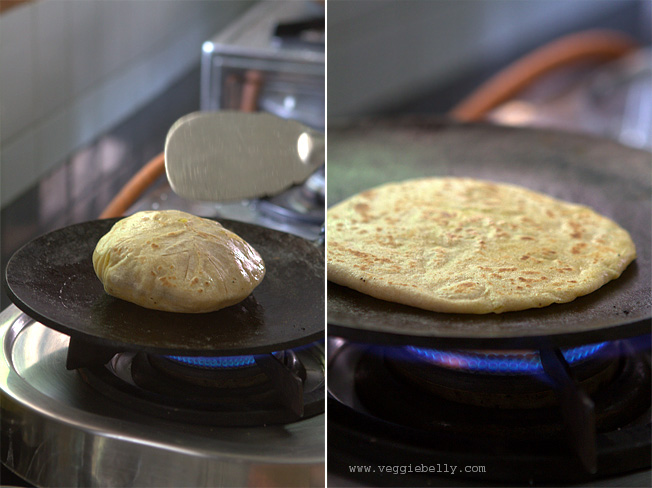
19. Then flip the paratha and let pale brown spots appear on the other side

20. Then increase heat to medium-high and drizzle about 1/4th teaspoon of vegetable oil (you can use less oil or oil spray)

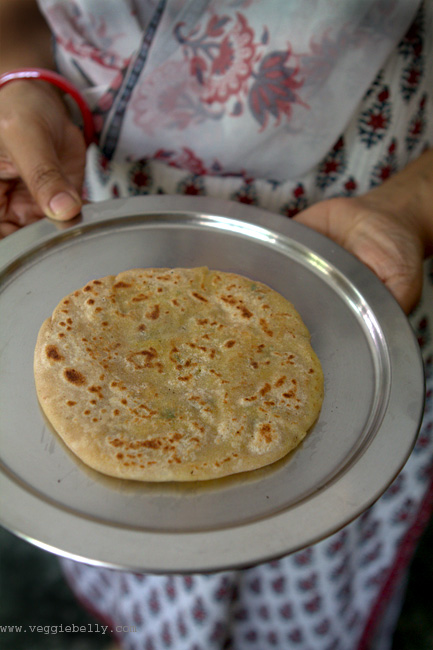
21. Cook paratha on both sides till the dough is cooked and lightly browned (but not too dark)

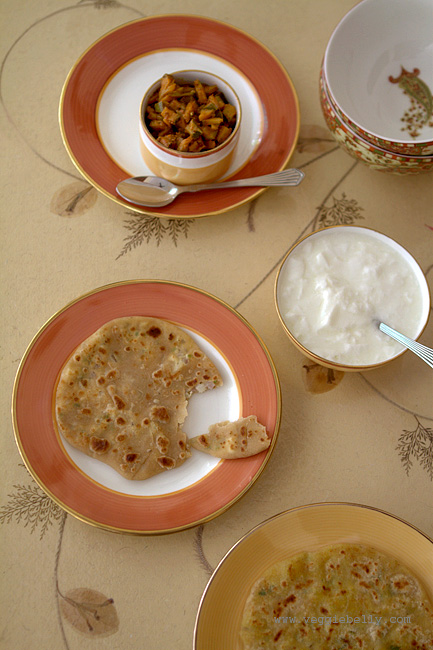
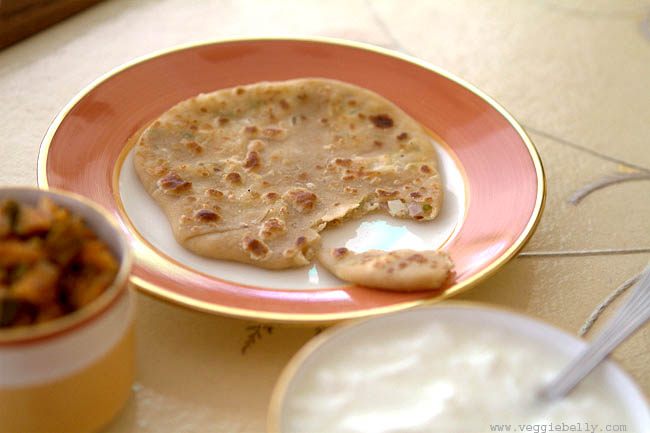
Serve paneer parathas with yogurt or my grandmother’s multi colored raita and my apple pickle.

Paratha making tips

- add enough water to the dough so that it is soft (but not sticky)

- sprinkle wateron the flour a little at a time, this way you are more in control of the final result

- a hard dough will make your parathas stiff

- when kneading, aim for a soft, smooth, elastic dough that is not sticky

- it important to cover and rest the paratha dough for atleast 15 minutes before rolling

- when rolling parathas use a gentle touch

- make sure you chop the filling ingredients very fine. For paneer parathas, the paneer must be grated finely, and the onions and cilantro must be minced. For aloo parathas, the potato must be mashed with no lumps. If you leave large pieces in your filling, it will tear the dough when you are rolling out the parathas.

- when stuffing parathas, you need to use about equal amounts of dough and filling. So if you are using a lime size ball of dough, use about a lime sized mound of filling. However, if you are new to paratha making, lesser amounts of filling may be easier to deal with it, but you will compromise on taste.

- the more you practice making parathas, the better you will get!

Dahi ke Aloo (Potato and Yogurt Soup) from Prerna of Indian Simmer

I dont know many other people who are as passionate about Indian cooking as Prerna is. Today, I am delighted to introduce her to you, via her guest post and this delicious recipe for dahi ke aloo (potato and yogurt soup). Her gorgeous blog, Indian Simmer is full of mouthwatering recipes and some of the best photography I’ve seen in the blogosphere. Take it away Prerna..

Like countless others I have always drooled over Sala’s flawless photography and her fabulous recipes. They always make you come back and look for some more, don’t they? So doing a guest post for her and cooking something for her readers was truly an honor. Thanks so much Sala for letting me do this!

I am here today with something very simple and as my husband says something very carby. Ok, raise your hands if you don’t like potatoes … everyone loves potatoes! At least I do, or maybe I like it a little more than I should but I don’t regret it. As a child I was the pickiest eater and potato was the only vegetable I could eat (does that count as a true vegetable?). But now that I am past that phase, potatoes still remain a favorite because you can do so much with them. Especially in Indian cooking when you can make something as royal as a Mughlai Aloo Dum or a simple stir fry, potatoes will always shine. The recipe I am sharing today is one such recipe.

Dahi  is hindi for yogurt and Aloo means potatoes. When potatoes are cooked in tangy and creamy yogurt with some few simple spices they become Dahi Ke Aloo. I call it potato and yogurt soup. My mom serves it with hot and crisp fresh out of the griddle rotis, I serve them with some fresh baguettes. Whatever you call them or whichever way you serve them they still remain classic comfort food and an easy quick fix dish.

Dahi Ke Aloo or Potato & Yogurt Soup Recipe

serves about 4

Ingredients
4 medium size potatoes (boiled, peeled)
2 cups yogurt (room temperature)
2 cups water
1 tablespoon olive oil (extra to drizzle on top of your soup)
1 teaspoon cumin seeds
1 teaspoon red pepper flakes (a little extra if you want to garnish)
1 teaspoon turmeric powder
1 ½ teaspoon coriander powder
Salt to taste

Method
Mash the potatoes. Thoroughly mash one and mash the others to bite size pieces. Set aside.
In a bowl whisk together yogurt and water leaving no lumps.

Heat oil in a medium size pot. Add cumin seeds. Once they start to pop, add turmeric and coriander powder. Mix the spices together and add potatoes immediately. Mix spices well with the potatoes.

Stir in the thinned yogurt. Mix it well together with the potatoes. Wait till the soup comes to a nice rolling boil and then add salt.

You can serve it hot. I like mine lukewarm with some extra virgin olive oil drizzled and some red pepper flakes sprinkled on top.

Mushroom Tikka Masala Recipe, a Guest Post on Rasa Malaysia

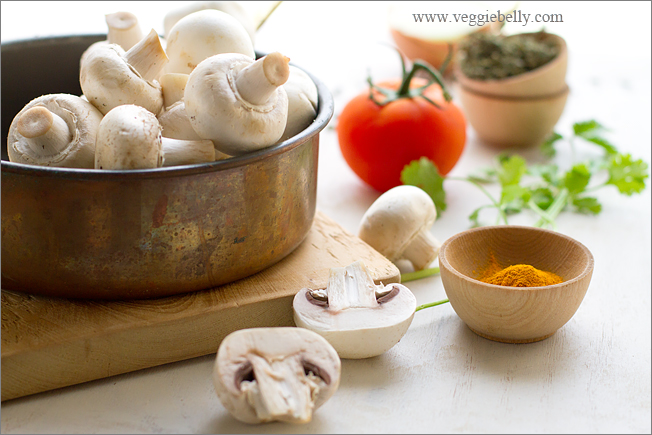
For many years, I have visited the Rasa Malaysia blog and drooled at the recipes and admired Bee’s photograpic talent. I was thrilled to bits when Bee invited me to guest blog for her! We picked a restaurant style vegetarian mushroom tikka masala for my guest post on Rasa Malaysia.

This mushroom tikka masala recipe is easy to make and is rich with flavors of Indian spices. Read my post over at Rasa Malaysia for this mushroom tikka masala recipe and for a great tip on how to make it taste like a restaurant’s.
After youve read my guest post, make sure you hop over to Amazon and pre-order Bee’s soon-to-be-published cookbook “Easy Chinese Recipes: Family Favorites from Dim Sum to Kung Pao”. I cant wait to get my hands on a copy!

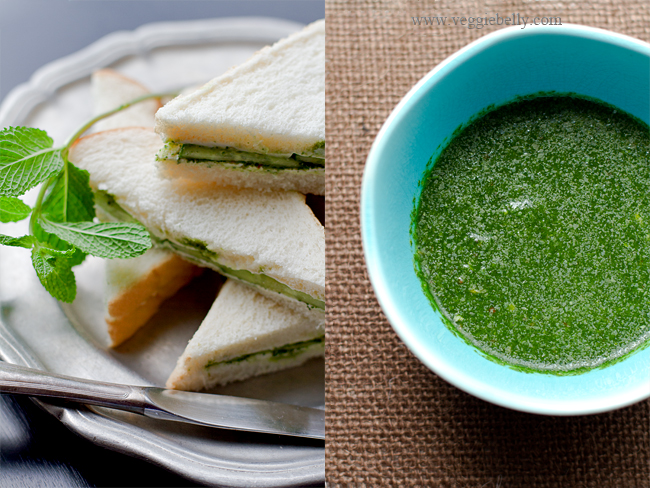
Cucumber Cream Cheese and Cilantro-Mint Chutney Sandwich Recipe

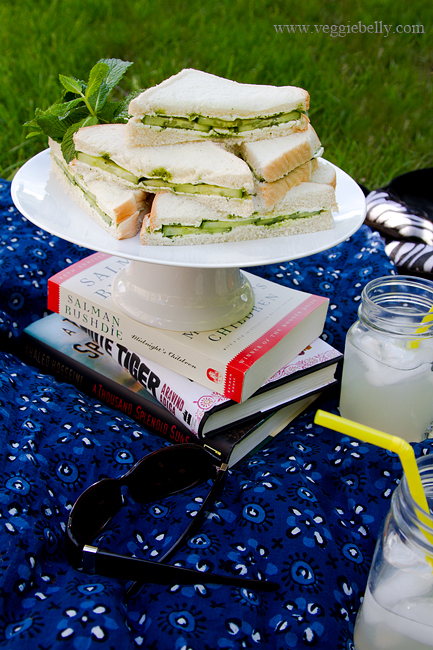
When the weather is nice, we will pack ourselves some sandwiches and lemonade and have a little picnic in our back yard. These cucumber, cream cheese, cilantro-mint chutney sandwiches are our favorite. I’ve made these for several picnics and I really dont know anyone who doesnt like them.

We used to get these sandwiches in India – white bread spread with a little butter, cilantro mint green chutney, and cucumber slices. It is India’s version of English tea sandwiches. I like to use cream cheese in this sandwich recipe; it goes great with the cucumbers and chutney.
Cucumber Cream Cheese and Cilantro-Mint Chutney

Sandwich Recipe

Makes 4 whole or 8 half sandwiches

½ an English seedless cucumber (the one with the plastic wrap)
8 slices of white or soft wheat bread
8 tablespoons cream cheese at room temperature, I used the low fat kind.
½ cup cilantro mint chutney. Recipe below.
Salt

Cut the cucumber into thin rounds.

Take 2 slices of bread. Spread 1 tablespoon cream cheese on one slice. Spread 1 teaspoon (or more if you like) chutney over the cream cheese. Arrange 4-5 slices of cucumber on top. Sprinkle a tiny pinch of salt over the cucumbers.

Spread one tablespoon cream cheese and then one teaspoon cilantro mint chutney on the other slice of bread. Place this on top of the cucumbers, to make a sandwich. Repeat for all bread slices.

Spreading the cream cheese first, and then the chutney will prevent the chutney from soaking through the bread. Serve immediately.

Cilantro Mint Chutney Recipe
Makes about 1/2 cup, enough for 4-6 sandwiches

1 cup cilantro leaves, tightly packed
1/2 cup mint leaves, tightly packed
1/2 fresh green chili or Thai hot pepper, chopped*
1/8 teaspoon cumin seeds
1 garlic cloves, peeled
1/2 tablespoon lemon juice
Salt
2 tablespoons water

*This makes a spicy hot chutney. Use less chili or leave it out if you don’t want it spicy.

Place all ingredients in a food processor and process into a smooth sauce, scraping down the sides of the food processor now and then.

If you are using a blender, you may need to use a little more water. Store the chutney in an air tight container in the fridge.

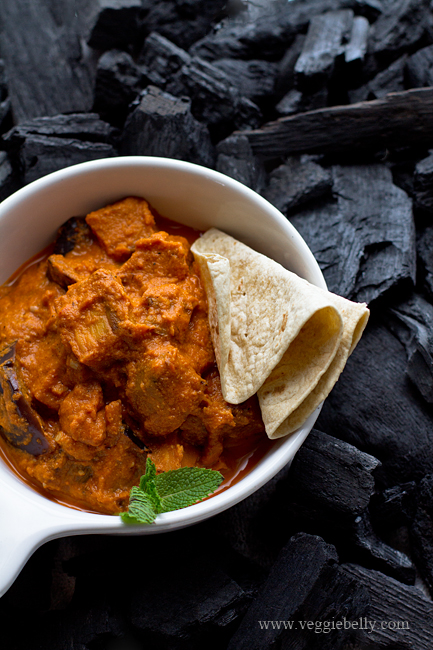
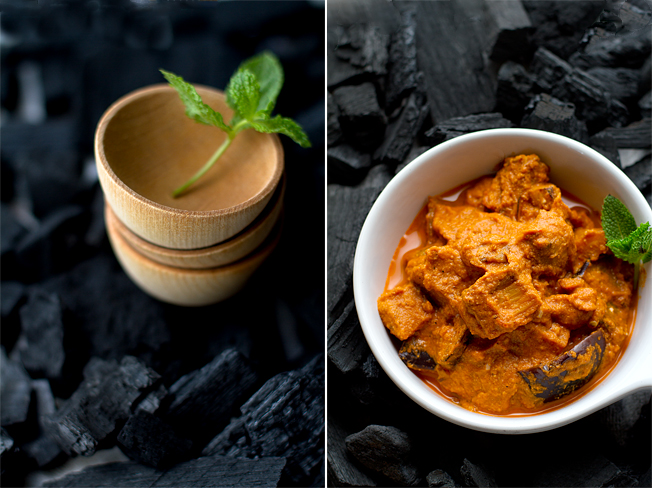
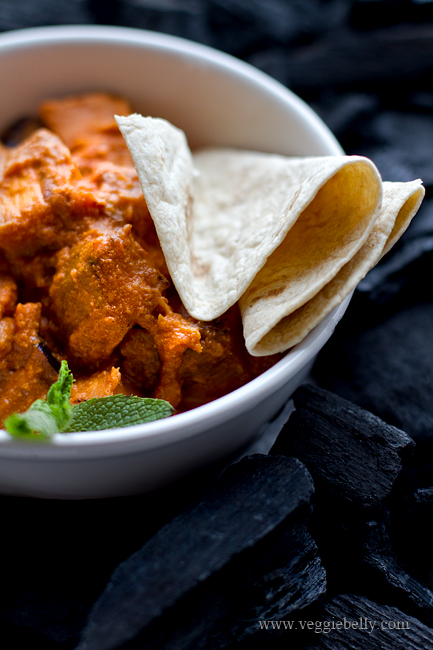
Smoked Eggplant Curry


This is the easiest method to smoke something. I learned this method from Sanjeev Kapoor’s new book, How to Cook Indian (scroll to the bottom of this post for a chance to win a signed copy of the book!).

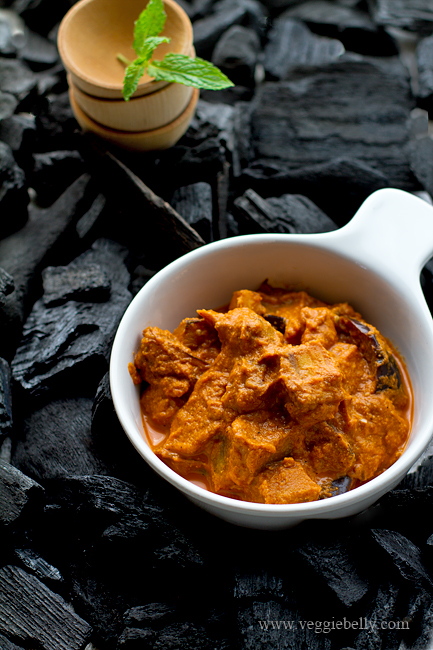
I was intrigued by Sanjeev Kapoor’s koyla (charcoal) chicken recipe in the book. He makes a chicken curry and then smokes it by placing a bowl with a smoking hot piece of charcoal in the curry. The smoke gets into the curry, making it all smoky and wonderful. I’ve adapted Sanjeev Kapoor’s smoked chicken curry by using eggplant and creating a great vegetarian smoked eggplant curry recipe.

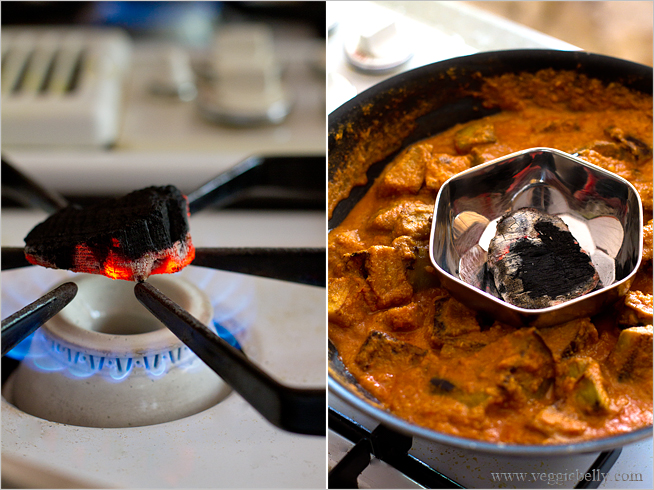
How to smoke the eggplant curry

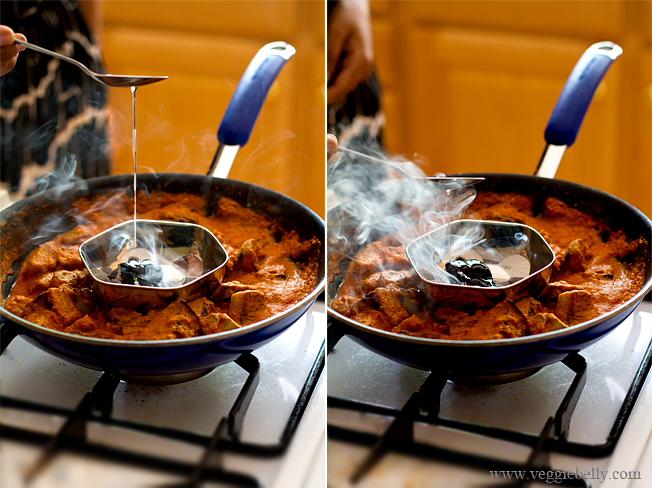
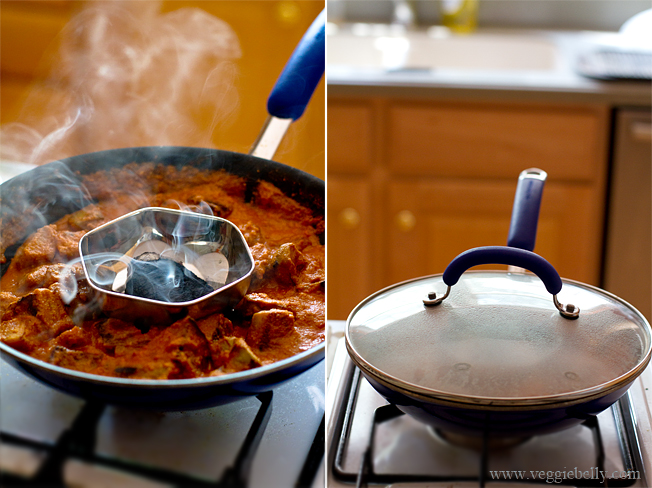
Heat charcoal till its red. Then put it in a small bowl, and place it over the curry.

Pour a little oil over the hot coal. The coal will now give out smoke, that will flavor the curry.

Cover the skillet to trap the smoke. Let it sit for a few minutes so that the smoke infuses the eggplant curry.

When choosing charcoal, make sure you buy all natural charcoal. Don’t buy anything that has chemicals or petroleum added to it or is ‘self igniting’.

Watch Sanjeev Kapoor making his smoked koyla chicken curry. His method of smoking and my adapted recipe will work well for zucchini curry, mushroom curry, or use paneer or mock meat in this recipe.

Smoked Eggplant Curry Recipe


vegetarianized from Sanjeev Kapoor’s Koyla Chicken recipe from his book, How to Cook Indian

Serves 2

3 medium tomatoes
6 whole cashewnuts
1 tablespoon butter, ghee or vegetable oil
½ lb American or Indian eggplant
1/2 teaspoon ginger paste
1/2 teaspoon garlic paste
1/4 teaspoon garam masala
¼ teaspoon or to taste, chili powder
1 teaspoon lemon juice, you may need more or less depending on how tart the tomatoes are.

For smoking the curry
1 lump of charcoal, about the size of a large lemon
1 teaspoon vegetable oil

Boil a medium pot of water, and drop the tomatoes in whole. When the tomato skins start to blister, drain them and let them cool a bit. Then peel the tomato skins and discard. Core the tomato. Place the skinned, cored tomatoes in a blender along with the cashew nuts and puree. Set this aside.

Cut the eggplant into 1 inch cubes. I peeled the skin first, but that’s optional.

 Heat butter, ghee or oil in a medium skillet. Add the eggplants, and let them brown a little on medium-high heat, about 4 minutes. Then add ginger and garlic. Stir on medium heat for about 2 minutes. Add the garam masala and chili powder and cook another 30 seconds.

Pour in the tomato puree and salt. Boil for 7 minutes or till the eggplant is cooked and the sauce has thickened a little. If the sauce gets too thick, sprinkle some water over it.

Turn off heat. Taste the curry and add lemon juice, if using.

Now comes the fun part – smoke the curry!

Hold a piece of charcoal, using tongs, over an open flame. You can do this on an open gas flame, or an outdoor grill. Heat it till it becomes red hot. (Be careful, the hot coal may give out sparks, turn on your ventilator or exhaust). Now you need to work quickly. Place the red hot coal in a small bowl.

Immediately place the bowl inside the skillet with the eggplant curry. Pour the oil over the coal, so that it smokes. Quickly place a lid over the skillet. Let the smoke from the charcoal infuse into the covered curry for about 6 minutes. The longer the charcoal bowl sits in the skillet, the smokier your curry will get.

Remove the bowl from the skillet, and discard the charcoal. Serve the smoked eggplant curry with rice, roti or naan.

**************************************************

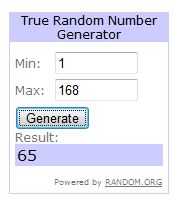
This giveaway has ended, the winner is comment #65, Shil!

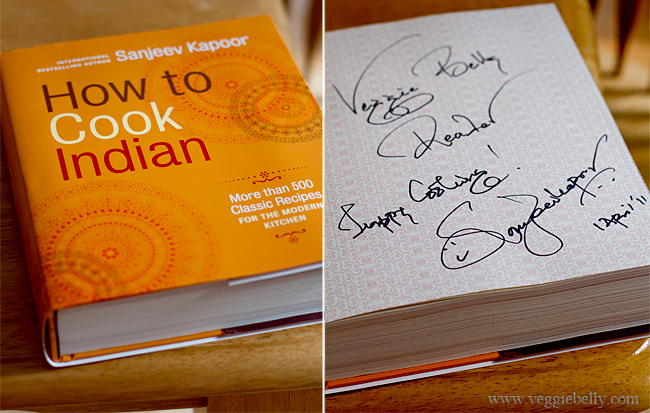
Win a signed copy of Sanjeev Kapoor’s new book,

How to Cook Indian!

This book has more than 500 classic Indian recipes for the modern kitchen.

To enter the giveaway:

Leave a comment below and tell me whats an Indian dish you havent tried at home yet, but would love to try and make.

Giveaway ends Friday June 3rd 9pm EST. One random winner will be picked.

I will ship anywhere in the world!

I met Sanjeev Kapoor at a book signing, and had an extra copy signed just for this giveaway. The signature says “Veggie Belly Reader, Happy Cooking! Sanjeev Kapoor :)

****************************** 


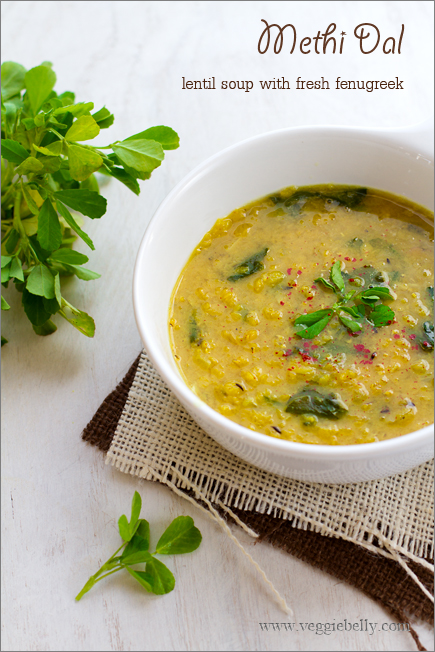
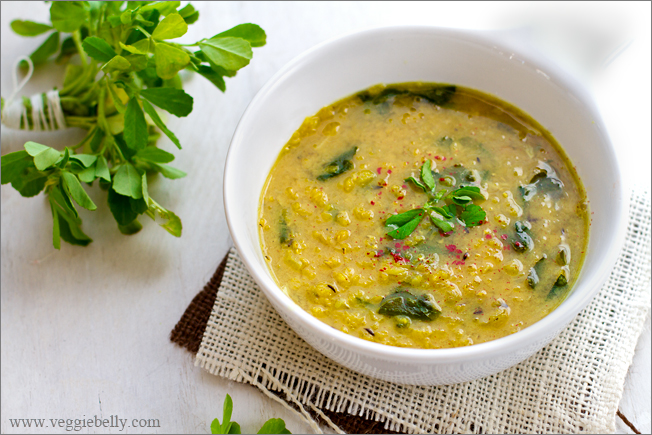
Methi Dal or Indian Lentil Soup with Fenugreek – A guest post on Herbivoracious

My recipe for this lovely, healthy, homely methi dal comes to you in the form of a guest post on Michael Natkin’s blog, Herbivoracious. I was so honored when Micheal asked me to guest post for him! I’m a huge fan of Herbivoracious, and have been following his amazing vegetarian recipes and techniques for years. I cant wait for Michael’s first book to come out!

Head on over to Herboviracious and read my guest post, a Methi Dal (Indian Lentil Soup with Fenugreek) recipe.

Related Posts with Thumbnails