How to take food photos with a bright, white, seamless background

I like taking food pictures on a seamless, bright, pure white background so that they look sunny and clean. “How to take food photos on a white background?” is the one question I get asked the most, so here is my set up and how I do it..

 What you’ll need

-         The food you are going to photograph
-         Background - large white foam board, white bed sheet or table cloth or white card board
-         Bounce or reflector – another piece of white foam board, or card board wrapped in aluminum foil
-         A camera with manual mode on a tripod. If you dont have a tripod, try using a higher ISO setting.


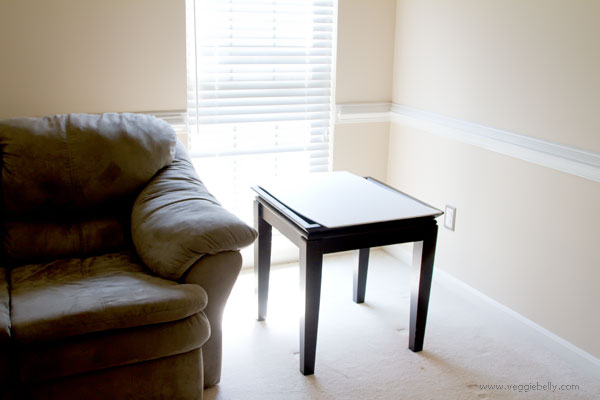
Choose a window with good sun light. This window is in my living room where I get plenty of sun light. I left the blinds closed, because the sun was very sharp, and I got plenty of light for this shot even with the blinds down. Remember, you don’t want direct sunlight falling on your subject.

If you feel the window light is too harsh, drape a white bed sheet over the window to mellow and diffuse the light.

Place a table close to your window. Place a white foam core, white card board or white bed sheet on the table.

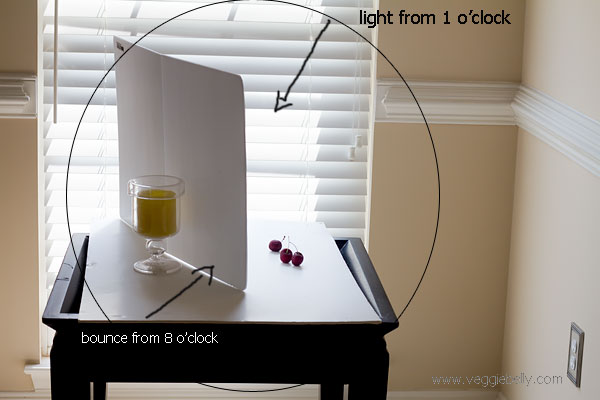
My basic food photography set up with natural light
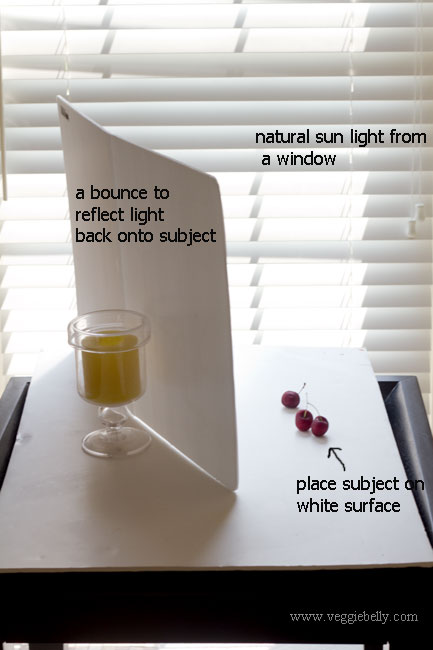
For a seamless white background for you pictures, I use a large white surface. Anything will do – white foam board, or cloth.

A bounce or reflector is just a piece of white material that is used to reflect light back on to the subject. A bounce or reflector will fill any shadows and lighten dark areas on your shot. Use a piece of white foam core or white card board. For a stronger bounce, you could also use a piece of card board that has been wrapped with aluminum foil.

Natural lighting for food photography and light placement

Think of your whole set up as a clock. You are standing with your camera at around 6 o’clock. You want the light coming any where from 9 o ‘clock or 3 o’clock. And the bounce should be on the opposite side of the light. Here, the light source (window) is around 1 o’clock and the bounce is placed at around 8 o’clock.

Now, put your camera in manual mode. Read your camera’s instruction book to learn how to use manual mode; its easier than you think!

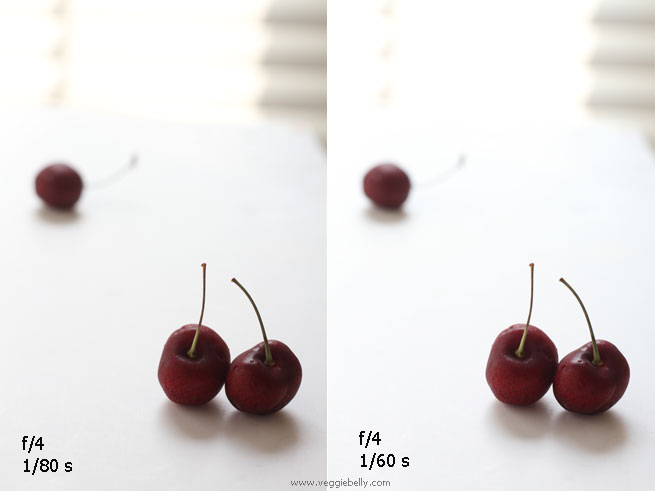
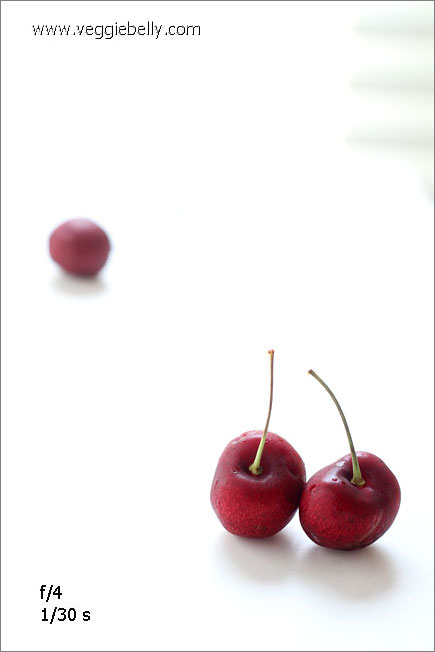
For the cherry shots, I picked an aperture setting of f/4 on my canon 50mm 1.8 lens. An aperture setting of f/4 lets me keep the front two cherries sharp and clear while throwing the cherry in the back out of focus.

Keeping the aperture setting constant at f/4, lets try shooting with different shutter speeds. Read your camera manual to see how you can change aperture and shutter speeds.

Exif info for photos below:
lens: Canon 50mm 1.8
aperture: f/4 for all photos
shutter speed: varying; look at pictures below
ISO: 200 for all photos
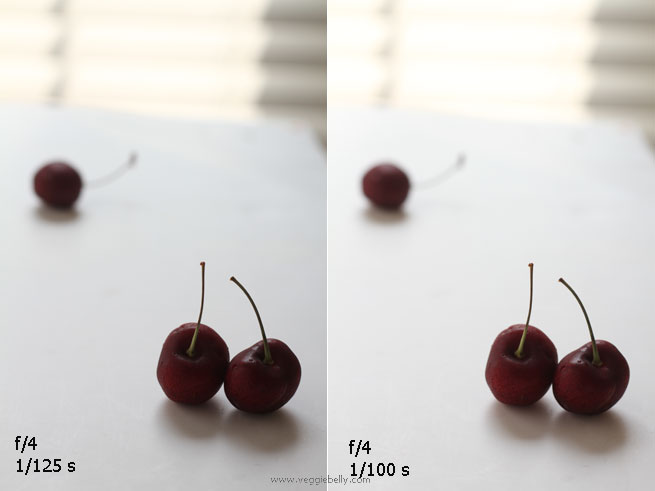
Keeping aperture value at f/4, lets start experimenting with shutter speed. At a shutter speed of 1/125 seconds, there isnt enough light. The picture is dark. Lets reduce shutter speed to 1/100 seconds. A little better, but still dark.

Lets try reducing the shutter speed even more, so that the camera lets more light in. Look at the picture with 1/60 seconds shutter speed. The white background is starting to look nice and bright. But the cherries are still a bit dark.

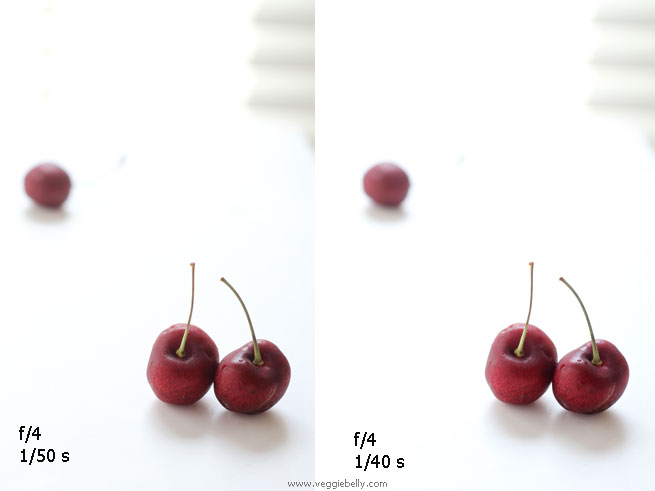
Notice how things are starting to look crisp and bright at 1/50 or 1/40 seconds shutter speed? This is what you want.

But at sutter speed 1/40 seconds, we are entering camera shake territory. Any lower, and my pictures will be shaky. This is where a tripod is useful, to stabilize the shot.

Now you make a creative decision. We have achieved a white enough background. Do you want it even brighter? I did. So I lowered the shutter speed one more increment, to let more light in.

At aperture value f/4 and shutter speed 1/30s I am satisfied with the brightness of the image. How bright or dark you want it is your own creative decision.

More..

- Tips on food photography by Helen of Tartelette
- Learn food photography blog by Neel
- Food photography tutorial series by White on Rice Couple
- Food photography setup on Steamy Kitchen
- Food photography setup series by Wrightfood
- Lara Ferronis ‘still life with’ food photography

Have you tried replicating this shot? If so, share a link to your pictures in the comments section below!

Jalapeno Lemonade

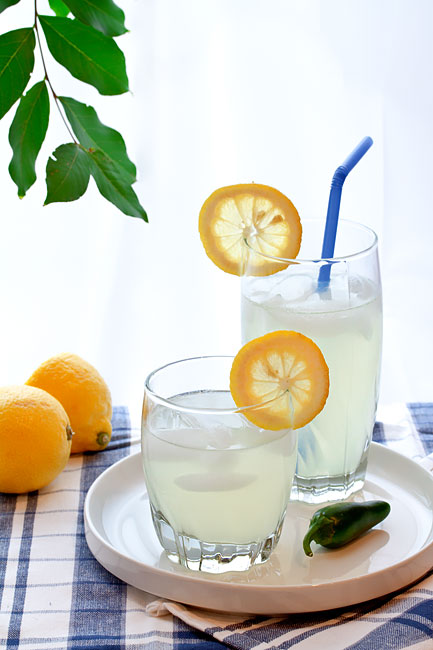
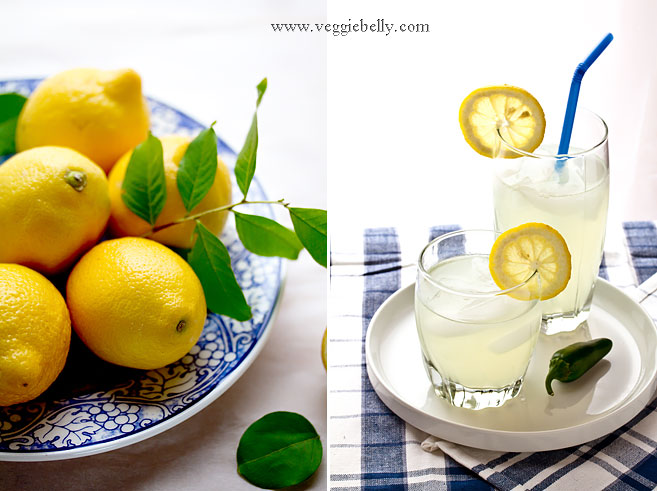
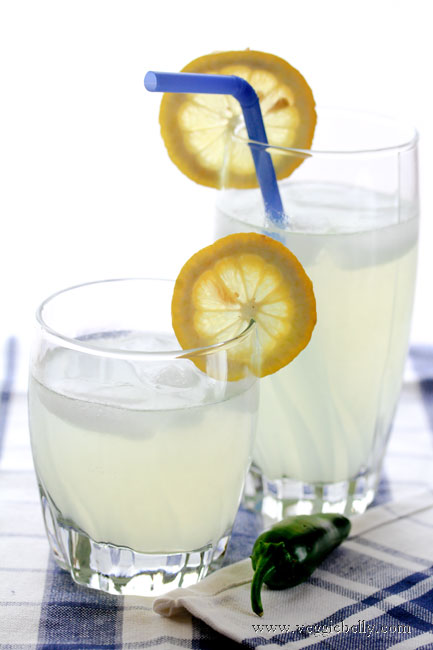
This is a sweet, refreshing lemonade with a touch of heat from jalapenos that will be great for a summer barbecue. Serve it ice cold, or spike it with some tequila! Dont be afraid of the jalapenos in this recipe, they add a mild, and very pleasant flavor. And you can make the lemonade as hot or mild as you like.

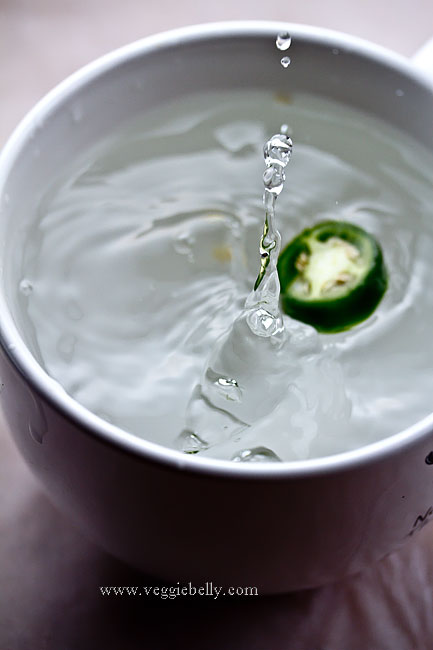
In case you are curious about this jalapeno water splash photo, here is the exif info:

Shutter speed: 1/1250
Aperture: f/18
ISO: 800
Exposure: manual
Lens: Canon 60mm macro

Setup: A bowl of water by a window. Camera on tripod, set to ‘continuous shooting’ mode. I dropped jalapeno slices into the water while continuously shooting. I think I took about 100 photos to get to this one.  

In order to capture the splash, you need to set your shutter speed very high (1/1250 in this case). Because the shutter speed was high, the camera lets less light in; to compensate for this I had to bump up the ISo to 800.

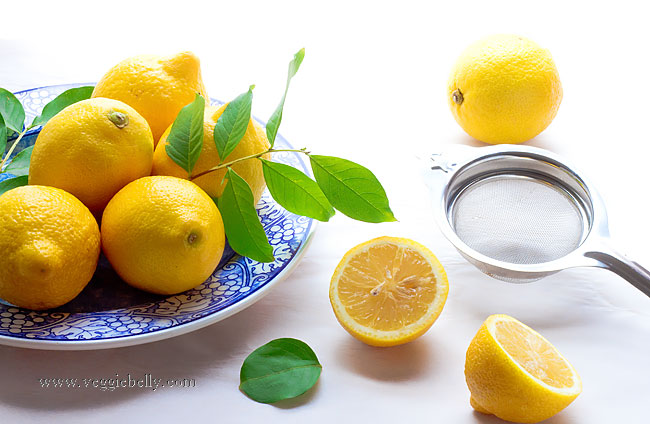
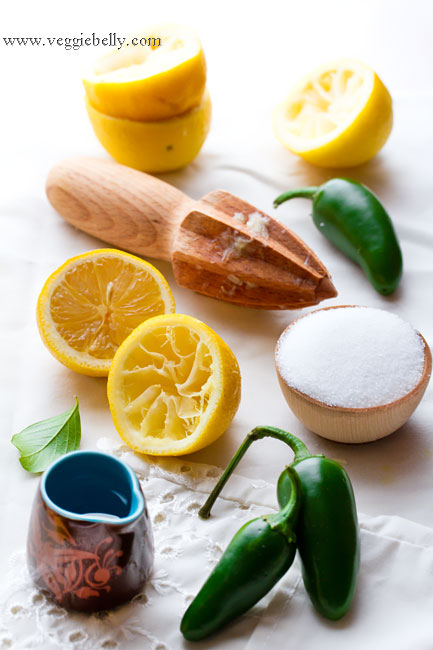
Squeezing a few lemons and mixing with water and sugar is so easy, I really dont know why we buy lemonade in the store!

What does jalapeno lemonade taste like? When you first sip it, its just like regular lemonade. When you swallow, the mild spice will hit your throat. This recipe is very mild. Use 2 jalapenos if you want it spicier.

Here is a similar recipe for jalapeno lemonade on serious eats inspired by Crate & Barrels jalapeno lemonade mix. My recipe is slightly different – i used a pinch of salt, which brings out the sweet and hot flavors in the lemonade; I also made my jalapeno lemonade less sweet. Here is another jalapeno lemonade recipe on kalamazoo gourmet that doesnt require boiling the jalapenos in simple syrup.

Jalapeno Lemonade Recipe

makes about 8 cups

for jalapeno sugar syrup
1 jalapeno, cut into 4 pieces (remove seeds for a milder lemonade)
1 cup water
1 cup sugar
1/8th teaspoon salt

other ingredients
1 cup lemon juice (juice of about 6 large lemons), strained
6 cups water

Place the chopped jalapeno and 1 cup water in a small saucepan. Bring to a boil. Continue boiling till about half the water has evaporated, about 2 minutes. Then add sugar and salt and stir. Reduce heat to low and simmer just until sugar has dissolved, about 2 minutes.  Let the syrup cool for about 5 minutes.

Place a strainer over a pitcher. Pour the jalapeno sugar syrup, lemon juice and 6 cups water through the strainer into the pitcher. Stir well. Serve chilled over ice cubes.

For tequila spiked jalapeno lemonade recipe: follow the recipe above, but instead of 6 cups water use 5 cups water + 1/2 cup (or more!) tequila. Serve on ice.

Omelette Rollups or Roulade with Smoky Fried Potatoes, Cream Cheese and Watercress


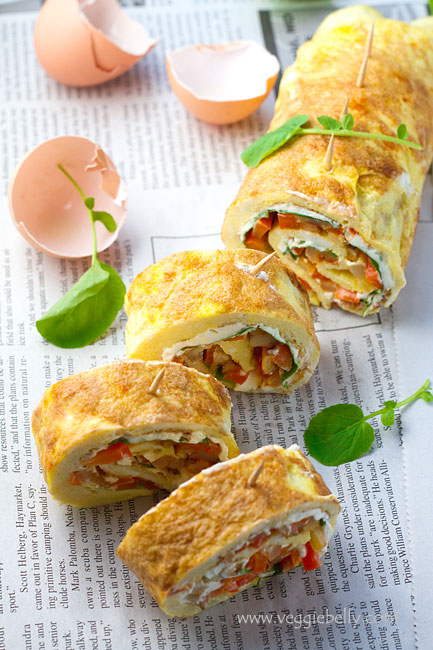
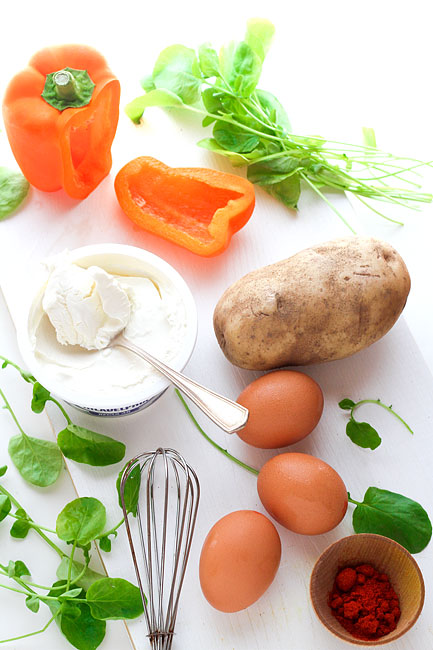
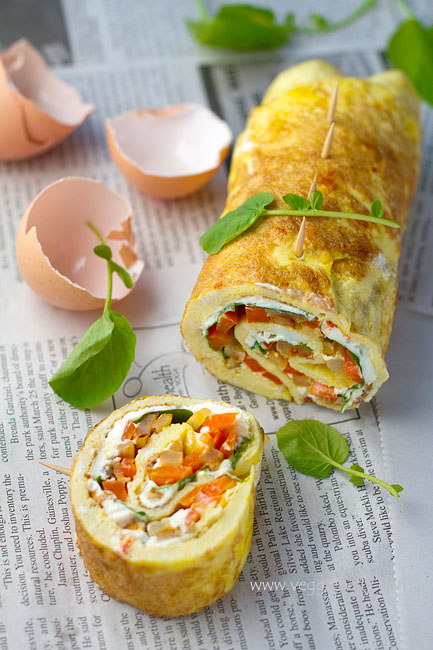
Here’s a recipe inspired by the Spanish frittata — I kept the potato which is traditionally used in a frittata, but I take it in a totally different direction. This roulade or roll up is a stuffed omelette with smoked paprika, fried potatoes, peppers and water cress. You can make this the previous day of a party and just cut it up and serve the day of. This is a great make ahead appetizer for entertaining!

Use any vegetables or cheeses you like. I enjoy the peppery bite of watercress with the creamy cheese. The orange bell pepper adds color, and the fried potatoes make these omelette pinwheels fun and filling.

(almost) Step-by-step instructions for omelette rollups

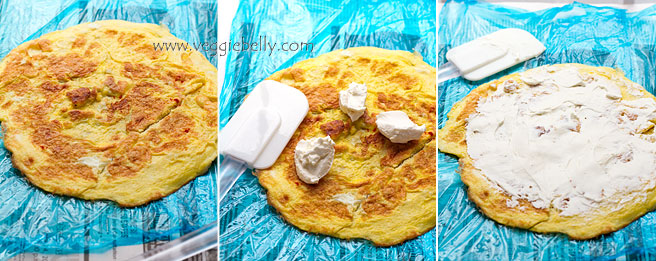
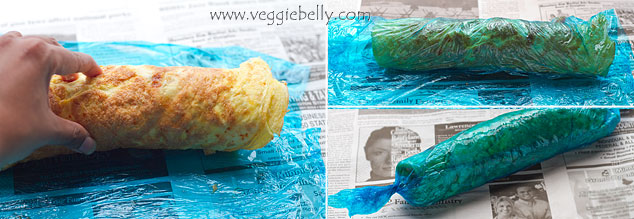
- Place cooked omelette on a large pice of cling film. Cling film must be about twice as long and wide as the omelette
- Let omelette cool completely
- Once cool, gently spread cream cheese over the omelette. Dont spread cream cheese all the way to the edges of the omelette. Leave a little space for the filling ooze out when rolling

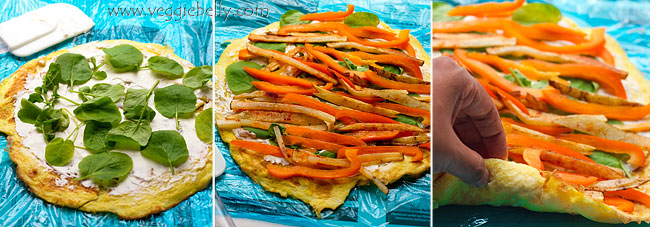
- Place a single layer of watercress leaves over the cream cheese
- Then arrange julienned peppers and fried potato sticks alternatingly. Place them horizontally. They should be in a single layer.
- Pick up the end of the omelette thats closest to you and begin rolling

- Roll gently, but tightly. Take care not to tear the omelette. You will now have an omelette ‘sausage’
- Now pick up the cling film that the omelette is on, and roll the omelette ‘sausage’ to make a package. Make sure you wrap and roll the cling film tightly over the omelette ‘sausage’
- Twist the ends of the package

- Place in the fridge for about 30 minutes. This will make the roulade easier to cut
- After 30 minutes, take out the package from the fridge. Carefully remove cling film.
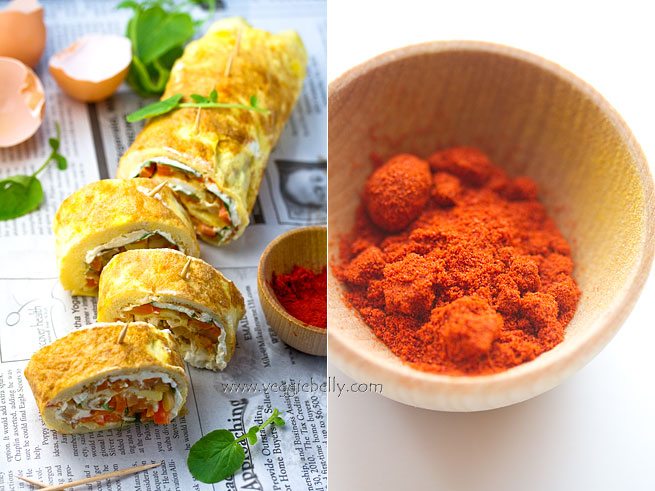
- Place 6-8 tooth picks at regular intervals on the omelette roll.
- Using a sharp knife, cut inbetween each tooth pick, to get spiral shaped omelette pinwheels
- Serve at room temperature 

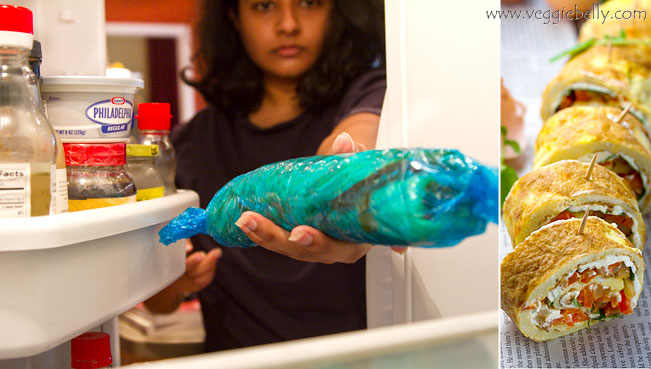
How I took the ‘inside the fridge’ photo above

I cleared out a section of the fridge and placed my camera inside the fridge, facing out. You need a remote trigger for your camera and a reasonably wide angle lens to do this (focal length for this was 34mm).

It took a few test shots and changing the setting to get the exposure right. Then its easy, I just opened the fridge, and clicked the remote as I was placing the roll up inside the fridge.

If you dont have a remote for your camera, set your camera on the self timer.

You can do this from inside the oven too (make sure the oven is not on!). 

Notes & Tips

- Omelette must be completely cool before rolling
- Cream cheese must be at room temperature, this will make it easier to spread
- Dont over cook the omelette. Cooking on high heat or for too long will make your omelette dry and you will risk tearing it while rolling
- Make sure the omelette is not too thick, or it will be difficult to roll. A 12 inch diamater pan is perfect for a 6 egg omelette
- If you find cooking and flipping over a 6 egg omelette is difficult, make 2 roulades instead. Use a 6 inch pan and make two 3 egg omelettes. This way, they will be easier to handle and flip over, compared to a large single omelette

Omelette Rollups or Roulade with Smoky Fried Potatoes, Cream Cheese, Bell Pepper and Watercress Recipe

serves about 3-4 as an appetizer

For the omelette
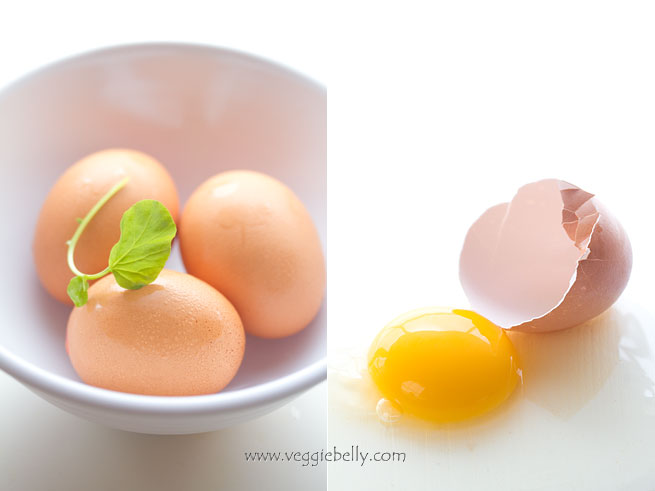
6 large eggs
1/8 teaspoon of smoked paprika (substitute with chilli powder, regular paprika or cayenne)
salt
non-stick spray or olive oil

For the smoky potatoes
2 tablespoons olive oil
1 small potato
a pinch of smoked paprika, use more if you like it spicy
salt

Other ingredients
6 tablespoons cream cheese, at room temperature
1/2 green or red or orange pepper, julienned
1/2 cup watercress leaves loosely packed

Make the omelette: Whisk the eggs, smoked paprika and salt. Heat a 12 inch diameter nonstick skillet and spray with non-stick spray or 1 tablespoon olive oil. Pour the egg mixture into the pan and cook on medium heat till the underside of the omelette is slightly golden. Carefully flip the omelette over and cook the other side till done. Using a large spatula, trasfer the omelette to a large sheet of cling film. Let omelette cool completely.

Make the potatoes: While omelette is cooling, make the smoky potatoes.  Scrub the potato clean. Leave skin on. Cut the potato into batons. Heat olive oil in a pan and add the potato sticks in a single layer. Fry the potatoes till golden. Remove cooked potatoes onto a paper towel and sprinkle with smoked paprika and salt.

Make the rollup: When the omelette is completely cool. Spread the cream cheese over the omelette. Then arrange the water cress leaves in a single layer. Place the pepper juliennes and smoky potato sticks over the watercress layer. Make sure the peppers and potato only form a single layer. Gently roll omlette. Wrap the omlette roll in cling film, gently but firmly. Place the package in the fridge for 30 minutes. Then cut into pinwheel pieces.

For detailed step-by-step instructions and photos see post above.

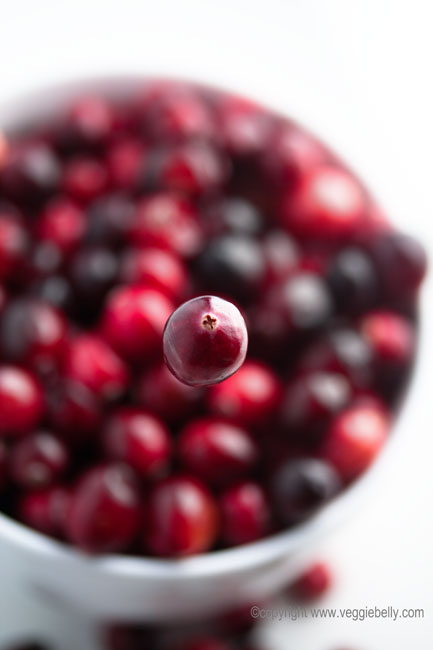
How I shot the floating cranberry photo

Many of you wrote to me asking how I shot this floating/suspended cranberry photo that appeared in this post.

Did I drop the cranberry into the bowl and shoot while it was falling?

Did I hold the cranberry up using a skewer or something similar and then photoshop the skewer?

Was this two photos that were merged together?

No, no, and no!

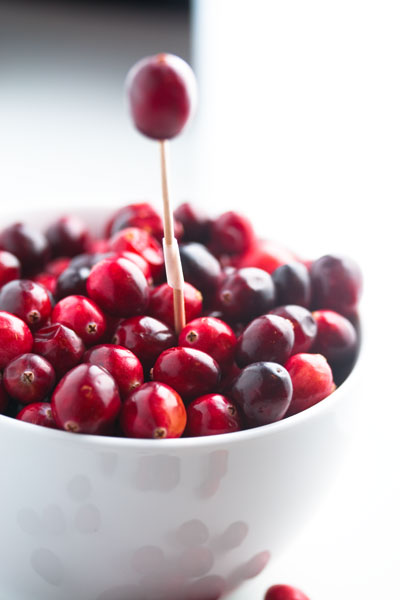
Its really very easy to do. No photoshopping, no fancy camera tricks. You just have to elevate the single cranberry from the rest, using a tooth pick. Take a look..

One tooth pick didn’t elevate the cranberry enough. So I taped two tooth picks together for extra height. Because of the short distance between the elevated cranberry and the rest of the bowl, I decided to use a macro lens.

A Macro lense, along with a wide aperture setting, will give the image a shallow depth of field. This means the background (in this case, the bowl full of cranberries) will be thrown out of focus. More background  blur means the more the floating cranberry will stand out.

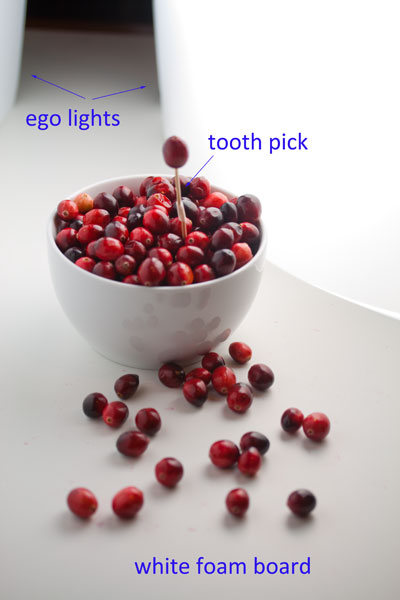
The set up is simple..

I placed the bowl with cranberries on a white foam core board. I placed two ego lights on the foam core; one at 2 o’clock and one at about 10 o’clock. (It was a winter night, so I couldn’t make use of natural sunlight, which is my first choice for food photos).

Then I took the shot from top down so that the tooth pick was directly under the floating cranberry. It took a few tries before I could position myself so that the tooth pick was not visible under the cranberry. And voila, the money shot!   

EXIF info

Camera: Canon Rebel XTi

Lens: 60mm macro

Aperture: f/2.8

Shutter speed: 1/125

ISO: 100

Exposure mode: Manual

Lighting: 2 Ego lights

Related Posts with Thumbnails