Thai Green Curry Pasta

Pasta is so versatile; really, it shouldn’t be restricted to Italian cooking. I love pasta with mustard seeds, cumin, turmeric, chili and cilantro – Indian style. I even had a pasta desert in someones house a long time ago – it was pasta cooked with sugar and coconut!

Ok, so the sweet pasta wasn’t exactly good. But I dont think i’ll ever stop experimenting with pasta.

And what better way to enjoy a rainy, cold weekend than to watch movies with a steaming bowl of pasta shells with creamy, flavor packed green curry.

Pasta Shells – 1/2 box
Coconut Milk – 1 can
Thai Green Curry Paste – 3-4 tbsp, I use Thai Kitchen Green Curry paste.
Peanut Butter – 1 tbsp
Soy Sauce – 2 tbsp
Sriracha or chili paste – 1 tbsp, optional
Onion – 1 small, diced
Garlic – 3 cloves, chopped
Ginger – 1 tsp minced
Mushroom – 1 box, sliced
Carrot – 1/2 large carrot chopped
Cilantro – chopped, for garnish
Oil
Salt

Boil the pasta till al dente. In the last 1 minute of cooking, add the carrots to the pasta water and boil. Reserve 1/4 cup of the pasta water. Drain the shells and carrots.

To the coconut milk, add the green curry paste, peanut butter, soy sauce and sriracha. Mix well.

Heat a pan and add some oil. To the oil, add the onion, garlic and ginger, saute till onions are translucent. Then add the mushrooms and saute on high for 3 minutes. Pour the coconut milk-green curry mixture over the mushrooms. Then add the reserved pasta water. Let it come to a boil. Then reduce heat and simmer 5 minutes. Taste and adjust salt.

To serve, pour the green curry over pasta and carrots. Garnish with chopped cilantro or scallions.

Peas, baby corn, broccoli or bamboo shoots will also work very well in this recipe.
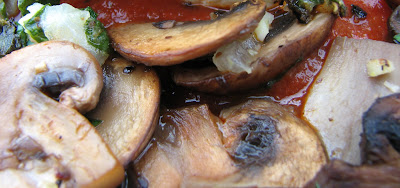
Posted by Picasa

4 Comments

Grilled Zucchini Tagine

Ive finally made use of that tagine I bought in Morocco last year. My long time friend V, and I took a trip to Marrakech and the Sahara desert. The souks in Marrakech were an exotic labyrinth of shops and stalls. Thats where I bought this tagine. And thats where I found out V is an expert bargainer!

We walked into a tagine shop and V made the shopkeeper, a lanky teenager, pull out almost every tagine on his shelves. Exhausted, the kid sat down, anticipating a large sale. V bargained and bargained for her lovely green tagine. Then she bargained and bargained for my yellow one you see in the picture. After about half an hour of this, V simply walked out of the shop saying she didnt like any of the tagines!

The almost weeping shopkeeper/kid came running behind us. He gave us the tagines for less than a fourth of the original price!

My tagine recipe today is for V, the bargain queen :)

There is a little twist in this recipe; the zucchini is grilled. I saw Bobby Flay on Iron Chef America – battle zucchini – where he grilled up some zucchini and made a tagine out of it. Thats my inspiration for this dish. The grill marks make the zucchini look great.

Zucchini – 4
Onion – 1 large, diced
Garlic – 4 cloves
Cauliflower – 5-6 florets
Chick peas – 1 can
Saffron – pinch
Cumin – 1 1/2 tsp
Paprika – 1 tsp
Turmeric – 1/2 tsp
Parsley – 2 tbsp chopped
Lemon Juice – 1 tbsp
Water or stock – 1 cup
Oil – 1 tbsp
Salt

Wash and dry the zucchini. Trim the end. Slice it in two lengthwise. Brush some oil on the cut sides and grill on a very hot grill, just till you get the grill marks.

In the meanwhile, heat a large, heavy bottom pan. Add the oil and saute the onion till light brown. Then add the garlic, cumin, turmeric and paprika and saute one minute.

Arrange the grilled zucchini and cauliflower in the pan, sprinkle with salt. Pour in the water or stock and bring to a simmer. Simmer covered till the vegetables are tender, about 10 minutes.

Stir in the chick peas and saffron and simmer another minute. Turn off heat. Mix in lemon juice and parsley.

Serve with couscous or as our camel man served it in the Sahara desert – with crusty bread.

Enoki Mushrooms, Snow Peas and Crispy Seitan in Sesame Honey Sauce

Ive walked past boxes of snowy white Enoki Mushrooms at the Asian store. I’d stop to admire these floral looking clusters, but never bought them because I wasn’t quite sure what to do with them. But this time I picked up a box, telling myself if they were so pretty to look at I’m sure they’ll taste good.

Enokis are a delicate, slightly sweet mushroom. They hardly need any cooking. Infact, you could use them raw in this recipe if you wish.

Crispy SeitanSeitan – about 5 large pieces. I use white wave seitan.
Rice or plain flour – 6 tbsp
Chili Powder – 1/2 tsp
Garlic Powder – 1/2 tsp
Salt
Oil

Mix the flour, chili powder, garlic powder and salt. Dredge the seitan pieces in the flour mixture. Heat one tbsp of oil in a pan, and pan fry the seitan till golden brown on both sides.

Now place the seitan on a cutting board and let it cool. Once cooled, cut into strips.

Enoki Mushrooms and Snow PeasEnoki Mushrooms – one 7 oz box
Snow Peas – about 25
Sesame Seeds – 2 tbsp

Cut off the end one third of the enoki cluster. You should now be able to separate the mushrooms into individual stems.

Saute the mushrooms in a pan with some oil on medium heat for about 1 minute.

You could also use the mushrooms raw.

Trim the ends of the snow peas. Boil water in a pot and add snow peas. Boil for 1 minute. Drain snow peas and place them in an ice bath. Drain before using.

Sesame Honey SauceSoy Sauce – 4 tbsp
Sesame Oil – 4 tbsp
Honey – 1 tbsp

Whisk all ingredients together.
Combine the mushrooms, snow peas and seitan in a bowl. Pour the sesame honey sauce over the vegetables. Toss carefully.

Sprinkle sesame seeds on top.

Posted by Picasa

Dijon Herb Grilled Tofu with Mushroom Medley

This is my veggiefied version of Ina Garten’s Grilled Herb Shrimp. Ive made this recipe several times. Ive also made the shrimp version for my carnivore friends. Everyone always loves the herb and dijon marinade! It tastes great in pasta too. Use fresh herbs, it makes a big difference.

Dijon Herb Tofu

Extra Firm Tofu – 1 package
Onion – 1/2 large, finely chopped
Garlic – 4 cloves, minced
Basil – 1/4 cup chopped
Parsley – 1/4 cup chopped
Dijon Mustard – 2 1/2 tsp
Dry Mustard – 1 tsp
Lemon Juice – 2 tbsp
Salt – 1 1/2 tsp
Pepper
Olive Oil – 1 tbsp (Ina uses 1/4 cup olive oil)

Mix together all ingredients except the tofu. Place in a bowl.

Wrap the tofu in several layers of paper towel. Place a weight on top for 1 hour to extract the liquid. Then cut the tofu into triangles.

Heat a large non stick pan. Arrange the tofu pieces in a single layer and ‘dry fry’ them. Press the tofu triangles so that they let their water out. When one side is slightly browned, turn the tofu once and cook the other side while pressing out the water. I learned this method from veganyumyum’s site. Check it out for a detailed explanation of dry frying tofu and “tofu geometry”!
When the tofu is done (if you stop hearing the angry hiss from the tofu while pressing down, youve probably gotten most the water out!), place the triangles in the herb-dijon bowl. Carefully toss the tofu in the mixture to coat. Let the tofu marinade an hour (or overnight if you have the time).

When you are ready to eat, heat a large non stick pan. Spray with olive oil spray. Place the tofu, along with the herb-dijon mixture in the pan. Grill both sides on medium, turning once.

Remember, the tofu is already cooked. We just want to cook the onion and garlic in the marinade!

If you have a lot of the herb dijon mixture stuck to your pan, deglaze with a splash of white wine (or even water) and drizzle over the tofu.

Mushroom Medley

Button Mushrooms – 1 box
Crimini (baby potobellos) – 1 box
Garlic – 2 cloves
White wine – couple of splashes
Basil – 2 tbsp chopped
Parsley – 1 tbsp chopped
Olive oil – 1 tbsp
Marinara sauce – 4 tbsp
Salt
Pepper

Clean and chop the mushrooms. Heat a non stick pan and add the oil olive. The pan should be very hot. Add the chopped mushrooms and spread them evenly on the pan. Cook them on high without moving the mushrooms around too much. If you stir too often mushrooms will release a lot of water.

When the mushrooms are golden, add the garlic, salt, pepper, basil and parsley. Then add a few splashes of white wine and let it reduce on high heat.

Turn heat off and stir in marinara sauce.

Posted by Picasa


Orange, Ginger, Green Tea Marmalade


I never eat marmalade on toast, it’s so boring! Marmalade exists for a higher purpose. Grill up some tofu with soy sauce and this marmalade. You can use this as a glaze on pretty much anything! Use it on pancakes.
Serve marmalade with brie and crackers Make an orange ginger cocktail, with some orange or pineapple juice, couple spoons of the marmalade and some rum. Or layer sponge cake with orange ginger marmalade and chocolate..heavenly!

Orange – 2 large
Water or Orange juice– 2 cups
Water – ¼th cup
Ginger root– 6 oz root
Sugar – 1 ½ cups
Fruit Pectin Powder – 3/4th of a 1.75 oz packet
Green Tea or Jasmine Tea – 1 tsp
Baking Soda – pinch
Lemon Juice – 1 tsp
Food coloring – 1 drop red, 3 drops yellow. Optional.

Zest the oranges, place zest a bowl. Then peel the skin and discard. Remove pith, seeds and any thick membrane. Squeeze the orange over the bowl and extract as much juice as you can. Chop up the remaining fruit and add to the bowl. You should have about 2 cups of orange juice, pulp and zest (from the 2 oranges).

Peel and grate the ginger. Squeeze the ginger juice out. Use between 2 tbsp to 1/4 th cup depending on how strong you want the ginger taste to be in the marmalade. I used 1/4th cup ginger juice because I love bold flavors. I also added a tbsp of finely chopped ginger pieces.

Place the ginger juice, orange zest, pulp and juice plus 2 cups of water or orange juice in a large heavy pan. Add the baking soda. Bring to a boil. Then reduce to medium-low and simmer 20 minutes.

In the meanwhile, boil 1/4th cup water. Add the green tea and turn off heat. Let it steep about 5 minutes. Strain and reserve the tea.

After 20 minutes of simmering, the orange and ginger should have thickened. Add the tea. You will have about 3 cups of liquid now.

To this add the fruit pectin. Bring to a rapid rolling boil, stirring often. Once the mixture is at a vigorous boil, add the sugar. Let it reach a rolling boil again. Stir constantly for another 2-3 minutes.

Turn off heat. Add the food coloring and lemon juice and stir. Leave to cool and then refrigerate. Alternatively, can the marmalade at this point.

You’ll notice in the photo that the marmalade is a bit runny. I only made this yesterday and the fruit pectin box says orange marmalade can take up to 2 weeks to set properly. I guess I’ll have to be patient!

Notes and Tips
Food coloring adds some depth to the marmalade’s color. But by all means leave it out, it will look great just by itself
I think orange zest adds a wonderful flavor and aroma to the marmalade, but it will add some bitterness too. So omit the zest if you don’t want that slight bitterness in the background.
If you want a stronger green tea flavor, leave the tea leaves in or steep longer
I love the ginger in this marmalade. The spiciness from the ginger hits the back of your throat. Add more or less ginger according to taste.
Low sugar pectin requires less sugar than normal pectin, so read the instructions on your fruit pectin box!

Posted by Picasa

Stir Fried Soy Curls with Spicy Sesame Sprout Slaw

For a week I’d waited impatiently. Then I came home this evening and there it was outside my front door! My 6 bag shipment of Butler Soy Curls! All the way from Grand Ronde, Oregon. I knew exactly what my very first recipe using soy curls was going to be.
A stir fry with soy curls and broccoli is on the menu today. I also used sprouts and red cabbage to make a colorful, spicy slaw.

Coating stuff in flour before stir frying is one of my favorite cooking methods. It creates a nice crispy crust. Here, I coat soy curls in rice flour and saute till brown. Then I toss them in a sauce.

A note on soy curls: Make sure you soak them in hot water for a good 20 minutes. Not only does this hydrate them properly, it also gets rid of the mild wheaty flavor. I added soy sauce, lemon juice, cooking wine and ginger in the soaking liquid for added flavor.

Stir Fried
Soy Curls

Soy Curls - 2 oz dry
Rice Flour – 1 tbsp. Corn flour or All Purpose can also be used. I love rice flour here, it makes things delicately crispy.
Broccoli – 8 florets
Ginger Paste – 1 tsp
Garlic Paste – 1 tsp

For the sauce:
Soy sauce – 2 tbsp
Lemon Juice – 1 1/2 tbsp
Sugar – 1-2 tbsp depending on how sweet you like it
Sesame Oil – 1 tbsp
Chili Paste – 1 tsp, optional

Soak soy curls in hot water for 20 minutes. See note above for additional flavoring. Squeeze out all the liquid. Toss soy curls in flour and some salt, toss to coat.

Heat a work, add a tsp of canola oil or spray with Pam. Add the soy curls and stir fry on medium high till they are golden brown. Remove from wok and set aside.

Add a little more oil or Pam to the work, ginger garlic paste and broccoli and stir fry on high till the broccoli is tender but crunchy. Now return the soy curls to the wok. Add all ingredients for the sauce and cook on medium high till sauce is absorbed.

Garnish with sesame seeds, chopped cilantro and scallions. Serve with rice or noodles and Spicy Sesame Sprout Slaw (recipe below).

Spicy Sesame Sprout Slaw

Its not regular sesame seeds that make this Asian slaw special. Rather, its my secret non-asian ingredient….Tahini! It adds the ‘sesameness‘, and also a satisfying creamy consistency to the dressing.

For a lighter version, use my Piquant Plum Sauce as dressing for this slaw.

Red Cabbage – 1/4 head, finely shredded
Bean Sprouts – 1/4 pound

For dressing:
Tahini – 2 tbsp
Soy Sauce – 1 tbsp
Lemon Juice – 2 tbsp
Sesame oil – 1 tbsp
Garlic – 1 tsp minced
Chili Paste – 1 tbsp or according to taste. I like lots of it!
Mint – about 6 leaves chopped.
You could use cilantro too. I used both today.

Whisk together all dressing ingredients. If its too thick for you, add a little water to thin it out.

Toss the cabbage and sprouts with the dressing.

More Slaw suggestions: try using shredded carrots or jicama!

Posted by Picasa

_uacct = “UA-4849514-1″;
urchinTracker();

Labels: , , , , , , tahini

Related Posts with Thumbnails