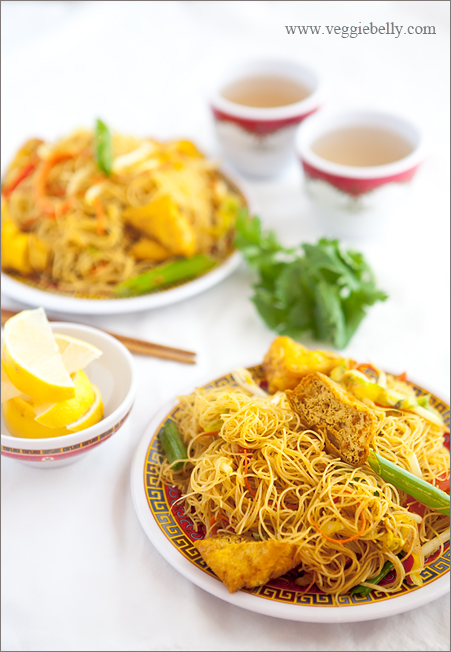
Singapore Rice Noodles Recipe

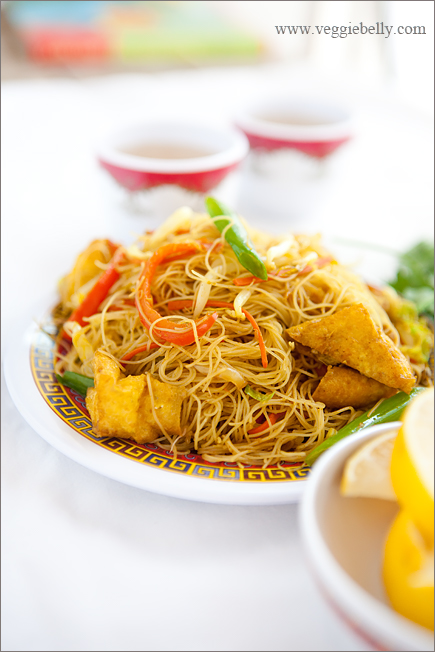
I love Singapore rice noodles – pan fried thin rice vermicelli with curry powder and turmeric. But most the ones you get at restaurants have fish sauce and or meat. So I make my own vegetarian Singapore rice noodles. Funnily, this dish is not Singaporean –  you won’t find it in Singapore. It is most likely an invention of Hong Kong chefs. Irrespective of its origins, this is a great vegetarian noodle dish!

I use S&B Oriental Curry powder for this recipe. For more about curry powders, read this post.

And the mushroom flavored soy sauce I use is Healthy Boy brand. If you cant find it, substitute with regular soy sauce.

Tips for perfect Singapore rice noodles

  • Don’t over soak the noodles. Read package instructions and make sure the noodles aren’t sitting in water longer than needed. Drain the noodles well. If you land up over-soaking the noodles, try to rescue them by spreading the drained noodles on a large platter and placing them under a fan, this should dry them out a bit.
  • Don’t over cook the vegetables, they will get soggy.
  • Use medium-high heat, this will ensure that the vegetables and noodles don’t get soggy.
  • Work quickly. Have all the ingredients prepped before hand, and then work quickly. Don’t let the vegetables or the noodles sit in the wok for too long. When you add the noodles and sauce to the wok, if you feel you are taking too long (over 2 minutes) to mix everything well, take the wok off the heat, and mix the noodles. You can then re-heat the noodles before serving.
  • Remember that every curry powder is different. Some are spicier/hotter than others. You may have to use more or less depending on the curry powder you use. Taste the noodles at the end, and add more curry powder and soy sauce if needed, then re-heat.
  • The taste of Singapore rice noodles develops over time (because of the curry powder), so it tastes even better the next day!
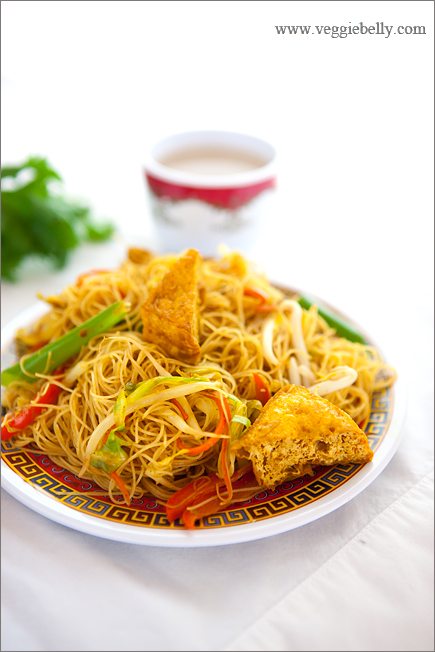
Singapore Rice Noodles Recipe

serves about 4


Ingredients
6 oz rice sticks, also called rice vermicelli or rice noodles
For the sauce
2 teaspoons curry powder, I recommend S&B Oriental curry powder
½ teaspoon turmeric
Crushed dry red pepper, to taste
3 tablespoons soy sauce
1 teaspoon brown sugar, optional
½ teaspoon vinegar, optional
1 tablespoon mushroom flavored soy sauce (available in Asian markets), substitute with soy sauce

For the noodles
1 tablespoon vegetable oil
1 heaping teaspoon garlic paste (use a mortar and pestle or grate in a microplane)
1 heaping teaspoon ginger paste (use a mortar and pestle or grate in a microplane), optional
1 medium carrot, peeled and cut into matchsticks
1 red pepper, cut into thin strips
1 1/2 cups shredded cabbage
1 cup cubed fried tofu, available in Asian markets
1 tablespoon sesame oil
1 heaping cup beansprouts
3 scallions, chopped
4 lemon or lime wedges
Chopped cilantro for garnish

Method:

  1. Soak the rice noodles according to package instructions. (This usually involves soaking them in warm or cold water for 2-5 minutes).Drain well and set aside in the colander.
  2. Whisk together all ingredients for sauce, along with 3 tablespoons of water. Set aside.
  3. Heat oil in a large wok, that is atleast 12 inches wide. Add the ginger and garlic and let them sizzle on medium heat, till fragrant and lightly browned.
  4. Pour in half of the sauce. Work quickly, and mix everything together, breaking up any lumps with a wooden spoon. Cook till the sauce starts to bubble, about 20 seconds.
  5. Throw in red peppers, carrot, cabbage, and tofu.
  6. Crank up the heat to medium-high and sauté till the vegetables just start to wilt, about 2 minutes. Don’t over cook the vegetables.
  7. Add the soaked, drained rice stick noodles to the vegetables. Also add the remaining sauce. Working quickly, and using two spoons or tongs, toss and combine everything till the noodles are well coated in the sauce.
  8. Turn off heat and add sesame oil, bean sprouts and scallions. Toss well.
  9. Serve immediately garnished with chopped cilantro and lemon or lime wedges on the side to squeeze over the noodles.

My First TV Appearance and a Brown Rice & Oregon Blueberry Salad!

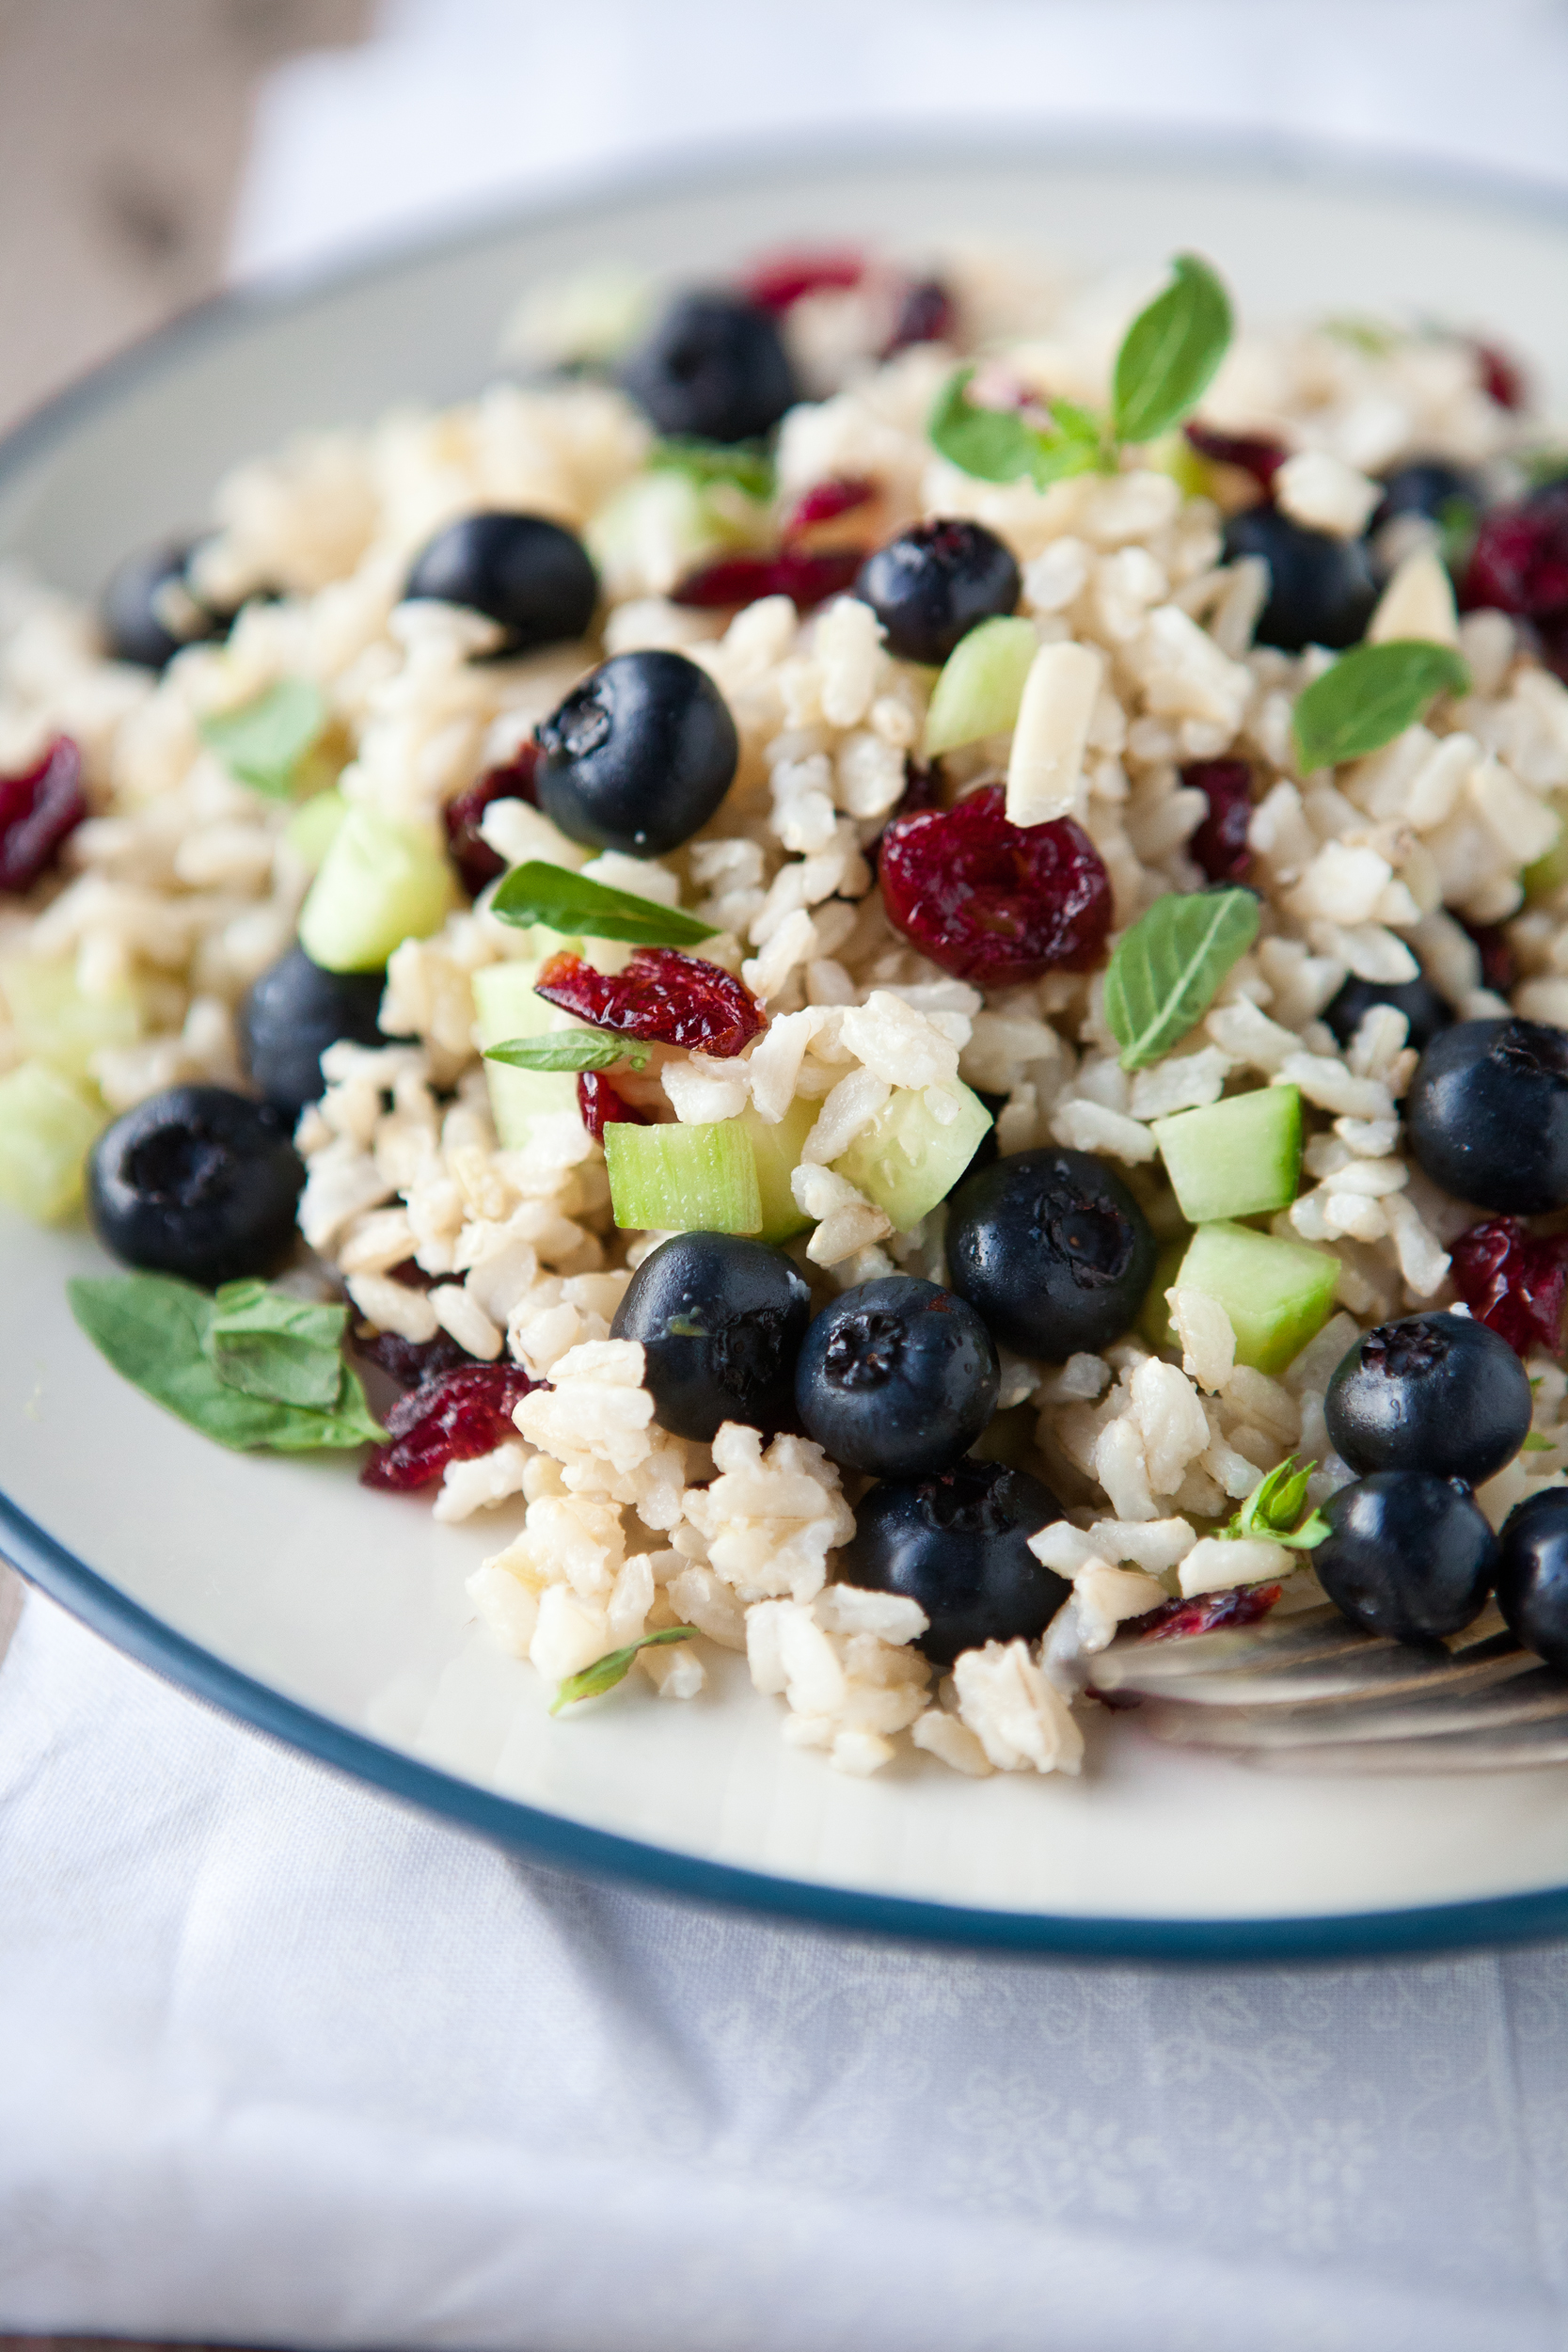
Guess what?! I was on live TV today! I made this delicious, easy, summer recipe on the Good Day Oregon show on FOX12! I won an IFBC food blogger contest by Hinode rice, and got to make my winning recipe on TV! Here is the video.

I usually make this recipe with quinoa or black rice, but loved the nuttiness of Hinode brown rice for this recipe. And if you have microwave rice, you can put this salad on the table in literally 5 minutes! This is a great dish to pack for school, work or a picnic. Some grilled peaches instead of the blueberries will also be lovely!

Brown Rice and Blueberry Salad Recipe

serves 3-4

Ingredients
1 cup long grain Hinode brown rice
1 cup fresh blueberries. I used Oregon hood river blueberries.
¾ cup cubed cucumber
¼ heaping cup dried cranberries
2 tablespoons slivered almonds
½ cup cubed mangoes, optional
½ cup baby arugula, optional

For the dressing
1½ tablespoons extra virgin olive oil
2 tablespoons lemon juice
1/4 teaspoon lemon zest
10 Basil leaves, chopped finely
Salt and pepper

Method

  1. Cook the brown rice according to package instruction. Let the cooked rice cool well.
  2. Then add all other ingredients from blueberries through arugula and mix gently.
  3. Whisk all the dressing ingredients together, and add to the rice. Toss well. Serve chilled or at room temperature.

Easy Zucchini and Cauliflower Curry Recipe. Only 8 ingredients!

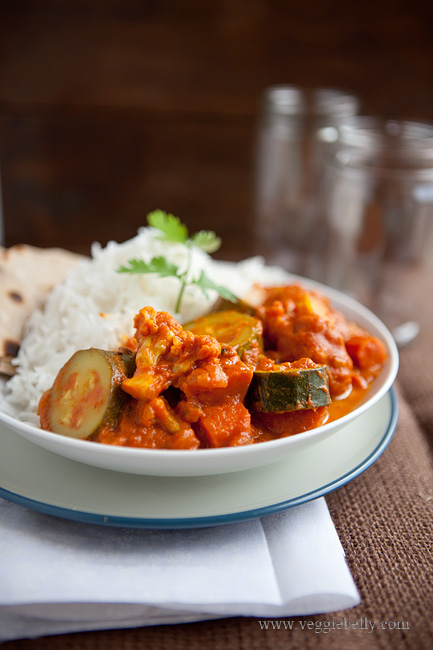
My husband loves this easy zucchini and cauliflower curry and requests it at least once a week. I will vary the vegetables depending on what’s available and what we are in the mood for. I’ve made this curry with eggplant, green beans and potatoes. I’ve made it with pumpkin and kale. I’ve also made it with cubed paneer,  green peppers and baby corn. This recipe is versatile!

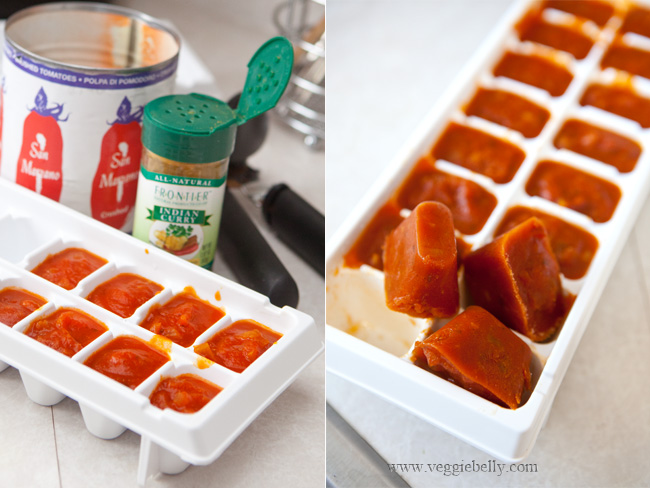
A make ahead tip: Because I make this curry so often (did I mention we love it?!), I’ve started making the curry sauce in bulk and freezing it. It’s easy. Once you are done with step 5 in the recipe below, just spoon the curry sauce into ice cube trays and freeze it. When solid, put the frozen curry cubes in freezer bags and return to the freezer.

You now have a delicious vegetarian, vegan curry base sitting in your freezer to pull out anytime and heat up along with vegetables of your choice!

I prefer the taste and convenience of canned tomatoes for this recipe. If you want to use fresh tomatoes, core them, and puree them in a blender. You will need 3 cups freshly pureed tomatoes + about 1 cup water. If the fresh tomatoes make a tart curry, you will want to add a little sugar at the end of cooking.

My favorite tomatoes to use for this curry:
-          Muir Glen fire roasted diced tomatoes
-          San Marzano crushed tomatoes
-          Del Monte diced tomates with basil, garlic and oregano

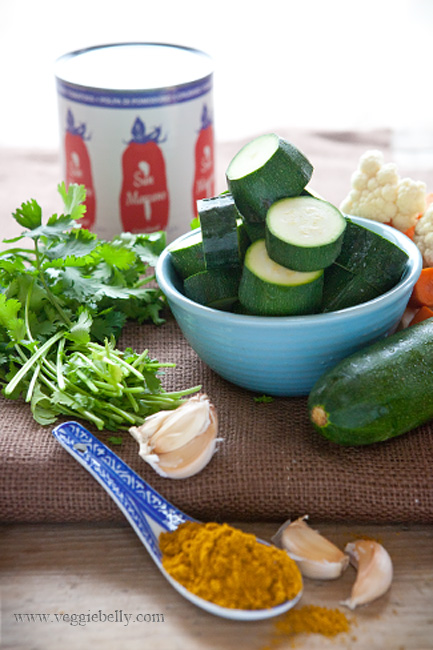
And the curry powder I used is Frontier Indian curry powder from Whole Foods, which is mild, very fragrant, tasty and has a hint of lemon peel. If you use a stronger curry powder, you may want to use less.

Easy Zucchini and Cauliflower Curry Recipe

serves 3-4

Ingredients
1 ½ tablespoons Oil
½ teaspoon Cumin seeds, optional
A pinch of asafetida, optional
½ large red onion, diced
2 garlic cloves, minced
2 teaspoons curry powder
One 14 oz can of diced or crushed tomatoes. I like San Marzano or Muir Glen.
2 zucchinis, about 12 oz
6 cauliflower florets (about 1 heaping cup of florets)
1 carrot
¼ cup coconut milk
Chopped cilantro or mint for garnish

Method
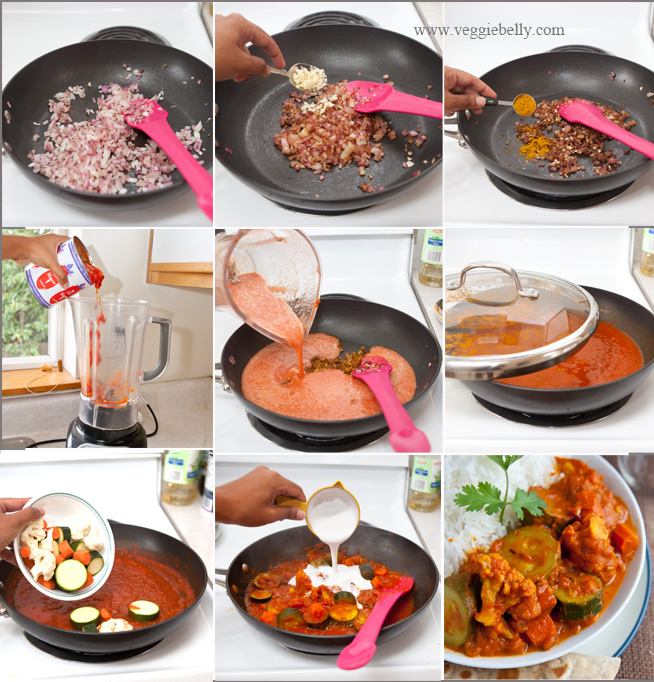
1.Heat oil in large sauté pan. Add cumin seeds if using. When they sizzle, add the asafetida if using.

2. Immediately add chopped onions. Cook on medium heat till the onions are lightly browned.

3. While the onions are cooking, puree the tomatoes. Place the canned tomatoes in a blender. Fill the empty tomato can with water, pour this into the blender as well. Puree well. You should have about 30 oz of puree now. Set aside.

4. When the onions are browned, add minced garlic and stir for 30 seconds.

5. Add curry powder and stir another 10 seconds. Then pour in pureed tomatoes and salt and bring to a boil. Reduce heat to medium-high, partially cover the pan with a lid and let the sauce simmer for about 15 minutes or till the sauce thickens a little. Careful, the sauce will bubble and splatter.

6. While the sauce is cooking, prepare the vegetables. Cut the zucchini into 3/4th inch rounds. Peel and cut the carrot into ½ inch pieces. Break up the cauliflower into florets.
7. Toss the vegetables in the curry sauce, cover and cook till the zucchini is soft, about 10 minutes.

Turn off heat and stir in the coconut milk. For an extra creamy curry, add 1/2 cup coconut milk instead of the 1/4 stated in this recipe.

Garnish with chopped cilantro or mint. Serve hot with brown rice or roti or pita bread. My grandmothers multi colored raita goes well with this dish.

Hot and Sweet Marmalade Glazed Tofu

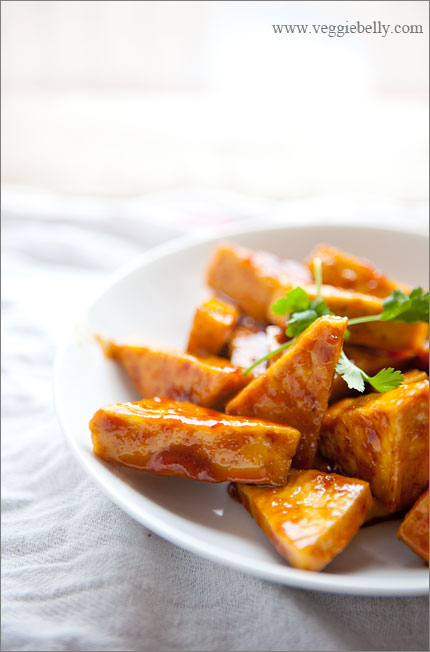
On a busy weeknight, this is my go to dish. Its quick and easy to make if you have pressed tofu lying around. I like to serve this hot and sweet marmalade glazed tofu with some steamed broccoli and brown rice for a complete meal.

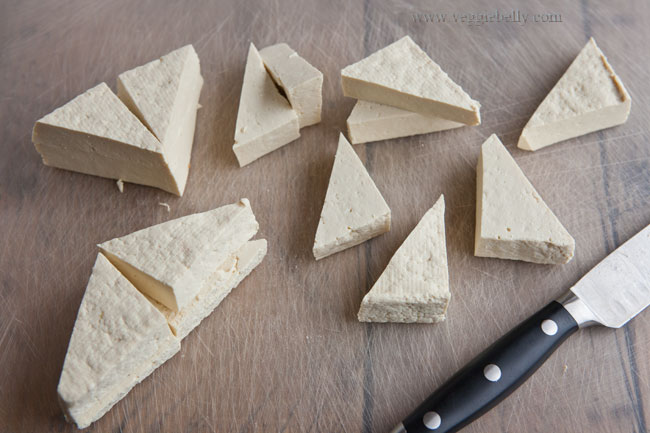
If you are not a tofu fan, but want to start incorporating some tofu in your meals, this is the perfect dish to start with. The glaze is sweet, spicy, and coats the tofu beautifully. I like to cut the tofu into small triangles (a method I learned from Vegan Yum Yum). The thinner you cut the tofu, the better results you will get with this recipe.

I originally posted this recipe a long time ago as sticky orange tofu thins. This continues to be one of my most popular posts, so I thought I should repost it, with updated photos. Checkout the old post to see what rubbish my photos were!

My original recipe requires you to slice the tofu as thinly as you can, that way you get to enjoy more of the orange glaze with every bit of tofu.

Hot and Sweet Marmalade Glazed Tofu Recipe

Inspired by this recipe from Vegan Yum Yum
Serves about 2

Ingredients
one 15 oz package of firm tofu, drained and pressed
A few drops of oil
For the glaze
4 tablespoons soy sauce
4 tablespoons orange marmalade. Substitute with brown sugar
1 1/2 tablespoons lemon juice
1 tablespoon or to taste sriracha or any other hot chili sauce
1 tablespoon chopped mint or cilantro for garnish

Method

  1. Slice the tofu into small triangles. The thinner you slice the tofu the better
  2. Whisk together the marmalade, soy sauce, lemon juice and sriracha and set aside
  3. Heat a few drops of oil and large, flat non-stick skillet. Place the tofu slices on the pan in a single layer. Don’t over crown the pan, do this in batches if needed.
  4. Cook the tofu on medium heat, till it is browned on both sides. Gently press on the tofu using the back of a wide spatula to release any excess water, as the tofu cooks.
  5. When the tofu is browned, reduce heat to low and pour the glaze all over the tofu
  6. Let the glaze bubble and thicken, while stirring gently and flipping the tofu slices. This will happen quickly, so make sure you keep the heat on low to prevent the marmalade from burning. When the glaze has thickened and the tofu is well coated, about 1 minute, turn off the heat.
  7. Garnish with chopped mint or cilantro
  8. Serve with steamed broccoli and brown rice

White Bean and Porcini Mushroom Soup

Dried porcini mushrooms are a beautiful thing. They have a meaty flavor, and a deep umami taste. Boil dried porcinis in water, and you have yourself the best vegetarian substitute for beef broth.  I always rehydrate extra porcinis, and freeze the stock in ice cube trays. This way I always have a flavorful stock on hand for soups.

Try to buy local porcini mushrooms if you can; they will be cheaper than the imported ones. And remember, fresh porcinis are not the same as the dried ones. Dried porcini mushrooms have a lovely, depth of taste that the fresh ones simply don’t have.

Because dried mushrooms vary in size, its best to weigh them (cup measurements wont work). In case you are in the market for a great kitchen scale, Escali scales are great.

I like to soak and cook my own beans. It’s healthier, cheaper and tastier. Soak beans overnight in water, and drain. Then cover them with fresh water, and bring to a boil. Cover with a lid, and let the beans simmer till done – about 1 to 1 ½ hours. Then drain. I know this sounds like a long time, but you don’t have to baby sit the beans, they pretty much take care of themselves. You can cook any kind of bean this way and save it in the fridge for several days to use in soups, salads, chili etc.

White beans like cannellini or navy are so silky and creamy when cooked, you really dont need to add any milk or cream to this. So this white bean and porcini soup is vegan. However, if you want to make this soup richer and creamier, just add 1/4 cup heavy cream right at the end.

White Bean and Porcini Mushroom Soup Recipe

serves about 4

Ingredients
1 cup dried white beans (cannellini or navy beans)
2 tablespoons olive oil
1 sprig of fresh rosemary
1 small onion, diced
2 cloves of garlic, chopped
¼ cup dry white wine, optional
1 oz dried porcini mushrooms

Method
Soak the dried white beans overnight in water. Then drain them.

In a medium sauce pan, heat the olive oil, and cook the onions on low heat till they are translucent. Don’t let the onions brown. Then add the garlic, rosemary, cracked black pepper, and salt. Cook 30 seconds, or till the garlic is fragrant. Don’t let the garlic brown.

Pour in white wine if using, increase heat to medium-high and let the wine bubble away, till most of it evaporates.

Then add the beans, and 4 cups of water. Bring the soup to a rolling boil on high heat. Then reduce heat to a simmer, cover the pan with a lid, and let the soup simmer till the beans are very soft – about 1 to 1.5 hour.

While the beans are cooking, rehydrate the mushrooms.

Boil 3 cup water in a medium saucepan. When the water boils, add the dried porcinis to the water. Reduce heat to medium or medium-low. Cover the pan, and let it simmer gently for about 20 minutes or till the mushrooms are rehydrated and soft. The mushrooms are done when you prick them with a fork, and they feel soft. If the mushrooms feel leathery, tough or hard, they need to cook more.

Depending on the size of the mushrooms, this may take more or less time, so check on the mushrooms periodically.

Turn off heat, and let the mushrooms sit in the stock for about 10 minutes. This will allow the sandy sediments to settle in the bottom of the pan. Using a slotted spoon, carefully remove the rehydrated porcinis from the liquid. Using a wooden spoon, press on the mushrooms to squeeze out some of the water back into the pan. Reserve the mushrooms.

When the sediment has settled to the bottom of the pan, pour the mushroom cooking liquid into a measuring cup. Do not use the sediment at the bottom. Measure out 2 cups of mushroom stock. Reserve this stock.

When the beans are cooked, add the rehydrated mushrooms, and the mushroom stock and boil for 1 more minute. Turn off heat. If you want a richer soup, add ¼ cup of heavy cream at this point.

Using an immersion blender, puree the soup till it is smooth. You can also use a blender or food processor to puree the soup.
Remember to vent the lid a little when blending hot liquids.

Garnish with chopped rosemary, and a drizzle of olive oil, and serve soup with crusty bread.

Broccoli Paratha – a Step by Step Recipe

I make parathas often – they are a delicious, substantial meal and you can fill them with lots of different things. I usually make the traditional paneer parathas or aloo (potato) filled parathas. But lately I’ve been experimenting with different types of fillings. These broccoli parathas are a recent favorite.

Broccoli Paratha Recipe – a Step by Step

Makes 8 parathas

Ingredients for the dough
2 cups whole wheat flour (atta)
½ teaspoon salt
1 cup warm water. You wont need all of it.
¼ teaspoon oil

Ingredients for the filling
1 lb broccoli crowns (without stalks)
¾ cup finely chopped cilantro leaves
½ teaspoon scant garam masala
1/8 teaspoon ajwain (carom) seeds. Substitute with jeera (cumin) seeds
1 green chili, finely minced. Use more or less according to taste.
Salt

More flour for rolling
Oil for frying the parathas

Method

  1. Place the flour and salt on a clean surface
  2. Make a well in the middle of the flour
  3. Sprinkle water in the well a little at a time, mixing the dough with your fingers after each sprinkle. Soon the dough will start to come together and look somewhat like scrambled eggs.
  4. At this point start kneading using the base of your palm.

5. If the dough is too tight, sprinkle more water while kneading. Gather all the loose flour around while kneading.

6. When the dough forms a slightly soft, elastic, non-sticky ball, stop kneading
7.  Drizzle ¼ teaspoon of oil over the surface of the dough and spread it evenly
8. Cover the dough with a damp kitchen towel, and let it rest for about 30 minutes. Remember – flours differ in their elasticity, and some doughs may need to be rested more than others

9. While the dough is resting, working on the filling. Grate the broccoli using the finest side of a box grater. You need about 2 cups of grated broccoli. Do not grate the stems. If your broccoli is wet, make sure to dry it very well before grating.

10. Place the broccoli in a bowl, and add the cilantro, garam masala and ajwain. Mix gently. Add salt to the broccoli filling only in the last minute, otherwise the filling will become soggy.

Note: There are several recipes that recommend you salt the grated broccoli first and then squeeze out the excess water, before proceeding with adding the spices. I’ve tried this method, and there wasn’t much moisture to squeeze out of the broccoli, so I skip this step in this recipe.

However, if you are not experienced with making parathas, it may get a little tricky to roll out these parathas. This is where salting and squeezing the broccoli will help. The salt pulls out the moisture in the broccoli. When you’ve squeeze out all the water, the filling becomes easier to work with.

But I didn’t salt the broccoli. Instead, I added salt in the last minute, so that the broccoli didn’t have much of a chance to let out water. I also worked quickly while filling and rolling.

11. When the dough has rested, knead it gently once more

12. Divide the dough into 8 equal parts. Roll each one into balls. Keep them covered with a damp towel
13. Pour out about ½ cup flour for dipping and rolling. Take one dough ball, and flatten it with your fingers. Then dip it into the flour
14. Gently roll out the dough into a 3 ½ inch round

15. Add salt to the broccoli filling, and mix well. Taste the filling and adjust salt if needed. Place 2 tablespoons of the broccoli filling in the center of the dough. If you haven’t made parathas before, use less filling, it will make it easier to seal and roll

16. Using both your hands, gently bring up the edges of the dough
17. Then gather the edges over the filling. Compact the filling down with your fingers if you need to
18. Now pinch the edges together to seal

19. Gently flatten the parathas using your fingers

20. Dip it in some flour
21. Using a gentle touch, roll out the parathas, sprinkling more flour if it sticks
22. Roll out the paratha into about a 5 inch round

23. Heat a heavy bottom pan on medium heat. Place the rolled out parathas on the pan. Cook till light brown spots appear on one side. Flip the parathas and let brown spots appear on the other side. Then increase heat to medium-high, drizzle about ¼ teaspoon oil over the parathas and cook till golden, about 30 seconds.

Serve hot with yogurt or raita and pickles.

Need more paratha making tips? See this post.

Tofu Skin Roulade with Sage Mushroom Stuffing. A Vegetarian Thanksgiving Recipe

I wanted to come up with a vegetarian thanksgiving recipe this year that can be a beautiful centerpiece on the vegetarian thanksgiving table. Just because you are vegetarian doesnt mean you are doomed to eat a bunch of sides (or tofurky..ugh!) on thanksgiving day. Make this tofu skin roulade with sage mushroom stuffing a day ahead and reheat it by steaming it for 10 minutes or so.

The tofu skin forms a golden exterior with great texture, and the stuffing inside is moist and mushroomy. Your very own, home made vegetarian tofurky for thanksgiving!

You will generally find tofu skin in Chinese restaurants, it is usually braised or stewed in a sauce.

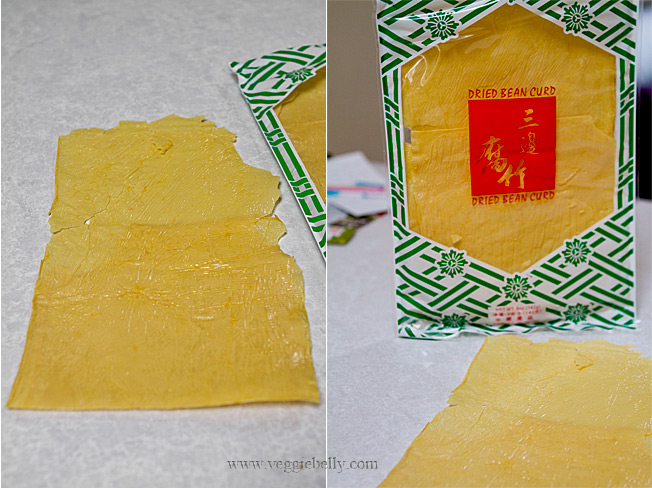
Tofu skin, also called beancurd skin or yuba is the skin that forms when simmering a pot of soy milk. It comes dried or frozen and is available in Asian stores. If using dried tofu skin or yuba, reconstitute it in hot water. If using frozen, simply defrost it for this recipe.

Tofu skin may look delicate, but it actually holds up very well to stuffing, rolling and steaming (which is what this recipe involves). If you cant find tofu skin or yuba, try making this recipe with seitan. See this recipe from the vegetarian times for seitan roulade or this recipe by vegan yumyum

Serve this tofu skin roulade with sage mushroom stuffing, along with my red wine gravy, kale and goats cheese mashed sweet potato (recipe coming up next!), and steamed green beans or brussels sprouts.

Tofu Skin Roulade with Sage Mushroom Stuffing

serves 2-3, with some left over stuffing to serve on the side.

Ingredients
three 9×12 inch sheets of dried or frozen tofu skin, also called yuba
1 tablespoon butter
1/4 cup diced onion
1/4 cup diced carrots
1/4 cup diced celery
6 large button mushrooms, chopped
1/2 tablespoon chopped fresh sage
2 sprigs of thyme
1/4 cup vegetable stock
1 cup store bought stuffing. I like pepperidge farm.

Method
If using frozen tofu skin or yuba, let it defrost before using. If you are using dried tofu skin or yuba, boil a large pot of water, turn off the heat, and put the tofu skins in the water. Let them soak for 15 minutes. Then gently pull them out of the water, letting all the excess water drip away.

Lightly oil a clean work surface, so that the tofu skins dont stick.

Lay 3 sheets of tofu skin, one on top of the other, so that their longest side is closest to you. If the tofu skins tear a little, dont worry, just patch them up.

Now work on the stuffing.

Heat butter in a skillet, add onion, carrot and celery and cook on medium heat till the onions are soft. Then add mushrooms, saute till the mushrooms are cooked, about 3 minutes. Add the sage and thyme, stir.

Add the stock and bring to a boil. Turn off heat, and stir in stuffing. Toss everything till the stuffing is mixed well, and absorbs all the stock.

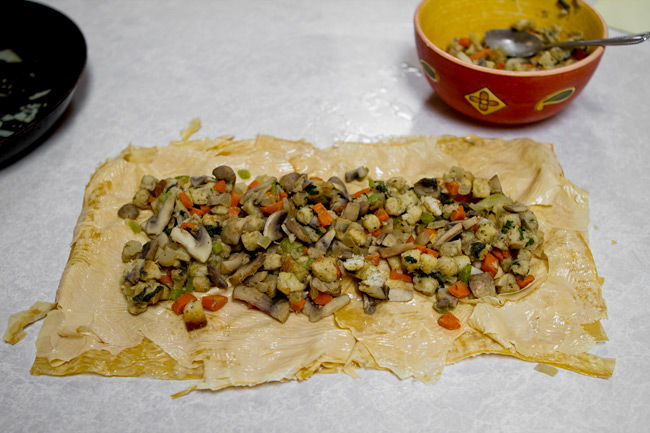
Now put the stuffing on the tofu skin layers, leaving a 1/2 inch border (see photo above). You dont have to use all the stuffing if it doesnt fit. Its ok if the stuffing is a little dry, it will moisten up when you steam the roulade.

Gently fold over the right and left sides of the tofu skins. Then pick up the longer side closest to you, and roll away from you. Keep the right and left sides tucked in as you roll away from you. Roll gently but firmly.

Place the roulade on a sheet of aluminum foil. wrap the foil around the roulade to make a log. Twist the ends closed. Repeat this with a second layer of foil.

Now the roulade is ready to steam.

Heat water in a large pot. Place a colander over the pot. Its brim must fit over the pot, but make sure the bottom of the colander doesnt touch the water.

Steaming method 1 – Put the roulade log into the colander, and cover with a lid. Bring the water to a boil, and steam on medium high heat for 1 hour or till the tofu skin is soft. Add more water to the pot as and when necessary.

Steaming method 2 - steam the roulade in a bamboo steamer. Steam till the tofu ski is tender, about 1 hour.

Steaming method 3 – this is what I used. take a skillet large enough to hold the roulade, pour 1/2 to 1 cup water in it. Bring to a boil. Place the roulade in the skillet. Cover it. Reduce heat to medium-high, and let the roulade steam, adding more water as it evaporates. Steam till the tofu skin is tender and no longer rubbery, about 1 hour.

When the roulade has steamed, removed it from the colander, and let it cool a little.

Then removed the foil wrapping.

Heat 1 teaspoon olive oil or butter in a non stick skillet. Carefully place the roulade on the skillet and sear all sides of the roulade till they are lightly golden.

Serve with red wine gravy, and kale and goats cheese mashed sweet potatoes.

Red Wine Gravy

serves about 4

Ingredients
1 cup red wine
1 cup vegetable stock
1 tablespoon flour
1 sprig of thyme, optional
1 tablespoon butter
Salt, pepper

Method
Whisk the wine, stock and flour together. Make sure there are no lumps. Add the thyme sprig. Pour into a sauce pan and simmer till the sauce has reduced to half its original volume. Whisk in the butter, salt and pepper. Strain and serve with tofu skin roulade.

Asparagus and Tempeh Stir Fry with Ginger Pearl Couscous Recipe

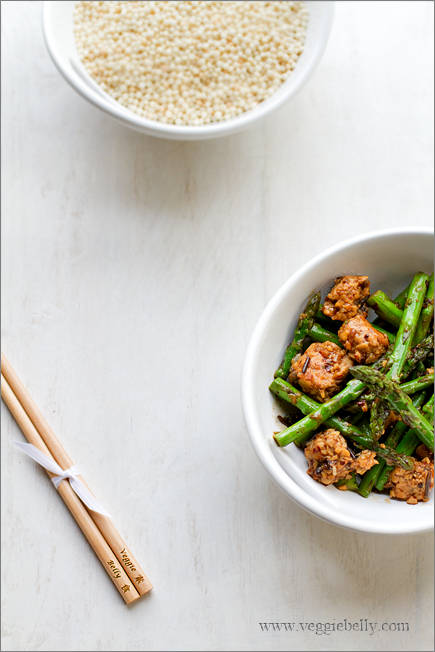
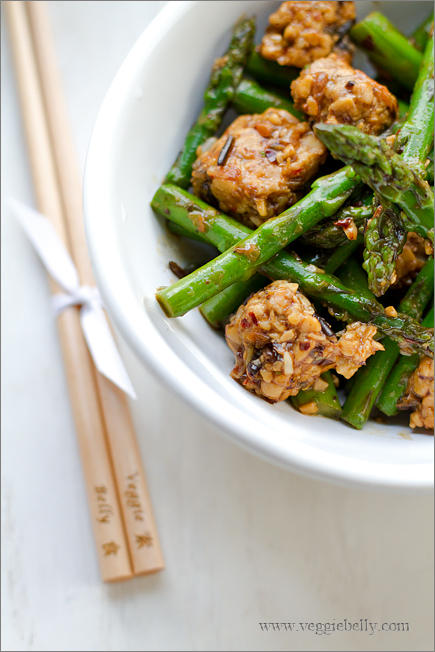
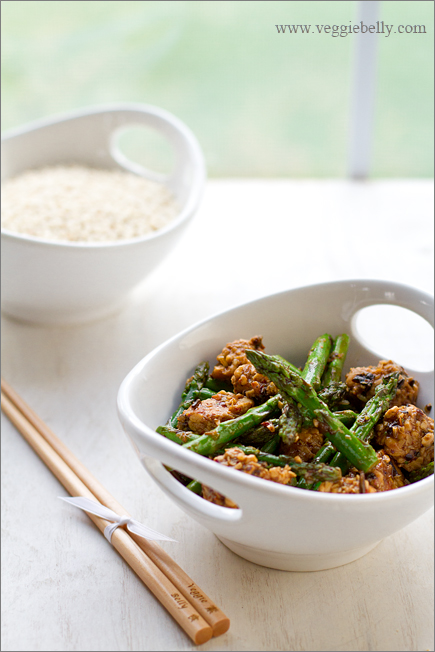
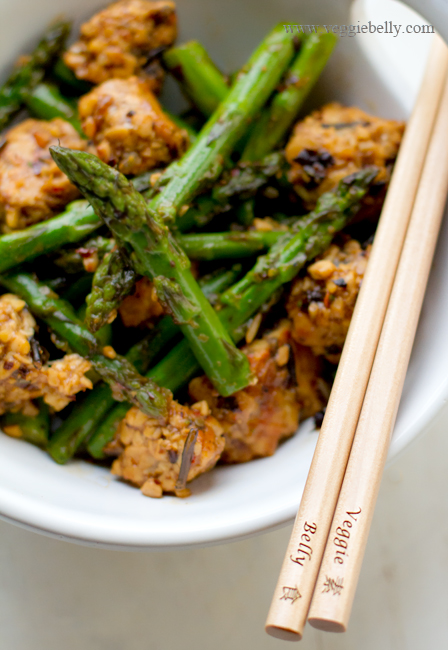
Tempeh is a fermented soy bean cake from Indonesia. Tempeh has a nutty flavor, firm texture, and is very high in protein, making it a great meat substitute in vegetarian and vegan recipes. In this tempeh stir fry recipe, I use some fresh asparagus.

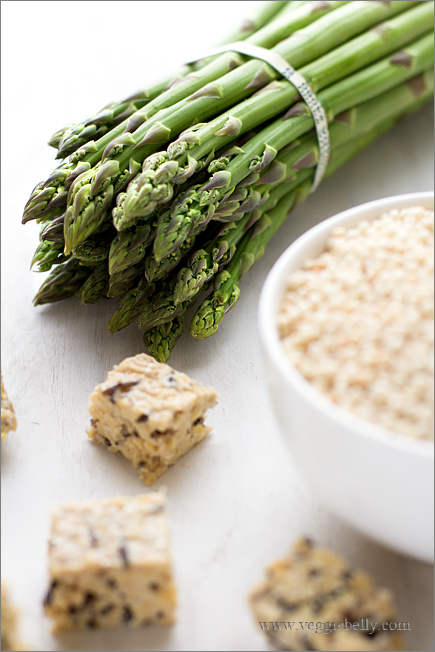
I like Light life tempehs, they have great texture and taste. For this stir fry recipe, I used Light life wild rice tempeh.

I like to serve the stir fry with a quick and simple ginger pearl couscous (also called Israeli couscous or mograbiah). Regular couscous, quinoa, orzo or brown rice with ginger will also be great.

More tempeh stir fry recipes on the web..
Broccoli tempeh stir fry recipe on Iron Stef
Another broccoli and tempeh stir fry recipe on Cate’s world kitchen
Stir fried summer vegetables and tempeh in coconut curry sauce recipe on savvy vegetarian

Asparagus and Tempeh Stir Fry Recipe

serves 2-3

1 bunch asparagus (about 35 asparagus spears)
8 oz tempeh
1 tablespoon vegetable or canola oil

For the sauce
1 teaspoon corn starch
 1/2 cup cold water
1 teaspoon fermented black beans, mashed with a fork
2 cloves garlic, chopped, optional
2 tablespoon soy sauce

Trim away the thick bottom ends of the asparagus. Then cut the asparagus spears in half. Cut the tempeh into 1 inch cubes.

In a medium bowl, whisk together the corn starch and water until there are no lump. Then add all other sauce ingredients.

Add the cubed tempeh to the bowl with the sauce. Toss well. Let it marinate for about half an hour. If you are in a hurry, you can skip the marinating.

Heat a large wok with the oil. Pull out the tempeh from the marinating liquid, and save the liquid. Add the tempeh to the wok, and sauté for 3 minutes or until the tempeh is lightly browned.

Add the asparagus spears, and stir 1 minute. Pour the reserved marinating liquid into the work, and let it boil for about a minute or till the asparagus is tender, but still a little crisp.

Serve with ginger pearl couscous.

Ginger Pearl Couscous or Israeli Couscous or Mograbiah recipe

1 teaspoon sesame oil
1 teaspoon finely minced fresh ginger
½ cup pearl couscous, also called Israeli couscous or mograbia
Salt

Heat sesame oil in a medium skillet. Add the ginger and let it sizzle for 30 seconds on medium heat. Add the pearl couscous and stir for 3 minutes or until it is lightly brown. Add 1 ¼ cup water. Bring to a boil. Reduce heat to low. Cover the pan and cook for about 10 minutes or till the couscous is done. Sprinkle with salt.

You can substitute the Israeli couscous with regular couscous, quinoa, orzo or brown rice. Just sauté the ginger and then follow the package directions on the couscous, quinoa, orzo or brown rice.

***********************************************

Like my personalized chopsticks?!

Win a pair of customized engraved wood chopsticks from www.chopchopsticks.com!

See their photo gallery for more personalized chop sticks.

To enter, leave a comment below and tell me what you would like engraved on your customized chopsticks if you won.

US residents only.

Giveaway ends Friday July 1st 2011 10pm EST.

One random winner will be picked.

Related Posts with Thumbnails