A Vegetarian Road Trip Across America. What Im Seeing, Doing and Eating Part 2

It has been an awe inspiring, eye opening trip so far and I am seeing so many breathtaking sites. Above is a picture of the magnificent Badlands in South Dakota. I wasnt expecting great vegetarian food driving through this part of the world, but I landed up discovering superb restaurants and some very unique vegetarian foods. Read on to see everything I’ve been eating and ‘cooking’ on this cross country drive.

If you’ve missed it, make sure you read part 1 of this trip first.

Notes from the Road

Total miles traveled – 3,001
States covered so far - Virginia, Maryland, West Virginia, Pennsylvania, Ohio, Indiana, Illinois, Wisconsin, Minnesota, South Dakota, Wyoming, Montana, Idaho
Cities visited - Cleveland OH, Chicago IL, Madison WI, Wisconsin Dells WI, La Crosse WI, Sioux Falls SD, Rapid City SD, Cody WY, Jackson WY, Idaho Falls ID, Boise ID 
Mood – awestruck and inspiried by what I’ve seen and experienced so far..
Observations –  Human directions are better than GPS directions; your GPS is not human.
I’m falling in love with America all over again. What a beautiful country! And driving across it is such a great way to see it
Best meal so far – vegetarian Native Indian taco at a tiny mountain cafe in Cheyenne Crossing, SD. Recipe below
Craving – Curd rice and hot masala chai
National parks and monuments visited – Badlands, Mt Rushmore, Crazy Horse, Custer State Park, Devils Tower, Yellowstone National Park, Grand Tetons
Entrance fees paid for the above - $103
Wildlife spotted - praire dog, fox, bison, elk, pronghorn, deer, lots of birds and creepy crawlies

Cutest Thing I Ever Saw

Custer State Park in South Dakota is home to the cutest donkeys ever. These little donkeys are called begging burros because they come up to passing cars and beg for food. Sometimes they wont let you go untill youve fed them. I took some bread from my hotel for them. They eat anything – donuts, pretzels, crackers. Cutest things ever!

Vegetarian Food on a Cross Country Road Trip – What I’m Eating

 I knew I was driving through the blackhills and would have to pack lunch that day. I had bought along a few Dr McDougalls vegan soup cups. The tortilla soup tasted decent.  All I had to do was add hot water to it and put it in my thermos. The soup plus and apple was a nice light lunch. What was even better was that I picnicked along a creek in the spearfish canyon, surrounded by breath taking fall colors.

The beautiful Spreafish Canyon, SD

Another time I made myself a quick vegetarian lunch on the road was in Wyoming. I was driving about 300 miles that day and was starving by early afternoon. I opened up a bag of spring mix I’d bought earlier in the city, tossed in some canned sweet corn, seasoned salt, sun chips and olive oil.

Then I drove by smallest town I’ve seen - Emblem WY, population 10 people!

I was also eating out during my trip ofcourse. A memorable meal was at the Phillips Avenue Diner in Sioux Falls, SD. I skipped the deep fried twinkie on their menu..gross. But the Salty Dog shake was heavenly – it was vanilla icecream, caramel syrup and beer nuts all blended together. It was caramely, salty and sweet.

And them something happened that every road tripper should dread. My masala dabba (Indian spice box) spilled itself all over my car’s trunk. That meant I had to take out my 2 suitcases, 7 boxes, 3 bags, 1 comforter, and 1 computer and then vaccum the whole car. Ugh! Such a pain trying to suck up all those little mustard seeds. Lesson: when you travel with a full masala dabba, tape up the damn thing!

Finding Vegetarian Food in the Land of Bison Meat


I was asked several times in South Dakota if a vegetarian eats chicken and fish. Seriously. This is the land of meat and potatoes and often that meat is bison. So how was I going to find tasty, healthy vegetarian food in South Dakota? At a restaurant that specializes in local meats ofcourse! I have nothing against non-vegetarian restaurants. They are afterall, the majority. If I can find a well constructed vegetarian meal at a Bison meat place, I am happy to eat there.

The Corn Exchange is a beautiful fine dining restaurant in Rapid City, SD that specializes in cooking with local, organic meats and produce.

Locally Grown Buffalo MeatI met acclaimed Chef and owner MJ Adams at the restaurant and chatted with her before dinner. Here are some things I asked her. (Photo of MJ with bison courtesy of The Corn Exchange.)

Sala: What is your food philosophy?
 MJ:
I take what is in season and worship the food. Somewhat like Alice Waters’ philosophy. I like to take seasonal stuff and prepare them in the simplest way possible.
 

Sala: I know there isn’t a big vegetarian culture here in South Dakota, but you always have one vegetarian entrée on your menu. How do you design your vegetarian dishes?
MJ:
I try to make it exciting. We use local vegetables like eggplant, english peas etc. We care about food and want to create dishes that people havent had before. We treat vegetarian dishes like any other entree and try to add wonderful components to them.
 

Sala: What are some of the vegetarian dishes you have served at the restaurant?
MJ:
Right now we have a vindaloo of fresh tomatoes, cauliflower and zucchini. I like doing Indian inspired dishes. We’ve previously had organic garnet yams in a coconut green curry. Another vegetarian dish at the Corn Exchange was a polenta with roasted summer vegetables like asparagus, peppers and zucchini all drizzled with basil oil.

The vegetarian entrée of the day was a fresh vegetable vindaloo topped with seared tofu. It sounded interesting, and I sat down to order it.

First came some nice bread with grass fed butter sprinkled with a touch of Hawaiian red sea salt – what a nice idea!

Next, I had a beautiful turnip soup. The turnip was local; and Chef MJ Adams sautés onions, carrots, celery, adds some sage, potatoes and turnips and cooks the soup in water. I loved the unadulterated turnip flavor of the soup.

The entrée was 2 seared tofu pieces sitting on a vindaloo of tomatoes, cauliflower and zucchini. The dish was light, and had a hint of ginger, garlic and cumin.

Native American & Other Food Finds

If you are ever in Rapid City, SD make sure you visit the Praire Edge Gallery. Their Native American art collection and souveniers are unique and interesting.

Michael, who owns Praire Edge gave me a ton of information about Native American food. One of the staples is a dried turnip (above left) that is reconstituted by boiled and eaten with meats. Wasna (above right) is a kind of Native American meat and berry patty.

Below are some more interesting food finds from my road trip..


How to Make Indian Tacos

While driving through the Blackhills of South Dakota, I stumbled upon the  Cheyenne Crossing Café. I was really hoping this charming little café (the only food place I had seen in over 50 miles of driving) would have  some vegetarian food. Not only did they have vegetarian food on the menu, they had a veggie version of their famous Indian tacos! AND they showed me how to make them!

Read on to see how the Cheyenne crossing café makes their  Indian tacos.

An Indian taco is a piece of Indian fry bread, topped with beans, meat, lettuce etc. Fry bread is the official state bread of South Dakota. It was introduced to the Native Americans by European settlers and is now a common food.

Fry bread is basically flour, baking powder and salt kneaded together with water. The dough is then rolled out and deep fried into soft, golden pillows.

Cheyenne crossing café was kind enough to let me into their kitchen and show me how they make their famous Indian taco.

The cafe uses Woodenknife fry bread mix. But you don’t need a mix. Making Indian fry bread is very easy, you just knead together flour, baking powder, salt and water. Take a look at my friend Michael’s excellent recipe for fry bread and vegetarian Indian tacos on his site, Herbivracious. 

 Chef Carol at the Cheyenne Crossing Café kneads a big bunch of fry bread dough.

Then she rolls it out into a big round.

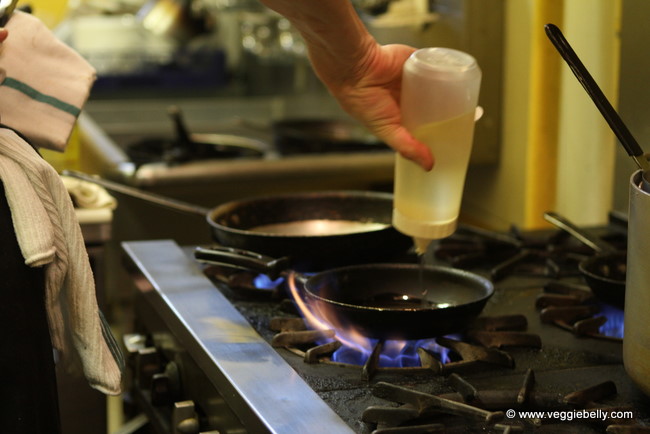
She deep fries it in canola oil untill it is puffy and golden.

The fry bread is now ready to become an Indian taco. My vegetarian Indian taco had beans, lettuce, tomatoes, olives, cheese and sour cream on top of the fry bread.

Eating my Indian taco – fry bread, beans, cheese, sour cream, lettuce. Really good and really bad (for you) at the same time!

Commonly Asked Questions About My Road Trip Across America

I’ve received many emails with questions about my road trip. People I meet along the way also seem to have similar questions for me, so I thought I’d do a little FAQ.

Are you driving alone?
Mostly. My husband came with me up to Chicago. A friend met up with me and rode with me for a few days. Other than that I am driving alone.

Are you scared?
No. I am being careful and sensible (for the most part!). There is nothing scary about driving in the US as long as you practise common sense. I dont drive at night, and I dont stay in shady places. I feel safe doing this trip. And I am having a tremendous amount of fun.

What if your car breaks down?
I drive a good, safe car that is tuned up and taken care of. I really dont expect car trouble. But I got myself a AAA membership before my trip. So if I was ever in trouble, I could call them and they will come out and help me.

Where are you staying?
A combination of hotels, friends homes, and Couch Surfing. Couch Surfing is a great idea – it connects travelers with locals who host them in their homes. I’ve hosted and been hosted several times around the world, and it has always been a wonderful experience.

Are you getting internet everywhere?
Pretty much. When I cant find a network, I use the Sprint MiFi my husband gave me. Cell phone service however, has been patchy in the moutains.

How are you processing your photos on the road?
I have my laptop with me. But my laptop doesnt have photoshop, which is the editing software I usually use. So I use Picasa to edit my pictures on my laptop for now.

Why are you driving cross country?
Read Part 1 of this series to learn more.

Rice Noodles and Vegetables in Soy Cilantro Broth Recipe

I was in Wall, a tiny little town in South Dakota. I really couldnt find any vegetarian options that I liked in town. So I decided to make myself something quick using my kettle and the vegetables I had in my cooler. Vary the amount of noodles, vegetables and seasonings however you like.

serves 1

Ingredients

8-10 pieces of dried shitake mushrooms
a handfull of rice noodles or rice sticks
2 handfulls of baby spinach
1 small carrot, chopped tiny
3 tablespoons sweet corn
1-2 soy sauce packets (saved from take out)
2 tablespoons cilantro paste (from a tube, found in the salad section of grocery store)
Red chili flakes
Garlic salt
A drizzle of sesame oil

Method

Reconstitute the mushrooms – boil water in a kettle, pour it in a bowl with the mushrooms, cover and let it soak till the mushrooms are soft. Fish out the mushrooms and reserve the soaking liquid.
Then Boil about 3 cups of water in a kettle. Place all ingredients in a large bowl, including the reconstituted mushroom. Pour boiling water over. Cover and let it sit about 12 minutes or till the rice noodles have softened. For extra flavor, add some of the mushroom soaking liquid.

Bisi Bele Bath Recipe

..a guest post by Radhika of Just Home Made

I am driving cross country at the moment, and I’ve just seen Mt. Rushmore in South Dakota! As I trek across America, I am posting a series of essays about what I’m seeing, doing and eating. Read the first one here – A Vegetarian Road Trip Across America.

While I’m traveling, I’ve asked my friend Radhika to guest post today. I cant think of anyone more qualified than Radhika to share this Bisi Bele Bath recipe with you (one of my top 10 favorite Indian foods). Radhika is a brilliant cook, and her pictures are stunning. Make sure you check out her moutwatering creations on Just Home Made. Over to Radhika for her prized bisi bele bath recipe and a post full of tips, trick and clever shorcuts..

Guest posting for Sala has been on my mind for a while. When I learned of her cross country road trip and her need for guest posts, I jumped in to email my intentions. When she replied with a ‘Yes”, my joy knew no bounds…

Sala’s blog with perfectly lit beatiful photographs had me at the first look and I was hooked ever since. She has been a virtual guru to me right from my initial days of blogging even without her own knowledge. In fact, truth be told, the very first time I shot my DSLR camera in ‘Manual’ mode (for my Ghee post) was after I read her tutorial post on “How to take food photos with a bright, white, seamless background

I am ecstatic and honored more than that to be guest posting for you, Sala.. In the words of revered saint and composer Sri Purandara Dasa’s ”Kereya neeranu kerege chelli” (kannada) which translates to “Spilling the pond water to the pond”, I dedicate this post to you..

I couldn’t have suggested a better dish for this guest post than Bisi Bele Bath recipe. Until she responded with “I Love Bisi Bele Bath, I’d kill to get the recipe!”, I had no clue she likes it that much. What more do I say than Bisi Bele Bath it is?

Don’t ask me. But if you do, (we) Kannadigas take pride in our Bisi Bele Bath (also spelled bisi bele baath, bisi bele bhath, bisi bele bhaath) recipes which we undoubtedly consider as the queen of one pot meals. As with any authentic recipe, the perfect Bisi Bele Bath is quite elusive to many.

The recipe I am sharing with you here is the answer to my own quest for the perfect Bisi Bele Bath with an intoxicating aroma and a lip smacking taste after a lot of trials and nips and tucks to a number of recipes combined into one. Be prepared to lick your fingers!

Even though the ingredient list seems long, fear not – I promise you, a tiny bit of kitchen slavery will be well worth its value in gold when this trademark signature dish of Karnataka is done..

Did you know?

Byadagi Chilli is named after the town Byadagi in Haveri district of North Karnataka. Guntur is named after the city Guntur in Andhra Pradesh. Notice how both these red chillies come from places that have hot climates averaging at least 40° C ? (about 104°F)

Mace and Nutmeg come from the same tree; nutmeg is the seed of the tree whereas mace is the delicate lacey outer orange-red covering of the seed.

 Marathi Moggu (meaning bud in kannada) comes from the buds of silk cotton tree? Wonder why it is named after Marathi though?

What you won’t find in the authentic version

  •  Aromatic/Basmati rice - Like I have said for Pongal, stick to non-sticky short grain rice. Unlike Pulao or Biryani, we do not want rice to take center stage, but rather blend in with the lentils.
  • Veggies like brinjal, okra or radish – Feel free to add any veggie of your choice. If in the name of Bisi Bele Baath, you get to incorporate different veggies into your food I’d gladly say yes. But, when you make it for a guest or a friend, stick to the list to preserve authenticity. 
  • Cumin seeds in the seasoning
  • Cilantro
  • Onion
  • Ginger/garlic

Notes:

  • Byadagi red chillies aren’t available in all the Indian grocery stores. Substitute for Byadagi – any high on color and mild in heat variety will do. For Guntur- any high on heat (usually low on color) variety will do.
  • For larger quantities, remember lentil : rice - 1.5 : 1 and rice to water ratio of 1: 4 or 5
  • Mace (Javithri) much like cloves is best appreciated in small quantities. Use it more and it can overpower the aroma and taste of the spice mix
  • Some like to add potatoes. But, I’d rather not as potatoes tend to absorb all the spices, neutralize them and impart their raw earthy taste.
  • If you want to skip making the spice mix from scratch or don’t have the ingredients, store-bought MTR Bisi Bele Baath powder is good enough for instant gratification.
  • Marathi Moggu (Kapok Buds) are not available even in Indian grocery stores where I live, so I brought a small stash on my India visit. However, I recently found that they are sold online.
  • Before peeling Chayote squash, slice of the ends; rub the cut open end with the chopped slice until the white froth ceases. This takes away the bitterness, if any. 
  • Store leftover Bisi Bele Baath mix in an airtight container either in the refrigerator or in the freezer to keep the aroma fresh.

Bisi Bele Bath Recipe

served about 4

Printable Recipe

Ingredients
1/2 cup Rice (sona masoori or any short grain rice)
3/4 cup Pigeon Peas (Toor Dal)
1/4 tsp turmeric
1/2 large Chayote Squash or Kohlrabi (Knol kohl) peeled, small diced
1 large Carrot, peeled, cut into 2″ long, 1 cm thick pieces
handful Green Beans, ends removed and broken into 1″ pieces
1/2 cup Double beans or Butter beans or green peas or a mix
1/2 large Green Bell Pepper (Capsicum), seeds removed and small diced
1 small tomato, diced
lemon sized seedless tamarind (adjust as per taste)
1-2 tsp Rasam powder* home made or store-bought
3 tbsp Bisi Bele Bath powder (recipe follows)
2 tbsp grated dry coconut (copra) or desiccated coconut
4 tsp peanut oil
salt

Ingredients for seasoning
2 tbsp Ghee or peanut oil or a mix of both
1/2 tsp black mustard seeds
1/8 tsp asafoetida or hing
1/4 cup peanuts or cashews
4 curry leaf stalks

Ingredients for the Bisi Bele Bath Powder
12 Dried red chillies – Byadagi
4 Dried red chillies – Guntur
2 tbsp Coriander seeds (dhania)
1-1/2 tsp bengal gram (chana dal)
1 tsp black gram (urad dal)
3 kapok buds (marathi moggu)
2 cloves (lavang)
1″ piece cinnamon (chakke)
2 green cardamom (elakki)
1/2 ” piece – mace / javitri / jai patre
1/4 tsp fenugreek seeds
1/4 tsp white poppy seeds (gasa gase or khus khus)
2 tbsp grated dry coconut (copra) /desiccated coconut

*optional: If you dont want to use rasam powder as listed above, dry roast these as well:
1/2 tsp cumin seeds
1/4 tsp mustard seeds
1/4 tsp whole black pepper
3-4 curry leaves

Method
Wash and soak tamarind in warm water for 10-15 mins. Skip this if using tamarind concentrate.

Wash rice well until water runs clear, drain and let soak for 10-15 mins. Soaking ensures rice to be cooked soft. When soaked, wash lentils until water runs clear. Cook lentils with turmeric and double the amount of water and rice with 2.5 times water in the pressure cooker for 3 whistles. Put lentils in lowest container. Alternately, cook lentils and rice on stove top separately until well cooked.

Meanwhile cook cut vegetables covered in a medium pot with just enough water. Add salt mid way and switch off when the vegetables are almost cooked but hold their shape well.

Squish soaked tamarind (if using) to a pulp. Discard leftover seeds and fiber.

While veggies, rice and lentil cook, in a kadai / thick bottomed skillet over medium heat, dry roast all the ingredients listed for the Bisi Bele Baath spice mix except fenugreek, poppy seeds and dry coconut, until fragrant and lentils turn golden brown. Remove onto a plate. Reduce the heat to low and dry roast fenugreek seeds and poppy seeds until fenugreek seeds turn golden brown. This will happen fast, so pay attention. Pour onto the plate with the other roasted ingredients. Switch off and dry roast dry coconut in the retained heat of the skillet until golden brown. If you are not using Rasam powder as listed above, optionally dry roast mustard, cumin and black pepper until mustard and cumin crackle and curry leaves crisp up. Remove onto the same plate and let cool. When roasted ingredients are cooled, grind them to a powder in a coffee grinder or a mixer and set aside. Do not open the lid, to keep the fresh aroma of the ground spices intact.

When cooker has cooled, whisk through the cooked lentils to mash well.

Heat oil in a heavy bottom pot and sauté diced green bell pepper. Add salt, diced tomato, stir and cook covered until bell pepper is cooked. Add the cooked vegetables along with the water, mashed lentils, rasam powder, salt, tamarind pulp and bring to a boil. Add rice to this and keep stirring to make sure it doesn’t burn at the bottom. Add more warm water to adjust the consistency if required.

Now add the freshly ground Bisi Bele Bath mix, stir well to break any lumps and simmer for 5-10 minutes. Check for taste and adjust tamarind, salt and spice mix. Switch off, sprinkle dry coconut on top and keep aside. Store the remaining Bisi Bele Bath mix in an airtight container.

For the tempering (seasoning), heat ghee/oil in a small kadai or saucepan over high heat. When the oil is hot enough, add mustard seeds. When they splutter, reduce heat to medium, add peanuts and stir until they crackle and turn a light brown. Now add asafoetida (hing) and curry leaves and sauté until curry leaves are crumbly crisp. Pour the tempering over on the piping hot Bisi Bele Bath, cover immediately to preserve the aroma and keep aside.

Serve hot drizzled with ghee and potato chips or Khara boondi on the side. Bisi Bele Bath tastes even better after several hours of making, which makes it a good candidate for a make-ahead meal.

Bisi Bele Baath shortcut method

Heat oil/ghee in the pressure cooker over medium-high heat and follow seasoning steps. Strain the peanuts and curry leaves and keep aside. To the seasoning, add diced bell pepper and turmeric and sauté for a bit. Add the remaining veggies and sauté, add diced tomato, salt, washed lentils, washed rice and stir well until rice turns opaque. Add tamarind pulp, rasam mix, Bisi Bele Baath mix, 5 cups of water and give it a good stir. Shut the cooker closed and cook for 2 whistles. When cooker cools, serve hot Bisi Bele baath with the fried peanuts and curry leaves. The only downside to this is some of the aroma is lost in the pressure cooking.

A Vegetarian Road Trip Across America. What I’m Seeing, Doing and Eating Part 1

A week ago, we rented our house in Virginia, packed our stuff into our car, and began a 3,000 mile road trip across America, to move to Portland OR. My husband is working on a project there and we have decided to make use of the opportunity to move and explore the west coast.

In a series of posts in the next couple of weeks, I will be sharing with you pictures of what I’m doing, seeing, and most importantly – eating.

Before I tell you all the yummy things I’ve been eating and cooking (yes, make shift cooking on the road!), here are some notes photos from my travels.

Notes from the Road

Total miles traveled – 1,628
States covered so far – Virginia, Maryland, West Virginia, Pennsylvania, Ohio, Indiana, Illinois, Wisconsin, Minnesota, South Dakota
Cities visited - Cleveland OH, Chicago IL, Madison WI, Wisconsin Dells WI, La Crosse WI, Sioux Falls SD, Wall SD
Mood – grateful and excited
Random thoughts – South Dakota is huge and empty. Cruise control is your friend.
Best meal so far – Mushroom stroganoff at the Cheese Factory restaurant, Wisconsin Dells, WI
Craving – nothing

Madion capitol building, Wisconsin

A gigantic Marylin Monroe statue in Chicago

The bean cloud, Chicago

Chicago river

Le Colonial French Vietnamese restaurant, Chicago

Vegetarian Food on a Cross Country Road Trip – What I’m Eating

I’m eating at some amazing restaurants across America. Here is a sampling.

West Side Market, Cleveland Ohio

Peruvian blue potatoes featured twice at the Mexican stall.

Tons of vegetarian pastas! We got a carrot, celelry + apple juice at the juice stall.

I was drawn to the Mexican stall at the market, and got these portobello and caramelized onion enchiladas for lunch.

Doing crepey things in the car. Strawberry+nutella=heaven

Farmers Market & the Best Vegetarian Meal I’ve Had. Madison, Wisconsin

The farmers market outside the capitol building in Madison was just lovely. The whole square was buzzing with activity.

Clockwise from top left: fresh ginseng, pom pom mushrooms, cheese curds, more cheese curds..drool!!

I am no longer a cheese curd virgin! I tried my first cheese curds at the farmers market in Madison. Oh my god, they were so tasty. Chewy, and incredibly flavorful. I also tried deep fried beer battered chees curds (below) at the Old Fashioned restaurant in Madison, they were great but I think I prefer the plain cheese curds.

The best soup I’ve ever had – Wisconsin beer and cheese soup garnished with pop corn. What a great idea! Whoever thought of putting beer and cheese together in a soup is a genius.

Brandy vinaigrette for my salad – creamy, tangy and unique.

They put mac and cheese on a pizza! I didnt actually eat this piiza, but I walked by a family who were enjoying it and asked to take a picture becasue ive never seen anything like it before!

After an amazing meal at the Old fashioned restaurant in Madison, we walked around sightseeing, and then headed north to Wisconsin Dells in search of the Cheese Factory restaurant. Rachael Ray has been here and a lot of sources highly recommend it. I wasnt disappointed at all. I had the best meal of this trip here – a mushroom stroganoff – satisfying, and full of umami. The restaurant has a nice homely feel to it, the food is hearty and the flavors are clean.

I HIGHLY recommend the Cheese Factory Vegetarian restaurant in Wisconsin Dells. It serves some of the best vegetarian food I’ve had recently.

I started with the rattlesnake tofu – two fingers of marinated tofu, grilled to a smokey flavor, served with spicy beans and fresh homemade barbeque sauce.

..and this my friends was the best dish I’ve had recently – an incredibly flavorful mushroom stroganoff full of super fresh mushrooms. I am drooling now just thinking of it!

Chicago – Stunning Architecture and Elegant Restaurants

Frontera Grill in Chicago was everything I imagined it to be. I loved the food and decor. I am a huge fan of Rick Bayless, and was so excited to eat at Frontera! Above: I’m digging into my wood fired mushroms, achiote rice, guacamole, home made corn tortilla, tomatillo salsa and tomatillo and roasted chipotle salsa. To the right is my drink, agua de jamaica (hibiscus juice) and nuts (peanut, pumpkin, fava beans) roasted with guajillo chile

Hongos chipotlados at Frontera – wild mushrooms, smoky creamy chipotle, squash and fried kale. All served with the softest homemade tortillas I’ve ever had.

More mushromy goodness at Frontera – wood fired mushroom tacos with achiote rice and guacamole

Our dinner that night was at a beautiful little French Vietnamese restaurant in Chicago called Le Colonial

Vietnamese rice paper rolls and plum dipping sauce

Banh Pho Xao – Rice noodles with soy sauce, chili garlic oil, tofu, and bean sprouts

They had a whole vegan vegetarian menu, I was beyond thrilled!

We ended this wonderful meal with a coconut macaron and vanilla ice cream.

I have never met a deep dish pizza I’ve liked. But I couldnt come to Chicago and not try a deep dish pizza pie. This Chicagoan delicacy in a very thick pizza with a ton of cheese, topped with another crust and then pizza sauce. Its sort of like an inside out pizza.

We ordered take out from the famous Giordanos pizza, because we were tired from a day of walking around and wanted to eat in our hotel room.

It was ok, and I dont see whats so famous about it. Maybe the pizza didnt taste as good because it was take out. But I didnt like the cheese, crust or the sauce. Besides it was too heavy. I prefer my thin crusts.

Making Vegetarian Meals on the Road – How I Prepared

As you can see, I’ve found some incredible places to eat all across America. But I don’t want to live on outside food alone while I’m traveling, so I am also making myself fresh, simple meals on the road – need to keep that digestive system happy!

I could drive across this country and live on pizza and fries. But I’d be miserable if those were my only vegetarian food choices while traveling 3,000 miles. So I decided I should eat as much fresh, tasty vegetarian food as I can on this road trip. And sometimes that means making it myself.

There have been some places on this trip where the only vegetarian food I could get at local restaurants was a salad. There have been other times where I have driven 400 miles and stopped in the middle of nowhere, tired and starving. At these times, I was able to open up my cooler and easily make myself a quick, healthy vegetarian meal or snack.

A few things that I packed:

- Cooler and some gel ice packs so I can store salad, baby spinach, fresh fruits etc. I’m so glad I did, because this cooler has come in very handy!
- Snacks and nuts (great on their own or in a salad made with cooler contents)
- Condiments and seasonings like sesame oil, pesto and Italian seasoning
- Soy sauce, red pepper flakes, salt and pepper packets all from take out. Their little size is perfect and far less messy than using a huge bottle of soy sauce in a rest area
- Couscous,  it cooks in no time and all you need is boiling water
- Rice noodles,  all it needs is a soaking in boiling water
- Instant rasam paste to satisfy that Indian food craving on the road
- A kettle so I can quickly make couscous, rice noodles or instant soup or rasam
- Disposable plates, cutlery, napkins
- A thermos for taking instant soup in the car

Salad Wrap – On the Road Snack Recipe

makes 1 wrap

We were driving in Ohio and stopped at a rest area where I quickly made a few of these wraps for a snack. We ate this along with some carrot and celery sticks, cheese cubes and pretzels

Ingredients
1 stone ground wheat wrap or tortilla
1-2 tablespoons hummus
1 tablespoon pesto
A few olives
2 hand fulls of salad leaves

Method
Spread the hummus and pesto on the wrap. Scatter some olives on top. Then add the salad leaves. Roll it up.

Red Moong and Butternut Squash Eriserry Recipe – a Guest Post by Rose of Magpies Recipes

Greetings from the windy city! I am on a cross country road trip right now (posts and pictures coming soon!) and have stopped in Chicago for a day. I have enlisted some of my favorite bloggers to bring you their recipes, while I’m driving 3,000 miles cross country! The first post in my guest post series comes from Rose of Magpies Recipes. Rose is from the state of Kerala, and her blog is full of Kerala recipes cooked with love. I am a huge fan of malayali cooking, and this red moong and butternut squash eriserry (a curry with coconut) is one of my favorites. Take it away Rose!


I am a huge fan of Sala’s gorgeous photographs and wonderful writing as much as I am her warm wonderful personality. When I heard that she was going on a cross country road trip and was wanting guest posts for her awesome blog Veggie Belly,  I sent off a mail to her saying I would love to guest post for her lovely blog, although I have only a few days of packing left to do to head off to India myself! Yes am so excited and just cannot wait to be  home. Am especially longing to introduce my little monkey to my grandmother who is just waiting to meet her first great-grand son!

I was thrilled when Sala very kindly said she would love if I did. Thank you Sala! I hope you are enjoying your trip. Since Sala loves Kerala food, I am sharing one of my favourite everyday Kerala dishes, Red Moong and Butternut Squash in Coconut curry (Van Payar Mathanga Eriserry). It is a simple yet comforting and delicious. And perfect for the transition to the fall season, although here in California we still have a few weeks of intense summer left!

While I come from a Syrian Christian family of big meat eaters I also love my veggies and lentils and am married to a lentil lover as well. T can go for weeks on just cherupayar or dal and for everyday eating we are most happy with such simple fare.

Eriserry is a typical Kerala lentil dish and is often part of the Onam Sadhya or harvest festival that happens in the month of September. In Kerala it is usually made with a variety of pumpkin available there, although here I make it with squash or even sweet potatoes. Traditionally fresh coconut is ground into a paste but I use the convenient frozen shredded coconut that is easily available in most Indian grocery stores here. Of course there is a difference in taste but this makes it a very easy dish to make.

Red Moong and Butternut Squash Eriserry Recipe (Van Payar Mathanga Eriserry)

serves 4-6

Ingredients
1 cup dry red moong beans or cow peas  (van payar)
2 cups butternut quash peeled and chopped (you can also use sweet potatoes. But mathanga or Indian pumpkin is traditional)
1-2 tablespoons coconut oil or canola oil
1/2 teaspoon mustard seeds
1/2 teaspoon cumin seeds
1/4 teaspoon turmeric powder
1 teaspoon dried chilli flakes or 3/4 tsp chilli powder-3/4
4-5 curry leaves
1 medium onion, chopped
2-4 cloves garlic, sliced thin (optional)
1 cup coconut Milk
1/4 cup shredded coconut. Do not substitute desiccated coconut 
Salt to taste

Method
Wash the red moong beans or cow peas and leave to soak in water while you prepare the rest of the ingredients. You can also soak them overnight so that they cook faster.

Pressure cook the beans with 2.5 cups of water and salt until they start to become soft ( about 1 whistle and 7 mins on simmer). Once the pressure has released, open the pressure cooker and add the squash and cook for about 2 more whistles until the beans are soft and the squash is fork tender.

If you don’t have a pressure cooker, you can just cook beans and squash in a deep pot instead, but this will take longer.

Meanwhile in a seperate pan or skillet heat the oil and add the mustard seeds and cumin seeds and let them splutter
Now add the turmeric powder, chilli flakes and curry leaves and the chopped onion and garlic if using and stir occasionally until the onions are translucent and starting to turn brown.

Add the shredded coconut and saute until the coconut turns lightly golden.

Add this to the cooked beans and stir well to combine. Heat and let it come to a boil for about 5 mins. Reduce the heat to low and add the coconut milk and let it simmer for about 5 mins. Taste to check the salt and add more if required. Do not let it come to a boil after adding the coconut milk as the coconut milk will curdle.

Serve hot with rice, fried pappadam and pickle. For extra points, serve some sweet payasam for dessert!

Lauki Thepla – Spiced Indian Flat Bread Recipe


Theplas remind me of long train journeys in India. Because this spiced Indian flat bread keeps so well, it is perfect to take along for a trip. We wrap them in thin cloth towels and munch on them on our train as we watch the country side go by. Theplas are also ideal for picnics because they dont need refrigeration.

You can make theplas with or without oil. But the oil less ones wont keep as long. If you want to make theplas without oil, just put one on your skillet, and then press a bundle of cloth on it, dabbing it everywhere (see picture below). This will distribute the heat and cook the theplas evenly.

If youve never made thepla before, it might take a bit of practise to get the dough right. You will need to vary the amount of water you use depending on how much water content your lauki has. But in general you need very little water for this recipe – just a few sprinkling. The lauki will release enough water when kneading to make a nice, soft dough.

For a great variation on this lauki thepla recipe, add grated radish or fresh methi leaves to the dough. You will need to use a little more water when kneading if you use grated radish or fresh methi leaves.

Lauki Thepla – Spiced Indian Flat Bread Recipe

makes 20 theplas

Ingredients
3 cups wheat flour (atta)
2 tablespoons vegetable oil
3/4 teaspoon or according to taste, salt
1/2 teaspoon turmeric powder
1/2 teaspoon ajwain (carom) seeds
1 teaspoon white sesame seeds
6 green chilis, or according to taste, ground into a paste
1/2 teaspoon ginger paste
1/2 teaspoon garlic paste
1 cup grated lauki (bottle gourd). Substitute with grated radish or fresh methi leaves
3 tablespoons yogurt
1/4 cup or more, chopped cilantro
a small bowl of water

Method
Place all ingredients except the water in a large bowl. Knead for about 1 minute. Sprinkle a little (about 1 tablespoon) water and knead 10 times. Sprinkle a little more water and knead again. Continue kneading and sprinkling water when needed till the dough is no longer sticky and has formed a soft ball. It should take approximately 5 minutes of kneading for the dough to reach this stage.

Remember: You may need to use a little more or less water depending on how ‘watery’ your lauki or bottle gourd is.

Roll out the thepla dough into a long log. Cut the log into 20 even pieces. Form each piece into a ball.

Place a ball of dough on a flat surface. Using a rolling pin, roll it out like you would a chapati. Sprinkle flour on the thepla as when needed so it doesn’t stick.

Heat a heavy skillet, griddle or tava. Place the rolled out thepla on it. Cook till brown spots appear, about 45 seconds. Turn the thepla over, pour 1/4 teaspoon oil around it and let it cook till golden on both sides.

Repeat for all the dough.

Store Lauki Thepla in an air tight container for upto 1 week. It will also freeze well.

Chettinad Meal Maker Curry Recipe

Chettinad is a region in South India where many of my ancestors come from. It is a dry, arid land inhabited by a devout and enterprising people. And the food is simply sensational. There is no greater pleasure than eating at a chettinad wedding! Chettinad cuisine uses an abundance of spices like cumin, fennel, fenugreek, star anise, poppy seeds, chillies, tamarind, shallots, coconut and curry leaf. This chettinad meal maker curry is inspired by my heritage.

Nemam Koil, our clan temple in Chettinad

Chettinad is famous for its palatial ancestral homes. This house in Kothamangalam is now Saratha Vilas hotel.

Chettinad homes are generally famed for their non vegetarian food. But you can easily enjoy the flavors of this region with this vegetarian, vegan recipe. Meal maker or Nutrella are Indian brands of soy protein that are quite meaty in texture. I used Indian meal maker in this recipe. Feel free to use any kind of dried soy chunk or granule product. TVP, TSP, soy chunks, soy granules, or even seitan will work.

This chettinad meal maker curry recipe is easily adaptable to different tastes, use only vegetables (cauliflower is nice) or adjust coconut milk however you like. You can use more or less chillies according to your preference.

Chettinad Meal Maker Curry Recipe

(A Spicy Curry using TVP, TSP, Meal Maker, Nutrella or Soy Chunks)
Serves about 4

Ingredients
1 cup dry soy chunks/Meal Maker/Nutrella/TVP/TSP*
1 tablespoon oil
½ teaspoon black mustard seeds
¼ teaspoon cumin seeds
6 curry leaves
1-3 green chillies, slit. optional
½ medium onion, chopped
3 garlic cloves, cut into slivers
2 small tomatoes, chopped
1 recipe masala powder, see recipe below
½ teaspoon ground turmeric
1 cup coconut milk
Salt

*Soy chunks like Meal Maker and Nutrella are easily available at Indian stores. TVP/TSP granules are available at the regular grocery store.

Method
Rehydrate the soy chunks (meal maker) or granules according to package instructions. This usually involves boiling a small pot of water with a little salt, boiling the soy chunks in it, then letting them soak in the boiling water (10 minutes for soy chunks, less for granules – read the box instructions). Drain the soy chunks or TVP granules, and squeeze out as much water as you can. Set the re-hydrated soy chunks or TVP granules aside, and proceed with the recipe.

Heat the oil in a medium saucepan. Add black mustard seeds and let them sizzle. Then add cumin and stir for 30 seconds. Add curry leaves and chillies, stir again. Then add onions, and sauté on medium-low heat for 3 minutes, or till the onions have softened. Now add the garlic and tomatoes. Continue to cook on medium-low heat till the tomatoes are very soft, about 6 minutes.

Add the ground masala powder (recipe below), turmeric, and salt, stir for a minute.

Add re-hydrated, squeezed soy chunks/meal maker/nutrella/TVP/TSP and pour in 2 cups water. Bring to boil. Continue boiling for about 5 minutes.

Pour in coconut milk and cook stirring for about 2 minutes. Taste the curry, if it is too spicy for you, add more coconut milk.

Garnish with chopped cilantro. Serve hot with rotis, chappatis, tortillas, or steamed rice.

For the masala powder
Ingredients
1 tablespoons coriander seeds
1/2 tablespoon cumin seeds
1/2 tablespoon fennel seeds
1 small dried red chili, optional

Method
In a small, heavy skillet on low heat, toast each of the ingredients one at a time. Roast each spice for about a minute, or till it lightly turns color and gets fragrant. Let the toasted spices cool a little. Then place in a coffee grinder and grind into a fine powder. Make sure there are no unground pieces.

Pineapple Semolina Pudding (Pineapple Kesari) Recipe

When I need a quick fix dessert recipe, I always resort to kesari – a semolina pudding with ghee, cashewnuts, and saffron. The ghee, nuts and saffron make this dessert exotic and special; but nobody will know you only spent 15 minutes making it!

I am delighted with this variation on regular kesari (also called sooji halwa). Pineapple juice adds a hint of fruity flavor to kesari, making it unique. Be sure you read my note on sugar** before you make this recipe.

Pineapple Semolina Pudding or Pineapple Kesari Recipe

serves about 8

Ingredients

4 cups fresh or canned pineapple juice*
1/4 cup + 2 tablespoons ghee
1/2 cup cashewnuts
1 cup semolina (rava or sooji)
1 cup sugar**
a pinch of saffron threads

* To make juice from fresh pineapple, blend 2 cups chopped fresh pineapple, with about 3 cups water to make a puree. Strain the juice, and measure out 4 cups.

**This will make a not-too-sweet dessert. If you want it sweeter, feel free to use more sugar, but keep in mind that how much sugar you need will vary slightly depending on how sweet your pineapple is. You may need to use less sugar if you are using canned pineapple juice.

Method

Heat a heavy bottomed wok or saucepan with 1/4 cup ghee. Add cashewnuts and fry on low heat till the nuts are golden. Using a slotted spoon, remove the the cashews from the ghee and place in a bowl.

Add semolina to the ghee. Stir on medium-low heat for about 3 minutes or till the semolina is toasted. Remove the semolina into a bowl. Wipe the pan clean.

Pour in pineapple juice and sugar. Bring to a boil. Boil for 1 minute. Reduce heat to low, and add the toasted semolina. Cook, stirring constantly on medium heat, till the pudding thickens – about 5 minutes. Cooking time will vary depending on how coarse your semolina is.

When the pudding starts to thicken, add 2 tablespoons ghee and stir. Remove from heat. Stir in fried cashew nuts.

Sprinkle saffron on top.

Vegetable, Paneer and Pasta Bake Recipe

I always enjoy the time I spend with my cousin Meena. She is such a pleasant and genuine person, and the time we spend together is always special. When we met last week (after more than a year!), we spent lazy afternoons gossipping, playing pallankuzhi, and cooking.

 This delicious vegetable, pasta and paneer bake recipe comes from Meena. She makes this vegetarian bake recipe for her post-swim meal. It is filling, and delicious without being heavy.

Meena didnt use cheese in this recipe, to keep it on the lighter side. But you can add some cheese on the top before baking. Vegans can use soy milk and tofu cubes instead of paneer (althought, I havent tried making the vegan version of this bake).

Meena microwaves the bake, which makes things very quick and easy. You can bake it as well, see instructions below. Remember, all the ingredients here already cooked – you only want to bake or microwave this dish just till the sauces bubble and the mushrooms cook.

Thanks meena, for your precious friendship, and for this delicious recipe that I know I will be making again and again.

There are multiple steps in this recipe, but dont let that put you off. Its well worth the effort. And you can make a big batch of this vegetable, paneer and pasta bake and freeze it.

Watch a step-by-step on how to make vegetable paneer and pasta bake

Vegetable Paneer and Pasta Bake Recipe

serves 3-4
Ingredients for the vegetables & paneer
6 oz paneer (substitute with drained, pressed, firm tofu)

3 cups fresh spinach, tightly packed
3.5 oz white button mushrooms (about 15 medium sized mushrooms)

Method
Cube the paneer and set aside.

Wash the spinach, and chop it. Place the washed, chopped spinach on a small wok. Cover it with a lid. Heat the wok on low heat, just untill the spinach wilts. Then remove from heat and sprinkle a little salt. Set aside.

Wipe the mushrooms clean with a paper towel. If the mushrooms have too much dirt, wash them in water, and drain well.

If the mushrooms are large, cut them in 4, if they are small, cut them in half. Set aside.

Ingredients for the pasta
1 1/2 cups cooked pasta*, such as elbow macaroni, shells, fusili, or penne
*Make sure the pasta is cooked al dente – it should not be over cooked or mushy.

Ingredients for the tomato sauce
4 small tomatoes
1 small onion (1/4th cup when chopped)
4 garlic cloves
1 tablespoon olive oil
1/4 teaspoon dried Italian seasoning
Salt & cracked pepper

Method
Core the tomato, chop it roughly and puree it in a blender.

Peel and chop the onion and garlic finely.

Heat olive oil in a small skillet. Add the chopped onion and garlic. Saute on medium heat till the onion gets translucent, about 2 minutes.

Add the pureed tomatoes and 1/4 cup water to the skillet. Bring to a boil. Now add Italian seasoning, salt and pepper. Let the sauce gently boil, till it thickens a little, about 3 minutes.

Ingredients for the white sauce
1 1/2 tablespoons olive oil or melted butter
1 1/2 tablespoons all purpose flour (maida) or wheat flour
1 cup room temperature or cold milk, preferably whole milk
1/4 teaspoon or to taste, dried Italian seasoning
Salt and cracked pepper

Method
Place the oil or butter in a non stick sauce pan (without heat). Sprinkle the flour over the oil or melted butter. Using a whisk, stir the flour into the oil or butter to incorporate. Place the pan on a stove over low heat. Immediately, pour in milk. Whisk again till the flour dissolves.

Increase heat to medium. Cook the sauce, whisking constantly, till the sauce thickens, about 2 minutes. Now add Italian seasoning, salt, and pepper. Turn off heat.

To assemble and cook the vegetable paneer and pasta bake

Take a medium baking dish, about 8 inches in diameter. Line the bottom with the paneer cubes. Layer the wilted spinach on top of the paneer. Pour the tomato sauce all over. Next, pour the white sauce. Arrange the mushrooms and pasta on top of the white sauce.

Optional step: sprinkle 1/2 cup grated cheddar or mozzarella cheese on top. Meena didnt use cheese in this recipe.

Place the bake in a 400 f oven and bake for 15 minutes or till the sauce is bubbling. If you are baking this in the oven without cheese, you need to pour the white sauce on top of the pasta, so that the pasta doesnt dry out in the oven.

Alternatively, microwave the bake on full power for 5-8 minutes or till the sauce bubbles. Microwave ovens vary.

Serve warm with a green salad.

Related Posts with Thumbnails