I learned this recipe from Veena aunty, my mother’s friend in India. She is such a fantastic cook, and always so eager to teach others her recipes. I always learn new recipes from Veena aunty when I’m in India. I’ve adapted and simplified the original recipe I learned.

After you try this easy eggless chocolate pudding recipe, you won’t be buying that boxed stuff anymore! The great thing about this recipe is that you can use anything from 2% milk to whole milk. And you can vary the sugar to your liking.

Tips for a fool proof eggless chocolate pudding
- Cornstarch as well as cocoa powder will form lumps easy. To avoid this make sure the milk is at room temperature
- If there is a big temperature difference between the cornstarch mixture and whatever it is going into, it will form lumps
- Despite taking precautions, if your cornstarch mixture does form lumps, you can easily rectify it by passing the mixture through a strainer and breaking up the lumps using the back of a wooden spoon
- Make sure you use standardized tablespoon and cup measures for this recipe
- The pudding will form a thin skin as it cools in the fridge. I quite like this pudding skin. But if you don’t, cover the pudding cups with plastic wrap so that the plastic wrap is directly touching the surface of the pudding. Then refrigerate. This will prevent skin formation
- My recipe calls for unsweetened cocoa powder. If you decide to use sweetened cocoa powder, reduce the sugar in this recipe by half. When the pudding is cooked, taste it, and add more sugar according to taste.
- Cornstarch brands differ in ‘strength’. So you may get a slighter thinner or thicker pudding than mine. But it will still taste the same.

How to prevent chocolate pudding from sticking to its cup
Have you ever had a chocolate pudding and the only way to get all of it was to scrape the sides of the dish? Pudding, because of its consistency has a tendency to stick to the sides of its dish. This can make cleaning up a pain. The solution is simple. I learned this great little tip from Veena aunty, my mother’s friend.
Wet the insides of the pudding serving dish with water. Then pour in the pudding to set. The wet inside surface of the dish will keep the pudding from sticking to the dish, and cleaning it will be a breeze!

Above: see what I mean? The pudding comes away from the inside of the cup easily!

More eggless chocolate puddings..
My friend Radhika’s eggless chocolate pudding recipe on Just Home Made
Smitten Kitchen’s chocolate pudding recipe using melted chocolate

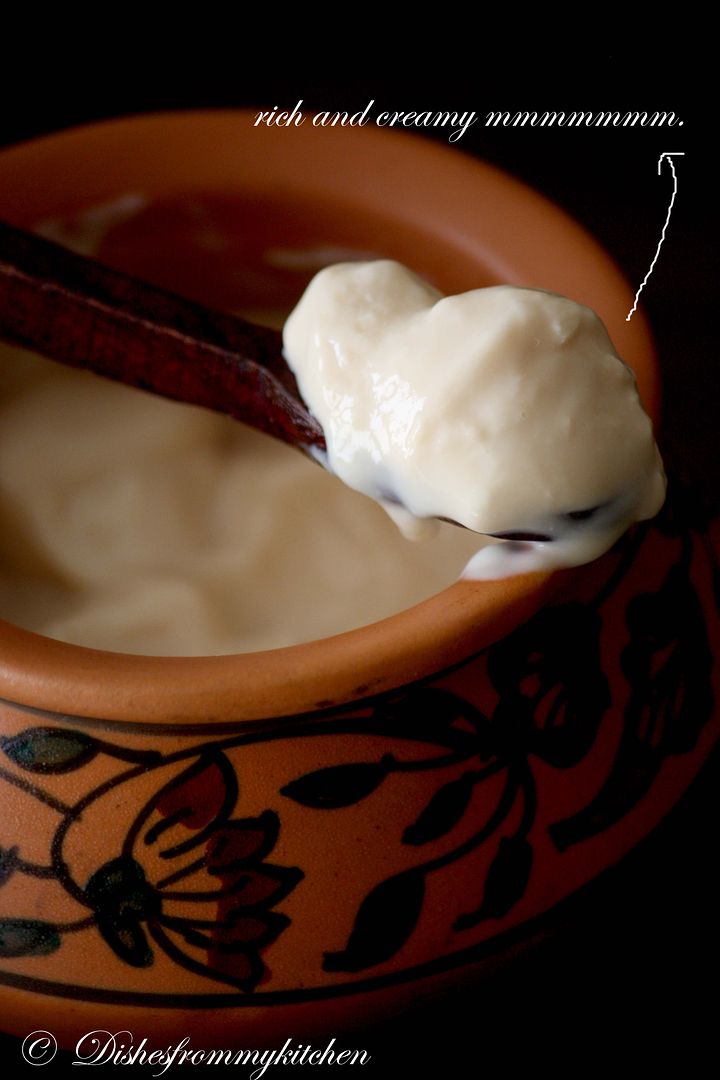
Easy Eggless Chocolate Pudding Recipe
serves 2-3
Ingredients
2 ¼ cup milk at room temperature, anything from 2% to whole milk is fine
2 tablespoons cornstarch (corn flour)
2 tablespoons unsweetened cocoa powder, I like Ghirardelli
½ cup sugar
½ teaspoon vanilla extract
Make sure the milk is at room temperature. If you are using cold milk, place it in a medium saucepan and heat on low, till it reaches room temperature. Dip your finger into the milk, it should not be too hot or too cold.
Place the corn starch and cocoa powder in a bowl. Pour approximately half the room temperature milk into the bowl. Using a fork or small whisk, whisk well till the corn starch and cocoa powder dissolve into the milk and form a slurry. Try to break up any lumps, but if some lumps are remaining, that’s ok. Set the slurry aside.
Add the sugar and vanilla extract to the other half of the milk. Cook on medium heat till the milk gets hot and steamy, but not yet boiling – about 5 minutes.
Place a strainer over the saucepan with the hot milk. Pour the cornstarch and cocoa slurry through the strainer.
Using a wooden spoon, push the cornstarch cocoa slurry through the strainer. Break up any lumps and push them through. Make sure you scrape up the underside of the strainer so that you get all the slurry.
Using a whisk, whisk the pudding so everything is well blended. Keep whisking till the pudding boils. Let it boil, while whisking, till the pudding thickens and gets glossy, about 1 minute.
Turn off heat and taste the pudding. If you would like it to be sweeter, add more sugar now, and whisk well. Remember that the hot pudding will always taste slightly sweeter than when it is cold.
If you feel the pudding is too thick, you can whisk in a little more room temperature milk at this point. Remember, the pudding will get firmer once it cools.
Take 2 individual serving cups. Fill them with water. Pour out the water. This will wet the insides of the cups and prevent the pudding from sticking to the insides, making washing up easier.
Pour the hot pudding into the 2 wet cups, dividing it equally. Cover with foil and place in the refrigerator to cool. When the pudding is completely cold (about an hour), it is ready to serve.
Top with roasted nuts, shaved chocolate, whipped cream or fresh fruit.

 Last week, we went blueberry picking in Blue Bee Farms in Sauvie Island, Portland. It was a wonderful, relaxing evening picking blueberries with friends and enjoying the Portland summer. Before we knew it we had picked 50 pounds of blueberries! Blueberry recipes were already starting to pop up in my head! I thought I should make lassi, an Indian fruit and yogurt drink, with a batch of blueberries before I froze them for later use. Then I got a better idea. Blueberry lime lassi popsicles! They are easy to make and a unique frozen treat for a warm day.
 If you don’t have popsicle molds, you can still make these popsicles. Simply the pour the lassi into paper cups and freeze them. Then when they are half frozen, stick a spoon in the middle. When you are ready to eat, tear away the paper cup, and wrap the spoon in a paper towel so it doesn’t get too cold to hold.
 I cooked the blueberries in sugar briefly. But this step is optional. You can also simply puree all ingredients, uncooked, and feeze them. See the recipe below for the no-cook variation. I’ve tried a dairy-free version of this recipe, using coconut milk instead of yogurt and that was very tasty as well.