Chocolate Sponge Cake Rolled with Chestnut Cream – a Guest Post

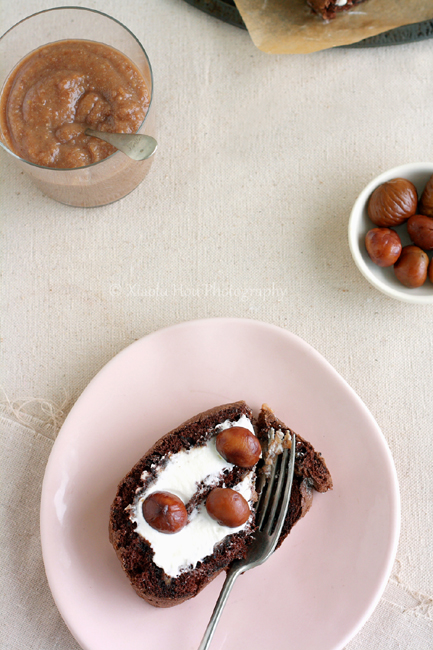
Today’s recipe for this chocolate sponge cake rolled with chestnut cream comes in the form a guest post by my friend, the amazingly talented Xia0lu of  6 Bittersweets blog. I tasted this cake when she made it, and I was blown away. I had no idea chocolate and chestnut could be so delicious! I’ve also tasted Xiaolu’s incredibly creative black sesame and mochi macrons - another testament to her baking skills! Infact, im so in love with anything she bakes, I ordered Xiaolu’s chocolate and red velvet cupcakes for my husband’s surprise birthday party. Needless to say, they were a huge hit. You can order her baked goodies here.

I was thrilled when Sala invited me to guest post on her blog. Not only because I was excited at the opportunity to contribute to her diverse collection of mouth-watering recipes and stunning photos. But also because she has become a dear friend to me in a short period of time. Starting with an early exchange in which she readily shared photography tips with me, Sala has been nothing but fun, warm, and generous through all of our interactions. I’m really glad that we live near each other, so we’ve been able to become friends in person and not just online. Thank you, Sala, for being a great friend, and thank you all as well having me here today!

I’ve always held a fascination for chestnuts. On one hand because they seem so sophisticated and European to me, especially in French desserts like Mont Blanc. On the other hand because they remind me of my early childhood in China. I recall smelling the fragrance of freshly roasted chestnuts as a little girl and growing excited anticipating the delicious stew of vegetables, meat, and chestnuts to come.

For today’s treat, I have chosen the more sophisticated route with a cake roll that is simple yet elegant. Though I’m more accustomed to using natural cocoa in my baked goods, the milder flavor of Dutch-process cocoa is preferable here, as it leaves the spotlight to the real star of the show: the chestnut cream. I particularly enjoy that this cake is light on the tongue, leaving you satisfied but not weighed down. If you’re looking for less conventional way to enjoy your chocolate cake, I hope you’ll give this a go =).

Chocolate Sponge Cake Rolled with Chestnut Cream Recipe

[Printable Recipe]

Adapted from Gourmet Traveller

Serves 6 to 8

XIAOLU’S NOTES: The homemade chestnut puree recipe makes more than you will need for this recipe. Extra puree can be refrigerated for up to 2 weeks and frozen for up to 1 year.

4 large eggs, room temperature
1/2 cup white sugar (preferably extra-fine/caster)
1/2 cup MINUS 1 Tbsp (65 g) cornstarch
5 Tbsp (35 g) Dutch-process cocoa, plus extra for dusting
1 Tbsp all purpose flour
1 tsp cream of tartar
1/2 tsp baking soda
3 1/2 Tbsp unsalted butter, melted and cooled
1 cup PLUS 2 Tbsp heavy cream
1 1/2 Tbsp powdered sugar, sifted
1 cup sweetened chestnut puree (Recipe below OR storebought is fine)

Preheat oven to 350 degrees F. Grease the base and sides a 12 x 16 3/4-inch jelly roll pan and line with parchment paper, cutting into the corners to fit and allowing the parchment to hang at least 3/4 inch past the tray’s edges.

Whisk eggs and sugar using an electric mixer until thick and pale (about 5 to 6 minutes). Sift cornstarch, cocoa, flour, cream of tartar, and baking soda together into a separate bowl. Then gently fold dry ingredients into the egg mixture with a spatula. Fold in butter.

Spoon batter carefully into lined pan, smoothing the top with a spatula. Bake in the middle rack of the oven until the cake springs back when lightly pressed (10 to 12 minutes). Remove from oven and carefully turn cake out onto a tea towel lined with fresh parchment paper. Peel off the other parchment paper from the cake. With the short side facing you, roll the cake within the tea towel to form a log. Let stand until just cool (8 to 10 minutes).

Whip heavy cream and powdered sugar until soft peaks form (refrigerate if not using immediately). Unroll cake and spread it with an even layer of chestnut purée, then spread only the 1/2 of the cake closest to you with cream, leaving a 3/4 to 1-inch border around the other edges as well. Reroll, dust with cocoa powder, and serve immediately.

Homemade Sweetened Chestnut Puree

Adapted from Kopiaste (click over for great step-by-step photos)
Makes about 2 to 2 1/4 cups

400 g boiled and peeled chestnuts [I bought precooked vacuum-packed ones]
1 1/2 cups milk
3/4 cup sugar, or to taste
1 tsp pure vanilla extract

Fill a medium to large saucepan with 2 inches of water and bring to a simmer over medium heat. Place all ingredients EXCEPT vanilla into a large Pyrex glass or other heatproof bowl that has a rim wider than the saucepan and which will not touch the simmering water when placed over the saucepan. Cover with a heatproof lid and let mixture boil for about 1 hour, checking occasionally to stir and make sure milk does not boil over.

Drain and reserve milk and let chestnuts cool slightly. Puree the chestnuts using a potato masher or in a food processor. Mix vanilla into the reserved milk, then add milk back into the puree a tablespoon at a time until desired consistency and sweetness is reached. Allow to cool completely, then refrigerate or freeze until needed.

No Bake Royal Chocolate Biscuit Cake

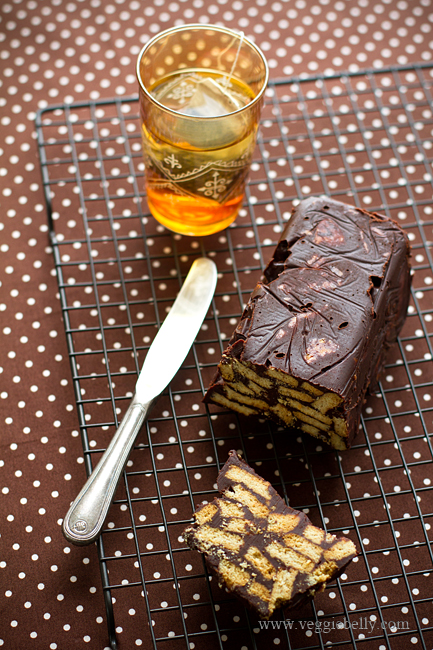
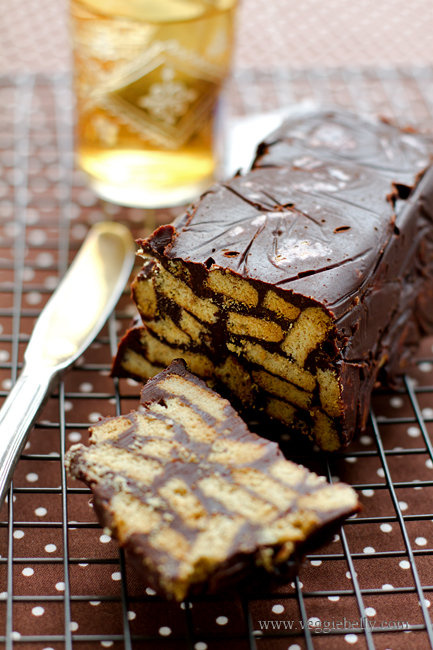
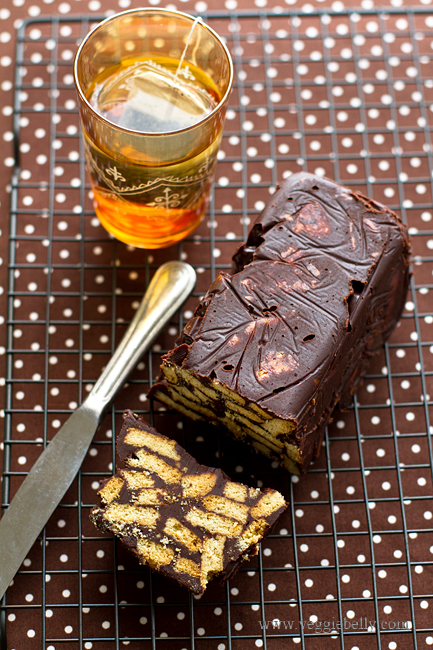
Watching snippets of the royal wedding on TV, and seeing Prince Williams groom’s cake – a chocolate biscuit cake – reminded me of the chocolate biscuit cakes of my childhood. Because my mother grew up in the UK before moving to India, we had a lot of British treats in our home in India. Chocolate biscuit cake was one of them. This recipe is simple to make, and requires no baking (which is why it’s also called a fridge cake).

As kids in India, we used to make this recipe with Indian Marie biscuits. We’d dip them whole into chocolate sauce, and stack them up – towers of chocolate biscuit goodness!


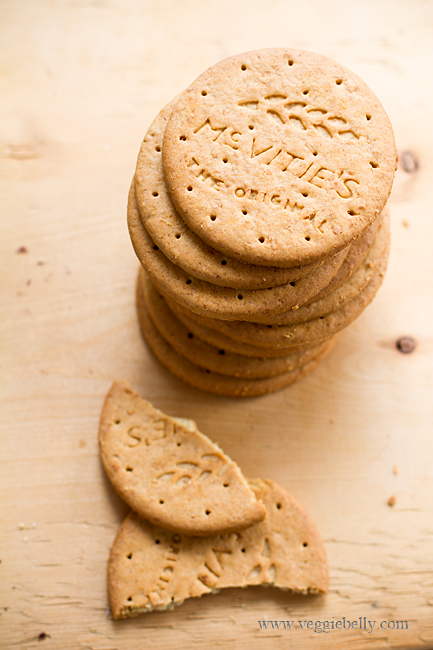
If you can find British digestive biscuits, they are the BEST for this recipe. I was thrilled beyond belief to find British McVities digestive biscuits in the International aisle of my local grocery store! I believe you can also find them at world market.

A digestive biscuit is a coarse wheat cookie, flaky, no too sweet and oh-so-delish. I wonder why it is “digestive”; must be because it has a bit more fiber than a regular cookie.

Substitutes for British digestive biscuits

- American graham crackers
– British rich tea biscuits (my second favorite for this recipe)
- Indian Britannia digestive biscuits
- Indian Marie biscuits

If you are using butter cookies or graham crackers, remember that they are sweeter, you might need less. Also taste and adjust the sugar as you go if you are using any of the substitutes.

You can glaze this cake with a chocolate ganache, but I skipped that step because the cake is quite rich as it is.

More yummy chocolate biscuit cake recipes..

Official Buckingham Palace chocolate biscuit cake recipe by Darren McGrady, former personal chef to the royal family
Chocolate biscuit cake recipe on Oprah.com
Chocolate biscuit cake recipe on Daily spud
Royal wedding groom cake recipe by Brown eyed baker
No bake English chocolate biscuit cake recipe on Joy of baking

Royal Chocolate Biscuit Cake Recipe

serves about 8

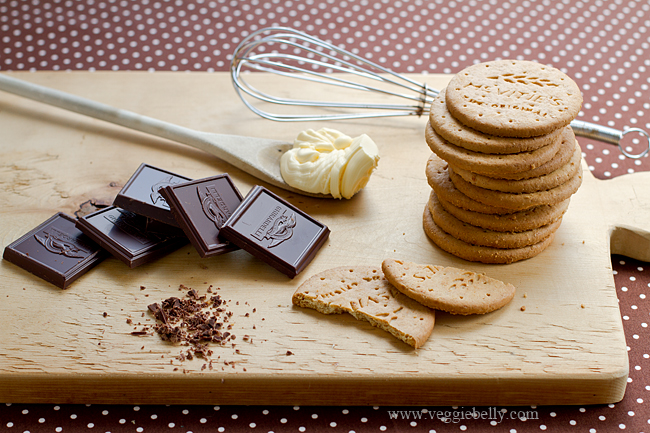
7 oz. McVities digestive biscuits (about 12 biscuits). See above for substitutions.
6 oz. semi-sweet chocolate (milk chocolate)*
2 oz. dark chocolate (60% cocoa)*
4 tablespoons butter
2 tablespoons milk
4 tablespoons sugar or honey

*You can vary the milk chocolate: dark chocolate ratio if you like. Just make sure the total amount of chocolate (milk&dark) is 8 oz.

Break each biscuit into about 10 pieces. Place the broken biscuits in a bowl.

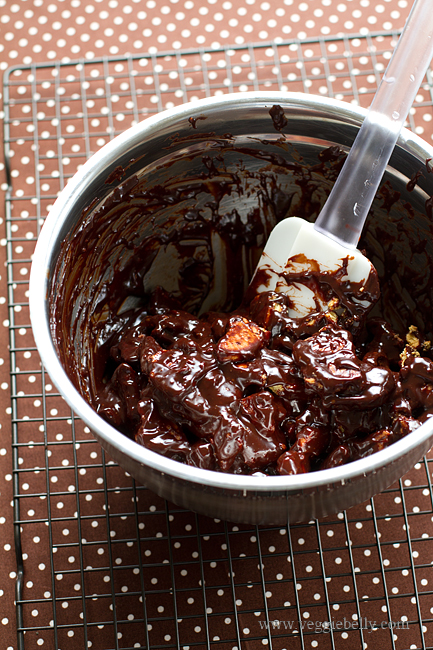
Melt all the other ingredients together in a double boiler –pour about 1 cup water into a saucepan or pot and bring to a boil. Then reduce heat and keep the water on a gentle simmer. Select a bowl that will fit over the saucepan, without touching the water (the steam from the water will melt the chocolate in the bowl).

Add all ingredients except the broken up biscuits, to the bowl over the simmering water. Whisk frequently, till everything is melted and you get a smooth sauce. Be careful not to get any water into the chocolate sauce.

Remove the bowl from the saucepan, and let the chocolate sauce cool for about 15 minutes. Gently fold in the broken up biscuits.

Line a loaf pan or cake tin with a large piece of glad wrap/cling film so that there is an over hang on all sides. Pour the cake mixture over the glad wrap and gently press down using a spatula, and flatten out the top. If your cake mixture is still warm, let it cool completely before proceeding.

Then fold the overhanging glad wrap over the cake. Using your palms, gently press down to compact everything. Refrigerate for 3 hours or till the cake is set.

Remove the glad wrap, cut into slices or cubes and serve.

Store chocolate biscuit cake in the fridge.

————————————————————————————————————————————————

Stonyfield Oikos Super Fruits Giveaway!

You can win all of these goodies!

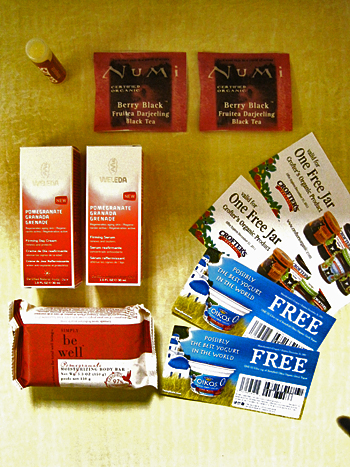
-        2 free coupons for Oikos Organic Super Fruits Greek Yogurt*
-        Weleda All Natural Pomegranate Firming Day Cream 
-       Weleda Pomegranate Firming Serum
-        2 free coupons for Crofters Organic Fruit Spreads
-        Organic Pomegranate lip balm, made by Eco Lips
-        2 samples of Numi Organic Berry Black Tea (featuring   organic raspberry and raspberry leaf)
-        Simply Be Well Organic Pomegranate Moisturizing Body Bar
-        RW Knudsen Family 32oz.  Organic Just     Pomegranate juice and coupons

To enter


- Leave a comment below and tell me what was the best dessert youve ever had.
- For a bonus entry, mention this post & link to it in  your own blog. Then come back here and tell me you did so.

Contest ends Friday, May 6th 2001 9pm EST. US residents only. One random winner be picked. Check this post for winner announcement.

*Oikos sent me coupons to try the yogurt, and it is lovely :)

This giveaway has ended, the winner is comment #36, Usha!

Chocolate Beet Cake – a Ross Burden Recipe

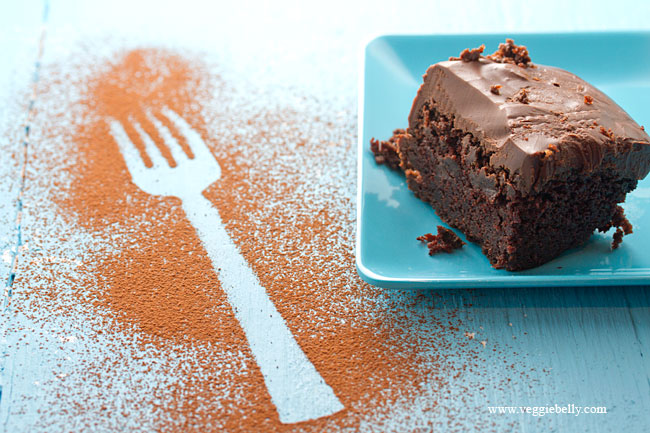
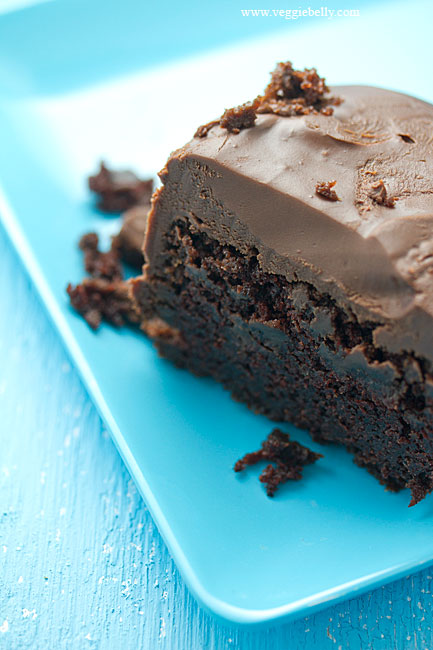
This is the ONLY chocolate cake I ever make. After the first time I made this cake, I threw out every other chocolate cake recipe I had. This easy, moist beet and chocolate cake recipe comes from Chef Ross Burden.

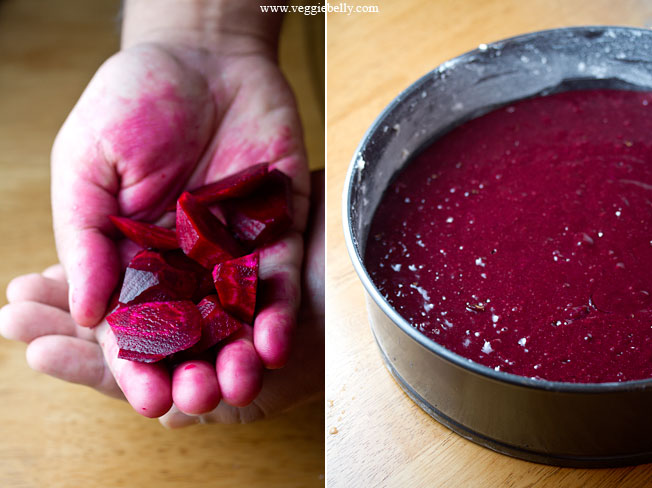
The cooked beets (beetroot) in this recipe keep the cake incredibly moist. And if you didnt tell your guests there are beets in this cake, they will never guess! My favorite trick is to serve this cake, and after everyone has eaten it, ask “guess whats in it”?!

To cook the beets, peel about 3-4 large beets. Chop them into chunks. Place in a pan with just enough water to cover them. Put a lid on the pan, and simmer till the beets are fork tender. Add more water while cooking if needed. But make sure you cook away all the water, you dont want the cooked beets to be watery. Then place the cooked beetroot in a blender and puree. Weigh the amount of beets needed, and proceed with the recipe below.

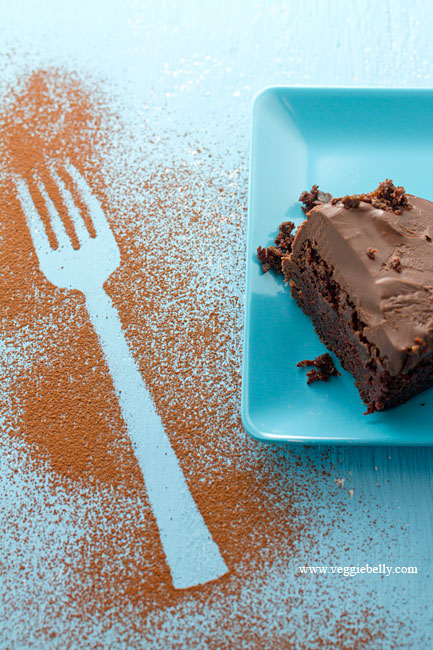
You wont find a picture of the whole chocolate beet cake here because it was all eaten up, and I struggled to even save this one piece so I could photograph it!

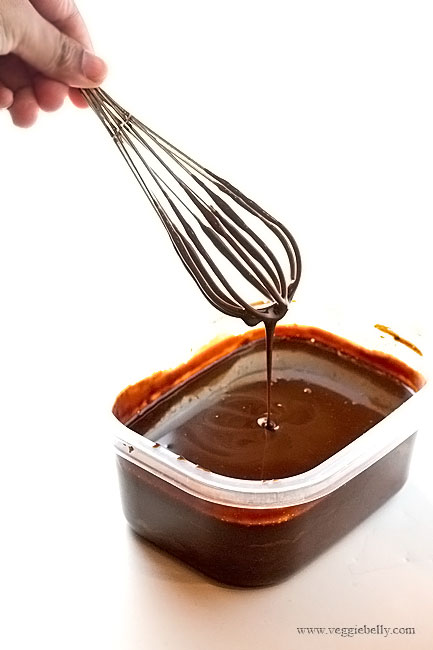
Ross Burden’s Chocolate frosting recipe is so easy and decadent. Make sure to use the best quality chocolate you can afford!

The only change I made to Ross’ original recipe is to add a little vanilla extract and a pinch of salt. If you wish, you could also add a couple of tablespoons of brewed espresso to the batter, for depth.

Make sure you use a kitchen weighing scale and measure the ingredients in the recipe by weight.

Ross Burden’s Beet (Beetroot) Chocolate Cake Recipe

original recipe is here

serves about 8

for the cake
85 grams dark chocolate
3 medium eggs
300 grams sugar
240 ml sunflower or vegetable oil
300 grams cooked beets (see post above for how to cook the beets)
1 teaspoon vanilla extract
30 grams cocoa powder
200 grams flour
1 1/2 teaspoon baking soda
1/4 teaspoon salt

for the chocolate ganache
250 grams dark chocolate, broken into pieces
250 ml heavy cream

Pre heat oven to 350 f.

Melt the chocolate (for the cake) over a double boiler. In a separate bowl, whisk together the eggs, sugar and oil. Slowly add the cooked beet puree , the melted chocolate and vanilla into the egg mixture. Beat just untill combined.

Sift the cocoa, flour, baking soda and salt. Add this to the beet batter. Fold just untill everything is combined. Dont over work or over mix the batter.

Spread a teaspoon of butter or oil over the surface of a 10 inch cake pan. Sprinkle some flour all over, and tap out the excess. Pour the cake batter into the prepared cake tin. Bake for about 30 minutes, or till a tooth pick or skewer inserted in the middle of the cake comes out clean. Baking time may vary depending on the pan and oven you are using.

While the cake is baking, work on the ganache frosting. Place the chocolate in a bowl. Heat the cream in a sauce pan, just till it starts to barely boil. Pour the hot cream over the chocolate and whisk till it forms a smooth sauce.

When the cake is done, cool it on a wire rack. Then pour the chocolate ganache over while the ganache is still warm. Let the ganache topping cool and set a little before serving.

Serve with Ross Burden’s burnt caramel icecream. Yum!

Rhubarb Raspberry Polenta Cake

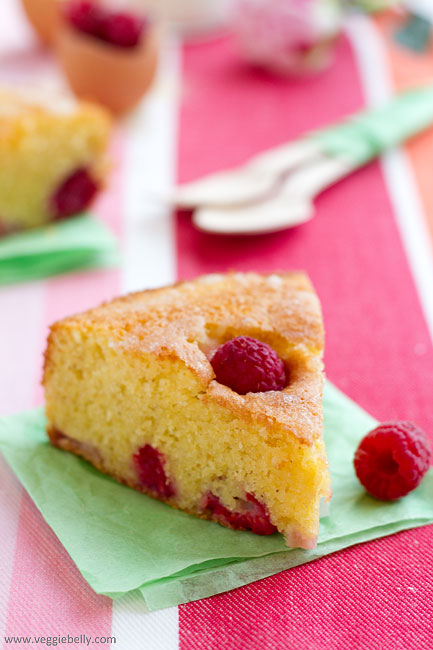
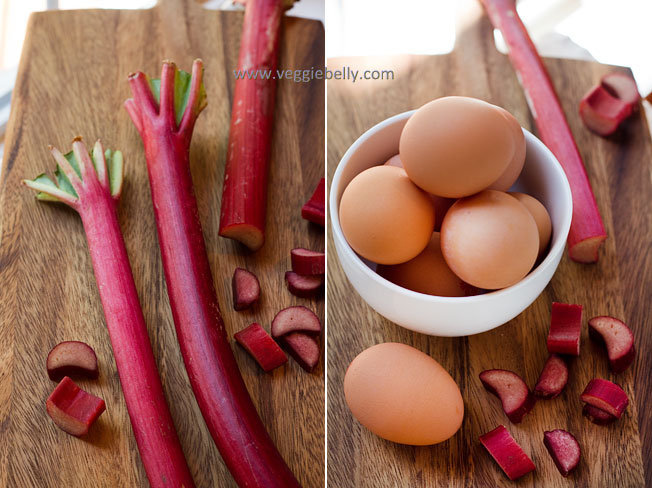
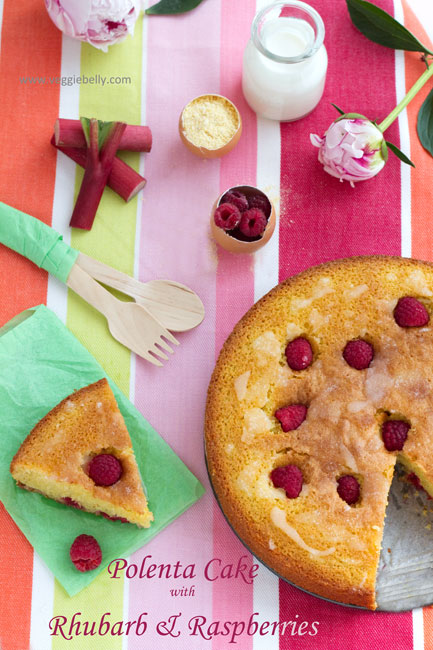
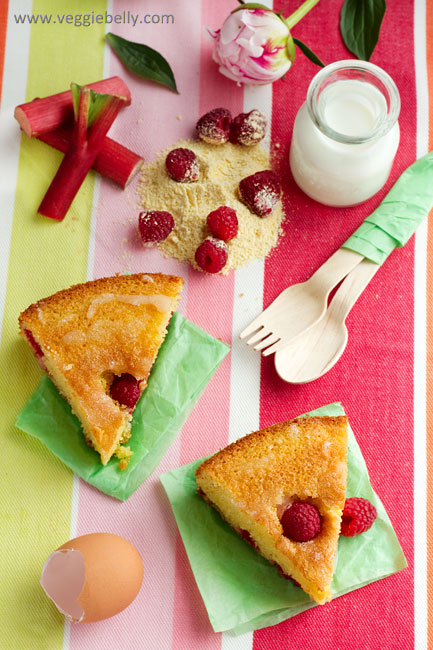
Its rhubarb season! Grocery store shelves are brimming with these beautiful red stalks. I couldnt let spring roll around and not make anything with rhubarb! Usually, rhubarb is used along with strawberries in pies (because rhubarb and strawberry seasons coincide). This recipe features rhubarb, along with raspberries in a polenta or cornmeal cake. If you like corn cakes, you’ll certainly love this dessert version!

Andrea, from Cooking Books blog says its the Scandinavians who know how to best enjoy the tartness of rhubarb. Andrea says,

“I’m not sure anyone appreciates rhubarb the way the Scandinavians do. In the US, it seems like you rarely find rhubarb without strawberry to mellow it’s tartness. But in Norway, rhubarb stands very much on its own. In fact, R remembers as a child being given stalks of raw rhubarb with a small bag of sugar for dipping and munching.”

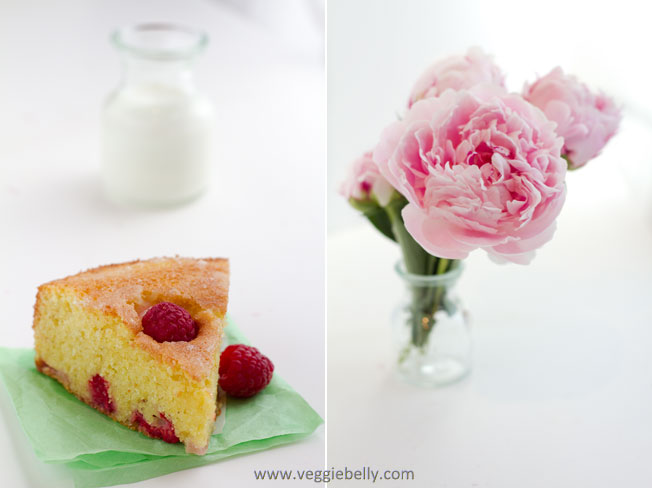
Tart rhubarb, tart raspberries, in a sweet, cornmeal cake. Just delicious! And I love the ‘corny’ taste and texture of this cake too.

I adapted the recipe from this recipe for raspberry and lemon polenta cake  by Jane Hornby. Jane’s recipe is for a layered polenta cake, filled with a cream cheese filling. I left out the filling all together and simply made a single cake, adding rhubarb.

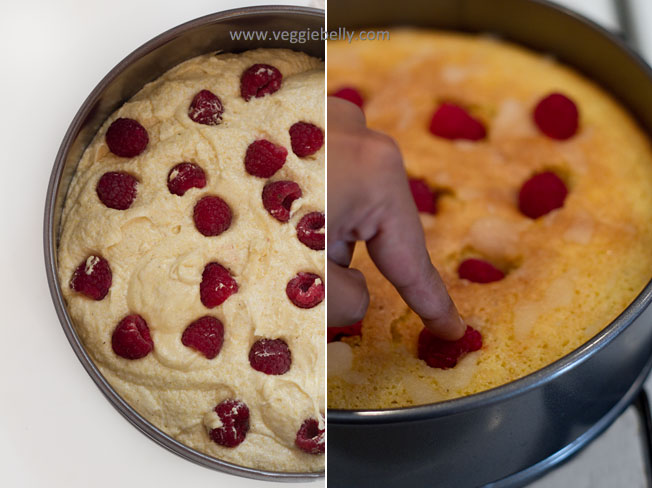
Add most the fruit to the batter and bake half way. Then sprinkle more berries on top of the half-cooked cake and continue baking.

Ever baked a cake with fruits in it and all the fruits sink to the bottom? Jane has the solution! Its a great trick for getting this cake to look beautiful too. Reserve some of the berries and then sprinkle them on top of your cake half way through baking. The cake should still be jiggly when you do this. Gently press the berries into the batter like the picture above and return cake to the oven. The batter will bake around the berries and when its done, you’ll have a perfect, berry studded cake!

You can store this cake covered at room temperature for about 2-3 days or wrapped tightly in the fridge for about 4-5 days. Serve with icecream or homemade rhubarb-raspberry compote.

Rhubarb Raspberry Polenta or Cornmeal Cake Recipe

adapted from this recipe  by Jane Hornby
serves about 8

8 oz or 225 grams sugar
8 oz or 225 grams butter, at room temperature
4 large eggs
1/2 teaspoon vanilla extract
6 oz or 175 grams fine cornmeal or polenta
1.75 oz or 50 grams flour(I used cake flour)
1 1/2 teaspoons baking powder
a pinch of salt
zest of 1 lemon
1 cup chopped rhubarb
1 cup raspberries
1/2 cup sugar
1 tablespoon lemon juice

Pre-heat oven to 375F. Butter a 9 inch cake tin or baking dish and line the bottom with parchment paper.

In a standing mixer, cream the sugar and butter together for about 3 minutes. Then add the eggs to this mixture one by one. Beat on high speed till the mixture is fluffy. Add vanilla and turn off the mixer.

Sift together the cornmeal/polenta, flour, baking powder and salt. Fold this into the egg mixture in 2 batches. Stir in lemon zest. Pour this batter into the baking dish or cake tin.

Reserve about 1/8 cup of the rhubarb and 1/8 cup of raspberries. Sprinkle the rest of the rhubarb and raspberries on top of the cake batter. Smooth out the top. Bake in the oven for about 20 minutes. The cake should still be jiggly, but risen. At this stage, take out the cake from the oven. In a small bowl, combine 1/2 cup sugar with 1 tablespoon lemon juice. Sprinkle the lemon juice-sugar mixture all over the top of the cake.

Then arrange the reserved rhubarb pieces and raspberries on top of the half cooked cake. Gently poke them into the batter (but dont poke them all the way in — see picture in post above).  Return cake to the oven and bake another 10 minutes. Cool cake slightly before removing it from the pan.

Fresh Fig and Spiced Rum Upside Down Cake

fig-rum-upside-down-cake2

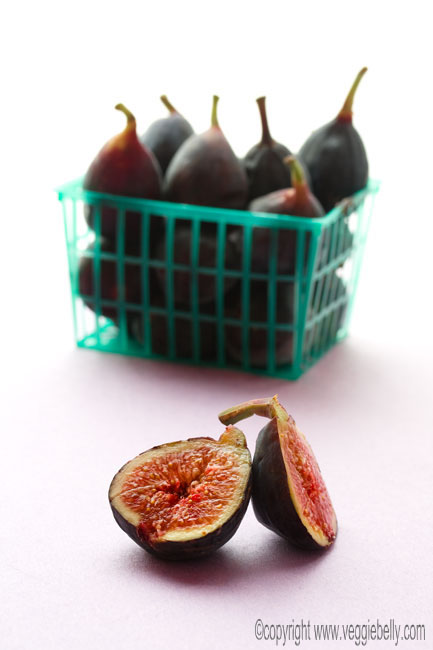
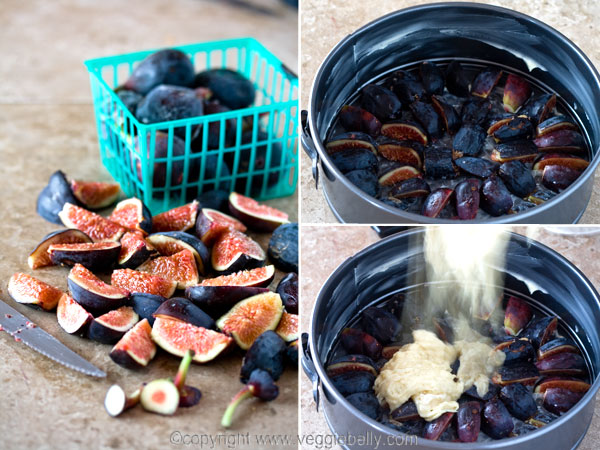
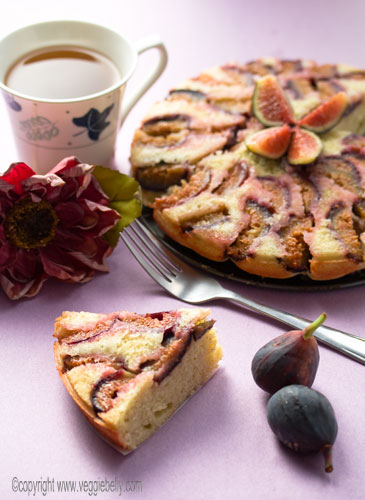
I have a confession. I cheated big time with this cake. I used…gulp…store bought cake mix! I didnt have time to make cake batter at home and I really wanted to make a fig upside down cake with a gorgeous box of fresh black figs.  So I resorted to a betty crocker mix…and it turned our yummy. The figs were so soft and sweet, I thought a nice rum and spice upside down cake would be fitting for these figs.

fresh black figs

Dont keep fresh figs for more than two days. They are best used the day you buy them.  You could also use dried figs in this recipe – just simmer them in a little water to reconstitute them and then proceed with the recipe.

arrange-figs-in-cake-pan-then-pour-batter

Wash and pat dry the figs. Then trim off the stems and quarter each fig. Pour some rum and spices over the figs and let them sit while you make the cake batter. Then arrange the figs in a cake pan and pour cake batter on top. Bake according to the instructions on the cake mix box.

fig-rum-upside-dowm-cake3

When the cake is done, invert it onto a plate and you’ll have gorgeous fig studded cake!

This post goes to monthly mingle over at ‘My Diverse Kitchen’, Meeta and Aparna have chosen the theme,  high tea.

Fresh Fig and Rum Upside Down Cake
Serve about 10

12-16  fresh figs
2/3 tsp cinnamon
1/4 tsp nutmeg
1/4 tsp allspice
1 tbsp sugar, more or less depending on how sweet the figs are
4 tbsp rum (I used captain morgans spiced rum)
1 box store bought cake mix (angel food, white or yellow cake mix)
Ingredients need to make the cake mix

Wash and dry figs. Cut off the stems. Quarter the figs. Arrange the figs in the bottom of a buttered cake pan in a single layer. (divide teh figs and batter into two cake pans if necessary). Mix cinnamon, nutmeg and allspice, sugar with rum. Pour this spiced rum over the figs.  Then prepare the cake mix according to manufacturers instructions. Pour cake batter into the cake pan, on top of the figs. Bake according to directions on the box. When cake is done, let it cool for 10 minutes and invert in onto a plate.

Chocolate Cup Cake Baked in a Cup


chocolate cake in a cup

I just may have created the world’s most expensive cupcakes. Thanks to UPS. Let me explain…

My sister moves a lot for her job. And every time she moves, it’s become somewhat of a tradition for me to send her something homemade and chocolaty. She is moving this week and I sent her mini chocolate cupcakes with chocolate ganache frosting.

Did I mention my sister lives in England?? It cost me nearly a week’s worth of groceries to send these cupcakes to England! But I suppose you can’t put a price on these things. Besides, the Ina Garten recipe I used for these cupcakes was just perfect. This is a chocolate cake recipe and worked very well for making cup cakes.I didn’t use the butter cream frosting that came with the cake recipe. Instead I made a simple chocolate ganache (recipe below).

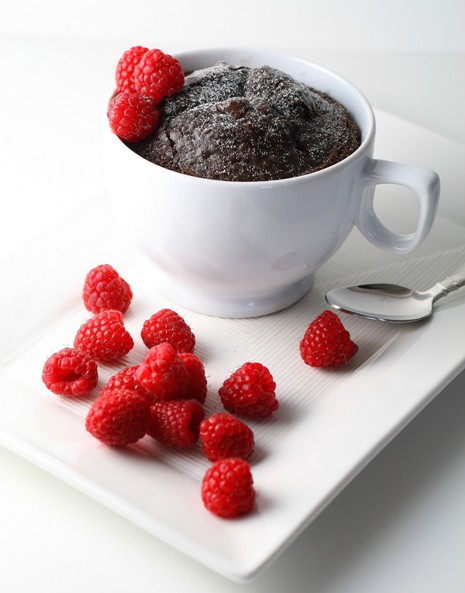
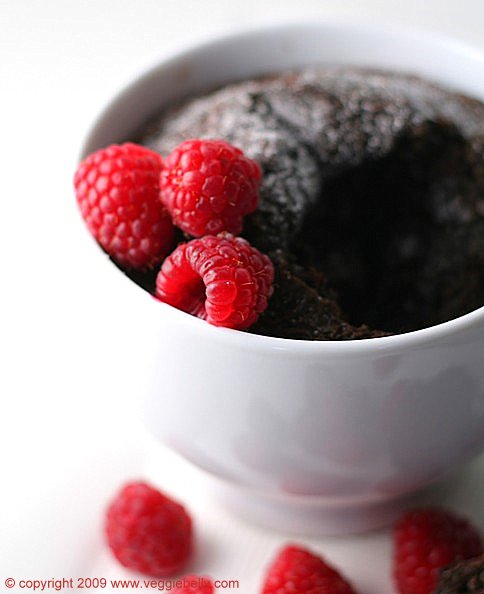
I had some left over batter, so I poured the batter into a big oven proof coffee mug and baked it right in the mug….this one is very literally a cup cake. It’s a lot of fun to eat out of the mug.

choccup3crop
 
How to bake cup cakes in a coffee mug or cup

Make a batch of your favorite cake batter. I recommend Ina Garten’s chocolate cake recipe.

Start with clean coffee mugs. Make very sure that the coffee mugs are oven proof. Butter the inside of the mugs and lightly dust with flour. Alternatively, spray the inside of the mugs with non stick spray.

Pour the cake batter only half way up the mug.

Bake in a 350F oven.

Baking times will vary depending on the size of the mug you use. When the cake is done, the batter would have risen, and your kitchen will smell like cake. At this point insert a tooth pick into the cup cake. If its done, the tooth pick will come out clean. Make sure you dont over bake and dry out your cup cake. I used a fairly large mug and it took 25 minutes.

To serve, dust some powdered sugar on top or top the cake with chocolate ganache (recipe below). Serve with fresh berries of your choice.

Notes: Use the best cocoa powder you can afford. Try adding some kahlua or rum to the cake batter for a more intense flavor.

Microwave Method

I attempted a batch in the microwave. I used the same method above and microwaved the batter in the mug for about 3 minutes. It works. But the oven method tastes better and has better texture.

chocolate cup cakes baked in a cup

Chocolate Ganache
Makes enough to frost 2, 8 inch round cakes or about 60 mini cupcakes1 cup semi sweet chocolate chips
1/3 cup heavy cream


Bring the cream to a simmer in a pan on low heat. Add the chocolate chips and whisk until melted. Turn off heat. Spread immediately on top of the cooled cake.

Related Posts with Thumbnails