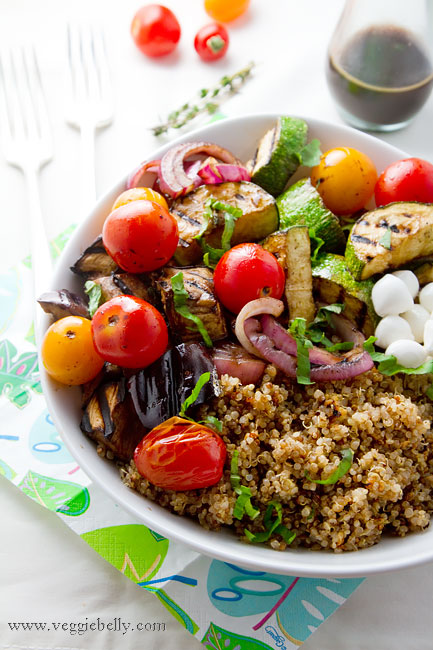
Balsamic Grilled Summer Vegetables with Basil Quinoa Salad


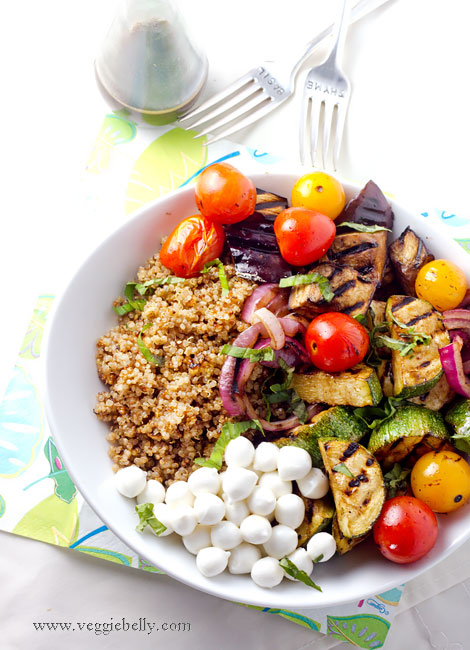
Repeat after me – balsamic makes everything better! Especially grilled summer vegetables and quinoa. I love to grill vegetables tossed in a simple dressing or marinade of balsamic vinegar, olive oil and garlic. I then serve the same dressing as a dipping sauce for the vegetables.
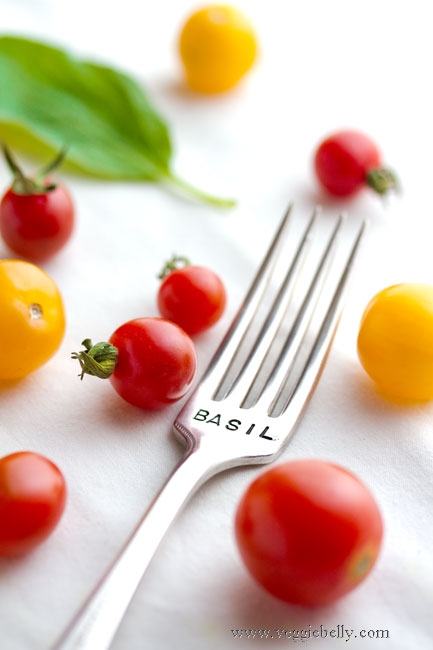
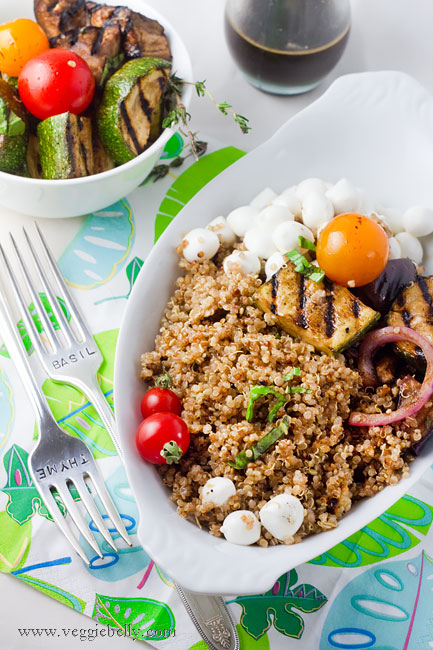
Herb name engraved vintage silver forks are the latest addition to my prop collection. I got them from Beach House Living shop on Etsy.com. Rita will customize the forks for you; her work is beautiful and service is super quick. Rita also flattens out engraved forks, spoons, and knives to be used as garden markers.

To salt or not to salt eggplant before cooking?

Eggplant is full of little air pockets (which is what makes it spongy). When cooking, these air pockets will absorb oil, and make your dish oily. Salting will collapse these air sacs.

Salt eggplants before cooking:
- to reduce oil absorption
- for firmer texture when cooked
- to remove bitterness from an old eggplant

Dont salt eggplant before cooking:
- for dishes that require mashing or pureeing the eggplant
- for silky, soft texture
- if you are quick cooking the eggplant or using high heat (like in this recipe)

How to salt eggplant:

Cut the eggplant as called for in the recipe. Place it in a colander. Sprinkle some salt over the eggplant (as much salt as you would when you cook it). Toss well. Place a heavy saucer or plate over the eggplants in the colander, to weigh them down. Let the eggplant sit like this in the colander for about and hour. All the moisture (brown liquid) will drain out. Rinse well, and pat dry with a cloth. Make sure eggplant pieces have been dried well. Then cook according to the recipe.

You dont have to salt the eggplant for this recipe, because you arent grilling it for long, so you dont risk it getting soft or mushy.

Use whatever vegetables you like. Red bell peppers, mushrooms, any winter squash, asparagus will also taste great grilled and served with quinoa; check out Dishing up Delight’s roasted vegetable quinoa recipe. 101 cookbooks has a quinoa recipe with roasted cherry tomato and tofu.  

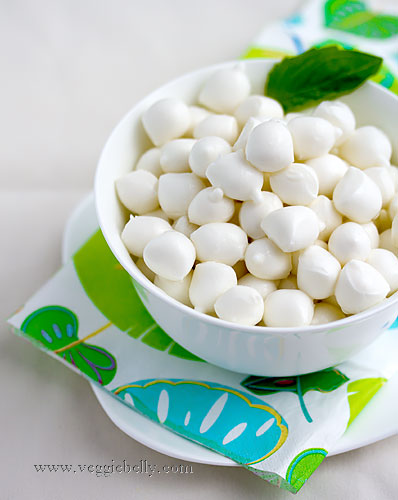
How cute are these little pearlini mozzarella balls? If you cant find them use bocconcini (slightly larger mozzarella balls). Vegans can use pan fried tofu or some toasted pine nuts or walnuts instead.

Balsamic Grilled Summer Vegetables (Eggplant, Zucchini, Tomato, Red Onion), Pearlini Mozzarella and Basil Quinoa Salad Recipe

serves about 3. (you will have as much grilled vegetables as quinoa).

for balsamic dressing
1/4 cup balsamic vinegar
3 tablespoons olive oil
2-3 cloves garlic minced
salt and pepper

for grilled summer vegetables
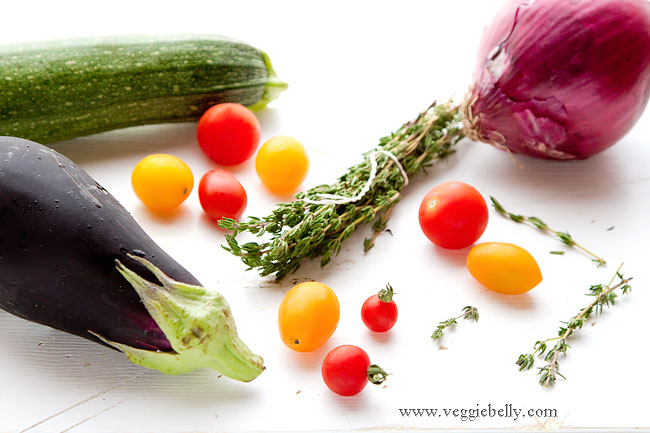
1 small italian eggplant (about 2 cups when cut into big cubes)
1 small zucchini (about 2 cups when cut into big cubes)
1/2 small red onion (1/4 of a large red onion)
3/4 cup cherry tomatoes
4 sprigs fresh thyme, leaves stripped

for basil quinoa salad
2 cups water
1 cup quinoa
1/4 cup basil leaves loosely packed, chopped

other ingredients
1/2 cup pearlini mozzarella balls, or bocconcini mozzarella balls, tossed in a little salt and pepper
(substitute with pan fried tofu or toasted pine nuts or walnuts for a vegan dish)

Whisk together all the balsamic dressing ingredients and set aside.

In a medium saucepan, boil water for the quinoa salad. Add quinoa and bring back to a boil. Reduce heat, and simmer covered, till all the water has been completely absorbed, about 20 minutes.

While quinoa is cooking, cut the eggplant and zucchini into 1 1/2 inch cubes. Cut the red onion into rings. Place cubed eggplant, zucchini, red onion, tomatoes and thyme leaves in a bowl. Pour half the balsamic dressing over the vegetables and toss well.

Brush grill grates with olive oil or non-stick spray (I used a stove top cast iron grill). Heat grill to medium-high. Grill the vegetables about 3 minutes on one side or till grill marks appear, about 3 minutes. Flip them over and grill other side till vegetables are tender but still a bit firm. Tomatoes will cook quicker, remove them from the grill as soon as they start to blister.

Reserve the balsamic dressing that remains in the bowl, to serve with the meal.

If you dont have a grill, broil the vegetables in the top rack of an oven, till one side is golden. Flip and broil other side.

When the quinoa finishes cooking, toss it with the second half of the balsamic dressing. Stir in chopped basil, salt and pepper. 

Spread quinoa on a platter or bowl. Arrange the grilled summer vegetables and mozzarella around the quinoa. Serve warm with the reserved balsamic dressing on the side.

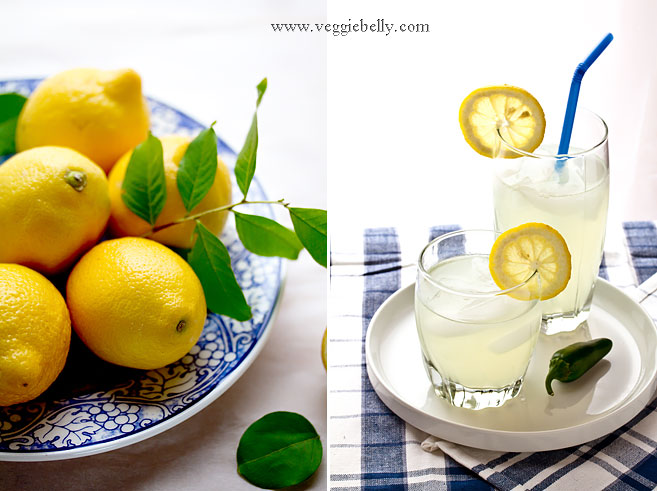
Jalapeno Lemonade

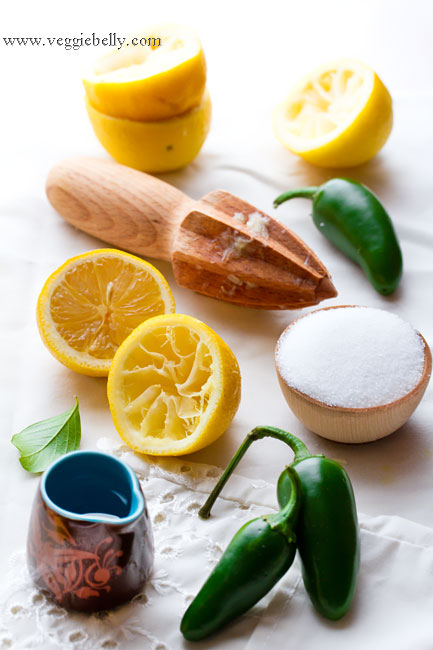
This is a sweet, refreshing lemonade with a touch of heat from jalapenos that will be great for a summer barbecue. Serve it ice cold, or spike it with some tequila! Dont be afraid of the jalapenos in this recipe, they add a mild, and very pleasant flavor. And you can make the lemonade as hot or mild as you like.

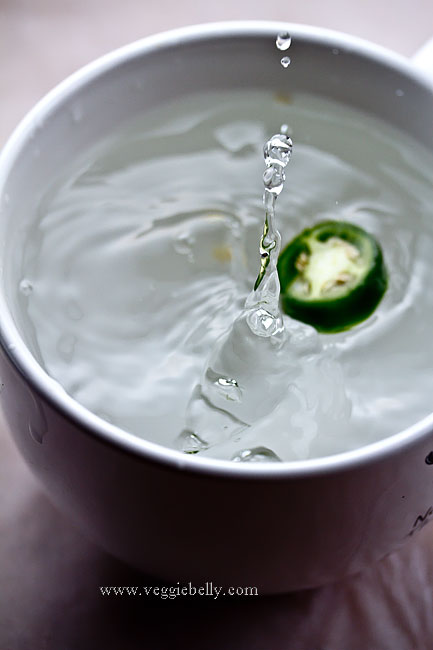
In case you are curious about this jalapeno water splash photo, here is the exif info:

Shutter speed: 1/1250
Aperture: f/18
ISO: 800
Exposure: manual
Lens: Canon 60mm macro

Setup: A bowl of water by a window. Camera on tripod, set to ‘continuous shooting’ mode. I dropped jalapeno slices into the water while continuously shooting. I think I took about 100 photos to get to this one.  

In order to capture the splash, you need to set your shutter speed very high (1/1250 in this case). Because the shutter speed was high, the camera lets less light in; to compensate for this I had to bump up the ISo to 800.

Squeezing a few lemons and mixing with water and sugar is so easy, I really dont know why we buy lemonade in the store!

What does jalapeno lemonade taste like? When you first sip it, its just like regular lemonade. When you swallow, the mild spice will hit your throat. This recipe is very mild. Use 2 jalapenos if you want it spicier.

Here is a similar recipe for jalapeno lemonade on serious eats inspired by Crate & Barrels jalapeno lemonade mix. My recipe is slightly different – i used a pinch of salt, which brings out the sweet and hot flavors in the lemonade; I also made my jalapeno lemonade less sweet. Here is another jalapeno lemonade recipe on kalamazoo gourmet that doesnt require boiling the jalapenos in simple syrup.

Jalapeno Lemonade Recipe

makes about 8 cups

for jalapeno sugar syrup
1 jalapeno, cut into 4 pieces (remove seeds for a milder lemonade)
1 cup water
1 cup sugar
1/8th teaspoon salt

other ingredients
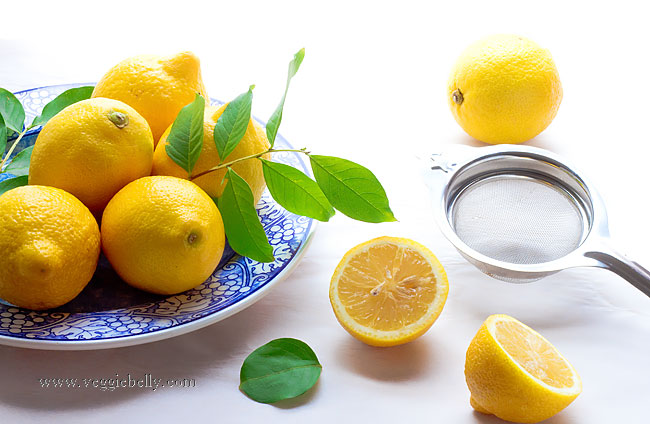
1 cup lemon juice (juice of about 6 large lemons), strained
6 cups water

Place the chopped jalapeno and 1 cup water in a small saucepan. Bring to a boil. Continue boiling till about half the water has evaporated, about 2 minutes. Then add sugar and salt and stir. Reduce heat to low and simmer just until sugar has dissolved, about 2 minutes.  Let the syrup cool for about 5 minutes.

Place a strainer over a pitcher. Pour the jalapeno sugar syrup, lemon juice and 6 cups water through the strainer into the pitcher. Stir well. Serve chilled over ice cubes.

For tequila spiked jalapeno lemonade recipe: follow the recipe above, but instead of 6 cups water use 5 cups water + 1/2 cup (or more!) tequila. Serve on ice.

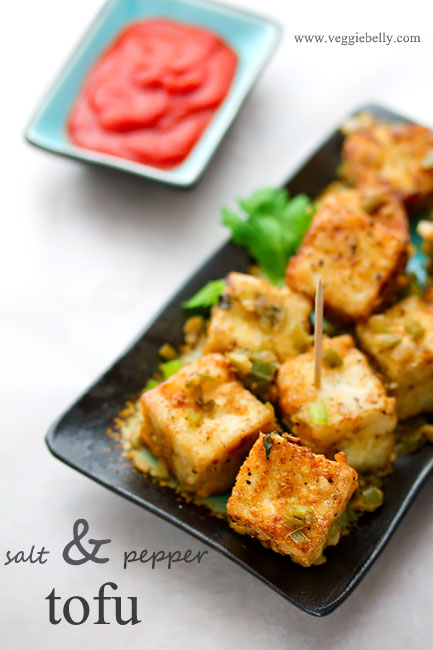
Chinese Salt and Pepper Tofu Restaurant Style


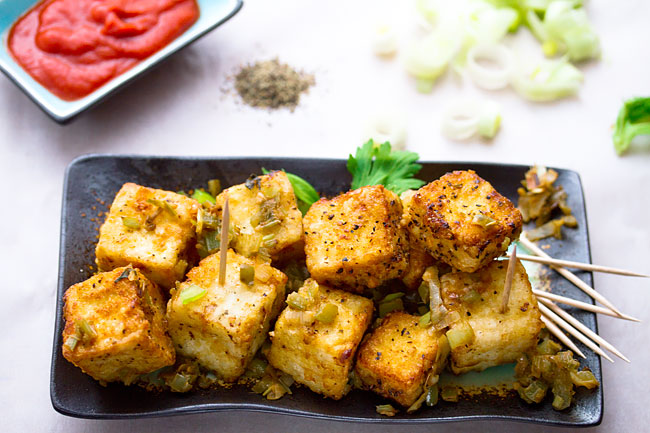
This vegan salt and pepper tofu recipe is a great dish to entertain with. I either serve it as an appetizer with tooth picks, or I serve it as an entree with some brown rice. All the components of this recipe can be made ahead and put together just before serving. This is a truly fancy, delicious, vegan, Chinese dish and it tastes like something you’d get at a restaurant.

To clean leeks, soak sliced leeks in water for a few minutes. The grit will settle to the bottom. Then scoop up the leeks floating on top and rinse under water.

There are a few recipes online for salt and pepper tofu, like this Chinese salt and pepper tofu on the post punk kitchen forum, this salt and pepper tofu with five spice  or this simple salt and pepper tofu  from Rachael Ray magazine.

Once you fry the tofu, toss it in sauteed leeks, celery, ginger, garlic and green pepper.

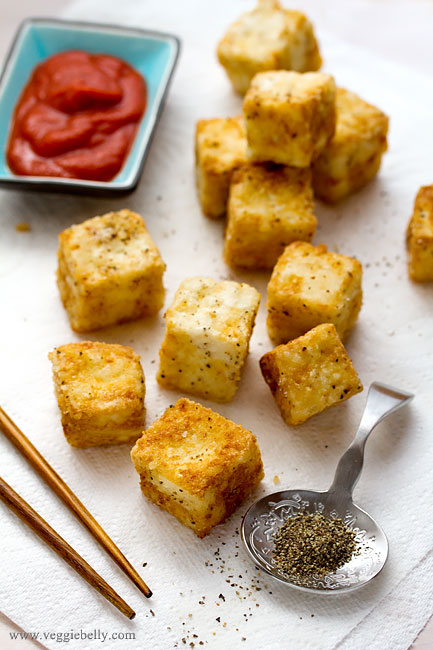
For a quick appetizer, skip the sauteeing just served the fried tofu with chili sauce like below. Toss tofu cubes in corn starch, salt and pepper. Fry till golden.

Notes:

- you can use this same method and recipe with button mushrooms, parboiled cubed potato, baby corn or paneer. The only change you will make is to make a batter out of the cornstarch and dip the vegetables or paneer in the cornstarch batter before frying. Tofu doesn’t need a batter because it has a lot of moisture already, so simply tossing it in cornstarch is enough 

- fry one piece of tofu first and taste it. Adjust the salt the pepper in the batch if needed and then continue frying the rest

- fry only a few pieces of tofu at a time. If you crowd the skillet, tofu wont crisp up

- if the oil temperature is too low, the tofu wont crisp up, instead it will get soggy with oil

- substitute leeks with 1/2 cup chopped onions

- you can make the leek, celery, bell pepper sauté a day ahead

- the tofu can be fried about an hour ahead of time and placed in your oven in the lowest temperature. simply toss the tofu in the sauté in the last minute

Vegan Chinese Salt and Pepper Tofu

serves 2 as an entree or about 4 as an appetizer

for the sauté
1/2 tablespoon oil
2 medium leeks, white part only, washed and grit removed (1 cup when chopped)
1 celery rib (1/2 cup when chopped)
1 small green pepper (1/2 cup when chopped)
1 tablespoon finely minced garlic
1 tablespoon finely minced ginger
1 tablespoon light soy sauce
1/2 teaspoon brown sugar

for the tofu
1 block (14 oz when drained) extra firm tofu
4 tablespoons corn starch
1/2 teaspoon or to taste freshly cracked black pepper
Salt

Vegetable or canola oil for frying

Chop the leeks, celery and green pepper into a fine dice. Heat oil in a wok on medium-high heat. Add chopped leeks, celery, and green pepper. Sauté on high heat for about 2 minutes. Add ginger and garlic. Cook another 1-2 minutes. Add soy sauce and brown sugar and cook 30 seconds. Set this mixture aside.

Pat dry the drained tofu. Cut into 1 inch cubes. Place the tofu cubes in a large bowl. Add corn starch, salt and pepper. Gently toss till the tofu pieces are very well coated.  

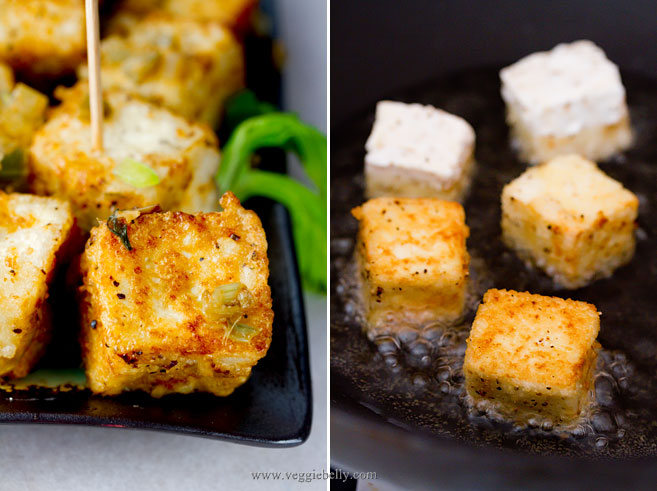
In a skillet, pour oil so that it comes up 1/2 inch. Heat the oil.Make sure oil is hot. Add tofu cubes a few at a time. If you fry too many in one go they won’t crisp up. Fry the tofu pieces, flipping them around, so that all sides are golden brown. Drain onto a few layers of paper towels.

Heat up the sautéed leeks, celery and bell pepper. Add the fried tofu cubes to this. Toss well. Serve vegan Chinese salt and pepper tofu with your favorite chili sauce and garnish with celery leaves or green onions.

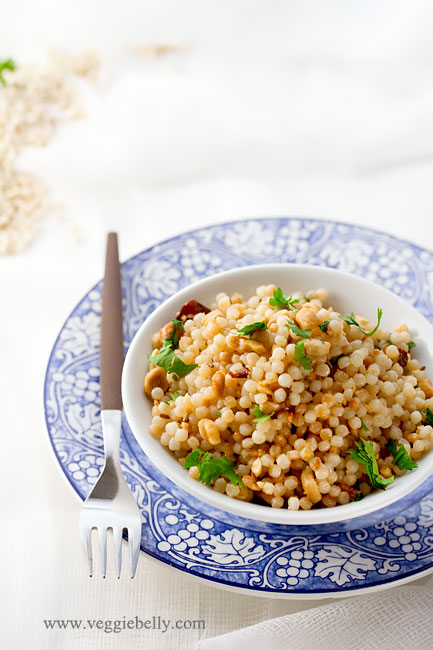
Easy Israeli Couscous with Roasted Peanuts. Ready in 10 minutes.

I am blessed to I have friends whom Ive known since childhood. These are the people I can be myself with and I know will support me through anything.

One such friend is Vidya. As children, Vidya and I hung out in each others’ houses all the time. We’ve shared much, and had a lot of fun together. And through the years, no matter where in this world we were, we’ve kept the close friendship going.

A few winters ago, Vidya drove up from North Carolina to visit me. She came bearing a tub of marinated olives and a delicious merlot. We sat in my kitchen late that night, talking, eating, drinking and watching the snow fall. We were warmed by friendship and wine.

Vidya then made us a midnight snack – Israeli couscous with cumin and roasted peanuts. We chatted and sipped wine as Vidya cooked the nutty, chewy, cumin scented dish. There we were, old friends, in the middle of a winter’s night; cooking, laughing and enjoying the sisterhood of a 20 year old friendship.

Thankyou Vidya, for so much more than just this recipe.

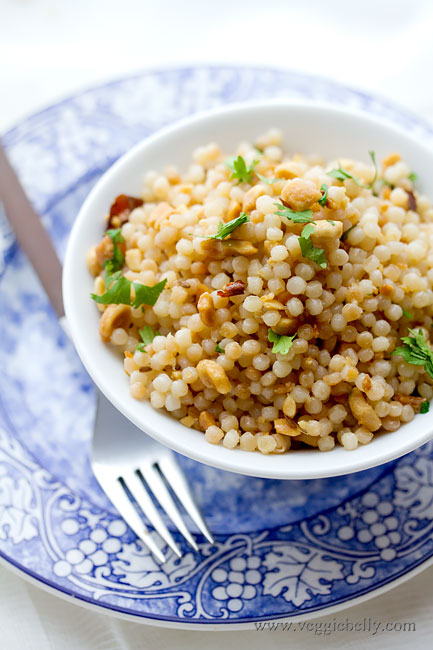
Vidya’s recipe for israeli or pearl couscous is a shortcut version of Indian sabudana or sago kichdi. The traditional recipe uses sabudana (tapioca pearls). But I like Vidya’s version with israeli couscous, its easy to make and you really cant mess it up. This is a great, 10 minute vegan snack or side dish.

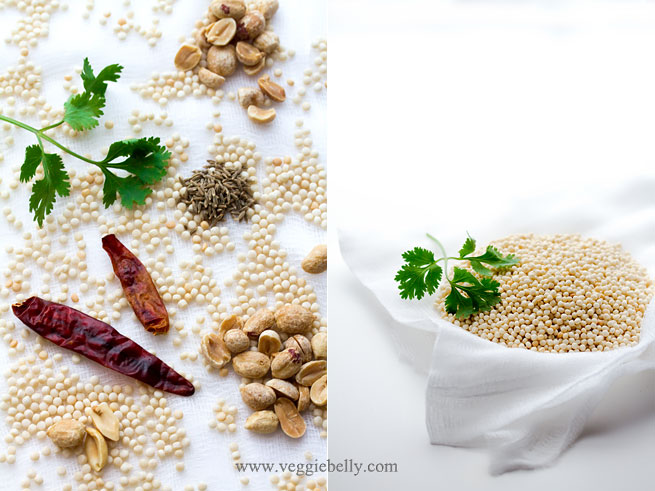
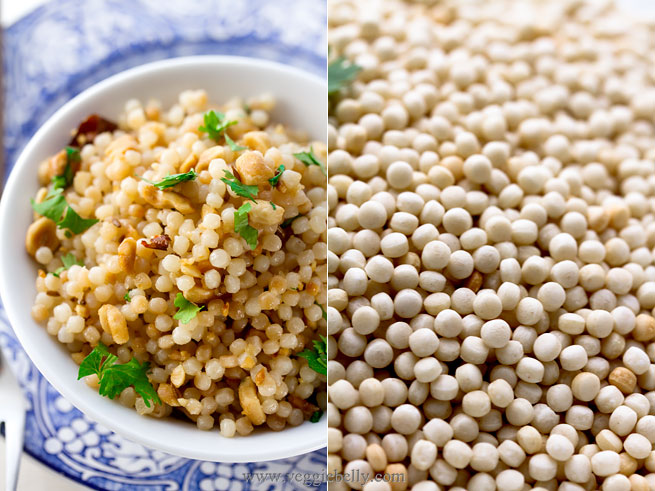
Israeli couscous, also called pearl couscous or mograbiah or ptitim is a type of pasta from the Levant region. If you dont have pearl couscous on hand, sustitute with cooked orzo or tapioca pearls.

Check out this curried Israeli couscous (mograbieh) recipe on gourmet sleuth. Vegan Yum Yum has a simple, vegan recipe for lemon pearl couscous.

But its this  couscous and mograbhia (israeli couscous) recipe on Dana Treat that really reminded me that I havent made this israeli couscous recipe in a while. Dana said she has a big load of israeli couscous and is always looking for recipes. Dana, this is for you :)  

I use 1/2 cup peanuts in this recipe, which is on the peanutty side. Thats how I like it. If you feel this is too much, reduce the amout of peanuts to upto 1/4 cup.
Israeli Couscous (Pearl Couscous or Mograbiah) with Roasted Peanuts Recipe

serves about 4 as a side

for the couscous

1 tablespoon oil
1 cup israeli couscous or pearl couscous, uncooked

for sauteing

1 tablespoon oil
1/2 teaspoon cumin seeds
a few curry leaves, optional
2 green or dried red chillies (or according to taste), chopped. Use jalapenos instead if you dont want it too spicy.
1/2 cup roasted peanuts, crushed lightly (this will be on the peanutty side, reduce the amount of peanuts if you wish)
1 tablespoon lemon juice
2 tablespoons chopped cilantro
salt

Heat oil in a large non stick skillet. Add couscous. Stir the couscous on low heat till it turns color and becomes light brown. Add 2 cups water. Bring to a boil. Reduce heat, cover the skillet and simmer till all the water is absorbed, 5-7 minutes. Couscous should not be mushy. 

While, couscous is cooking, take a wok, heat the oil and add cumin seeds. When they start to sizzle, add the curry leaves, and green or red chillies and cook for about 15 seconds. Add the cooked israeli couscous, peanuts, lemon juice and salt. Stir well. Turn off heat. Adjust lemon juice according to taste. Add cilantro. Serve warm.

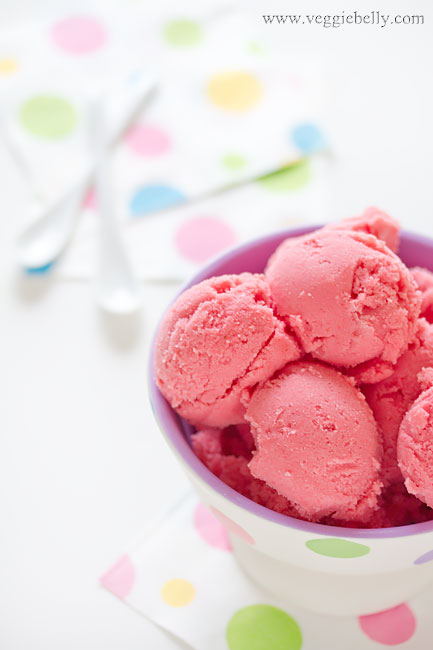
Raspberry Buttermilk Sherbet


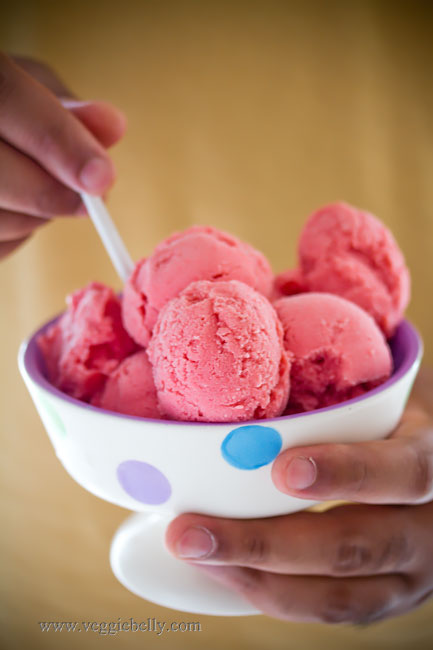
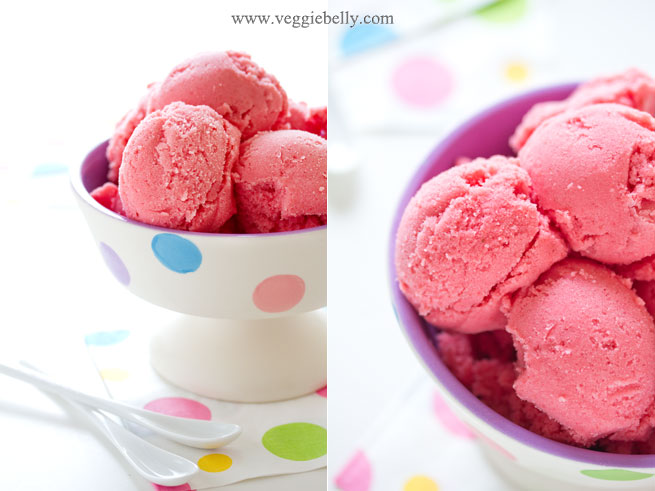
I’m in possession of a brand new Cuisinart ice cream maker. And this fruity, tart, not too heavy and gorgeous pink sherbet is exactly the sort of frozen treat I wanted to make to  inaugurate my ice cream maker. This food network recipe is super simple and easy – only 5 ingredients!

The original sherbet recipe uses some cracked black pepperon top of the sherbet. I left this out.

This is the ice cream maker I bought:

For the price, its fantastic

Difference between sherbet and sorbet

- Sorbets never have dairy. They only contain fruit puree, sugar, water and flavorings.

- Sherbets always contain some dairy. Besides the fruit puree and sugar, sherbets will have cream, milk or buttermilk in this case.

In the UK however, a sherbet is a fizzy drink! Its the same in India where I come from; some cold drinks are called ‘sarbath’.

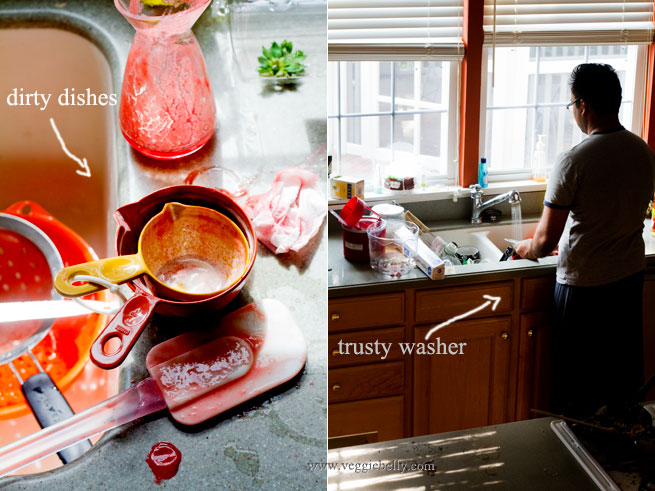
There is always a pile of dishes to do in my kitchen, thanks to my food blogging tendencies. But my trusty human dish washer always helps…and then he is rewarded with sherbet ;)

Notes

- Pretty much any fruit will work in this recipe – peaches, mangoes, all berries

- Make sure the sugar is superfine. If not, it will not dissolved in the liquids properly. You could put granulated sugar in a food processor to make it finer

To make frozen treats like ice cream, sorbet and sherbet without an ice cream maker:

Place the ice cream mixture in an airtight container. Freeze till it has become solid. Then remove from freezer, break it up, and put the icecream in a blender. Blend till smooth. Return ice cream to the freezer. Once it has frozen again, repeat this process once more (blend again and freeze again).

Raspberry Buttermilk Sherbet Recipe

Adapted from this Food network recipe
serves 4-6

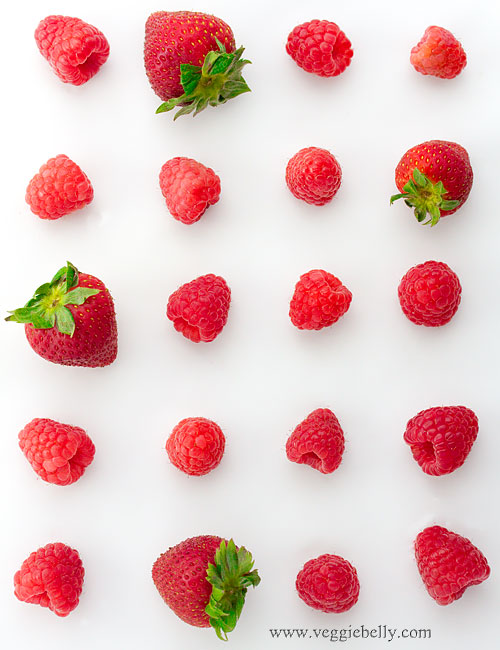
6 cups raspberries
1/4 cup 100% grape or apple juice
1 cup superfine sugar
1 1/2 cups whole buttermilk
1/4 cup heavy cream
pinch of salt

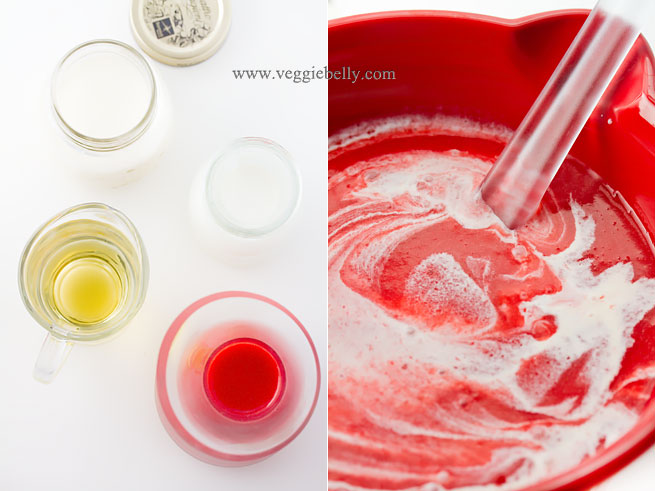
In a blender, puree the raspberries, fruit juice and sugar. Pass through a strainer (with a bowl below), reserving the liquid and discarding the solids that remain in the strainer.  Stir in buttermilk, cream and salt.  Cover and refrigerate for about an hour.

Then process the mixture in an ice cream maker according manufacturers instructions. Then scoop the churned sherbet into an airtight container and freeze for at least 2 hours before serving. Thaw the sherbet for about 5 minutes before serving.

See notes above on how to make this recipe without an ice cream maker.

Vegan Eggplant Rollatini Stuffed with Couscous and Pine Nuts

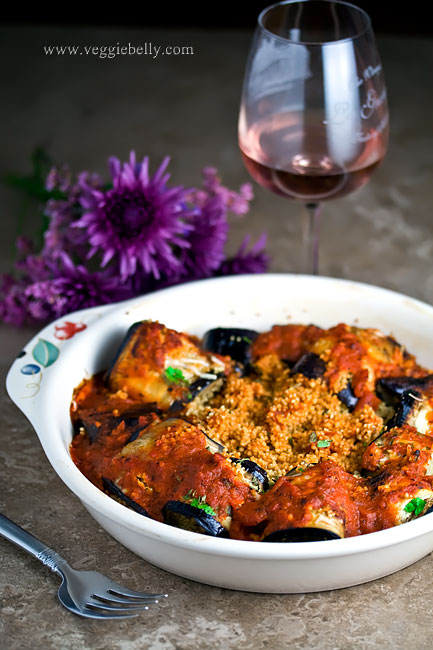
A typical Italian rollatini or rolatini has ricotta, parmesan and other cheeses and sometimes the eggplants are dipped in egg before pan frying. I cut out the dairy and eggs in this recipe to keep this rollatini vegan. Not using cheese also lightens this dish up considerably. Instead of the cheese, I stuffed the rollatini with a delicious toasted pine nut couscous that Near East sent me to sample.

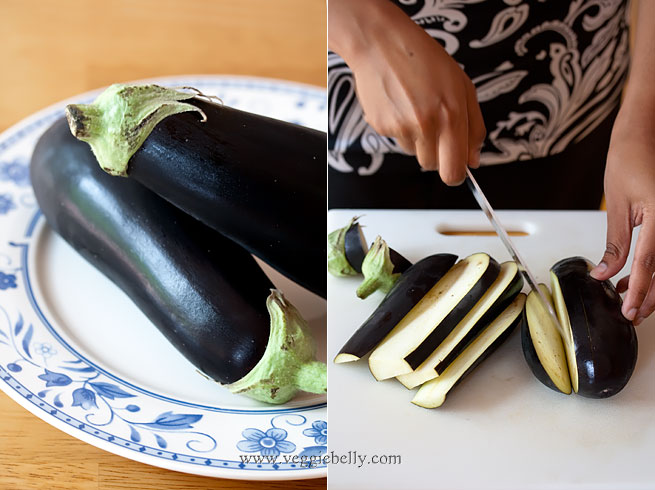
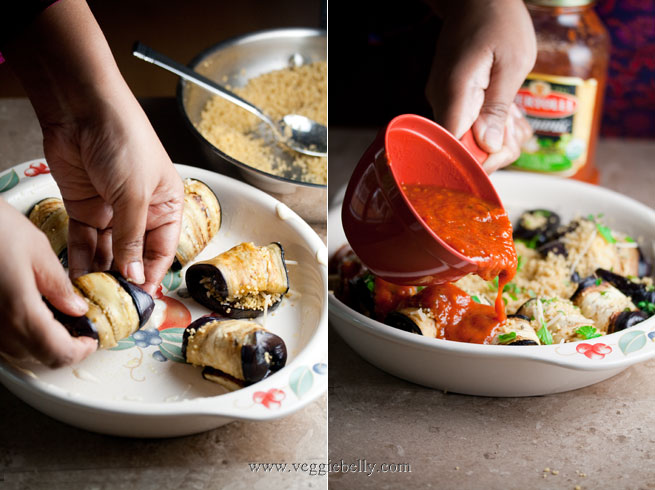
Take 2 medium eggplants. Cut off the stem end. Slice the eggplant lengthwise into 1/4th inch thick pieces. Discard the two end slices which have too much skin. Sprinkle salt and pepper on the slices

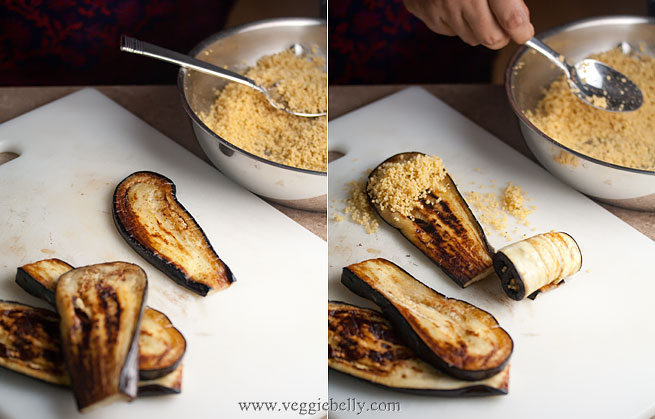
Pan fry the eggplant pieces in a skillet with a little olive oil, till they are golden (sorry, no photo!). Then place the slices on a work surface. Place a spoon of cooked pine nut couscous on one end of the eggplant.

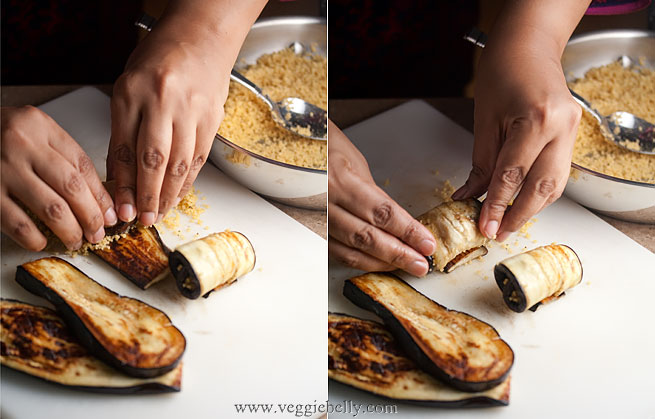
Roll. Repeat.

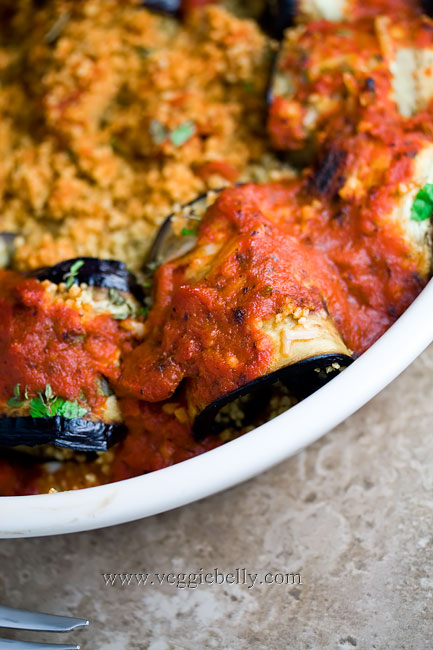
Place the stuffed and rolled eggplant onto a baking dish that has been spread with margarine or olive oil. Place any extra couscous in the center of the baking dish and inbetween the eggplant rolls. Sprinkle chopped parsley or basil.

Pour a cup of marinara sauce over. Non vegans: sprinkle 3/4 cup of mozzarella cheese at this stage. Bake till bubbling.

Eggplant Rollatini stuffed with Couscous and Pine nuts Recipe

serves about 2

2 medium eggplants
salt and pepper
1/2 cup couscous, uncooked
4 tablespoons toasted pine nuts
2 tablespoons chopped basil or parsley
1 1/2 cups marinara sauce, use more if you like it saucy
2 tablespoons margarine or olive oil + more to cook eggplants

Pre heat oven to 375f.

Cut eggplant lengthwise into 1/4th inch thick strips. Sprinkle salt and pepper. Pan fry the strips on a little olive oil till both sides are golden.

Cook the couscous according to package instructions. Mix in the toasted pine nuts to the couscous.

Place a spoon of the the couscous on one end of an eggplant piece, and roll it. See pictures and instructions above. Repeat with all eggplant strips. Place the stuffed and rolled eggplants onto a baking dish that has been rubbed with a little margarine. Add any left over couscous to the baking dish. Sprinkle basil or parsley on top. Then pour marinara sauce over. Non vegans can add 3/4 cups of shredded mozzarella. Bake till the sauce is bubbly, about 15 minutes.

Note: If you dont want to bother with rolling the eggplants, layer the eggplant, couscous and marinara sauce to make vegan eggplant and couscous lasagna!

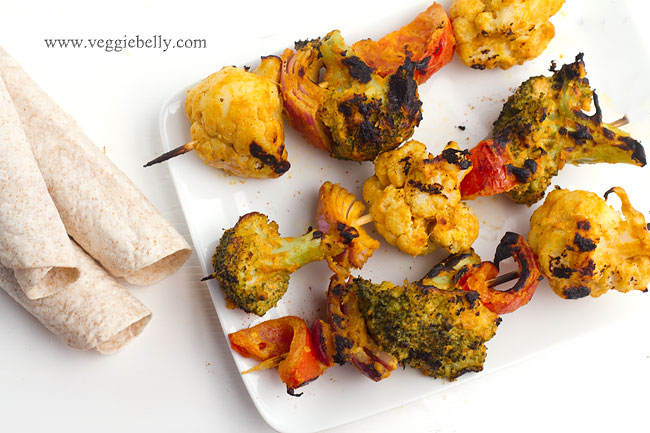
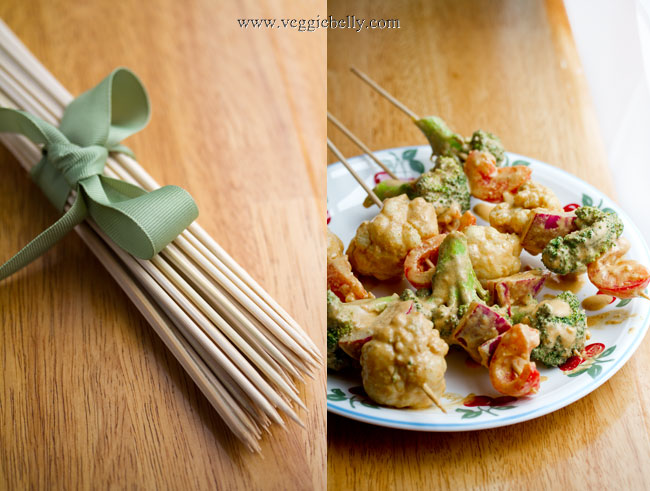
Tandoori Grilled Broccoli and Cauliflower Kebabs


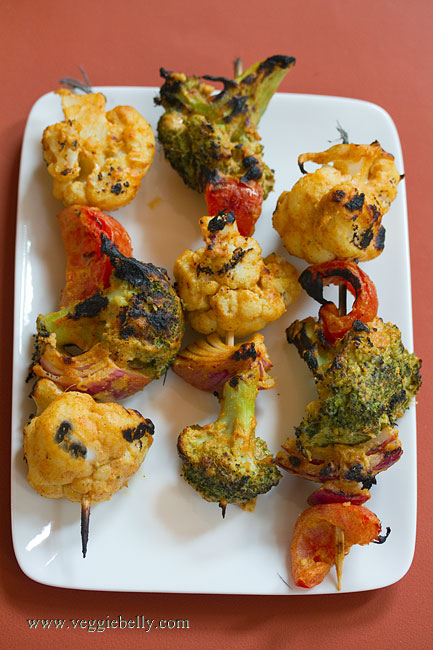
A tandoor is an Indian clay oven. Marinated meat, cottage cheese (paneer) or vegetables are skewered and cooked in the oven. The result is smoky, charred skewers of tandoori yumminess.


Make sure you soak the skewers before grilling, otherwise they will burn on the grill. If you dont have a grill, you can place the skewers in the oven and broil them till brown and slightly charred. Then flip the skewers and broil the other side.
The tandoori marinade recipe I give you is very versatile, you can use it for paneer, tofu, potatoes, even seitan.

I like to blanch the broccoli and cauliflower before marinating. This reduces grilling time and also makes it easier to thread the skewer into the broccoli and cauliflower.

We usually eat these grilled kebabs with either brown rice, rotis or pita bread and some raita. Here are some recipes on Veggie Belly that will make great accompaniments to these kebabs:

Walnut raisin rice

My grandmother’s multicolored raita

Tamarind Jelly

Tandoori Grilled Broccoli and Cauliflower Kebabs Recipe

serves about 2 as an entree

4 bamboo skewers (about 10 inches long)

1 small head of broccoli
1/2 small head of cauliflower
1 small red onion, cut into 4 wedges
1 large tomato, cut into 4 wedges

for marinade
3 tablespoons chickpea or garbanzo flour (besan)
1/2 cup yogurt
2 tablespoons lemon juice
2 tablespoons vegetable or canola oil
1 tablespoon garlic paste
1 tablespoon ginger paste
1 teaspoon garam masala
1 teaspoon paprika
1/2 teaspoon turmeric powder
1 teaspoon coriander powder
Salt

Soak bamboo skewers in water for atleast 30 minutes, to prevent them from burning on the grill.

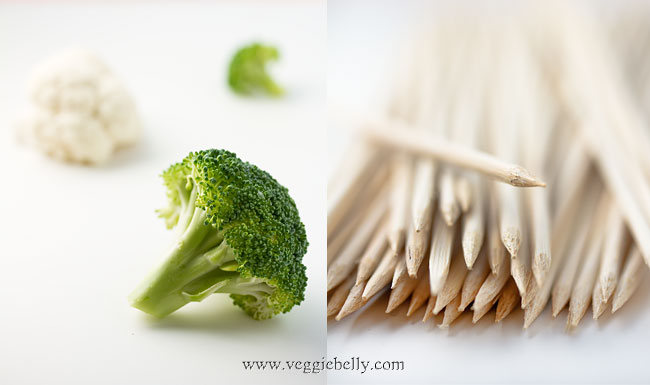
Cut the broccoli and cauliflower into large florets. You should have 6 florets (about 2 cups) each of broccoli and cauliflower.

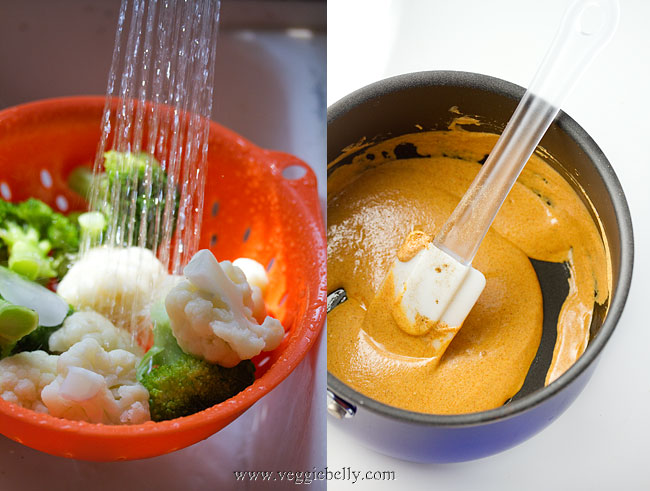
Bring water to boil in a medium pot. Add plenty of salt. Add the broccoli and cauliflower florets. Bring back to a boil. Cook for 20 seconds. Then turn off heat and drain the broccoli and cauliflower. Rinse under very cold water to stop the cooking. If the tap water is not cold enough, dunk the broccoli and cauliflower in a bowl filled with water and ice cubes, then drain. Pat dry with a towel. Make sure the vegetables arent wet, if they are they will dilute the marinade.

Whisk all marinade ingredients together in a bowl. Add the broccoli, cauliflower, tomato and onion pieces to the marinade. Mix gently so the marinade coats all the vegetables. Cover and refridgerate for about 30 minutes.

Heat an out door grill to 400f. Skewer the broccoli, cauliflower, onion and tomato pieces. Place on grill and cook till one side of the vegetables is slightly charred, about 1 minute. Then using tongs, flip the skewers and cook the other side. If you dont have a grill, broil the skewers in the oven.
Cambodia – Places, Faces and Food

If you are a regular reader of this blog, you know I took a trip to South East Asia earlier this year. You can see my posts and recipes from Thailand here, here, and here. I also went to Cambodia on that trip; here are some pictures and thoughts from Cambodia..
Bayon temple in Angkor Thom

Angkor Wat, Cambodia’s major tourist attraction is a spectacular, 800 year old temple complex. The scale and beauty of the Angkor temples are awe inspiring. But at the same time, they were nothing new to me – I grew up in India with ancient temples all around me.  What really intrigued me was the fact that these  Hindu temple complexes exist  so far away from India.

Ta Prohm temple, where Tomb Raider movie was shot

“If Angkor Wat, the Bayon and other temples are testimony to the genius of the ancient Khmers, Ta Prohm reminds us equally of the awesome fecundity and power of the jungle. There is a poetic cycle in this venerable ruin, with humans first conquering nature to rapidly create, and nature once again conquering humans to slowly destroy” – Lonely Planet Cambodia

 Faces of Cambodia

The children of Cambodia, whether they are novice monks, beggars on the streets or school kids on vacation, are the most beautiful I have ever seen.

Bright orange clad monks were everywhere – a striking visual juxtaposition to the monochrome, stone temples.

Just as the sun was setting, and the throngs of tourists were leaving Angkor, I saw this beautiful, graceful young monk emerge from the stone facade to catch a glimpse of the setting sun. I chatted him and his friend up, and offered some candy; they were then more than happy to pose for me :)

This girl, along with her little brother were begging in the hot sun. She was hauntingly beautiful. I asked my tour guide to tell her she was pretty. But he hesitated. Perhaps, he did not want to complement a beggar girl? I then asked him what the khmer word for beautiful was and repeated it to her.

These kids were playing in the water to cool off. This used to be the Queen’s pond when Angkor was inhabited.

Vegetarian Food in Cambodia

I had no trouble finding meatless food in Cambodia. (Some of the dishes I ate probably had fish sauce in them, but I was ok with that). I had breakfast at the hotel, which was a huge continental spread. Lunch was near the tourist attractions and the waiter perfectly understood ‘no meat’. Dinner was in downtown Siem Reap where there are a handful of vegetarian restaurants.

A bas relief in Agkor showing people placing skewered meat over a fire – barbeque..800 years ago!

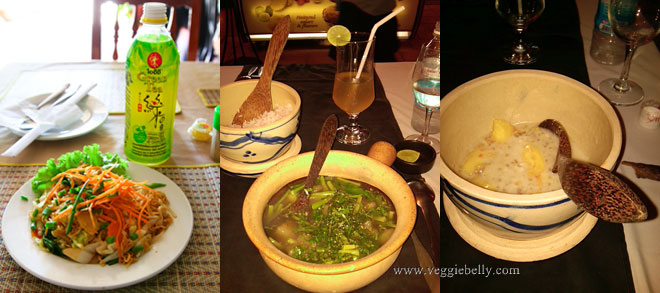
Right to left – a) Veggie noodles and green tea for lunch near Angkor Wat. After my food came I realized it was instant noodles, ugh!  b) Dinner at Chamkar vegetarian restaurant in Siem Reap; Cambodian sour soup with pumpkin and greens served with rice. c) Dessert – lentil and banana pudding

If you go to Siem Reap, Chamkar restaurant in old market, is great. Chamkar is a vegetarian/vegan restaurant, serving Cambodian food. Its on a busy, but beautiful street, service is good and prices are low. My soup was light, and rustic. I wasnt crazy about the lentil-banana dessert though.

Pardon the ugly food pictures, it was the end of a very hot and tiring day so I decided to abandon my (heavy) camera at the hotel before heading for dinner. The second and third pictures were taken with my cell phone camera.

Related Posts with Thumbnails