Indian Coconut Rice. A Guest Post for 6Bittersweets

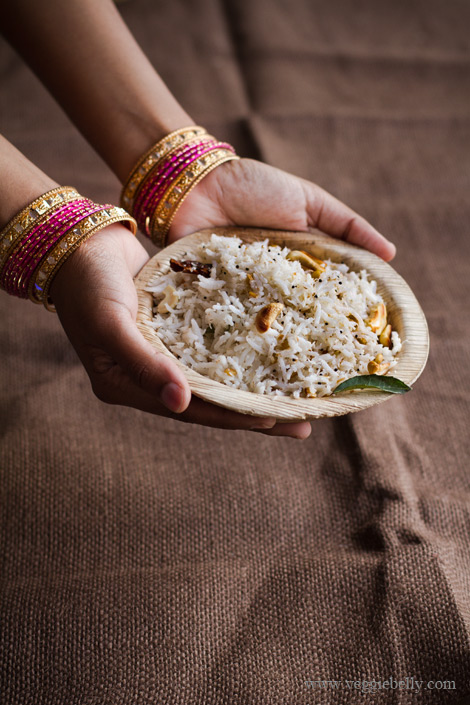
I’m at the airport, about to board my plane to India (and then I’m going to Jordan, Dubai and Israel). I wanted to quickly tell you about my coconut rice guest post over at my lovely friend Xiaolu’s blog 6bittersweets. While I was busy packing and finishing up work before I leave for my trip, I was resorting to easy, filling recipes like this one. This coconut rice is fragrant, easy to make and very flavorful.

Head over to 6bittersweets blog to read my post on this Indian coconut rice recipe !

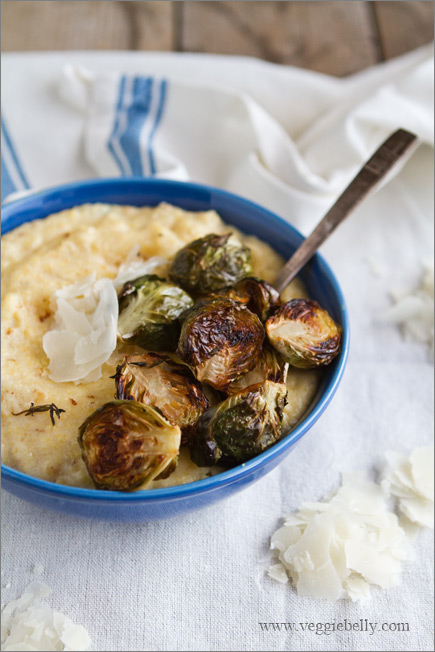
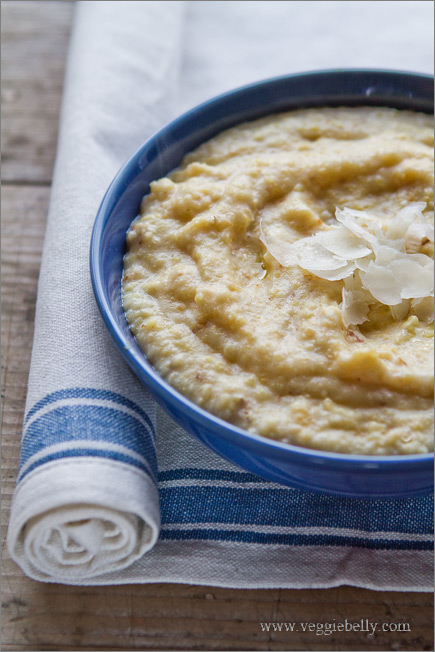
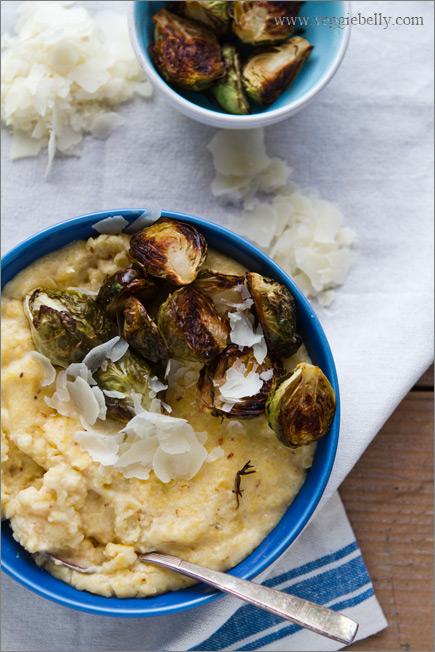
Creamy Polenta with Balsamic Roasted Brussels Sprouts Recipe

This creamy polenta with balsamic roasted brussels sprouts recipe is the ultimate comfort food. I love curling up on the sofa with a hot bowl full for dinner. The left overs are great for lunch the next day.

Roasting brussels sprouts in the oven till they are caramelized is my favorite way of preparing them. If you are not  fan of brussles sprouts, simply replace  them with broccoli florets or mushroom caps. Yum!

I like my polenta extra creamy, so I add half milk, half water as my cooking liquid. Make sure you use a large pan to accommodate the boiling and spluttering from the polenta.

Bob’s Red Mill is my favorite polenta. The flavor and texture are just wonderful. Polenta is nothing but ground cornmeal. It comes in fine, medium or coarse grinds. I like the texture of medium and coarse grinds for this recipe. Cooking times may vary depending on what grind you use.

Creamy Polenta with Balsamic Roasted Brussels Sprouts Recipe

serves 3-4

Ingredients for Creamy Polenta
1 1/2 cups water or vegetable stock
1 1/2 cups milk, any fat% you like
1 cup polenta (not the quick cooking type). I like Bob’s Red Mill polenta
salt
1 tablespoon butter
1/4 cup grated parmesan cheese

Method
In a large pot, bring the milk and water or vegetable stock and some salt to a boil. As soon as it begins to boil, pour the poelnta/corn meal in a steady stream, while whisking. Continue to whisk till it is incorporated.

Let the polenta cook on medium heat for about 30 minutes or till the polenta is cooked and no longer gritty. Stir the polenta every 10 minutes so it doesnt burn in the bottom. Be cautious, the polenta can bubbles and splutter as it cooks.

When polenta is done, butter and parmesan. Serve immediately with roasted brussels sprouts (recipe below).

Polenta will tighten up as it cools. To reheat, add a little water to it.

Ingredients for Balsamic Roasted Brussels Sprouts
12 brussels sprouts. Substitute with 12 broccoli florets or 18 white button mushrooms
3/4 tablespoon olive oil
1/2 tablespoon  balsamic vinegar
1 clove garlic, peeled. Optional
3 thyme sprigs. Optional
Salt
Cracked black pepper

Method
While the polenta is cooking, work on th roasted brussles sprouts.

Pre heat oven to 375f

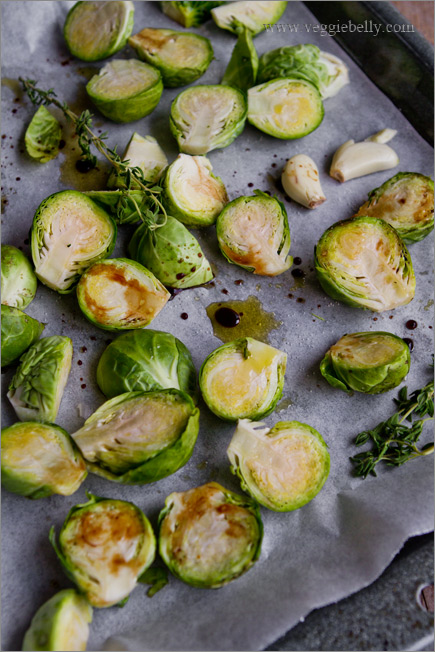
Cut and discard the brussles sprouts stems. Peel away any yellow leaves. Cut each brussels sprout in half lengthwise.

Place brussles sprouts in a bowl with all other ingredients and toss well.

Spread out on a baking sheet lined with parchment paper. Make sure the brussels sprouts are in a single layer.

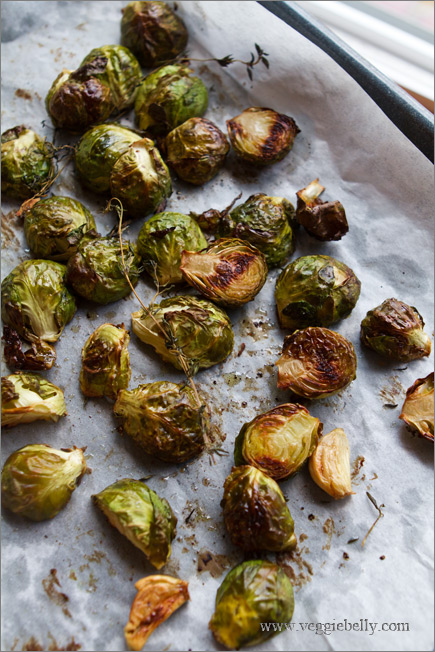
Bake in a 375f for about 20 minutes or till the brussels sprouts are browned. Half way through, toss the brussels sprouts and return to the oven, so they brown evenly on all sides.

If using broccoli or mushrooms follow the same method, but roast them in a 425f oven for about 20 minutes or till browned.

Serve hot with creamy polenta.

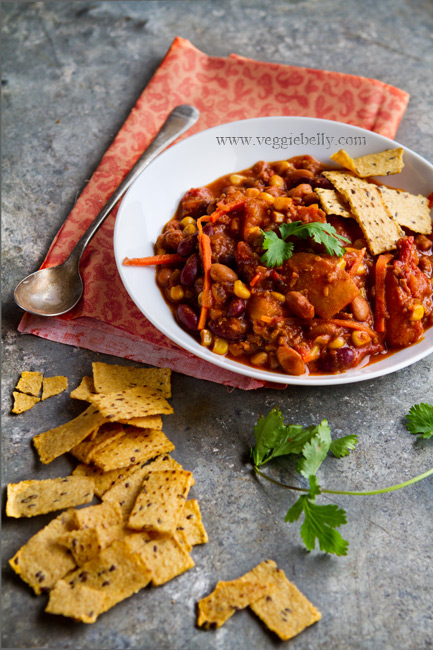
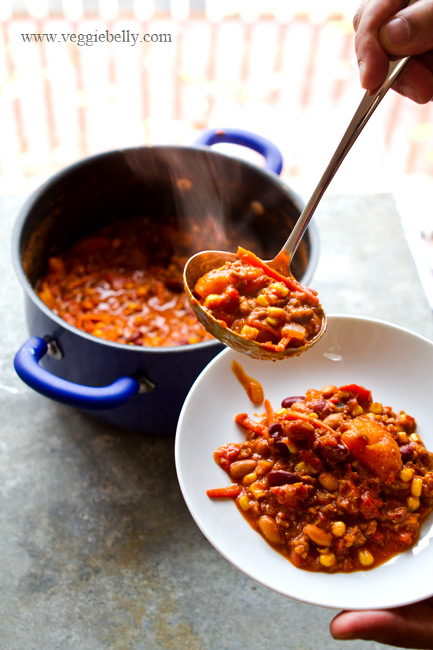
Drunken Pumpkin Chili Cooked in Oregon Beer

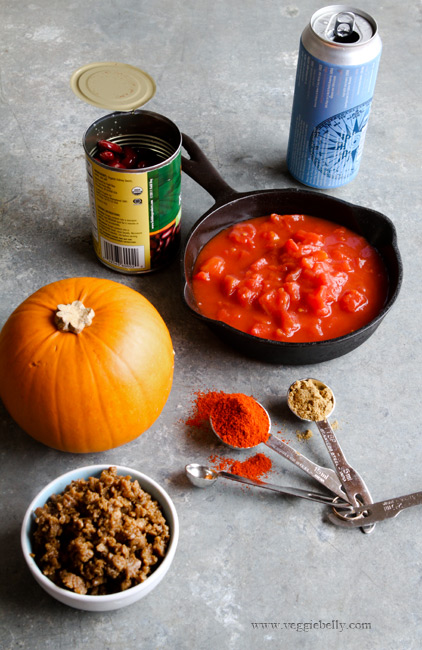
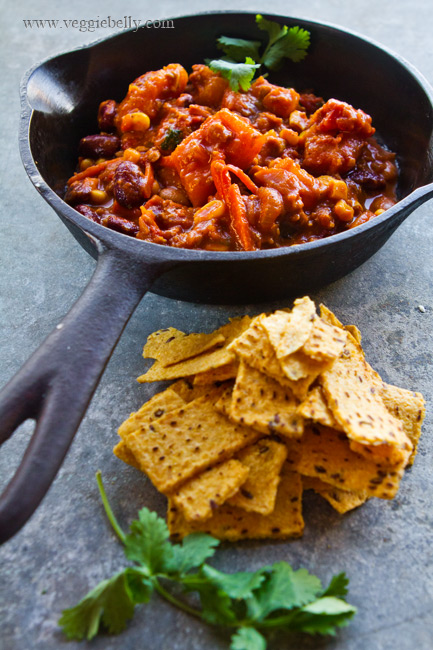
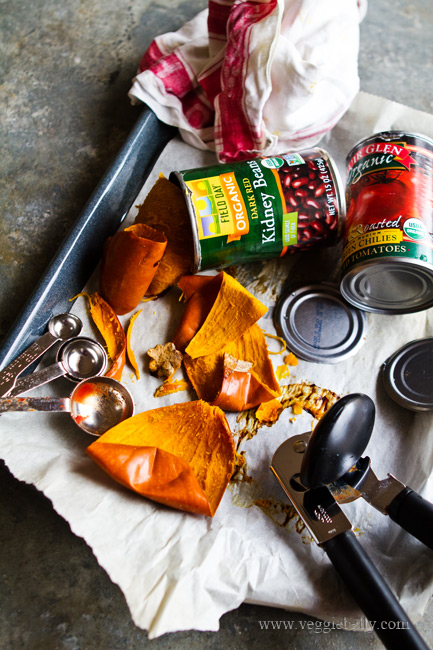
If you know how to open a few cans, you can make this vegetarian drunken pumpkin chili recipe. Its that easy! I kept this recipe seasonal by using some pumpkin. You could easily leave out the pumpkin part of the recipe, and still have a very yummy chili.

In the summerI use zucchini in this recipe instead of the pumpkin. But no matter what season you make this chili, make sure to use a beer you actually like. Dont use a beer that is too bitter, it will make your entire chili bitter. As a tribute to Oregon’s amazing local beers, I used a beer from here. But any pale lager or medium bodied beer will work. Serve the same beer with your meal.

This is a great recipe to make ahead or to feed a crowd. The recipe is also very forgiving, you can adjust the seasonings as you like, leave out the pumpkin, use different beans, cook it too long, too less..it will still taste good! Meat lovers will like this dish too.

Drunken Pumpkin Chili Recipe

Serves about 6

Ingredients
one 1.5 lb pie pumpkin or sugar pumpkin
2 tablespoon olive oil
1 large onion, diced
1 large carrot, cut into matchsticks
2 tablespoons paprika
1 tablespoon chili powder
1 tablespoon ground cumin
one 15 oz can kidney beans, drained
one 15 oz can pinto beans, drained
half a 15 oz can sweet corn, drained
two 14 oz cans of diced tomato
1 tablespoon tomato paste
one 12 oz can of beer (pale or medium lager)
2 cups meatless crumbles like Yves ground round or Morningstar crumbles
1 cup shredded pepper jack cheese

Method
Pre heat oven to 375f

Using a sharp knife, cut the pumpkin in half. Using a spoon, scoop out the seeds and membrane. Place the pumpkin halves on a cookie sheet lined with parchment paper, cut side down. Bake in a 375f oven for 15 minutes or just until the pumpkin is soft enough to peel the skin away. 

When the pumpkin is done, remove from oven. Wait for it to cool enough to handle it. Peel the skin, and discard. Also discard the stem end of the pumpkin. Cut the pumpkin into 1 inch cubes. You should have about 3 cups of cubed pumpkin.

In a large pot, heat the oil and add the diced onion. Cook on medium heat till the onion is soft. Then add the carrots, paprika, chili powder, and cumin. Stir for about 30 seconds.

Add the kidney beans, pinto beans, sweet corn, and tomatoes, tomato paste, beer, the baked and peeled pumpkin, and salt to the pot. Bring to a boil, while stirring. When the chili boils, reduce the heat and simmer for 15 minutes or till the pumpkin is soft.

If the chili gets too thick, add 1-2 cups water.

When the pumpkin is soft, stir in the meatless crumbles and cook just untill the crumbles are heated through. If using frozen crumbles, make sure they get completely heated.

Taste and adjust for salt. At this point if you like, you can add 1 tablespoon of sugar to the chili for some sweetness or 2 tablespoons lime juice for some tang. Both are optional.

Serve drunken pumpkin chili with sprinkled cheese on top and tortilla chips or brown rice.

Tofu Skin Roulade with Sage Mushroom Stuffing. A Vegetarian Thanksgiving Recipe

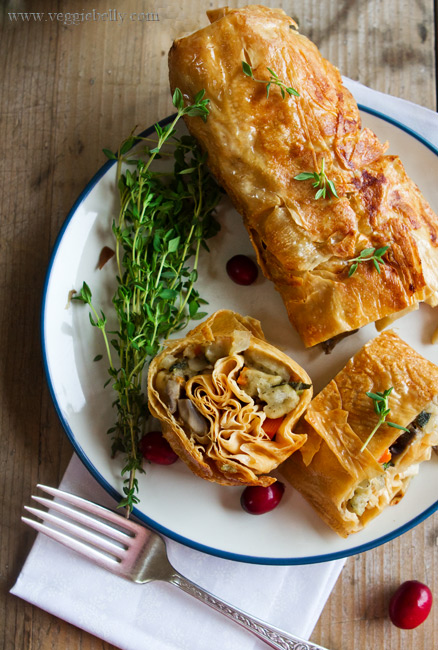
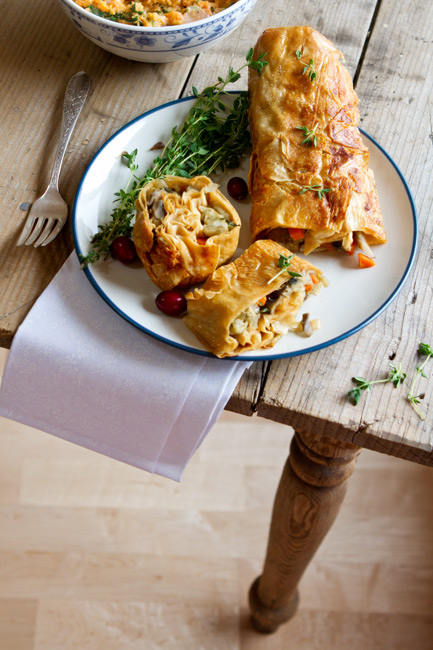
I wanted to come up with a vegetarian thanksgiving recipe this year that can be a beautiful centerpiece on the vegetarian thanksgiving table. Just because you are vegetarian doesnt mean you are doomed to eat a bunch of sides (or tofurky..ugh!) on thanksgiving day. Make this tofu skin roulade with sage mushroom stuffing a day ahead and reheat it by steaming it for 10 minutes or so.

The tofu skin forms a golden exterior with great texture, and the stuffing inside is moist and mushroomy. Your very own, home made vegetarian tofurky for thanksgiving!

You will generally find tofu skin in Chinese restaurants, it is usually braised or stewed in a sauce.

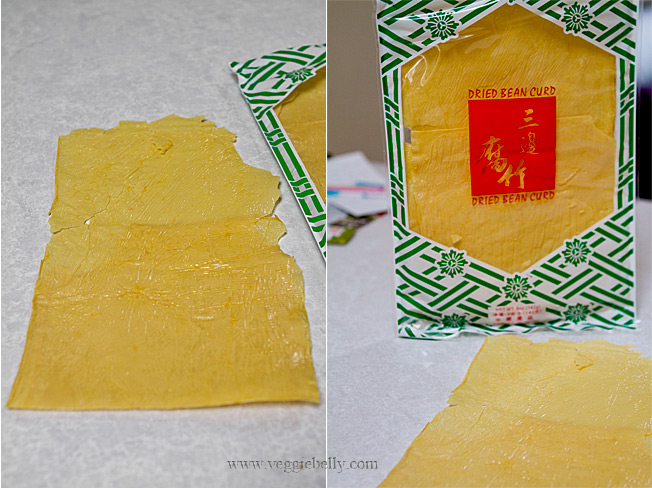
Tofu skin, also called beancurd skin or yuba is the skin that forms when simmering a pot of soy milk. It comes dried or frozen and is available in Asian stores. If using dried tofu skin or yuba, reconstitute it in hot water. If using frozen, simply defrost it for this recipe.

Tofu skin may look delicate, but it actually holds up very well to stuffing, rolling and steaming (which is what this recipe involves). If you cant find tofu skin or yuba, try making this recipe with seitan. See this recipe from the vegetarian times for seitan roulade or this recipe by vegan yumyum

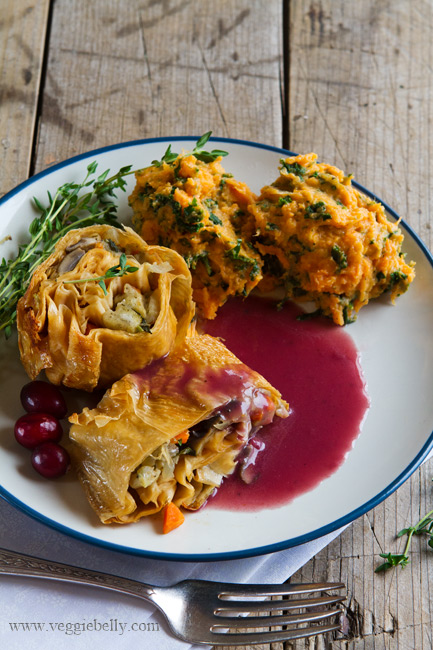
Serve this tofu skin roulade with sage mushroom stuffing, along with my red wine gravy, kale and goats cheese mashed sweet potato (recipe coming up next!), and steamed green beans or brussels sprouts.

Tofu Skin Roulade with Sage Mushroom Stuffing

serves 2-3, with some left over stuffing to serve on the side.

Ingredients
three 9×12 inch sheets of dried or frozen tofu skin, also called yuba
1 tablespoon butter
1/4 cup diced onion
1/4 cup diced carrots
1/4 cup diced celery
6 large button mushrooms, chopped
1/2 tablespoon chopped fresh sage
2 sprigs of thyme
1/4 cup vegetable stock
1 cup store bought stuffing. I like pepperidge farm.

Method
If using frozen tofu skin or yuba, let it defrost before using. If you are using dried tofu skin or yuba, boil a large pot of water, turn off the heat, and put the tofu skins in the water. Let them soak for 15 minutes. Then gently pull them out of the water, letting all the excess water drip away.

Lightly oil a clean work surface, so that the tofu skins dont stick.

Lay 3 sheets of tofu skin, one on top of the other, so that their longest side is closest to you. If the tofu skins tear a little, dont worry, just patch them up.

Now work on the stuffing.

Heat butter in a skillet, add onion, carrot and celery and cook on medium heat till the onions are soft. Then add mushrooms, saute till the mushrooms are cooked, about 3 minutes. Add the sage and thyme, stir.

Add the stock and bring to a boil. Turn off heat, and stir in stuffing. Toss everything till the stuffing is mixed well, and absorbs all the stock.

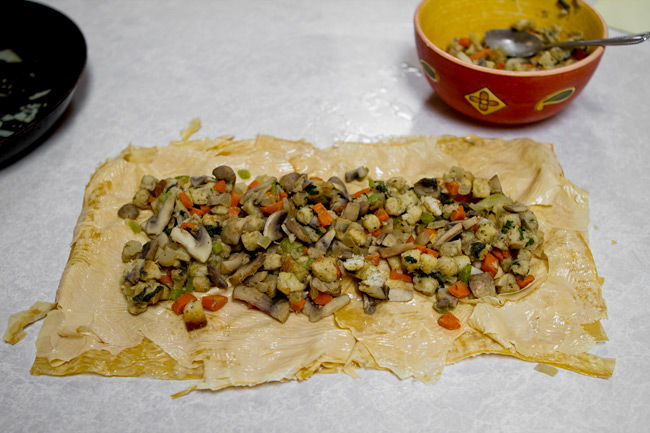
Now put the stuffing on the tofu skin layers, leaving a 1/2 inch border (see photo above). You dont have to use all the stuffing if it doesnt fit. Its ok if the stuffing is a little dry, it will moisten up when you steam the roulade.

Gently fold over the right and left sides of the tofu skins. Then pick up the longer side closest to you, and roll away from you. Keep the right and left sides tucked in as you roll away from you. Roll gently but firmly.

Place the roulade on a sheet of aluminum foil. wrap the foil around the roulade to make a log. Twist the ends closed. Repeat this with a second layer of foil.

Now the roulade is ready to steam.

Heat water in a large pot. Place a colander over the pot. Its brim must fit over the pot, but make sure the bottom of the colander doesnt touch the water.

Steaming method 1 – Put the roulade log into the colander, and cover with a lid. Bring the water to a boil, and steam on medium high heat for 1 hour or till the tofu skin is soft. Add more water to the pot as and when necessary.

Steaming method 2 - steam the roulade in a bamboo steamer. Steam till the tofu ski is tender, about 1 hour.

Steaming method 3 – this is what I used. take a skillet large enough to hold the roulade, pour 1/2 to 1 cup water in it. Bring to a boil. Place the roulade in the skillet. Cover it. Reduce heat to medium-high, and let the roulade steam, adding more water as it evaporates. Steam till the tofu skin is tender and no longer rubbery, about 1 hour.

When the roulade has steamed, removed it from the colander, and let it cool a little.

Then removed the foil wrapping.

Heat 1 teaspoon olive oil or butter in a non stick skillet. Carefully place the roulade on the skillet and sear all sides of the roulade till they are lightly golden.

Serve with red wine gravy, and kale and goats cheese mashed sweet potatoes.

Red Wine Gravy

serves about 4

Ingredients
1 cup red wine
1 cup vegetable stock
1 tablespoon flour
1 sprig of thyme, optional
1 tablespoon butter
Salt, pepper

Method
Whisk the wine, stock and flour together. Make sure there are no lumps. Add the thyme sprig. Pour into a sauce pan and simmer till the sauce has reduced to half its original volume. Whisk in the butter, salt and pepper. Strain and serve with tofu skin roulade.

Aloo Gobi Tart Recipe

..a guest post by Radhika of Food for 7 Stages

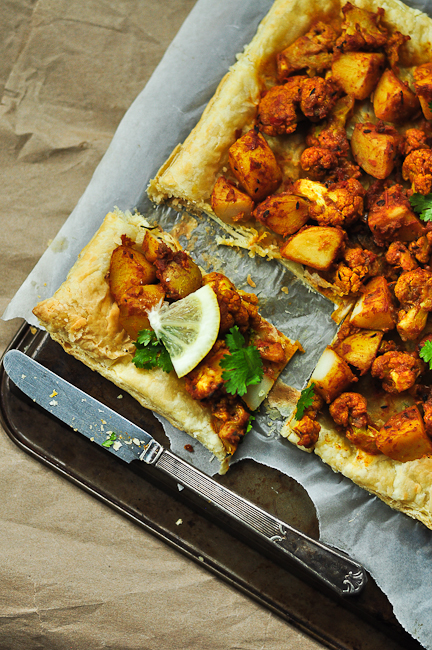
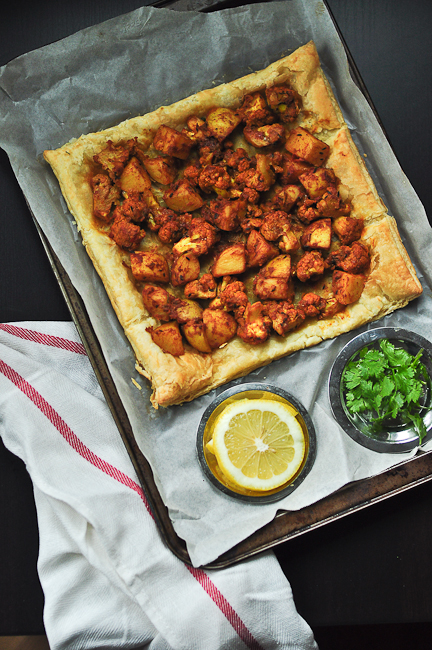
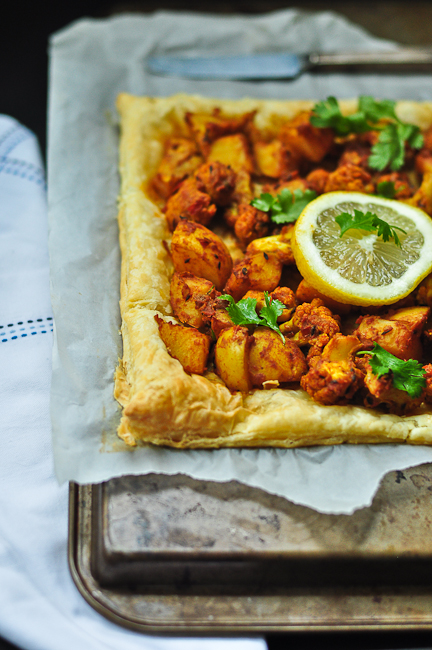
I have been reading Radhika’s mouth watering blog,  Food for 7 stages right since its inception. I am excited to invite her to guest blog today, because her recipe for aloo gobi (Indian potato and cauliflower curry) tart is ingenious. We usually eat al00 gobi with rotis, but radhika puts this classic curry on a puff pastry shell to make it a spicy, decadent meal.

And make sure you read my travel posts, about my vegetarian road trip across america part1 and part2

You need inspiration and then some motivation to pursue a task. When it comes to blogging I draw the inspiration from bloggers like Sala of Veggie Belly. Her eye candy pics, storytelling and her love for traveling makes me feel connected with her though I don’t know her personally. But that is what a good blog and good blogger do to you.

When I came to know that Sala was looking for bloggers to guest post whilst she was traveling across the country, I immediately wrote to her. And she graciously accepted my request to guest post in her beautiful blog. Though it is hard to express my gratitude through words, I thank Sala wholeheartedly for giving me this opportunity to write this guest post in Veggie Belly. 

The tree in front of my home warned us well ahead of time about the changing season. Though I am happy to see those bright orange leaves am not really prepared to face the  aftermath. The thought of unpacking the long forgotten boxes filled with our jackets and winter clothes makes me nervous. I couldn’t believe that one brutal winter can change my love for this season. However, I have to accept the fact and move forward. Before the temperature drops further I have to move all my plants indoor, paint our deck and rearrange my home. Sigh. 

As there is always a blessing in disguise, it is the right time to turn on my oven and get started with baking again. The nip in the air made me crave for something hot yet spicy and I got reminded of the gluten free fusion tart I baked few months ago. Though I was not very happy with the tart crust as the sweetness of almond meal was overpowering the better half seemed to like it. And Aloo Gobhi tart it is. This time I wanted to whip up something real quick and I didn’t have patience to make the tart crust from the scratch. Ding… The idea of using puff pastry popped in my mind and viola I had a delicious savory tart to share it with you all. Flaky buttery crust forms a perfect base for this spiced Aloo Gobhi Masala and I would never think of using another crust recipe. Yumm.

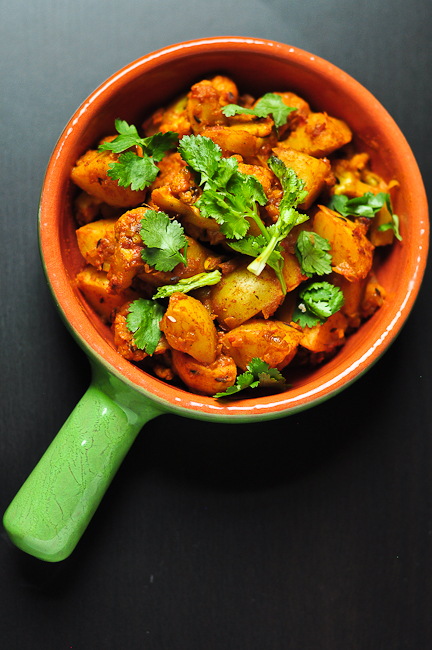
There are very few vegetables that marry well with each other. Cauliflower (Gobi) and Potatoes (Aloo) are the right candidates for this perfect marriage. When these two vegetables are blended together with the right spices they create wonders and Aloo Gobhi is one such popular dish from India. The very thought of combining this popular curry with flaky puff pastry makes me weak at the knees. If you are a savory lover like me, go ahead and make this Aloo Gobi tart. I am sure you will enjoy this fusion savory tart as much as my family did. 

Aloo Gobi Tart Recipe

serves 2-3

Ingredients
2 cup Cauliflower florets
2 Potatoes (medium size)
1/2 teaspoon finely chopped ginger
1/2 cup finely chopped Onion
1/4 cup finely chopped Tomato
3 teaspoon Canola Oil (or any cooking oil)
1/4 teaspoon Cumin Seeds / Jeera
2 Cardamon pods
1/4 teaspoon Turmeric Powder
1/2 teaspoon Chili Powder
1/2 teaspoon Kashmiri Chili Powder or red chili powder
1/2 teaspoon Cumin Powder
1/2 teaspoon Coriander Powder
1/4 teaspoon Garam masala
2 teaspoon Yogurt
2 cup + 4 teaspoon Water
Salt to taste
1 Puff Pastry Sheet (preferably Pepperidge farm), substitute with home made or store bought pie crust
1/4 tablespoon Butter (Optional)
2 tsp Dried fenugreek leaves / Kasuri Methi (Optional)

Method
 Preheat oven to 400 F.

Line a baking tray with wax/parchment paper or foil. Brush it with butter/oil. Place 1 frozen puff pastry sheet on it and allow it to thaw.

Wash cauliflower florets. In a sauce pan, add 2 cup of water, 1/2 tsp salt. Bring it to boil. Turn off and add the cauliflower florets. Let it stand for couple of minutes. This step will cleanse the cauliflower.

In another sauce pan, boil Potatoes until it is 95% cooked (fork tender). I prefer to steam the potatoes. I cut them into equal size chunks and put it in my steamer for 5-6 minutes.

In a wok/kadai, add oil. When it is hot add cumin seeds and allow it to sizzle. Add cardamon, finely chopped ginger. Add onion. Saute until it turns translucent, for 2-3 minutes on medium flame.

Then add tomato, 1/2 tsp salt and saute for another 3 minutes or until it becomes mushy. Add turmeric powder, chili powder, kashmiri chili powder, saute. Add 2-4 tsp water to prevent it from sticking.

Add cumin powder, coriander powder and saute. Add 2 tsp yogurt, potato and cauliflower. Mix well. Adjust salt as per taste.

Then add garam masala, mix and close the kadai with a lid and let it simmer for couple of minutes. This will allow the flavors to marry well. Do not forget to stir in between to avoid sticking to the pan.

Open the lid, if there is any liquid left cook for couple of minutes until the water evaporates. Turn off and allow it to cool.

Place the baking tray in oven and bake the puff pastry sheet for 10 minutes. Remove it from the oven and reduce the temperature to 350 F.

Spread the Aloo Gobhi Masala on the tart. Add few swirls of butter and bake for another 10-15 minutes.

Serve it hot.

Bisi Bele Bath Recipe

..a guest post by Radhika of Just Home Made

I am driving cross country at the moment, and I’ve just seen Mt. Rushmore in South Dakota! As I trek across America, I am posting a series of essays about what I’m seeing, doing and eating. Read the first one here – A Vegetarian Road Trip Across America.

While I’m traveling, I’ve asked my friend Radhika to guest post today. I cant think of anyone more qualified than Radhika to share this Bisi Bele Bath recipe with you (one of my top 10 favorite Indian foods). Radhika is a brilliant cook, and her pictures are stunning. Make sure you check out her moutwatering creations on Just Home Made. Over to Radhika for her prized bisi bele bath recipe and a post full of tips, trick and clever shorcuts..
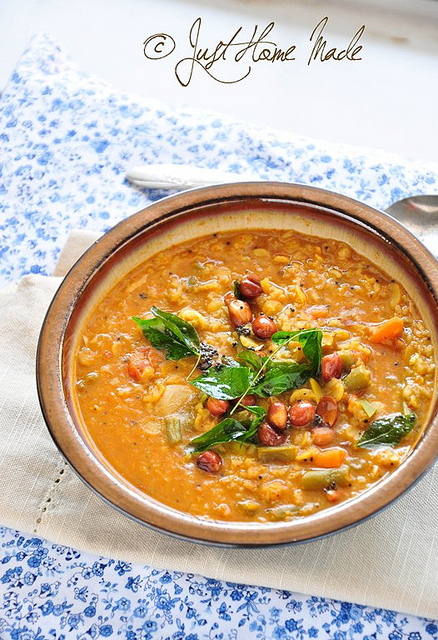
Guest posting for Sala has been on my mind for a while. When I learned of her cross country road trip and her need for guest posts, I jumped in to email my intentions. When she replied with a ‘Yes”, my joy knew no bounds…

Sala’s blog with perfectly lit beatiful photographs had me at the first look and I was hooked ever since. She has been a virtual guru to me right from my initial days of blogging even without her own knowledge. In fact, truth be told, the very first time I shot my DSLR camera in ‘Manual’ mode (for my Ghee post) was after I read her tutorial post on “How to take food photos with a bright, white, seamless background

I am ecstatic and honored more than that to be guest posting for you, Sala.. In the words of revered saint and composer Sri Purandara Dasa’s ”Kereya neeranu kerege chelli” (kannada) which translates to “Spilling the pond water to the pond”, I dedicate this post to you..
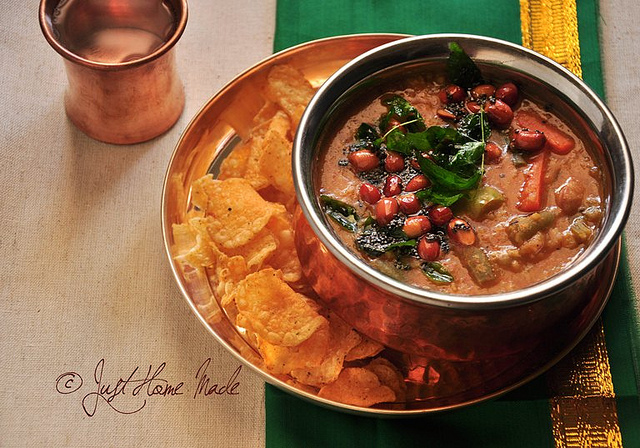
I couldn’t have suggested a better dish for this guest post than Bisi Bele Bath recipe. Until she responded with “I Love Bisi Bele Bath, I’d kill to get the recipe!”, I had no clue she likes it that much. What more do I say than Bisi Bele Bath it is?

Don’t ask me. But if you do, (we) Kannadigas take pride in our Bisi Bele Bath (also spelled bisi bele baath, bisi bele bhath, bisi bele bhaath) recipes which we undoubtedly consider as the queen of one pot meals. As with any authentic recipe, the perfect Bisi Bele Bath is quite elusive to many.

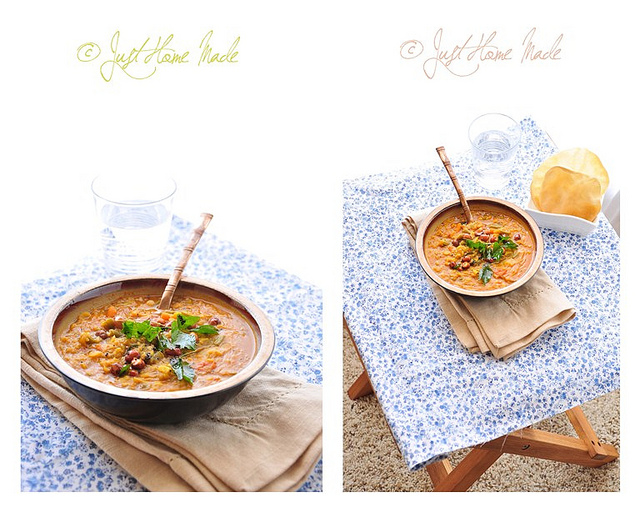
The recipe I am sharing with you here is the answer to my own quest for the perfect Bisi Bele Bath with an intoxicating aroma and a lip smacking taste after a lot of trials and nips and tucks to a number of recipes combined into one. Be prepared to lick your fingers!
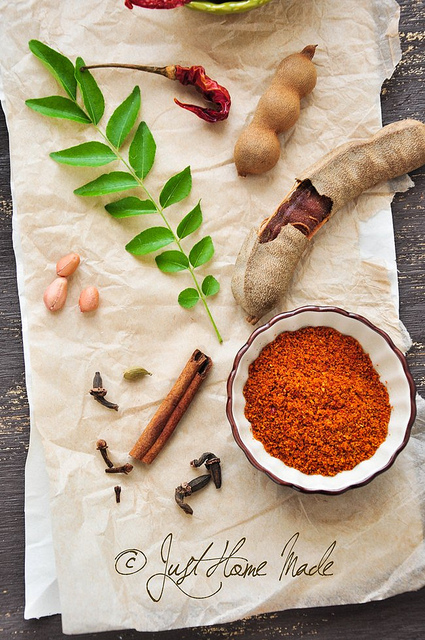
Even though the ingredient list seems long, fear not – I promise you, a tiny bit of kitchen slavery will be well worth its value in gold when this trademark signature dish of Karnataka is done..
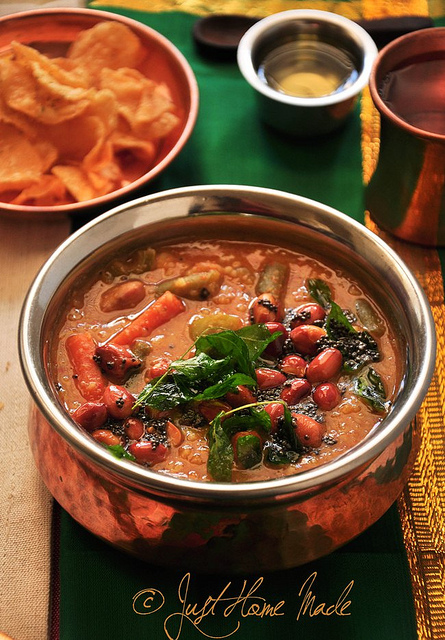
Did you know?

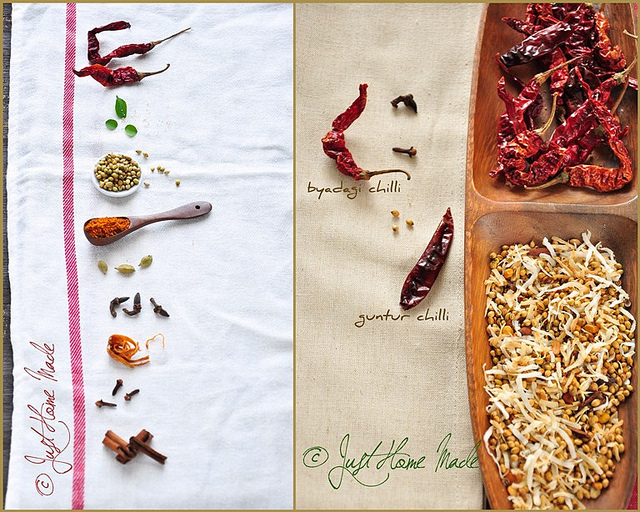
Byadagi Chilli is named after the town Byadagi in Haveri district of North Karnataka. Guntur is named after the city Guntur in Andhra Pradesh. Notice how both these red chillies come from places that have hot climates averaging at least 40° C ? (about 104°F)

Mace and Nutmeg come from the same tree; nutmeg is the seed of the tree whereas mace is the delicate lacey outer orange-red covering of the seed.

 Marathi Moggu (meaning bud in kannada) comes from the buds of silk cotton tree? Wonder why it is named after Marathi though?
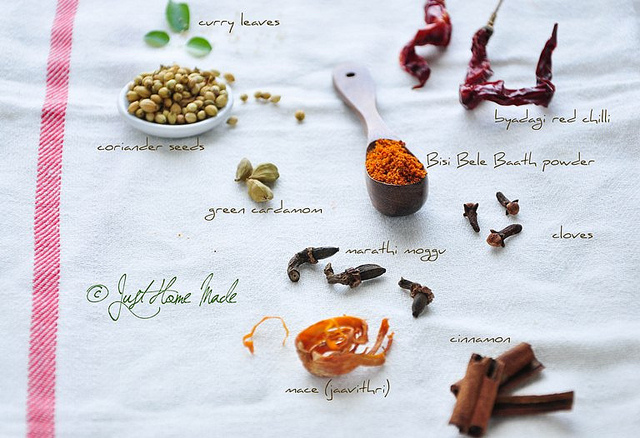
What you won’t find in the authentic version

  •  Aromatic/Basmati rice - Like I have said for Pongal, stick to non-sticky short grain rice. Unlike Pulao or Biryani, we do not want rice to take center stage, but rather blend in with the lentils.
  • Veggies like brinjal, okra or radish – Feel free to add any veggie of your choice. If in the name of Bisi Bele Baath, you get to incorporate different veggies into your food I’d gladly say yes. But, when you make it for a guest or a friend, stick to the list to preserve authenticity. 
  • Cumin seeds in the seasoning
  • Cilantro
  • Onion
  • Ginger/garlic

Notes:

  • Byadagi red chillies aren’t available in all the Indian grocery stores. Substitute for Byadagi – any high on color and mild in heat variety will do. For Guntur- any high on heat (usually low on color) variety will do.
  • For larger quantities, remember lentil : rice - 1.5 : 1 and rice to water ratio of 1: 4 or 5
  • Mace (Javithri) much like cloves is best appreciated in small quantities. Use it more and it can overpower the aroma and taste of the spice mix
  • Some like to add potatoes. But, I’d rather not as potatoes tend to absorb all the spices, neutralize them and impart their raw earthy taste.
  • If you want to skip making the spice mix from scratch or don’t have the ingredients, store-bought MTR Bisi Bele Baath powder is good enough for instant gratification.
  • Marathi Moggu (Kapok Buds) are not available even in Indian grocery stores where I live, so I brought a small stash on my India visit. However, I recently found that they are sold online.
  • Before peeling Chayote squash, slice of the ends; rub the cut open end with the chopped slice until the white froth ceases. This takes away the bitterness, if any. 
  • Store leftover Bisi Bele Baath mix in an airtight container either in the refrigerator or in the freezer to keep the aroma fresh.
Bisi Bele Bath Recipe

served about 4

Printable Recipe

Ingredients
1/2 cup Rice (sona masoori or any short grain rice)
3/4 cup Pigeon Peas (Toor Dal)
1/4 tsp turmeric
1/2 large Chayote Squash or Kohlrabi (Knol kohl) peeled, small diced
1 large Carrot, peeled, cut into 2″ long, 1 cm thick pieces
handful Green Beans, ends removed and broken into 1″ pieces
1/2 cup Double beans or Butter beans or green peas or a mix
1/2 large Green Bell Pepper (Capsicum), seeds removed and small diced
1 small tomato, diced
lemon sized seedless tamarind (adjust as per taste)
1-2 tsp Rasam powder* home made or store-bought
3 tbsp Bisi Bele Bath powder (recipe follows)
2 tbsp grated dry coconut (copra) or desiccated coconut
4 tsp peanut oil
salt

Ingredients for seasoning
2 tbsp Ghee or peanut oil or a mix of both
1/2 tsp black mustard seeds
1/8 tsp asafoetida or hing
1/4 cup peanuts or cashews
4 curry leaf stalks

Ingredients for the Bisi Bele Bath Powder
12 Dried red chillies – Byadagi
4 Dried red chillies – Guntur
2 tbsp Coriander seeds (dhania)
1-1/2 tsp bengal gram (chana dal)
1 tsp black gram (urad dal)
3 kapok buds (marathi moggu)
2 cloves (lavang)
1″ piece cinnamon (chakke)
2 green cardamom (elakki)
1/2 ” piece – mace / javitri / jai patre
1/4 tsp fenugreek seeds
1/4 tsp white poppy seeds (gasa gase or khus khus)
2 tbsp grated dry coconut (copra) /desiccated coconut

*optional: If you dont want to use rasam powder as listed above, dry roast these as well:
1/2 tsp cumin seeds
1/4 tsp mustard seeds
1/4 tsp whole black pepper
3-4 curry leaves

Method
Wash and soak tamarind in warm water for 10-15 mins. Skip this if using tamarind concentrate.

Wash rice well until water runs clear, drain and let soak for 10-15 mins. Soaking ensures rice to be cooked soft. When soaked, wash lentils until water runs clear. Cook lentils with turmeric and double the amount of water and rice with 2.5 times water in the pressure cooker for 3 whistles. Put lentils in lowest container. Alternately, cook lentils and rice on stove top separately until well cooked.

Meanwhile cook cut vegetables covered in a medium pot with just enough water. Add salt mid way and switch off when the vegetables are almost cooked but hold their shape well.

Squish soaked tamarind (if using) to a pulp. Discard leftover seeds and fiber.

While veggies, rice and lentil cook, in a kadai / thick bottomed skillet over medium heat, dry roast all the ingredients listed for the Bisi Bele Baath spice mix except fenugreek, poppy seeds and dry coconut, until fragrant and lentils turn golden brown. Remove onto a plate. Reduce the heat to low and dry roast fenugreek seeds and poppy seeds until fenugreek seeds turn golden brown. This will happen fast, so pay attention. Pour onto the plate with the other roasted ingredients. Switch off and dry roast dry coconut in the retained heat of the skillet until golden brown. If you are not using Rasam powder as listed above, optionally dry roast mustard, cumin and black pepper until mustard and cumin crackle and curry leaves crisp up. Remove onto the same plate and let cool. When roasted ingredients are cooled, grind them to a powder in a coffee grinder or a mixer and set aside. Do not open the lid, to keep the fresh aroma of the ground spices intact.

When cooker has cooled, whisk through the cooked lentils to mash well.

Heat oil in a heavy bottom pot and sauté diced green bell pepper. Add salt, diced tomato, stir and cook covered until bell pepper is cooked. Add the cooked vegetables along with the water, mashed lentils, rasam powder, salt, tamarind pulp and bring to a boil. Add rice to this and keep stirring to make sure it doesn’t burn at the bottom. Add more warm water to adjust the consistency if required.

Now add the freshly ground Bisi Bele Bath mix, stir well to break any lumps and simmer for 5-10 minutes. Check for taste and adjust tamarind, salt and spice mix. Switch off, sprinkle dry coconut on top and keep aside. Store the remaining Bisi Bele Bath mix in an airtight container.

For the tempering (seasoning), heat ghee/oil in a small kadai or saucepan over high heat. When the oil is hot enough, add mustard seeds. When they splutter, reduce heat to medium, add peanuts and stir until they crackle and turn a light brown. Now add asafoetida (hing) and curry leaves and sauté until curry leaves are crumbly crisp. Pour the tempering over on the piping hot Bisi Bele Bath, cover immediately to preserve the aroma and keep aside.

Serve hot drizzled with ghee and potato chips or Khara boondi on the side. Bisi Bele Bath tastes even better after several hours of making, which makes it a good candidate for a make-ahead meal.

Bisi Bele Baath shortcut method

Heat oil/ghee in the pressure cooker over medium-high heat and follow seasoning steps. Strain the peanuts and curry leaves and keep aside. To the seasoning, add diced bell pepper and turmeric and sauté for a bit. Add the remaining veggies and sauté, add diced tomato, salt, washed lentils, washed rice and stir well until rice turns opaque. Add tamarind pulp, rasam mix, Bisi Bele Baath mix, 5 cups of water and give it a good stir. Shut the cooker closed and cook for 2 whistles. When cooker cools, serve hot Bisi Bele baath with the fried peanuts and curry leaves. The only downside to this is some of the aroma is lost in the pressure cooking.
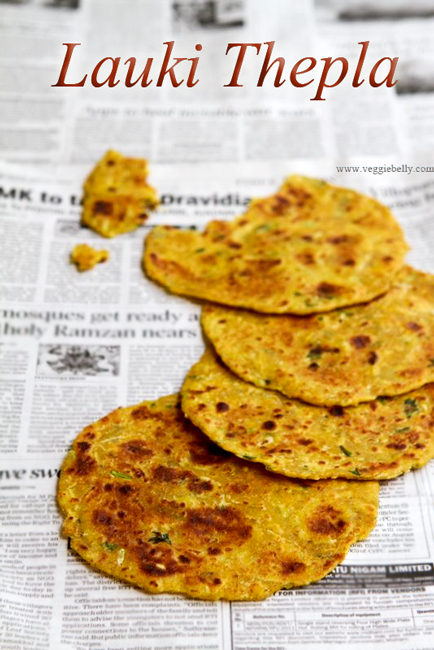
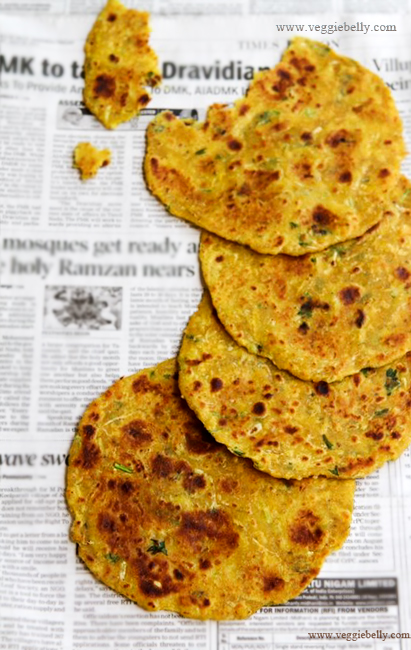
Lauki Thepla – Spiced Indian Flat Bread Recipe


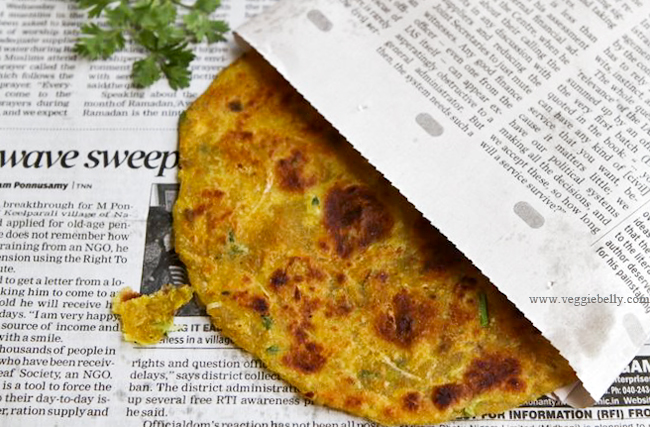
Theplas remind me of long train journeys in India. Because this spiced Indian flat bread keeps so well, it is perfect to take along for a trip. We wrap them in thin cloth towels and munch on them on our train as we watch the country side go by. Theplas are also ideal for picnics because they dont need refrigeration.

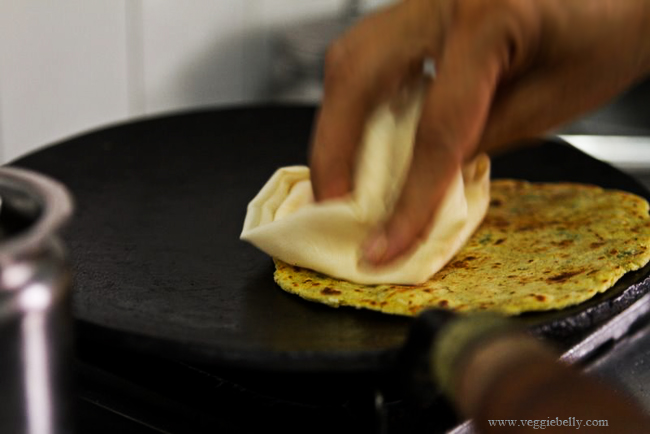
You can make theplas with or without oil. But the oil less ones wont keep as long. If you want to make theplas without oil, just put one on your skillet, and then press a bundle of cloth on it, dabbing it everywhere (see picture below). This will distribute the heat and cook the theplas evenly.

If youve never made thepla before, it might take a bit of practise to get the dough right. You will need to vary the amount of water you use depending on how much water content your lauki has. But in general you need very little water for this recipe – just a few sprinkling. The lauki will release enough water when kneading to make a nice, soft dough.
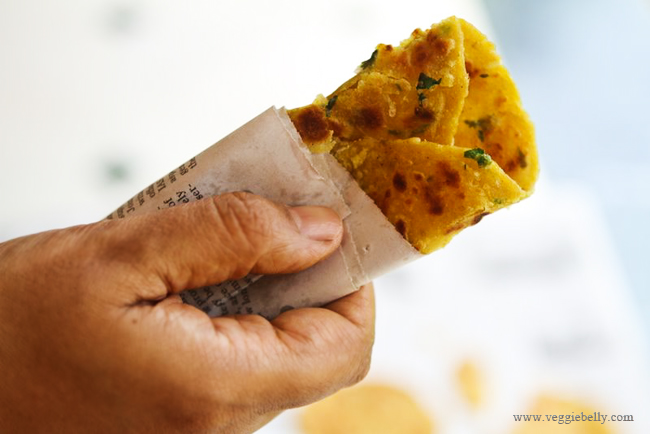
For a great variation on this lauki thepla recipe, add grated radish or fresh methi leaves to the dough. You will need to use a little more water when kneading if you use grated radish or fresh methi leaves.

Lauki Thepla – Spiced Indian Flat Bread Recipe

makes 20 theplas

Ingredients
3 cups wheat flour (atta)
2 tablespoons vegetable oil
3/4 teaspoon or according to taste, salt
1/2 teaspoon turmeric powder
1/2 teaspoon ajwain (carom) seeds
1 teaspoon white sesame seeds
6 green chilis, or according to taste, ground into a paste
1/2 teaspoon ginger paste
1/2 teaspoon garlic paste
1 cup grated lauki (bottle gourd). Substitute with grated radish or fresh methi leaves
3 tablespoons yogurt
1/4 cup or more, chopped cilantro
a small bowl of water

Method
Place all ingredients except the water in a large bowl. Knead for about 1 minute. Sprinkle a little (about 1 tablespoon) water and knead 10 times. Sprinkle a little more water and knead again. Continue kneading and sprinkling water when needed till the dough is no longer sticky and has formed a soft ball. It should take approximately 5 minutes of kneading for the dough to reach this stage.

Remember: You may need to use a little more or less water depending on how ‘watery’ your lauki or bottle gourd is.

Roll out the thepla dough into a long log. Cut the log into 20 even pieces. Form each piece into a ball.

Place a ball of dough on a flat surface. Using a rolling pin, roll it out like you would a chapati. Sprinkle flour on the thepla as when needed so it doesn’t stick.

Heat a heavy skillet, griddle or tava. Place the rolled out thepla on it. Cook till brown spots appear, about 45 seconds. Turn the thepla over, pour 1/4 teaspoon oil around it and let it cook till golden on both sides.

Repeat for all the dough.

Store Lauki Thepla in an air tight container for upto 1 week. It will also freeze well.

Chettinad Meal Maker Curry Recipe

Chettinad is a region in South India where many of my ancestors come from. It is a dry, arid land inhabited by a devout and enterprising people. And the food is simply sensational. There is no greater pleasure than eating at a chettinad wedding! Chettinad cuisine uses an abundance of spices like cumin, fennel, fenugreek, star anise, poppy seeds, chillies, tamarind, shallots, coconut and curry leaf. This chettinad meal maker curry is inspired by my heritage.

Nemam Koil, our clan temple in Chettinad

Chettinad is famous for its palatial ancestral homes. This house in Kothamangalam is now Saratha Vilas hotel.

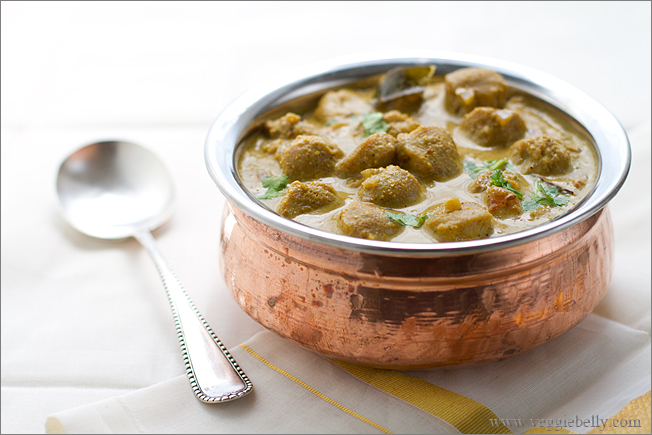
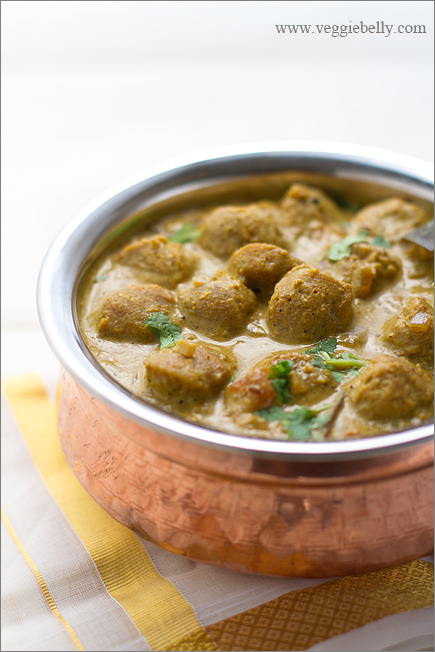
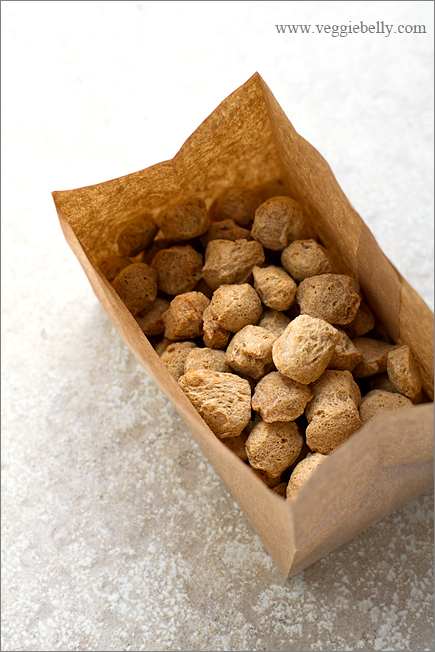
Chettinad homes are generally famed for their non vegetarian food. But you can easily enjoy the flavors of this region with this vegetarian, vegan recipe. Meal maker or Nutrella are Indian brands of soy protein that are quite meaty in texture. I used Indian meal maker in this recipe. Feel free to use any kind of dried soy chunk or granule product. TVP, TSP, soy chunks, soy granules, or even seitan will work.

This chettinad meal maker curry recipe is easily adaptable to different tastes, use only vegetables (cauliflower is nice) or adjust coconut milk however you like. You can use more or less chillies according to your preference.

Chettinad Meal Maker Curry Recipe

(A Spicy Curry using TVP, TSP, Meal Maker, Nutrella or Soy Chunks)
Serves about 4

Ingredients
1 cup dry soy chunks/Meal Maker/Nutrella/TVP/TSP*
1 tablespoon oil
½ teaspoon black mustard seeds
¼ teaspoon cumin seeds
6 curry leaves
1-3 green chillies, slit. optional
½ medium onion, chopped
3 garlic cloves, cut into slivers
2 small tomatoes, chopped
1 recipe masala powder, see recipe below
½ teaspoon ground turmeric
1 cup coconut milk
Salt

*Soy chunks like Meal Maker and Nutrella are easily available at Indian stores. TVP/TSP granules are available at the regular grocery store.

Method
Rehydrate the soy chunks (meal maker) or granules according to package instructions. This usually involves boiling a small pot of water with a little salt, boiling the soy chunks in it, then letting them soak in the boiling water (10 minutes for soy chunks, less for granules – read the box instructions). Drain the soy chunks or TVP granules, and squeeze out as much water as you can. Set the re-hydrated soy chunks or TVP granules aside, and proceed with the recipe.

Heat the oil in a medium saucepan. Add black mustard seeds and let them sizzle. Then add cumin and stir for 30 seconds. Add curry leaves and chillies, stir again. Then add onions, and sauté on medium-low heat for 3 minutes, or till the onions have softened. Now add the garlic and tomatoes. Continue to cook on medium-low heat till the tomatoes are very soft, about 6 minutes.

Add the ground masala powder (recipe below), turmeric, and salt, stir for a minute.

Add re-hydrated, squeezed soy chunks/meal maker/nutrella/TVP/TSP and pour in 2 cups water. Bring to boil. Continue boiling for about 5 minutes.

Pour in coconut milk and cook stirring for about 2 minutes. Taste the curry, if it is too spicy for you, add more coconut milk.

Garnish with chopped cilantro. Serve hot with rotis, chappatis, tortillas, or steamed rice.

For the masala powder
Ingredients
1 tablespoons coriander seeds
1/2 tablespoon cumin seeds
1/2 tablespoon fennel seeds
1 small dried red chili, optional

Method
In a small, heavy skillet on low heat, toast each of the ingredients one at a time. Roast each spice for about a minute, or till it lightly turns color and gets fragrant. Let the toasted spices cool a little. Then place in a coffee grinder and grind into a fine powder. Make sure there are no unground pieces.

Related Posts with Thumbnails