Spinach and Taleggio Cheese Quesadillas. 10 Minutes, 4 Ingredients!

A quesadilla recipe doesnt get simpler than this. Only 10 minutes and 4 ingredients, and I promise you will love this easy cheesy quesadilla!

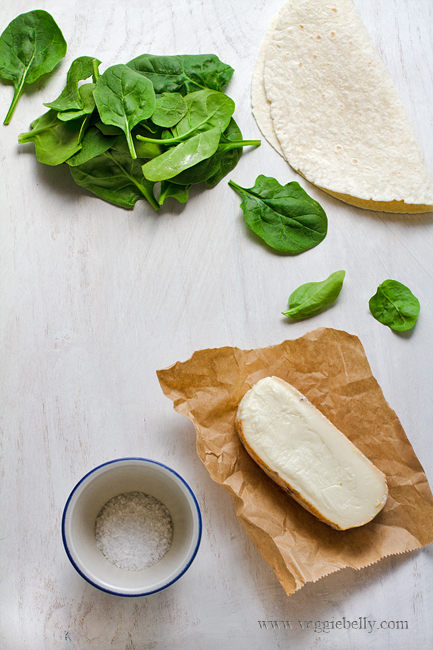
Taleggio is a soft, Italian cows milk cheese. It has a strong fruity smell, but a wonderful mild flavor. You can substitute taleggio with fontina or brie. Since this recipe is simple, and uses very few ingredients, I like to use a “special” cheese like taleggio, where its flavor and creaminess can shine through.

I also like to use asparagus instead of spinach in this recipe. Asparagus and taleggio cheese were made for each other!

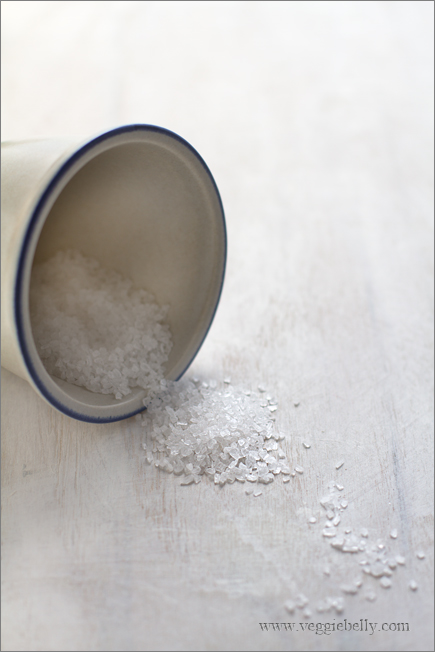
Sea salt is a beautiful thing. It has a coarser grain than table salt, and gives you a pleasant burst of saltiness. Because sea salt is more granular it is perfect for sprinkling over food, or using it in quick recipes, where it doesnt have a chance to dissolve. I used a beautiful bag of salt crystals from the Trapani Saltpans of Italy that I picked up at Eataly in New York.

Easy Spinach and Taleggio Cheese Quesadilla Recipe

makes 1 quesadilla

1 eight inch flour or wheat tortillas
1 oz taleggio cheese (substitute with fontina or brie)
1/2 cup fresh baby spinach leaves loosely packed
1/4  teaspoon olive oil
Sea sat

Lay out a tortilla on a work surface. Trim away the rind of the cheese, and cut into into small pieces. Put the cheese pieces all over one half of the quesadilla. Place spinach leaves on top of the cheese. Fold over the other half to form a half moon shaped quesadilla.

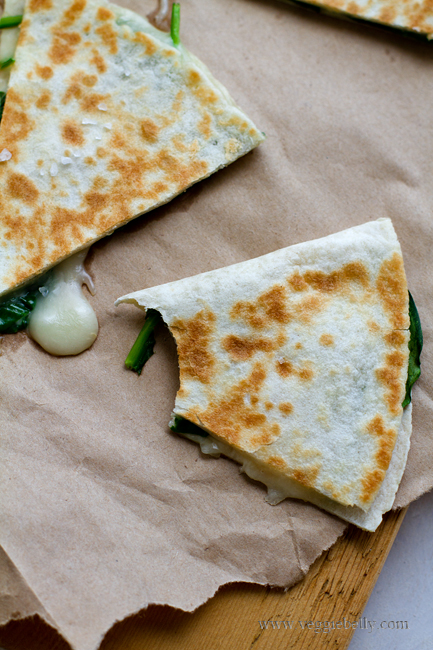
Heat a non stick pan on medium heat, drizzle a little oil. Place the folded quesadillas in the pan, and cook on medium heat for 1 minute or till the tortilla is light brown and cheese is just about to melt. Turn the quesadilla over and lightly brown the other side, about 45 seconds. Dont over cook the tortillas, the cheese will get oily.

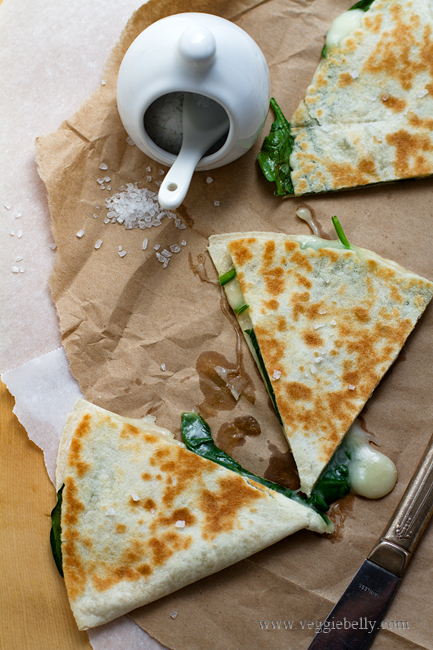
Cut into wedges and sprinkle a tiny pinch of sea salt on top. Serve with a lettuce, tomato, cucumber salad and your favorite salad dressing.

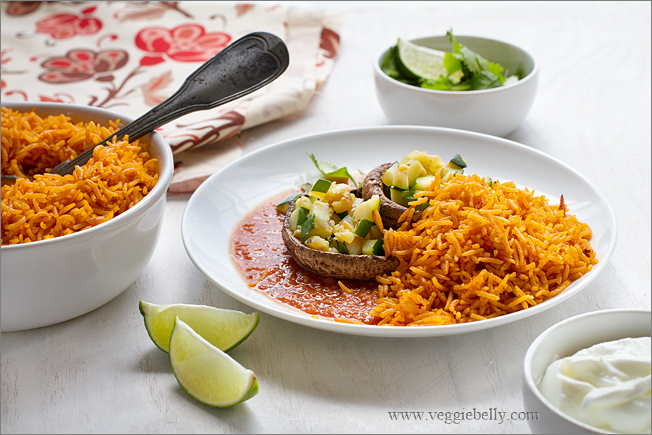
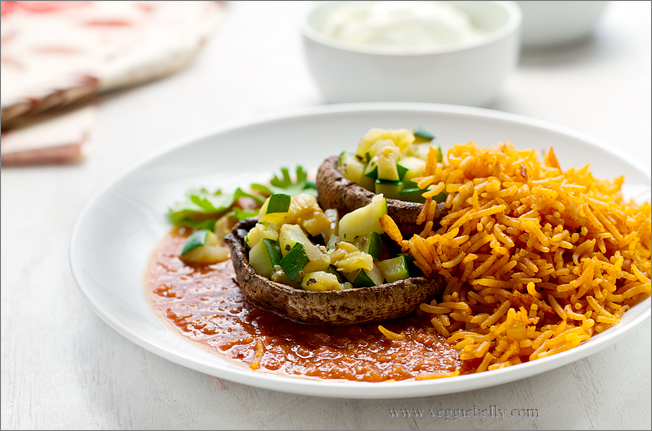
Portobello Mushroom and Zucchini Rellenos with Ranchero Sauce and Mexican Yellow Rice

A traditional Mexican chile relleno (stuffed chile) is usually a poblano chile stuffed with meat and cheese, dipped in batter and deep fried. My Portobello mushroom and zucchini relleno recipe is a little different. It is a lighter, simpler, vegetarian, vegan relleno, and it requires no frying. This recipe can get even simpler if you use store bought ranchero or enchilada sauce.

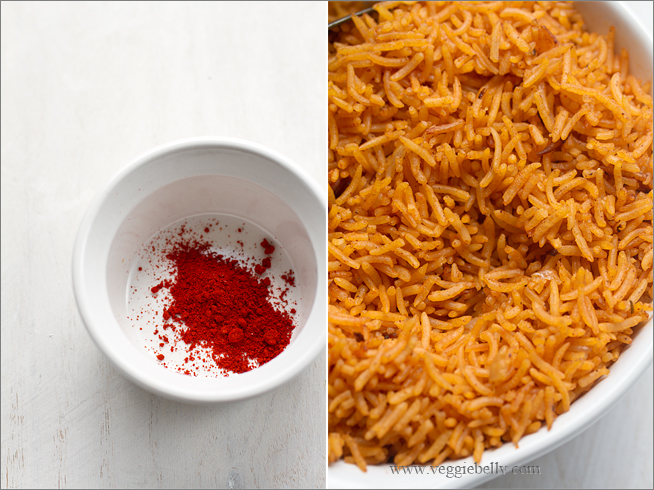
Ground annatto gives the rice its brilliant orange-yellow color. Annattos are the red seeds of the Achiote tree, often called ‘lipstick tree’ because of Annattos coloring properties.

This is a good make ahead recipe. You can make the ranchero sauce and the Mexican yellow rice ahead of time. Simply cook the vegetables the day of, heat up the sauce and rice and assemble everything!

Watch this video to see how to make Portobello rellenos stuffed with peppers and rice. It’s in Spanish, but the method is simple to watch and follow :)

Happy Cinco de Mayo!

Portobello and Zucchini Rellenos in Ranchero Sauce with Mexican Yellow Rice

Serves about 4

For the ranchero sauce
1 teaspoon olive oil
1/2 medium onion, diced
2 cloves over garlic, minced
½ jalapeno, or according to taste
½ teaspoon scant, ground cumin
½ teaspoon dry oregano
One 14 can crushed tomatoes OR 2 cups fresh chopped tomatoes
Salt

Heat oil in a medium saucepan and add the onions. Cook on medium heat till they are soft. Add the garlic, and jalapeno and stir 2 minutes. Then add cumin, oregano, tomatoes, and salt. Cook the same on medium heat for about 3 minutes. If you are using fresh tomatoes, they will take longer to cook.

Serve the sauce chunky or puree it in a blender. I pureed it.

You can make this sauce up to 3 days ahead.

For the vegetables
6 small portabello mushrooms (weighing about 8oz total)
1 teaspoon + 1 teaspoon olive oil
1/2 teaspoon dry oregano
1 large zucchini, cut into small cubes
½ cup cotija cheese (feta, grated pepper jack or cheddar will also work)*
Salt

* I didn’t use the cheese

Wipe the portabellos with a paper towel. Then using a small spoon, gently scrape out the dark gills. Using a small, sharp knife, remove the stem.

Brush a little oil all over the mushrooms.

Heat a skillet on medium high, and cook the mushrooms, gill side down, in a single layer for 2 minutes. Then flip the mushrooms and cook the other side another minute or till cooked through. While the second side is cooking, sprinkle salt and half the oregano over the mushrooms cavities.

In a same skillet, heat a little more oil, add the zucchini and remaining oregano. Saute on high heat for about 2 minutes or till the zucchini is tender but still a little crunchy, and not mushy. Sprinkle salt, and the cheese.

For the yellow rice
1 large or 2 small vegetable bouillon cubes*
2 cups warm water
1 tablespoon butter or olive oil
1 small onion, diced
1/2 teaspoon achiote powder, also called ground annatto (substitute with ¾ teaspoon turmeric or saffron)
1 cup long grain rice
Chopped cilantro for garnish

*I used 2 small Herb Ox brand vegetable bouillon cubes; they are tasty and have no MSG. Maggie or Knorr stock cubes will also work.

Dissolve the bouillon cubes in warm water and set aside.

Sauté the onions in butter or olive oil in a medium saucepan. When the onions are soft, add the Achiote powder and rice. Stir on low heat for a minute.

Pour in the bullion water, and bring to a boil. Reduce heat to a low, cover the pan, and let the rice simmer for 10 minutes or till the rice is cooked, but the grains are still separate, and not mushy. Cooking time may vary depending on the rice.

Fluff rice with a fork. Garnish with cilantro.

To assemble and serve
Spread ranchero sauce on a platter. Arrange the mushrooms, gill and stem side up, over the sauce. Spoon a little zucchini and cheese into the mushroom cavities.

Serve the yellow rice on the side, along with sour cream (optional), extra cheese and extra chopped cilantro.

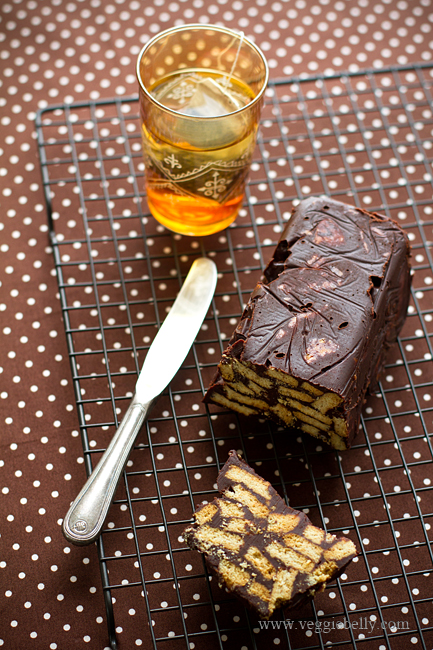
No Bake Royal Chocolate Biscuit Cake

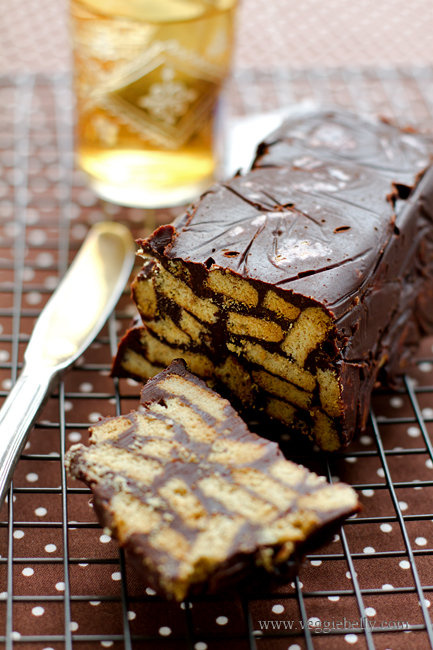
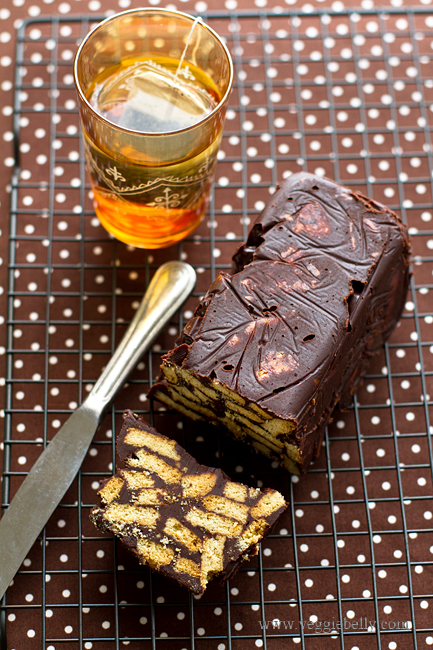
Watching snippets of the royal wedding on TV, and seeing Prince Williams groom’s cake – a chocolate biscuit cake – reminded me of the chocolate biscuit cakes of my childhood. Because my mother grew up in the UK before moving to India, we had a lot of British treats in our home in India. Chocolate biscuit cake was one of them. This recipe is simple to make, and requires no baking (which is why it’s also called a fridge cake).

As kids in India, we used to make this recipe with Indian Marie biscuits. We’d dip them whole into chocolate sauce, and stack them up – towers of chocolate biscuit goodness!


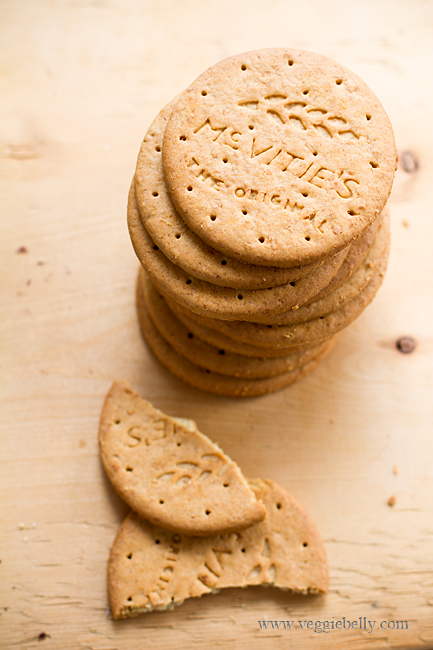
If you can find British digestive biscuits, they are the BEST for this recipe. I was thrilled beyond belief to find British McVities digestive biscuits in the International aisle of my local grocery store! I believe you can also find them at world market.

A digestive biscuit is a coarse wheat cookie, flaky, no too sweet and oh-so-delish. I wonder why it is “digestive”; must be because it has a bit more fiber than a regular cookie.

Substitutes for British digestive biscuits

- American graham crackers
– British rich tea biscuits (my second favorite for this recipe)
- Indian Britannia digestive biscuits
- Indian Marie biscuits

If you are using butter cookies or graham crackers, remember that they are sweeter, you might need less. Also taste and adjust the sugar as you go if you are using any of the substitutes.

You can glaze this cake with a chocolate ganache, but I skipped that step because the cake is quite rich as it is.

More yummy chocolate biscuit cake recipes..

Official Buckingham Palace chocolate biscuit cake recipe by Darren McGrady, former personal chef to the royal family
Chocolate biscuit cake recipe on Oprah.com
Chocolate biscuit cake recipe on Daily spud
Royal wedding groom cake recipe by Brown eyed baker
No bake English chocolate biscuit cake recipe on Joy of baking

Royal Chocolate Biscuit Cake Recipe

serves about 8

7 oz. McVities digestive biscuits (about 12 biscuits). See above for substitutions.
6 oz. semi-sweet chocolate (milk chocolate)*
2 oz. dark chocolate (60% cocoa)*
4 tablespoons butter
2 tablespoons milk
4 tablespoons sugar or honey

*You can vary the milk chocolate: dark chocolate ratio if you like. Just make sure the total amount of chocolate (milk&dark) is 8 oz.

Break each biscuit into about 10 pieces. Place the broken biscuits in a bowl.

Melt all the other ingredients together in a double boiler –pour about 1 cup water into a saucepan or pot and bring to a boil. Then reduce heat and keep the water on a gentle simmer. Select a bowl that will fit over the saucepan, without touching the water (the steam from the water will melt the chocolate in the bowl).

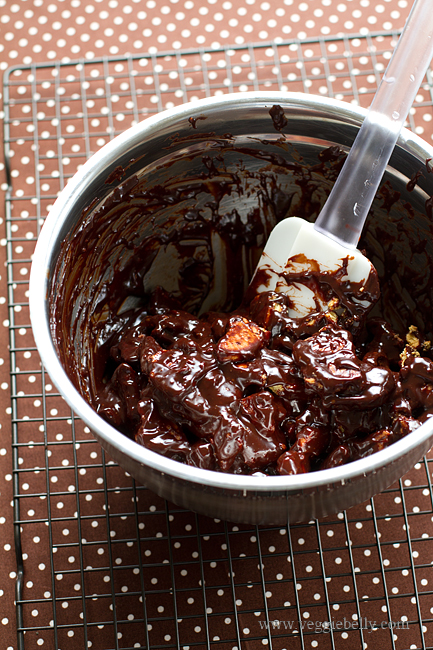
Add all ingredients except the broken up biscuits, to the bowl over the simmering water. Whisk frequently, till everything is melted and you get a smooth sauce. Be careful not to get any water into the chocolate sauce.

Remove the bowl from the saucepan, and let the chocolate sauce cool for about 15 minutes. Gently fold in the broken up biscuits.

Line a loaf pan or cake tin with a large piece of glad wrap/cling film so that there is an over hang on all sides. Pour the cake mixture over the glad wrap and gently press down using a spatula, and flatten out the top. If your cake mixture is still warm, let it cool completely before proceeding.

Then fold the overhanging glad wrap over the cake. Using your palms, gently press down to compact everything. Refrigerate for 3 hours or till the cake is set.

Remove the glad wrap, cut into slices or cubes and serve.

Store chocolate biscuit cake in the fridge.

————————————————————————————————————————————————

Stonyfield Oikos Super Fruits Giveaway!

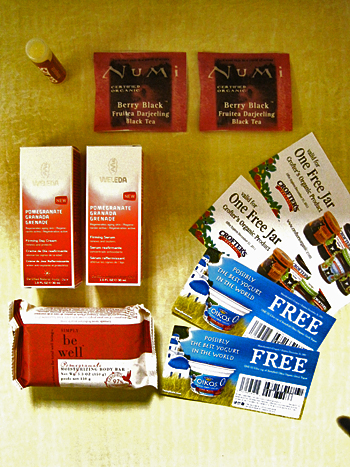
You can win all of these goodies!

-        2 free coupons for Oikos Organic Super Fruits Greek Yogurt*
-        Weleda All Natural Pomegranate Firming Day Cream 
-       Weleda Pomegranate Firming Serum
-        2 free coupons for Crofters Organic Fruit Spreads
-        Organic Pomegranate lip balm, made by Eco Lips
-        2 samples of Numi Organic Berry Black Tea (featuring   organic raspberry and raspberry leaf)
-        Simply Be Well Organic Pomegranate Moisturizing Body Bar
-        RW Knudsen Family 32oz.  Organic Just     Pomegranate juice and coupons

To enter


- Leave a comment below and tell me what was the best dessert youve ever had.
- For a bonus entry, mention this post & link to it in  your own blog. Then come back here and tell me you did so.

Contest ends Friday, May 6th 2001 9pm EST. US residents only. One random winner be picked. Check this post for winner announcement.

*Oikos sent me coupons to try the yogurt, and it is lovely :)

This giveaway has ended, the winner is comment #36, Usha!

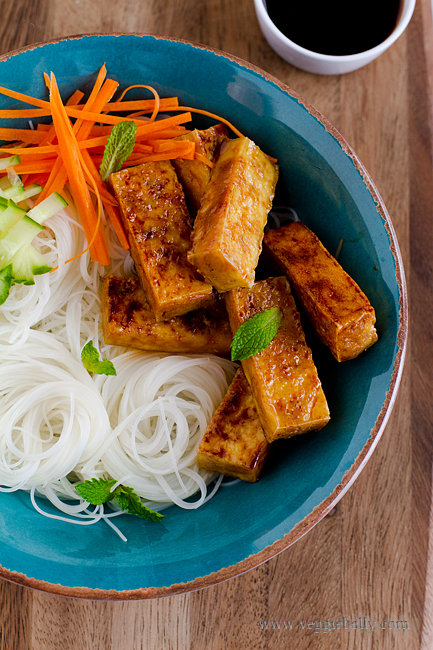
Teriyaki Tofu Noodle Bowl

My dear friend Mahi loves my tofu recipes and recently requested a ginger tofu recipe. This is what I came up with. Mahi, this ginger teriyaki tofu noodle bowl recipe is for you ♥

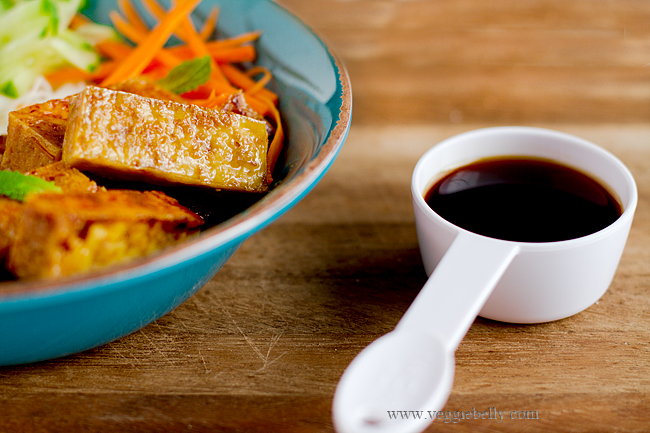
Teriyaki sauce is really easy to make at home. Just whisk together sugar, mirin and sake (or vinegar), and let it boil to thicken. You can use this sauce as a marinade on vegetables, brush it over anything you are grilling, or toss it in some rice or noodles. My ginger teriyaki sauce recipe is sweet, you could ofcourse adjust the sugar according to taste.

I love using thin rice noodles for this recipe. All you have to do is soak them in hot water till they have softened. You can find rice noodles or rice vermicelli in the Asian section of the grocery store. For a larger selection of rice noodles, head to an Asian store. When buying rice noodles for this recipe make sure that rice and water are the only ingredients. Some brands use corn starch in their rice noodles, and thats ok too.

Teriyaki Tofu Noodle Bowl Recipe

Serves 1 as a main dish

For the Ginger Teriyaki Tofu
Half of a 15 oz package of tofu, pressed. Read this post on how to press tofu.
4 tablespoons soy sauce
4 tablespoons brown sugar (this will produce a sweet sauce, use less if you dont want it sweet& remember mirin is sweet too!)
2 tablespoons mirin (look for ‘mirin style seasoning’ in the asian section of the grocery store ot substitute with 1 tablespoon rice vinegar+a pinch of sugar)
2 tablespoons rice vinegar
1 tablespoon minced fresh ginger

Cut the tofu into 1 inch long pieces. Lay the tofu pieces on a non stick skillet and brown each side on medium heat (no oil needed).

Place all remaining ingredients in a non stick sauce pan, and bring to a gentle boil. Reduce heat and simmer for about 2 minutes or till the sugar dissolves and sauce thickens slightly. Take care not to boil the sauce too much and burn the sugar. Taste the sauce, and adjust sugar or rice vinegar if needed.

When the tofu pieces are browned, pour half the teriyaki sauce over the tofu. Save the other half of the teriyaki sauce to serve for dipping.

Turn the tofu pieces so all sides are coated with sauce. On low heat, let the sauce bubble away and thicken (but be careful not to burn the sauce), about 1-2 minutes.

Serve ginger teriyaki tofu over rice noodles (recipe below) and the remaining teriyaki sauce on the side for dipping.

For the Rice Noodles
2 oz dry rice noodles or rice vermicelli
1/4 cup carrots peeled and cut into thin sticks
1/4 cup of cucumber cut into thin sticks
1 teaspoon sesame oil
1 teaspoon rice vinegar
½ teaspoon dried chili flakes, optional
Salt
1 tablespoon chopped mint or cilantro

Soak rice noodles in very hot water for 10 minutes, or prepare according to package directions. Drain well.

Gently toss the noodles and all other ingredients together in a bowl. Top with ginger teriyaki tofu. Serve reserved teriyaki sauce on the side for dipping the noodles.

How to Press Tofu

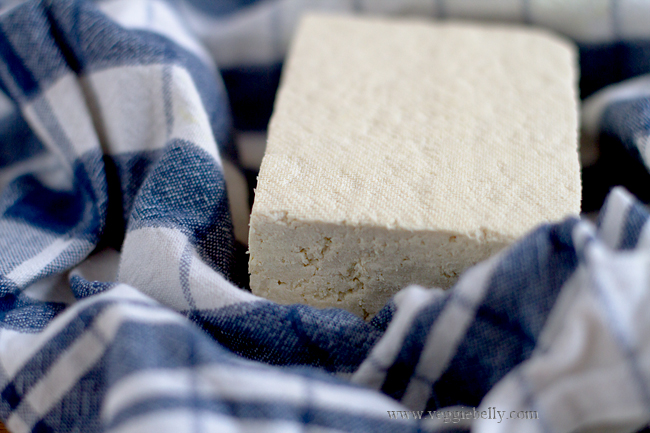
Many tofu recipes in cookbooks and online, including several of my own, call for pressed tofu. Pressing tofu takes out the water in it and makes it firm. Pressed tofu becomes wonderfully dense and pleasantly chewy when cooked. Pressed tofu is also a great meat substitute. So how exactly do you press tofu? Read on..

What you need to press tofu
one 15oz package of firm tofu, drained and patted dry
an absorbant kitchen towel
paper towels
a plate
something heavy (weighing about 2 lbs). Choose from:

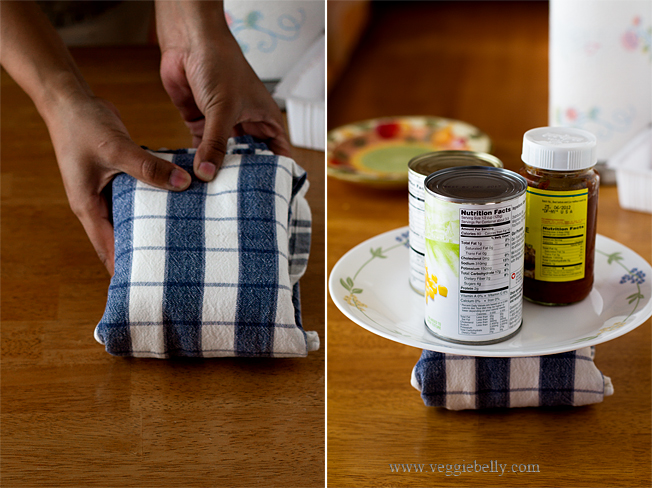
  • 2-3 cans – canned beans, canned corn, peanut butter jar, pickle jar…whatever you have
  • a book
  • heavy skillet


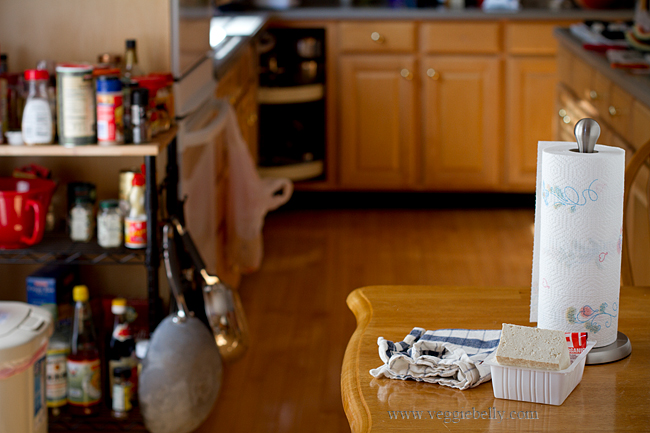
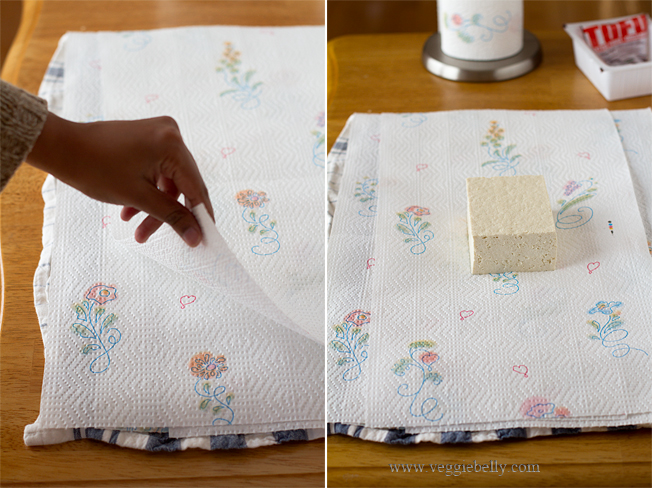
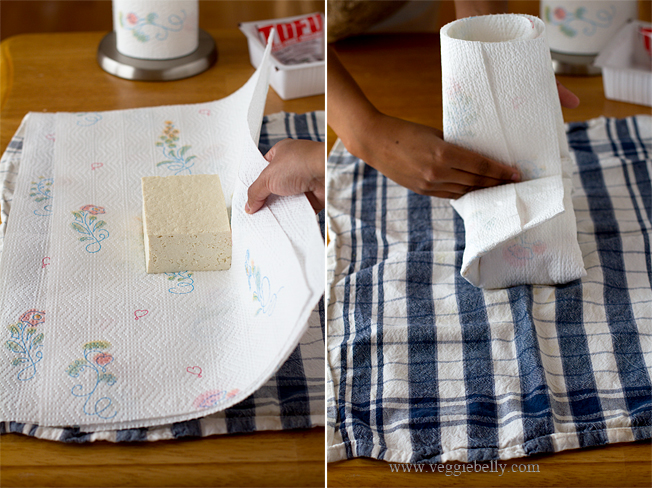
Lay out the kitchen towel on a table. Place 3 layers of paper towels on top so that the paper towels cover the cloth towel. Put the tofu block in the center.

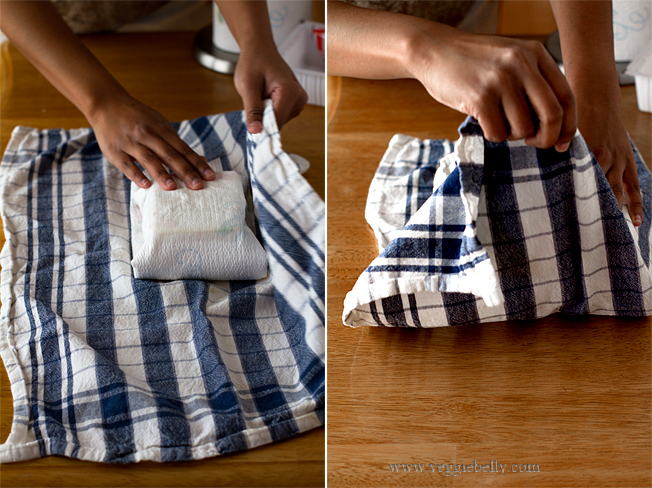
Now wrap the paper towels over the tofu. Bring all four side up and wrap them gently, but firmly over the tofu block.

Now do the same with the cloth towel. Bring each side up and wrap firmly.

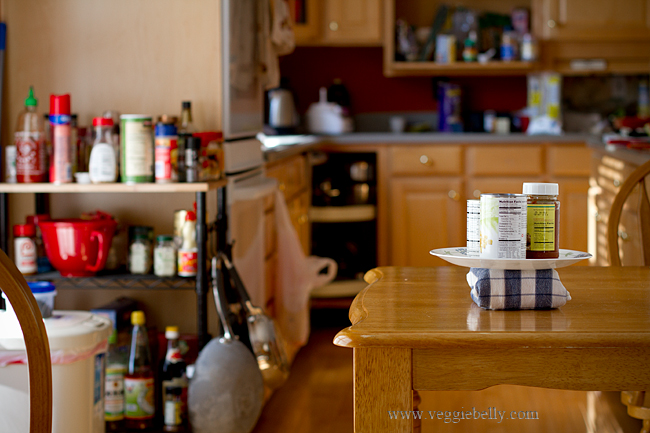
You will now have a tofu parcel. Put a plate over the tofu parcel. Place 2 to 3 cans (or a book, or skillet, or anything heavy – weighing about 2lbs) over the the plate. Adjust their positioning so that the plate is well balanced over the tofu.

Let the tofu with the weights sit for atleast 1 hour, and up to 4 hours.

The weights will release all the water in the tofu, and the towels will absorb it.

 How long to press the tofu will depend on its water content and how dense it is. But you should press tofu for atleast an hour, longer wont hurt. Trader Joe’s extra firm tofu is very firm, so I dont need to press it for more than an hour. Other firm tofus arent as dense, so I press them longer.

Use right away or store pressed tofu in a zip lock bag for 2-3 days in the fridge.

Now go check out some of my tofu recipes!

More tofu pressing methods..

How to press tofu in 5 steps in too many combined
A video on how to press tofu using a plate and book
Tips on how to press tofu on Bon Appetite
How to press tofu using a heavy pot on Fit Sugar

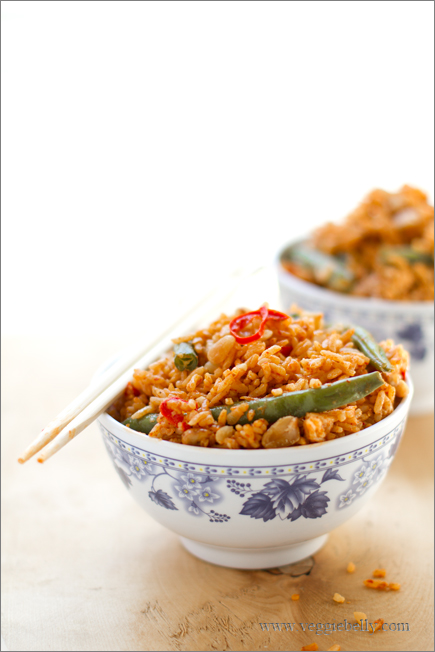
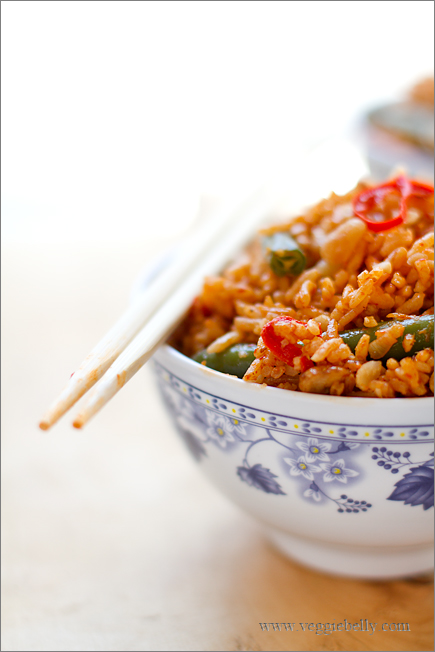
Quick Thai Red Curry Fried Rice with Green Beans

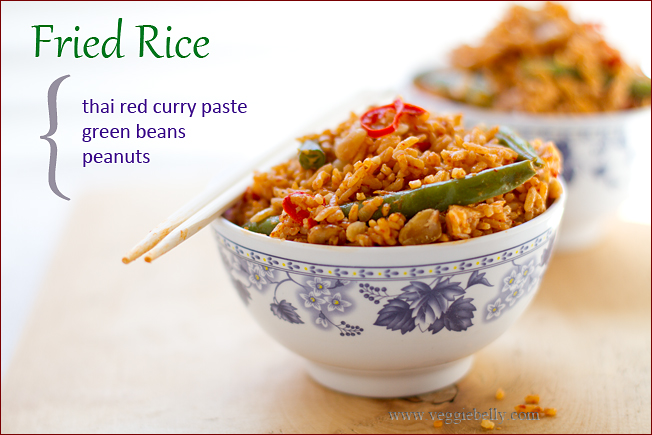
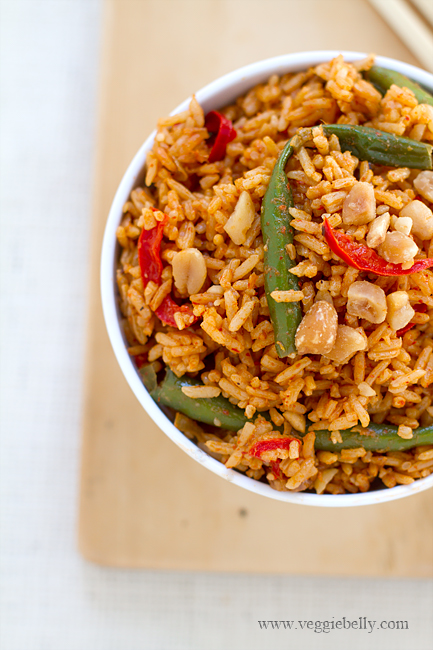
If you have left over rice, you can make this Thai red curry fried rice in 10 minutes. This is a quick, easy meal and a great way to use up left over rice and vegetables. Add some scrambled tofu or a couple of scrambled eggs to add extra protein to this fried rice recipe.

Blanched asparagus, or broccoli, or frozen mixed vegetables will also work in this instead of the green beans. I just happen to think green beans taste nice with Thai red curry paste.


Day old rice is best for fried rice. Also called overnight rice, day old rice it is drier than freshly made rice, so it absorbs flavors nicely, and the rice grains stay separated. If you don’t have left over rice from the previous day, make rice like you usually would (should not be mushy), then spread it out on a plate and place it under a fan or in the fridge till it is completely cooled.

Check out Jaden’s secrets to cooking the best fried rice.


Fried Rice with Thai Red Curry Paste and Green Beans Recipe

serves 4-6

3 cups cooked jasmine rice, preferably a day old (brown rice, wild rice or basmati will also work)
20 haricots verts or green beans
1 tablespoon or according to taste, thai red curry paste
2 tablespoon soy sauce or tamari
1 tablespoon vegetable oil
1 small onion, diced
1 small red pepper, diced
2 tablespoons roasted peanuts, lightly crushed
Chopped cilantro, mint or thai basil for garnish

Trim the ends of the green beans, and cut them in half. Bring a medium saucepan full of water to a boil. Salt the water generously. Add the green beans, and boil for about a minute or till the beans tender but still a little crisp. Drain the beans. Fill the pot with cold water and enough ice cubes to make the water very cold. Dunk the beans in the ice water. This will stop the cooking process and keep the beans bright green and crisp. Drain well.

In a small bowl, whisk the red curry paste, soy sauce, and 2 tablespoons water together till they form a paste. Set aside.

Heat oil in a wok. Add onion and sauté till translucent. Then add red pepper, and sauté for about a minute. Add the drained green beans, and the whisked red curry paste. Stir on high heat for about 30 seconds.

Add cooked rice (must be cooled) to the wok. Using a wide spatula, gently and quickly stir the fried rice to incorporate everything.

Top with crushed peanuts, fried garlic slices, chopped cilantro or mint or thai basil.

Optional: add 2 scrambled eggs to the fried rice.

This fried rice tastes better the next day!

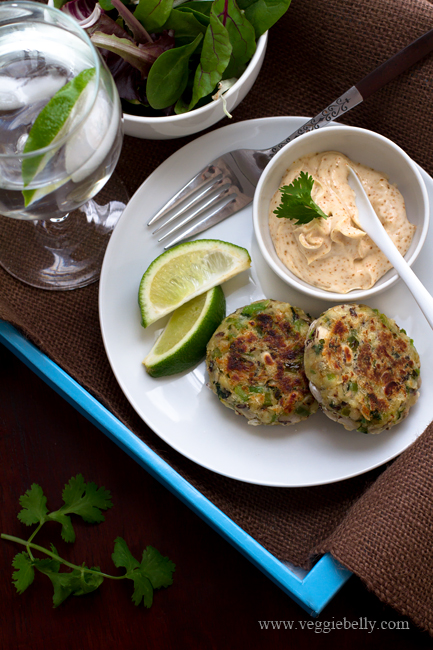
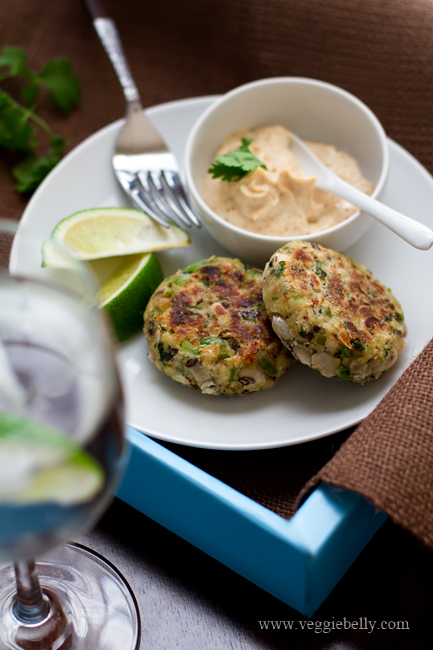
Black-Eyed Pea Cakes with Chipotle Mayonnaise

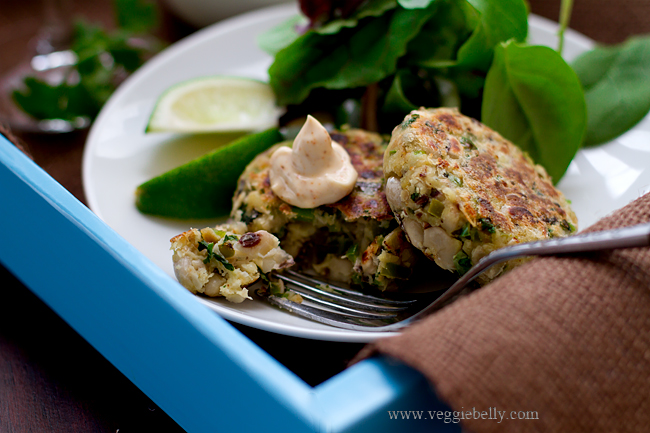
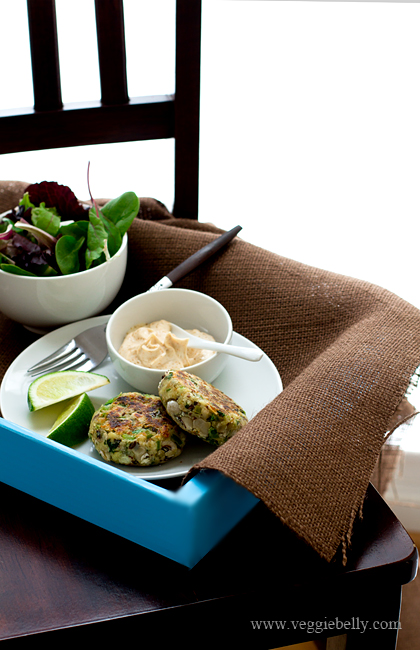
I had these wonderful black eyed pea cakes at Spotted Dog, a vegetarian friendly restaurant in Carrboro, NC. Their vegetarian black eyed pea patties had jalapenos, red pepper, celery, lime, and cilantro. I think my recipe comes pretty close to Spotted Dog’s! Served with a green salad, this makes a satisfying lunch.

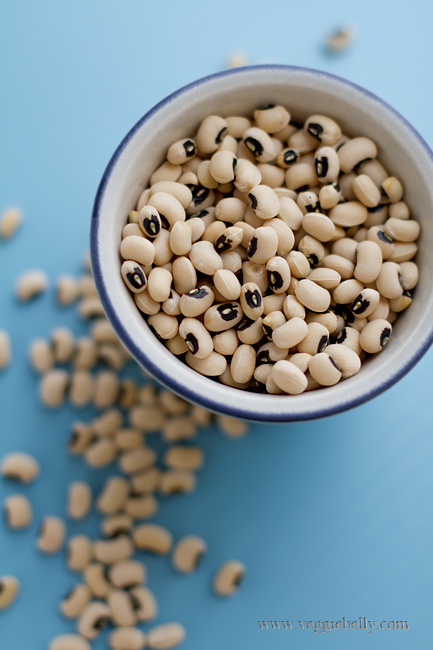
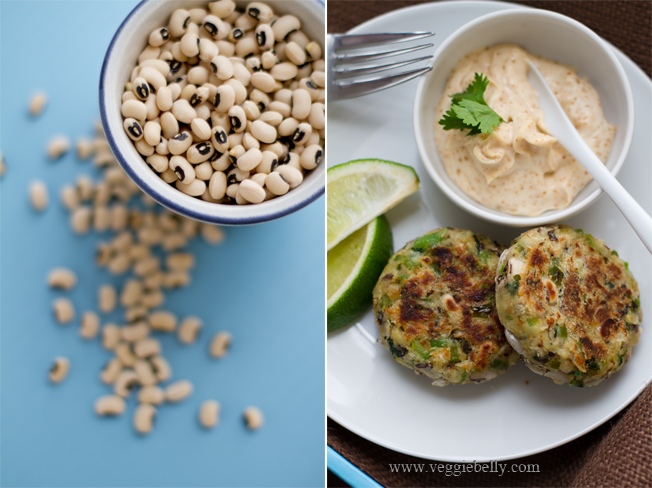
You can used canned black eyed peas as a short cut, but I prefer the texture of freshy cooked dry black eyed peas in this recipe.

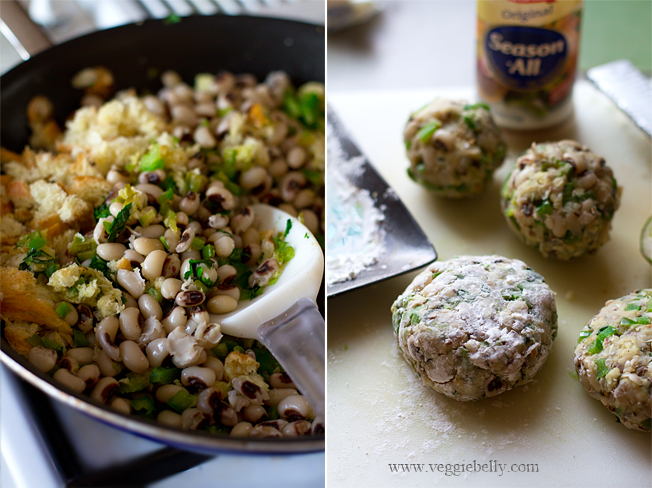
You could dip these cakes in butter milk, roll them in bread crumbs and shallow fry them. But this can get messy, and I didn’t want to use too much oil. So to kept things on the simpler and lighter side. I just dusted the patties with a tiny bit of corn starch, and pan cooked them with just a little olive oil.

More black eyed pea cake recipes..

Black eyed pea cakes recipe with liquid smoke on Fat free Vegan

Black eyed pea cakes recipe with cumin, on Soup Spoon

Martha Hall Foose’s Black-eyed pea cakes recipe on Ezra Pound cake


Tips for forming the patties

If the mixture is too wet, the patties will be difficult to form. So make sure your black eyed peas are drained very well drained.
Add more bread to a wet mixture, to make it more firm.
If the mixture is too dry, either mash the black eyed peas more, or sprinkle a little water
Using a wide spatula will make it easier to flip the cakes while cooking them

If you don’t want to pan fry them, you could brush the black eyed pea cakes with oil, and broil them till the tops are browned and crusty. Carefully flip them over, brush more oil and broil the other side.

Black-eyed pea Cakes Recipe with Chipotle Mayonnaise

makes 4 cakes

½ cup dry black eyed peas*
1 teaspoon + 1 teaspoon olive oil
½ teaspoon or to taste, finely chopped jalapenos, optional
1 garlic clove, minced
½ a medium green pepper, diced small
½ cup slightly stale bread, torn into small pieces. I used left over challa bread.
Zest of ½ small lime
1 tablespoon lime juice
1-2 tablespoons chopped cilantro
¼ teaspoon or to taste Seasoned salt (I like Lawry’s and McCormick’s)
1 tablespoon Corn starch

Soak the dry black eyed peas overnight in water. Drain. Then boil plenty of fresh water in a medium pot. Salt it generously. Add soaked peas, and boil till cooked, about 20 minutes.

Drain the peas well. If they are watery, the cakes won’t hold together.

*I prefer dried black eyed peas that have been freshly cooked. But if you don’t want to use dry beans, use canned black eyed peas instead. Rinse and drain them well. Then measure out 1 1/4 cups for this recipe. You may need to use more bread, because canned beans can be wetter than cooked dried beans.

Heat a medium sauce pan with 1 teaspoon oil. Add jalapeno, garlic and green pepper and sauté on medium heat till pepper is soft, about 2 minutes. Add the bread, lime zest, lime juice, cilantro, seasoned salt, and mix well. Turn off heat.

Add the cooked drained black eyed peas. Mix well. Using a potato masher, or the back of a wooden spoon, mash the black eyes peas. The mixture doesn’t have to be completely mashed, some whole black eyes peas (about 30%) will give the cakes a nice texture. Taste and adjust seasoning.

When the mashed peas mixture is cool enough to handle, divide it into 4. Roll each section into a ball. Place the 4 balls on a plate.

Sprinkle corn starch on another small plate. Dust your hands with the corn starch. Using both your corn starch coated hands, pick up a black eyed pea ball and gently flatten it to form a disc like patty. Dust your hands again, and repeat with the other balls.

Heat a medium non-stick skillet with ½ teaspoon oil, add 2 patties, and cook on medium-high heat till the patties are golden on one side. Carefully flip them and brown the other side. Remove to a plate.

Add another 1/ 2 teaspoon oil to the pan, and cook the other 2 patties.

Serve like a burger with chipotle mayonnaise burger buns, tomato slices, lettuce, pickle etc. Or serve over salad greens with chipotle mayonnaise.

Chipotle Mayonnaise Recipe

¼ cup mayonnaise (vegenaise, silken tofu or tahini for vegans)
¼ to ½ teaspoon chipotle powder. Substitute with smoked or regular paprika
½ teaspoon lime juice

Whisk everything together in a small bowl. Keep chilled.

Spicy Szechuan Eggplant with Tofu

I am on a mission to make myself like eggplant. Many of you on twitter and facebook helped me with your amazing eggplant recipe suggestions to make me like it! I am now trying every method possible (except deep frying!) – grilled eggplant, sautéed eggplant, baked eggplant, stir fried eggplant..and I’m pleased to inform you, I loved the eggplant in this vegan Chinese Szechuan eggplant and tofu recipe!
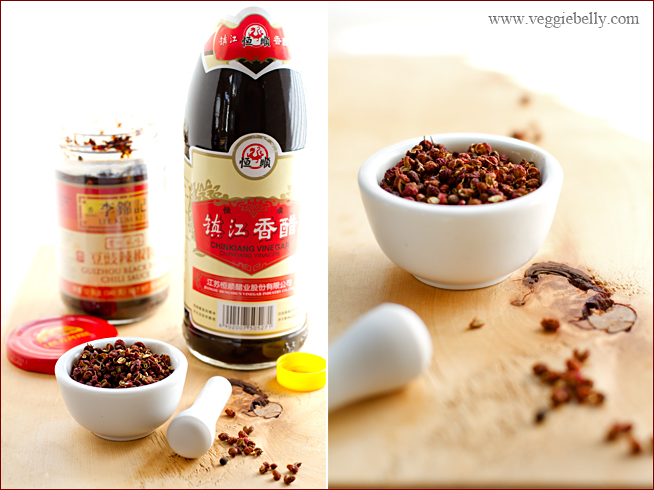
My dear friend and incredibly talented food blogger, Xiaolu of 6bittersweets blog took me on a tour of a local Chinese grocery store. She showed me some amazing and exotic ingredients that I can’t wait to try! I picked up the chili bean sauce, black vinegar, and Szechuan pepper used in this recipe during my Chinese grocery store visit.
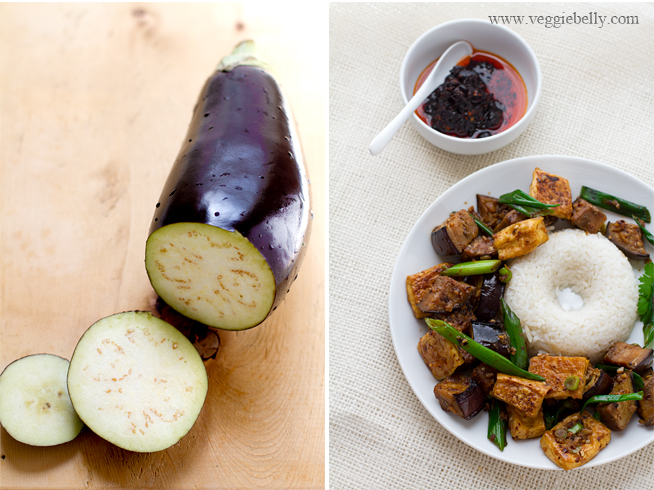
The basic idea for this dish comes from Fuchsia Dunlops  book ‘Land of Plenty’. And because Xiaolu has such a passion for food (you DO read her blog don’t you?!), I consulted with her to perfect this vegan Chinese eggplant and tofu recipe.
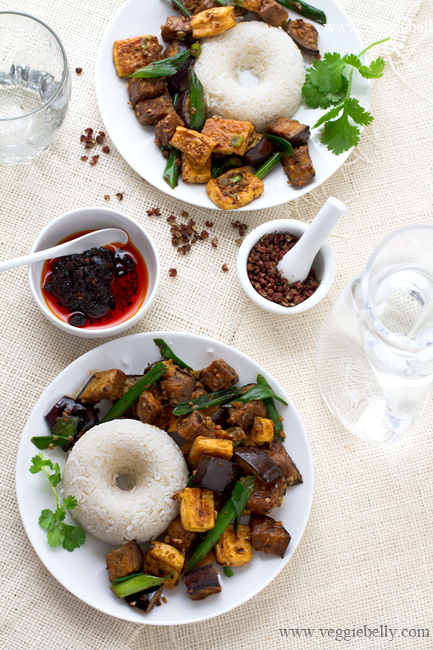
This recipe does take a bit of time to make, but it is so worth the effort. It tastes like something you’d get at a Szechuan restaurant.You can easily use any combination of vegetables you like for this dish – broccoli, cauliflower, potatoes, or zucchini along with seitan, tempeh or paneer.
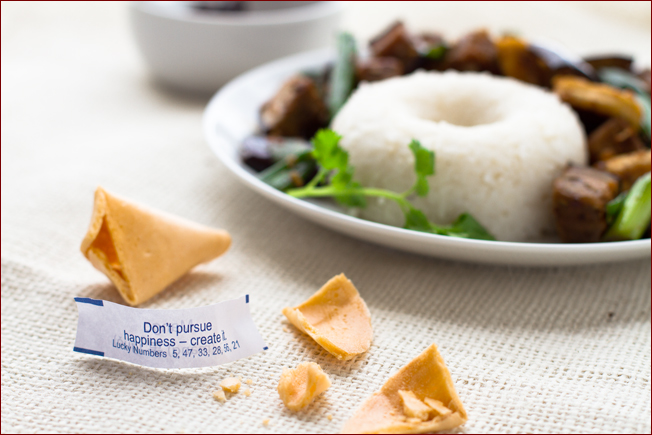
Short cuts and substitutions

Instead of pressing and then pan frying your own tofu, buy pre-baked or pre fried tofu in the grocery store
Use store bought paneer cubes instead of the tofu, and lightly pan fry them
Use balsamic vinegar instead of the Chinese black vinegar (it doesn’t taste the same, but it’s the closest substitute for Chinese black vinegar I can think of)
Use regular black pepper corns instead of Szechuan peppercorns

To salt or not to salt an eggplant before cooking? See this post.
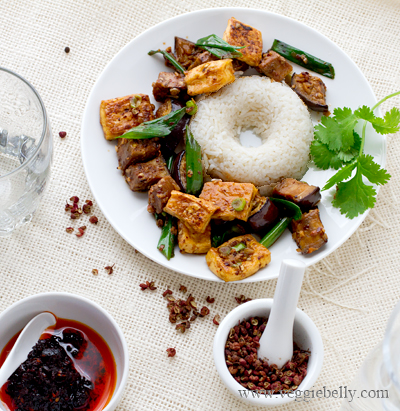
 

More delicious vegetarian and vegan Szechuan Chinese eggplant and tofu recipes

Vegetarian Szechuan eggplant recipe on Weird Combinations
Vegan Szechuan eggplant recipe with beansprouts on No Meat Zone Recipes
Szechuan tofu stri fry recipe  on Eating Well
Szechuan garlic eggplant and tofu recipe on Hypokrtical
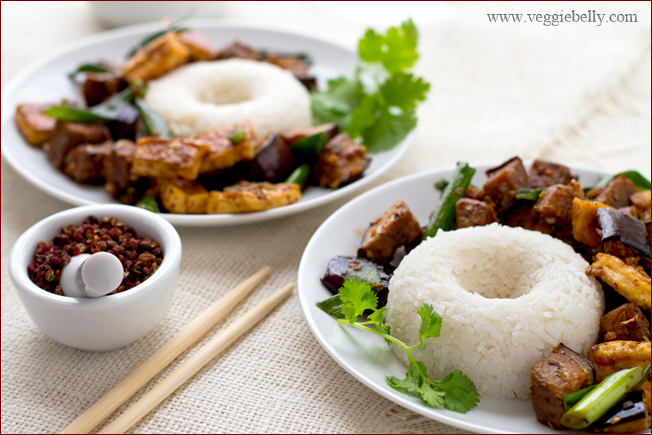
I molded the rice using this cute rice mold I got as a gift.

Szechuan Tofu and Eggplant Recipe

adapted from Fuchsia Dunlop’s Land of Plenty
serves about 3 with rice

For the tofu
One 14 oz pack of extra firm tofu
1 tablespoon of vegetable oil, optional

For the eggplant
1 lb purple or Asian eggplant, cut into ¾ inch cubes
1 tablespoon oil

For the szechuan sauce
1 tablespoon Soy sauce
1 1/2 teaspoon Sugar
1/4 teaspoon Szechuan peppercorns lightly roasted in a dry skillet, and then crushed in a mortar and pestle. Substitute with regular black peppercorns. Use less if you dont want it spicy.
1 tablespoon Chinese black vinegar. Substitute with cider vinegar or balsamic
1/2 cup water

½ tablespoon oil
1-3 tablespoon black bean chili sauce (this sauce is very spicy! Start with 1 tablespoon, taste and add more at the end of cooking if needed) update: I used “guizhou black bean chili sauce”, the brand is Lee Kum Kee. Whatever brand you buy, make sure the ingredients include fermented black beans and chili peppers.

2 tablespoons finely minced ginger
2 tablespoons finely minced garlic
5 scallions/green onions, chopped into 1 inch pieces
2 teaspoon sesame oil, optional

press the tofu
Drain the tofu and pat it dry. Place several layers of paper towels on a table. Place the drained tofu in the middle of the paper towels. Wrap the towels firmly, but without breaking the tofu, around the tofu block (like a gift wrap). Wrap this in an absorbent kitchen towel. Place a plate over the tofu parcel. Put something heavy (like a few cans of beans) on top of the plate. Let the tofu sit with the weights on top for about 4 hours (longer won’t hurt).

cook the eggplant
In a large non-stick skillet, heat the oil. Add the eggplant cubes in a single layer, without crowding. Fry the eggplant cubes on high heat till they are golden, about 3 minutes for american purple eggplants. The eggplant doesnt have to be fully cooked, just browned on the outside. Flip the eggplant pieces and brown the other side. Make sure the eggplant cubes are in a single layer, so they brown quickly. Don’t over-crowd the pan. Do this in batches if needed.

Set the eggplant aside on a plate.

make the tofu
Cut the compressed tofu into ¾ inch cubes

Wipe the skillet clean. Turn heat to medium. Arrange the tofu cubes in a single layer on the skillet. I don’t use oil for the tofu, but you can use 1 tablespoon of oil if you like. Cook tofu on medium heat. Don’t move around or disturb the tofu cubes while cooking. When brown on one side (about 12 minutes), flip the tofu cubes and brown the other side. When the tofu is light brown on all sides, remove it and place it in a plate.

(If you don’t want to pan fry the tofu, toss pressed tofu it in ½ tablespoon oil, spread the tofu cubes in a single layer on a baking sheet lined with parchment paper, and bake it in a 375f oven for about 40 minutes or till the tofu is golden, and slightly chewy).

make the Szechuan sauce
In a medium bowl, whisk together the soy sauce, sugar, Szechuan pepper, vinegar and water. Keep the bowl at hands reach.

Heat a large wok with oil on high heat. Carefully add the chili bean sauce, ginger and garlic, and stir for 30 seconds. The chili bean sauce may give out fumes, so stand back. Take care not to burn it.

Remove the wok from heat. Extend your arm with the wok, so that nothing splashes on you. Now carefully pour in the whisked ingredients.

Return wok to the stove. Immediately add the scallions/green onions, eggplant, tofu, and 1/2 cup water. Toss gently and cook on high for 5 minutes or till the eggplant has softened but is not mushy. Add more water if the dish is too dry. Taste the dish and add more chili bean sauce if you like.

Drizzle sesame oil, if using.

Serve with steamed rice or wheat tortillas and extra soy sauce and chili bean sauce on the side

Related Posts with Thumbnails