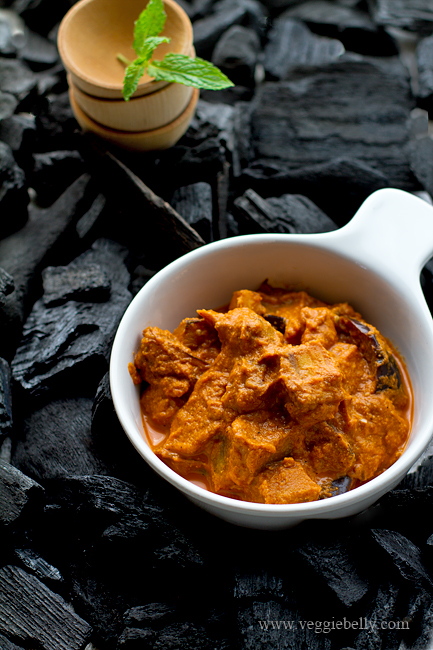
Mushroom Tikka Masala Recipe, a Guest Post on Rasa Malaysia

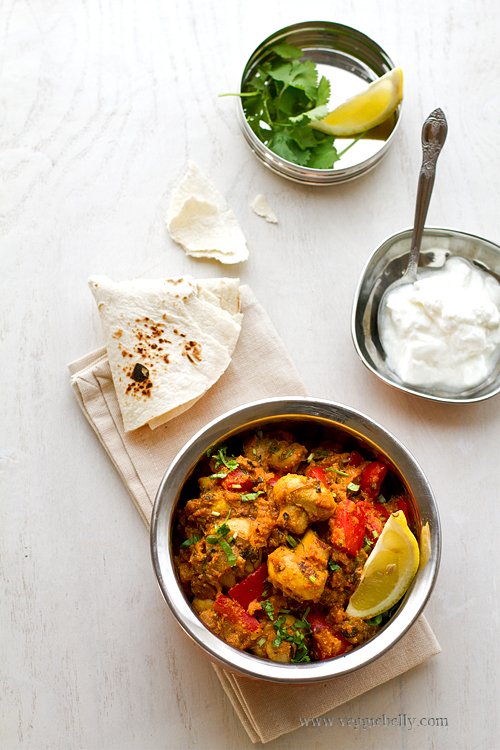
For many years, I have visited the Rasa Malaysia blog and drooled at the recipes and admired Bee’s photograpic talent. I was thrilled to bits when Bee invited me to guest blog for her! We picked a restaurant style vegetarian mushroom tikka masala for my guest post on Rasa Malaysia.

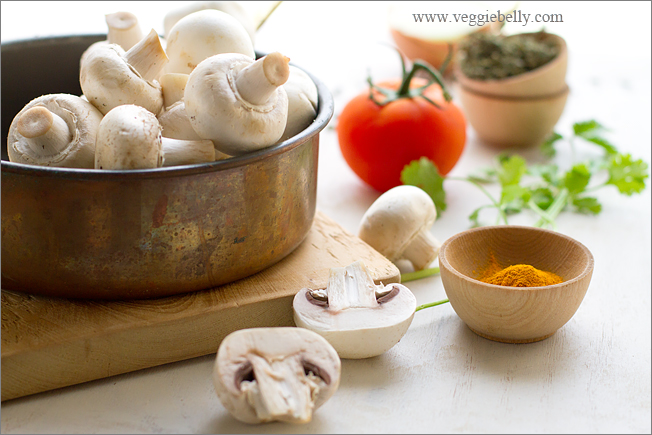
This mushroom tikka masala recipe is easy to make and is rich with flavors of Indian spices. Read my post over at Rasa Malaysia for this mushroom tikka masala recipe and for a great tip on how to make it taste like a restaurant’s.

After youve read my guest post, make sure you hop over to Amazon and pre-order Bee’s soon-to-be-published cookbook “Easy Chinese Recipes: Family Favorites from Dim Sum to Kung Pao”. I cant wait to get my hands on a copy!

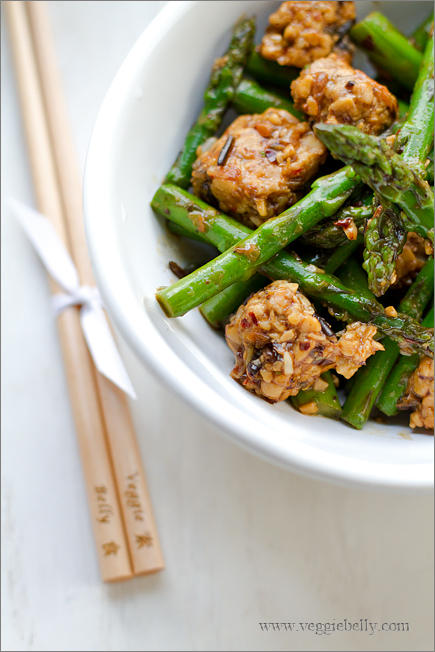
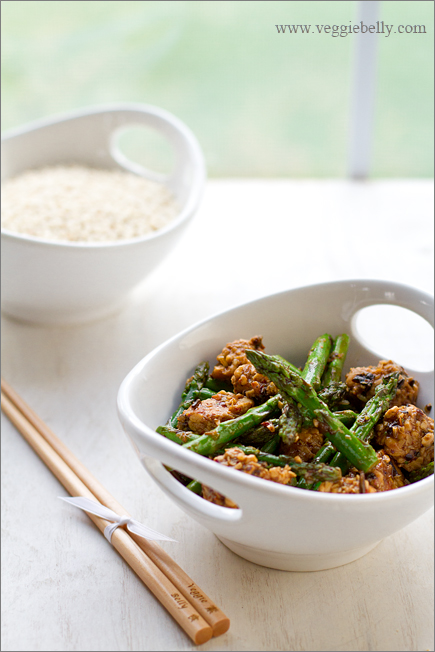
Asparagus and Tempeh Stir Fry with Ginger Pearl Couscous Recipe

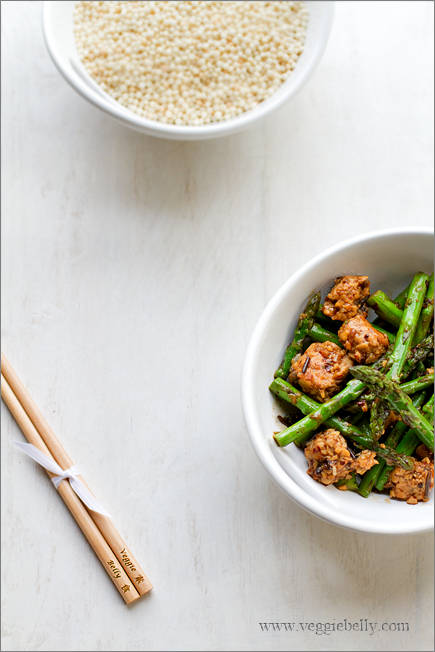
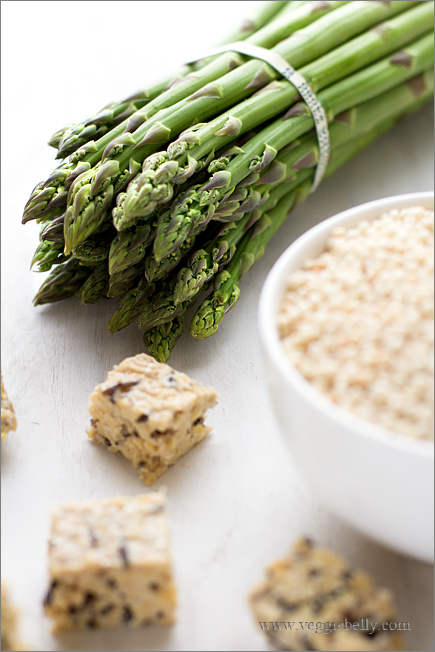
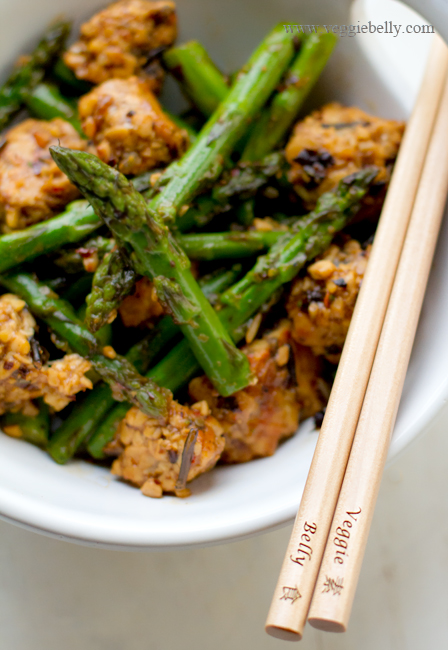
Tempeh is a fermented soy bean cake from Indonesia. Tempeh has a nutty flavor, firm texture, and is very high in protein, making it a great meat substitute in vegetarian and vegan recipes. In this tempeh stir fry recipe, I use some fresh asparagus.

I like Light life tempehs, they have great texture and taste. For this stir fry recipe, I used Light life wild rice tempeh.

I like to serve the stir fry with a quick and simple ginger pearl couscous (also called Israeli couscous or mograbiah). Regular couscous, quinoa, orzo or brown rice with ginger will also be great.

More tempeh stir fry recipes on the web..
Broccoli tempeh stir fry recipe on Iron Stef
Another broccoli and tempeh stir fry recipe on Cate’s world kitchen
Stir fried summer vegetables and tempeh in coconut curry sauce recipe on savvy vegetarian

Asparagus and Tempeh Stir Fry Recipe

serves 2-3

1 bunch asparagus (about 35 asparagus spears)
8 oz tempeh
1 tablespoon vegetable or canola oil

For the sauce
1 teaspoon corn starch
 1/2 cup cold water
1 teaspoon fermented black beans, mashed with a fork
2 cloves garlic, chopped, optional
2 tablespoon soy sauce

Trim away the thick bottom ends of the asparagus. Then cut the asparagus spears in half. Cut the tempeh into 1 inch cubes.

In a medium bowl, whisk together the corn starch and water until there are no lump. Then add all other sauce ingredients.

Add the cubed tempeh to the bowl with the sauce. Toss well. Let it marinate for about half an hour. If you are in a hurry, you can skip the marinating.

Heat a large wok with the oil. Pull out the tempeh from the marinating liquid, and save the liquid. Add the tempeh to the wok, and sauté for 3 minutes or until the tempeh is lightly browned.

Add the asparagus spears, and stir 1 minute. Pour the reserved marinating liquid into the work, and let it boil for about a minute or till the asparagus is tender, but still a little crisp.

Serve with ginger pearl couscous.

Ginger Pearl Couscous or Israeli Couscous or Mograbiah recipe

1 teaspoon sesame oil
1 teaspoon finely minced fresh ginger
½ cup pearl couscous, also called Israeli couscous or mograbia
Salt

Heat sesame oil in a medium skillet. Add the ginger and let it sizzle for 30 seconds on medium heat. Add the pearl couscous and stir for 3 minutes or until it is lightly brown. Add 1 ¼ cup water. Bring to a boil. Reduce heat to low. Cover the pan and cook for about 10 minutes or till the couscous is done. Sprinkle with salt.

You can substitute the Israeli couscous with regular couscous, quinoa, orzo or brown rice. Just sauté the ginger and then follow the package directions on the couscous, quinoa, orzo or brown rice.

***********************************************

Like my personalized chopsticks?!

Win a pair of customized engraved wood chopsticks from www.chopchopsticks.com!

See their photo gallery for more personalized chop sticks.

To enter, leave a comment below and tell me what you would like engraved on your customized chopsticks if you won.

US residents only.

Giveaway ends Friday July 1st 2011 10pm EST.

One random winner will be picked.

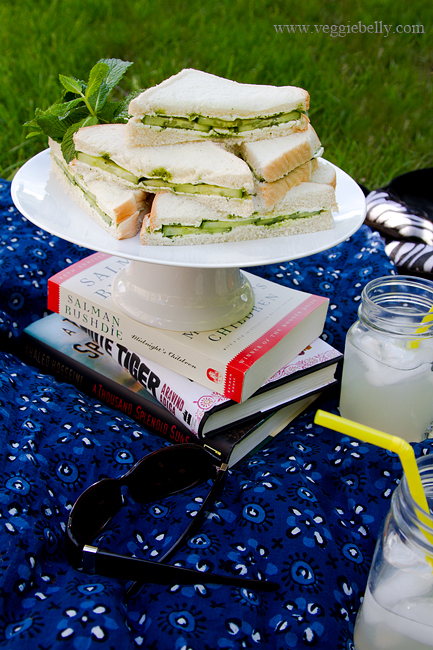
Cucumber Cream Cheese and Cilantro-Mint Chutney Sandwich Recipe

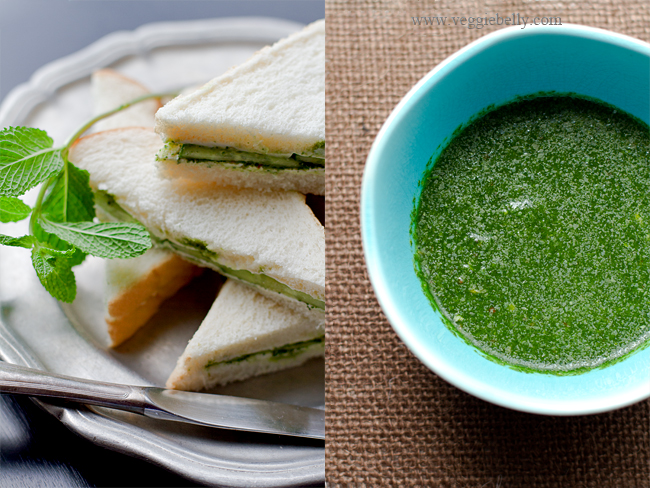
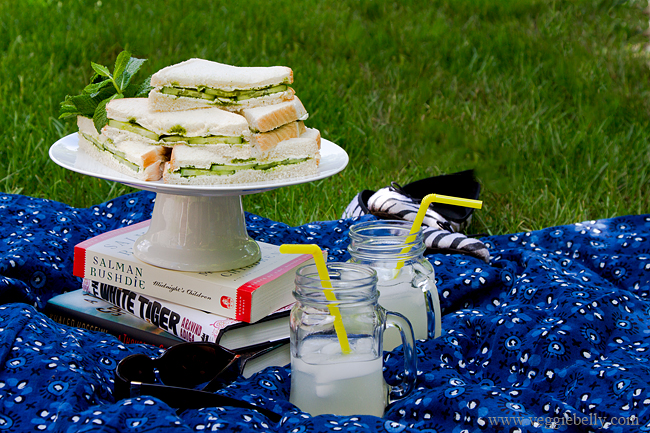
When the weather is nice, we will pack ourselves some sandwiches and lemonade and have a little picnic in our back yard. These cucumber, cream cheese, cilantro-mint chutney sandwiches are our favorite. I’ve made these for several picnics and I really dont know anyone who doesnt like them.

We used to get these sandwiches in India – white bread spread with a little butter, cilantro mint green chutney, and cucumber slices. It is India’s version of English tea sandwiches. I like to use cream cheese in this sandwich recipe; it goes great with the cucumbers and chutney.

Cucumber Cream Cheese and Cilantro-Mint Chutney

Sandwich Recipe

Makes 4 whole or 8 half sandwiches

½ an English seedless cucumber (the one with the plastic wrap)
8 slices of white or soft wheat bread
8 tablespoons cream cheese at room temperature, I used the low fat kind.
½ cup cilantro mint chutney. Recipe below.
Salt

Cut the cucumber into thin rounds.

Take 2 slices of bread. Spread 1 tablespoon cream cheese on one slice. Spread 1 teaspoon (or more if you like) chutney over the cream cheese. Arrange 4-5 slices of cucumber on top. Sprinkle a tiny pinch of salt over the cucumbers.

Spread one tablespoon cream cheese and then one teaspoon cilantro mint chutney on the other slice of bread. Place this on top of the cucumbers, to make a sandwich. Repeat for all bread slices.

Spreading the cream cheese first, and then the chutney will prevent the chutney from soaking through the bread. Serve immediately.

Cilantro Mint Chutney Recipe
Makes about 1/2 cup, enough for 4-6 sandwiches

1 cup cilantro leaves, tightly packed
1/2 cup mint leaves, tightly packed
1/2 fresh green chili or Thai hot pepper, chopped*
1/8 teaspoon cumin seeds
1 garlic cloves, peeled
1/2 tablespoon lemon juice
Salt
2 tablespoons water

*This makes a spicy hot chutney. Use less chili or leave it out if you don’t want it spicy.

Place all ingredients in a food processor and process into a smooth sauce, scraping down the sides of the food processor now and then.

If you are using a blender, you may need to use a little more water. Store the chutney in an air tight container in the fridge.

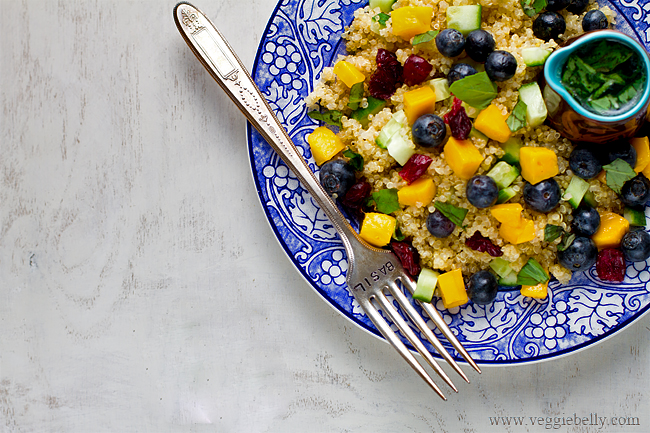
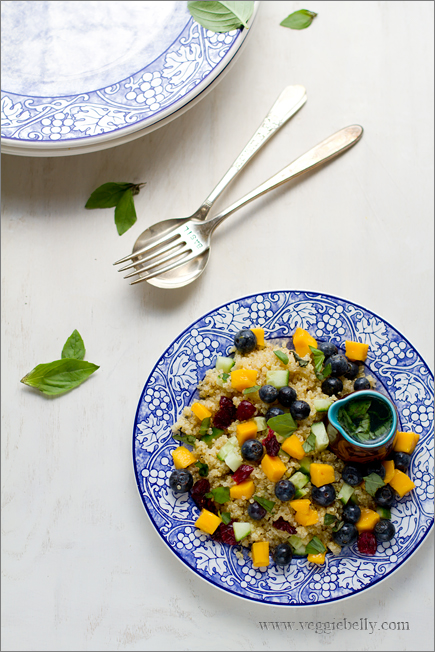
Mango Blueberry Quinoa Salad with Lemon Basil Dressing Recipe

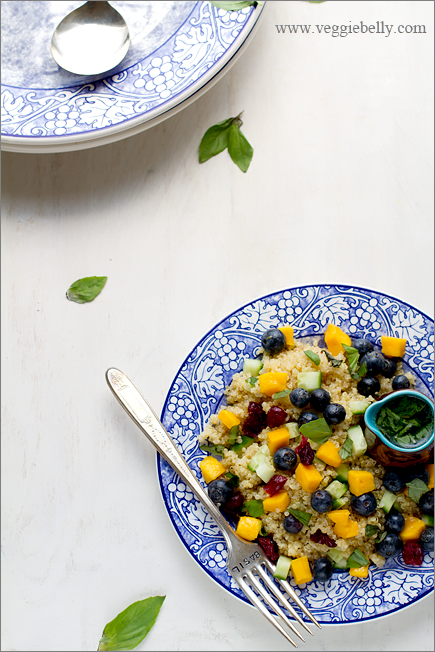
My sister regularly gets this blueberry mango quinoa salad with lemon basil dressing at the Marks and Spencer grocery store in UK. She also regularly raves about it to me. She says it’s the perfect healthy salad for summer – fruity, tangy, fresh and filling.

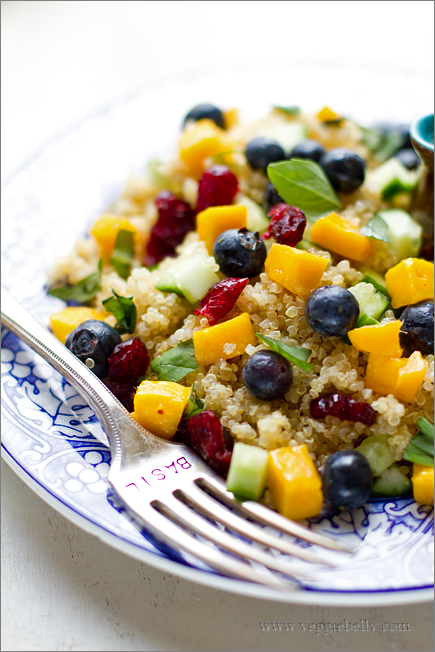
Marks and Spencer’s version of this salad has quinoa, barley, red rice, sprouts, mango, blueberry, and cucumbers. I simplified it a bit, and used only quinoa plus the fruits and cucumber.

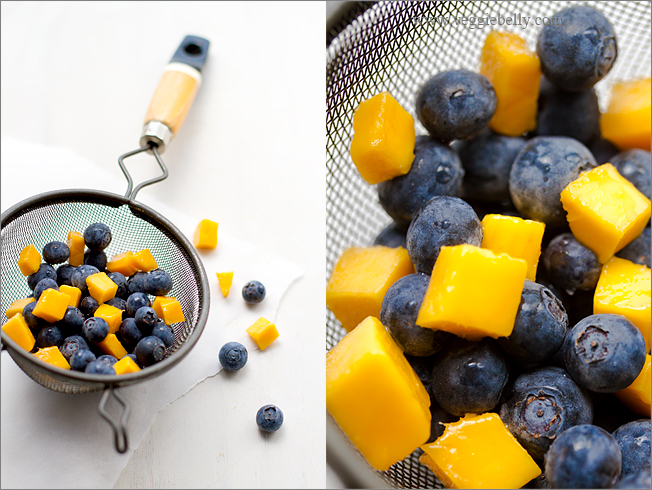
Cut the cucumber and mango about the same size as the blueberries, so everything looks uniform. Add the fruits to the salad just before serving to ensure they are fresh and juicy. This salad recipe has as much fruits and vegetable as there is quinoa. If you want it less fruity just use less fruits or more quinoa.

The dressing recipe here will make a little more than you need. Toss  half the dressing with the quinoa. Serve the other half on the side – this always pleases the people who like their salads extra tangy!

You can customize this blueberry mango quinoa salad recipe any way you like. Here are some suggestions to add to this recipe if you want some variations:

-          Cooked chickpeas
-          Any kind of sprouts
-          Walnuts
-          Cubed jicama
-          Cubed carrot
-          Fresh mint

Here is another recipe for blueberry mango quinoa salad with lemon basil dressing ala Marks and Spencer from foodwired

Blueberry Mango Quinoa Salad with Lemon Basil Dressing Recipe

Serves about 2

For the quinoa
1/2 cup quinoa
1 cup water

For the fruits and veggies
½ cup fresh blueberries
½ cup cubed ripe mangoes
½ cup cubed cucumbers
1/2 tablespoon dried cranberries

For the lemon basil dressing
1½ tablespoons extra virgin olive oil
2 tablespoons lemon juice
1/4 teaspoon lemon zest
10 Basil leaves, chopped finely
Salt and pepper

Place the quinoa and water in a medium skillet and bring to a boil. Then reduce heat, and simmer covered for about 15 minutes or till the quinoa is cooked. Remove the lid, and fluff the quinoa with a fork. Let it cool to room temperature.

While the quinoa is cooking, combine the fruits in a bowl and refrigerate till you are ready to serve the salad.

Whisk together all the dressing ingredients, except the chopped basil. Refrigerate till you are ready to serve. Chop and add the basil to the dressing just before serving. If you add it earlier, it will go black.

Add half the dressing to the quinoa and mix gently.

Assemble the salad just before serving – toss the quinoa, fruits and cucumbers together. Serve other half of the dressing on the side. Serve  immediately.

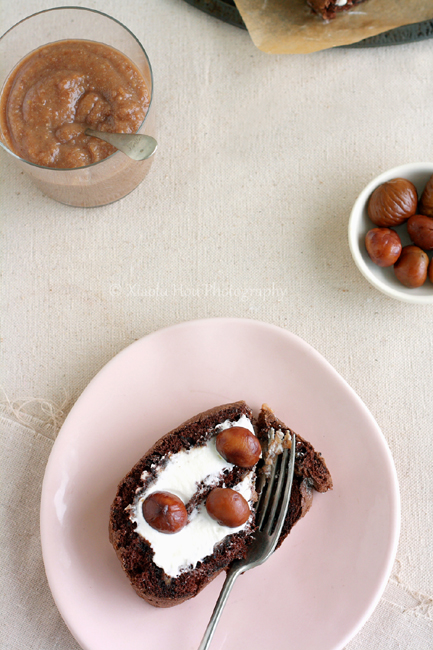
Chocolate Sponge Cake Rolled with Chestnut Cream – a Guest Post

Today’s recipe for this chocolate sponge cake rolled with chestnut cream comes in the form a guest post by my friend, the amazingly talented Xia0lu of  6 Bittersweets blog. I tasted this cake when she made it, and I was blown away. I had no idea chocolate and chestnut could be so delicious! I’ve also tasted Xiaolu’s incredibly creative black sesame and mochi macrons - another testament to her baking skills! Infact, im so in love with anything she bakes, I ordered Xiaolu’s chocolate and red velvet cupcakes for my husband’s surprise birthday party. Needless to say, they were a huge hit. You can order her baked goodies here.

I was thrilled when Sala invited me to guest post on her blog. Not only because I was excited at the opportunity to contribute to her diverse collection of mouth-watering recipes and stunning photos. But also because she has become a dear friend to me in a short period of time. Starting with an early exchange in which she readily shared photography tips with me, Sala has been nothing but fun, warm, and generous through all of our interactions. I’m really glad that we live near each other, so we’ve been able to become friends in person and not just online. Thank you, Sala, for being a great friend, and thank you all as well having me here today!

I’ve always held a fascination for chestnuts. On one hand because they seem so sophisticated and European to me, especially in French desserts like Mont Blanc. On the other hand because they remind me of my early childhood in China. I recall smelling the fragrance of freshly roasted chestnuts as a little girl and growing excited anticipating the delicious stew of vegetables, meat, and chestnuts to come.

For today’s treat, I have chosen the more sophisticated route with a cake roll that is simple yet elegant. Though I’m more accustomed to using natural cocoa in my baked goods, the milder flavor of Dutch-process cocoa is preferable here, as it leaves the spotlight to the real star of the show: the chestnut cream. I particularly enjoy that this cake is light on the tongue, leaving you satisfied but not weighed down. If you’re looking for less conventional way to enjoy your chocolate cake, I hope you’ll give this a go =).

Chocolate Sponge Cake Rolled with Chestnut Cream Recipe

[Printable Recipe]

Adapted from Gourmet Traveller

Serves 6 to 8

XIAOLU’S NOTES: The homemade chestnut puree recipe makes more than you will need for this recipe. Extra puree can be refrigerated for up to 2 weeks and frozen for up to 1 year.

4 large eggs, room temperature
1/2 cup white sugar (preferably extra-fine/caster)
1/2 cup MINUS 1 Tbsp (65 g) cornstarch
5 Tbsp (35 g) Dutch-process cocoa, plus extra for dusting
1 Tbsp all purpose flour
1 tsp cream of tartar
1/2 tsp baking soda
3 1/2 Tbsp unsalted butter, melted and cooled
1 cup PLUS 2 Tbsp heavy cream
1 1/2 Tbsp powdered sugar, sifted
1 cup sweetened chestnut puree (Recipe below OR storebought is fine)

Preheat oven to 350 degrees F. Grease the base and sides a 12 x 16 3/4-inch jelly roll pan and line with parchment paper, cutting into the corners to fit and allowing the parchment to hang at least 3/4 inch past the tray’s edges.

Whisk eggs and sugar using an electric mixer until thick and pale (about 5 to 6 minutes). Sift cornstarch, cocoa, flour, cream of tartar, and baking soda together into a separate bowl. Then gently fold dry ingredients into the egg mixture with a spatula. Fold in butter.

Spoon batter carefully into lined pan, smoothing the top with a spatula. Bake in the middle rack of the oven until the cake springs back when lightly pressed (10 to 12 minutes). Remove from oven and carefully turn cake out onto a tea towel lined with fresh parchment paper. Peel off the other parchment paper from the cake. With the short side facing you, roll the cake within the tea towel to form a log. Let stand until just cool (8 to 10 minutes).

Whip heavy cream and powdered sugar until soft peaks form (refrigerate if not using immediately). Unroll cake and spread it with an even layer of chestnut purée, then spread only the 1/2 of the cake closest to you with cream, leaving a 3/4 to 1-inch border around the other edges as well. Reroll, dust with cocoa powder, and serve immediately.

Homemade Sweetened Chestnut Puree

Adapted from Kopiaste (click over for great step-by-step photos)
Makes about 2 to 2 1/4 cups

400 g boiled and peeled chestnuts [I bought precooked vacuum-packed ones]
1 1/2 cups milk
3/4 cup sugar, or to taste
1 tsp pure vanilla extract

Fill a medium to large saucepan with 2 inches of water and bring to a simmer over medium heat. Place all ingredients EXCEPT vanilla into a large Pyrex glass or other heatproof bowl that has a rim wider than the saucepan and which will not touch the simmering water when placed over the saucepan. Cover with a heatproof lid and let mixture boil for about 1 hour, checking occasionally to stir and make sure milk does not boil over.

Drain and reserve milk and let chestnuts cool slightly. Puree the chestnuts using a potato masher or in a food processor. Mix vanilla into the reserved milk, then add milk back into the puree a tablespoon at a time until desired consistency and sweetness is reached. Allow to cool completely, then refrigerate or freeze until needed.

Smoked Eggplant Curry


This is the easiest method to smoke something. I learned this method from Sanjeev Kapoor’s new book, How to Cook Indian (scroll to the bottom of this post for a chance to win a signed copy of the book!).
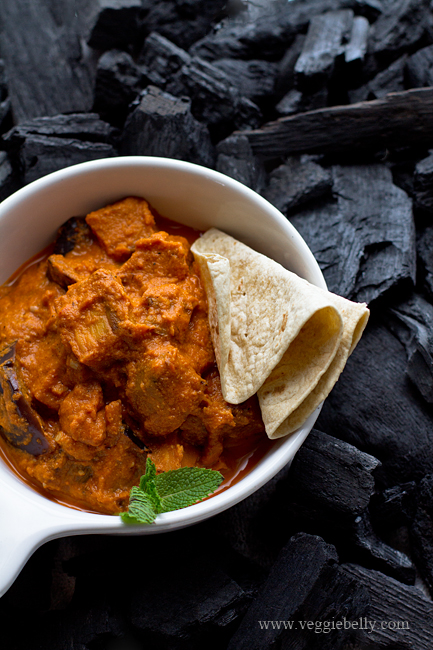
I was intrigued by Sanjeev Kapoor’s koyla (charcoal) chicken recipe in the book. He makes a chicken curry and then smokes it by placing a bowl with a smoking hot piece of charcoal in the curry. The smoke gets into the curry, making it all smoky and wonderful. I’ve adapted Sanjeev Kapoor’s smoked chicken curry by using eggplant and creating a great vegetarian smoked eggplant curry recipe.

How to smoke the eggplant curry
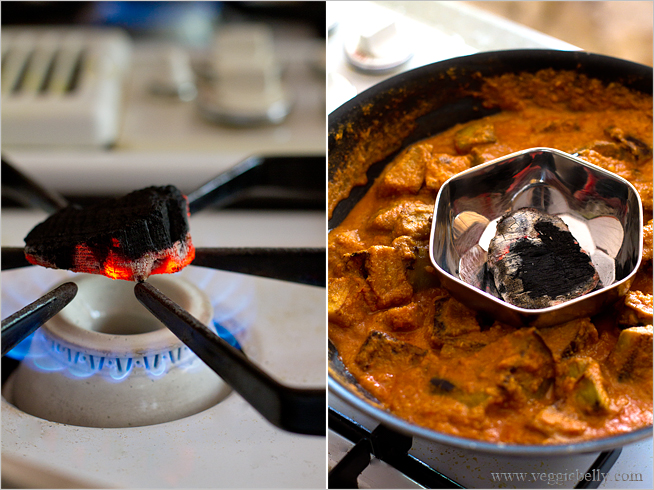
Heat charcoal till its red. Then put it in a small bowl, and place it over the curry.
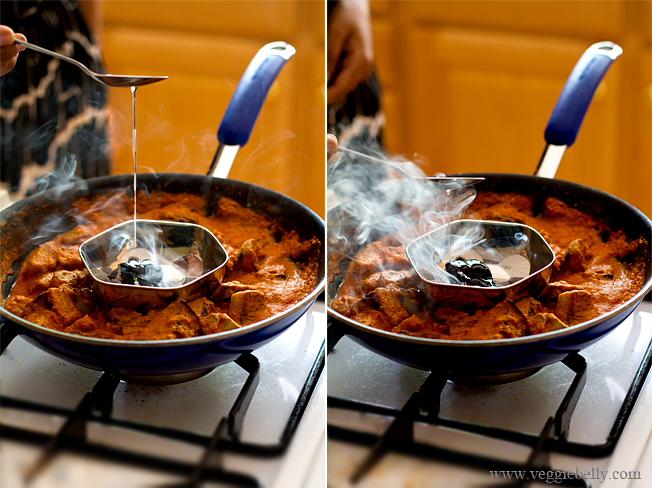
Pour a little oil over the hot coal. The coal will now give out smoke, that will flavor the curry.
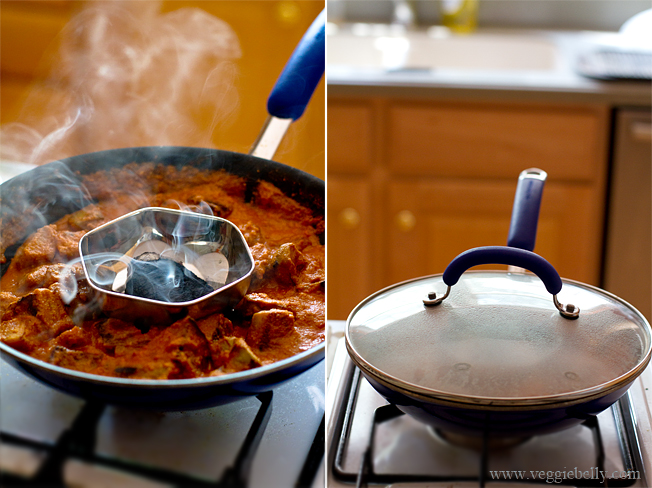
Cover the skillet to trap the smoke. Let it sit for a few minutes so that the smoke infuses the eggplant curry.

When choosing charcoal, make sure you buy all natural charcoal. Don’t buy anything that has chemicals or petroleum added to it or is ‘self igniting’.
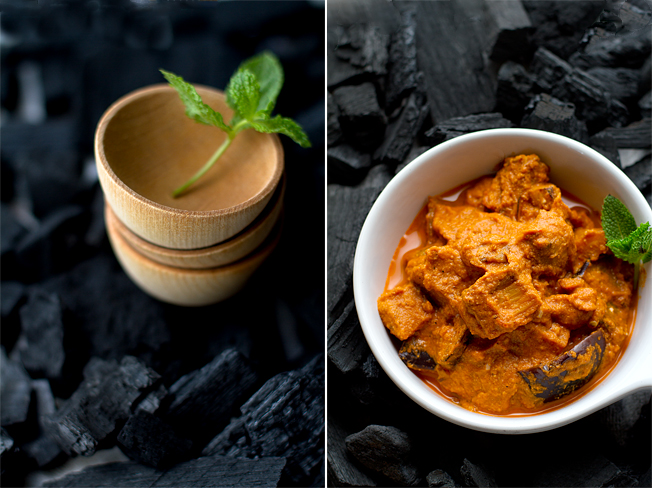
Watch Sanjeev Kapoor making his smoked koyla chicken curry. His method of smoking and my adapted recipe will work well for zucchini curry, mushroom curry, or use paneer or mock meat in this recipe.
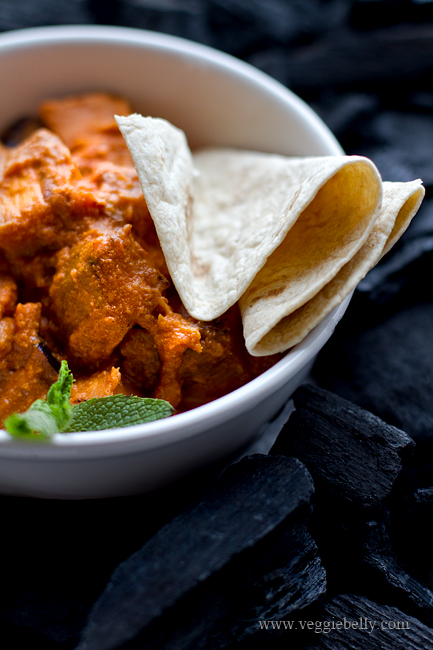
Smoked Eggplant Curry Recipe


vegetarianized from Sanjeev Kapoor’s Koyla Chicken recipe from his book, How to Cook Indian

Serves 2

3 medium tomatoes
6 whole cashewnuts
1 tablespoon butter, ghee or vegetable oil
½ lb American or Indian eggplant
1/2 teaspoon ginger paste
1/2 teaspoon garlic paste
1/4 teaspoon garam masala
¼ teaspoon or to taste, chili powder
1 teaspoon lemon juice, you may need more or less depending on how tart the tomatoes are.

For smoking the curry
1 lump of charcoal, about the size of a large lemon
1 teaspoon vegetable oil

Boil a medium pot of water, and drop the tomatoes in whole. When the tomato skins start to blister, drain them and let them cool a bit. Then peel the tomato skins and discard. Core the tomato. Place the skinned, cored tomatoes in a blender along with the cashew nuts and puree. Set this aside.

Cut the eggplant into 1 inch cubes. I peeled the skin first, but that’s optional.

 Heat butter, ghee or oil in a medium skillet. Add the eggplants, and let them brown a little on medium-high heat, about 4 minutes. Then add ginger and garlic. Stir on medium heat for about 2 minutes. Add the garam masala and chili powder and cook another 30 seconds.

Pour in the tomato puree and salt. Boil for 7 minutes or till the eggplant is cooked and the sauce has thickened a little. If the sauce gets too thick, sprinkle some water over it.

Turn off heat. Taste the curry and add lemon juice, if using.

Now comes the fun part – smoke the curry!

Hold a piece of charcoal, using tongs, over an open flame. You can do this on an open gas flame, or an outdoor grill. Heat it till it becomes red hot. (Be careful, the hot coal may give out sparks, turn on your ventilator or exhaust). Now you need to work quickly. Place the red hot coal in a small bowl.

Immediately place the bowl inside the skillet with the eggplant curry. Pour the oil over the coal, so that it smokes. Quickly place a lid over the skillet. Let the smoke from the charcoal infuse into the covered curry for about 6 minutes. The longer the charcoal bowl sits in the skillet, the smokier your curry will get.

Remove the bowl from the skillet, and discard the charcoal. Serve the smoked eggplant curry with rice, roti or naan.

**************************************************

This giveaway has ended, the winner is comment #65, Shil!

Win a signed copy of Sanjeev Kapoor’s new book,

How to Cook Indian!
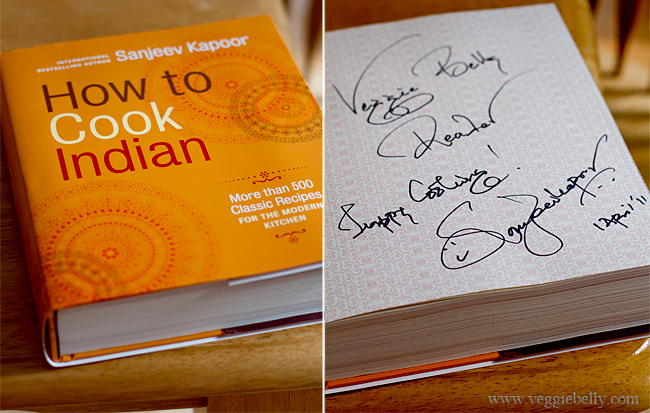
This book has more than 500 classic Indian recipes for the modern kitchen.

To enter the giveaway:

Leave a comment below and tell me whats an Indian dish you havent tried at home yet, but would love to try and make.

Giveaway ends Friday June 3rd 9pm EST. One random winner will be picked.

I will ship anywhere in the world!

I met Sanjeev Kapoor at a book signing, and had an extra copy signed just for this giveaway. The signature says “Veggie Belly Reader, Happy Cooking! Sanjeev Kapoor :)

****************************** 
 

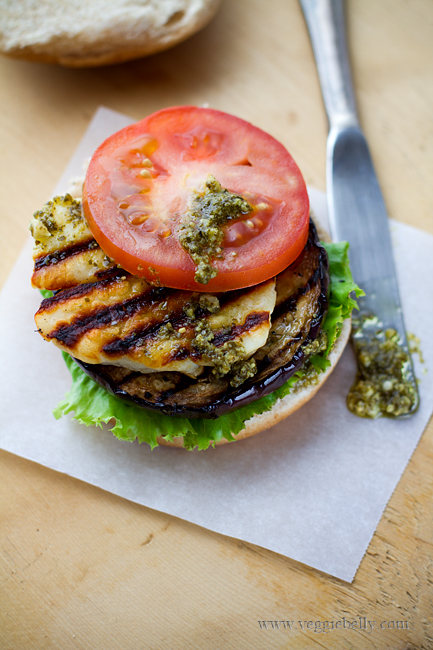
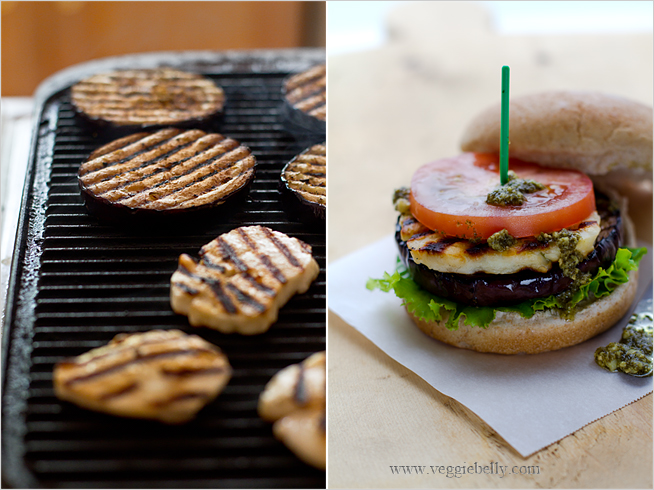
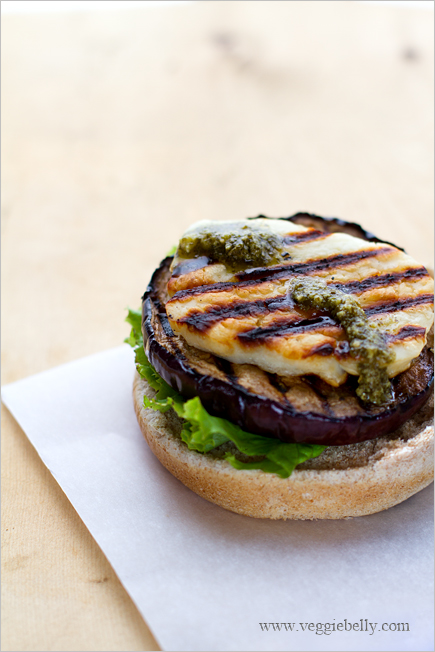
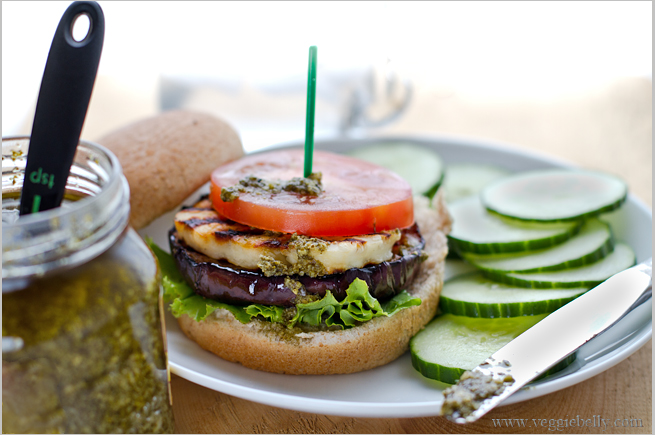
Grilled Eggplant, Halloumi and Pesto Burgers

Here is a vegetarian grilled eggplant, halloumi and pesto burgers recipe that even meat lovers will go crazy for. This is perfect for weekend and holiday grilling.

Halloumi is one of my favorite cheeses. This salty, dense cheese is from Cyprus and is great for grilling. You can substitute halloumi with mozzarella, feta or paneer, but it just wont be the same :(

But if you do use any of the substitutions, remember that you don’t have to grill the mozzarella or feta. If using paneer, sprinkle it with salt after grilling.

The eggplant and halloumi won’t stick if your grill is hot and well-seasoned. If you are doubtful, spray some nonstick spray on the grill grates before starting it up.

Grilled Eggplant, Halloumi and Pesto Burgers Recipe

Makes 4 burgers

1 medium eggplant, weighing about 1 lb.
3/4 tablespoon olive oil
3/4 tablespoon balsamic vinegar
1/4th teaspoon dry Italian seasoning
Salt and pepper
4 oz halloumi cheese

To assemble the grilled eggplant, halloumi and pesto burgers
4 medium sized burger buns
4 teaspoons pesto
Mayonnaise, according to taste. Optional.
2 leaves of lettuce, cut in half
1 large tomato, cut into 4 slices

Cut the eggplant into ½ inch thick rounds, at its widest part. Save the remaining eggplant for another dish. Place the sliced eggplant in a shallow dish.

Whisk the olive oil, balsamic vinegar, Italian seasoning salt and pepper together. When adding salt, keep in mind that the halloumi is an already salty cheese. Pour the whisked ingredients over the eggplant rounds, and toss well to coat.

Slice the halloumi into ½ inch thick slices.

Heat a grill on medium-high heat. You can use an outdoor grill or a cast iron stove top grill like I did.

When the grill is hot, arrange the eggplant slices on the grill, and cook for about 6 minutes on each side or till the eggplant is cooked.

Then grill the halloumi slices on both sides till golden grill marks appear, about 2 minutes per side.

If you don’t have a grill, you can cook the eggplant and halloumi in batches on a large skillet.

You are now ready to assemble the burgers.

Spread some mayonnaise, if using, on 2 halves of a burger bun. Take one half of a bun, and stack the grilled eggplant, halloumi and spread 1 teaspoon of pesto. Top it with tomato and lettuce. Place the other half of the burger bun on top.

Serve with fries or a chilled cucumber salad tossed with a little olive oil, balsamic vinegar, salt and pepper.

These burgers will go great with my blueberry lemonade or jalapeno lemonade.

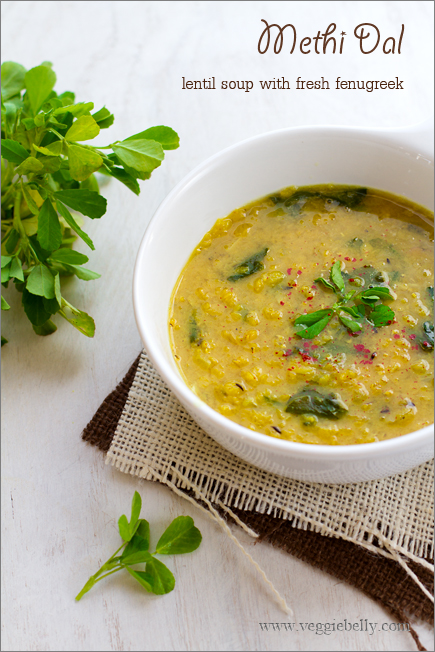
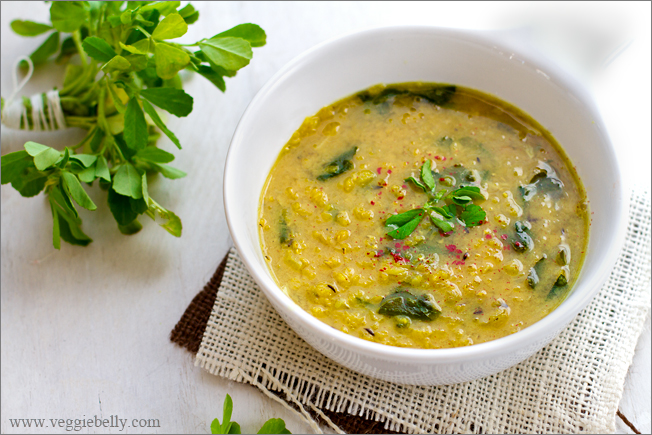
Methi Dal or Indian Lentil Soup with Fenugreek – A guest post on Herbivoracious

My recipe for this lovely, healthy, homely methi dal comes to you in the form of a guest post on Michael Natkin’s blog, Herbivoracious. I was so honored when Micheal asked me to guest post for him! I’m a huge fan of Herbivoracious, and have been following his amazing vegetarian recipes and techniques for years. I cant wait for Michael’s first book to come out!

Head on over to Herboviracious and read my guest post, a Methi Dal (Indian Lentil Soup with Fenugreek) recipe.

Related Posts with Thumbnails