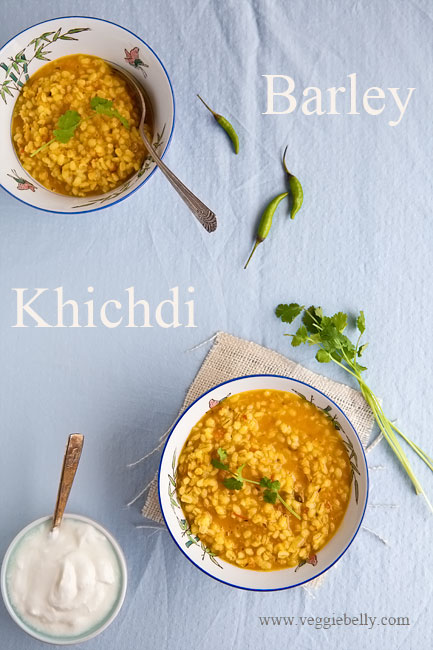
Barley Khichdi Recipe

When I want a quick, comforting meal with no fuss, I turn to this barley khichdi. A traditional Indian khichdi is made with rice, moong dal (yellow mung beans) and turmeric and is cooked to a risotto like consistency. I use barley instead of the rice to create a curried Indian barley khichdi. This vegetarian barley khichdi is tasty, easy to make and will please the whole family! Plus, you can easily cut out the ghee and use oil instead to make this khichdi vegan.

I recommend you use pearl barley in this recipe. Pearl barley cooks quicker than the non-pearled kind.  What’s the difference between pearl barley and hulled un-pearl barley? Hulled barley has its outer husk on, so it takes longer to cook. Pearl barley has its outer husk removed, therefore it cooks quicker. If you use hulled barley for this recipe keep in mind you will need to give it more time and water to cook.
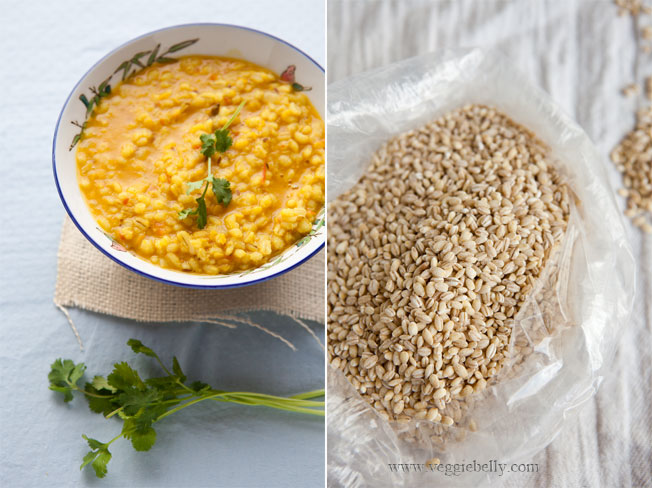
Add a handful of frozen mixed vegetables or a little cubed carrot and some peas if you wish. Also use less dal, according to your preference.  This is a very forgiving recipe. If you have a pressure cooker, feel free to cook this in a pressure cooker.
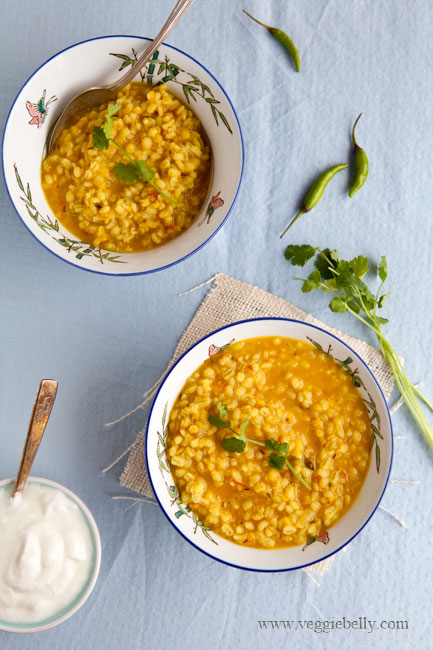
Barley Khichdi Recipe

serves about 2

Ingredients
1 1/2 tablespoons butter or ghee
¼ teaspoon cumin seeds
1/8 teaspoon asafetida, optional
1 green chili, slit. Optional
½ onion, minced
1 small tomato, chopped finely
¼ teaspoon turmeric powder
½ cup pearled barley
¼ scant cup yellow moong dal. Substitute with masoor dal
A squeeze of lemon, optional
Chopped cilantro for garnish

Method
1. Heat ghee in a medium sauce pan. Add the cumin seeds. When they sizzle, add asafetida and green chili. Stir for 30 seconds.
2. Then add onions. Sautee on medium heat till the onions are soft (don’t let them brown).
3. Add the tomatoes, and cook till they are soft.
4. Add turmeric, barley and moon dal. Stir for a few seconds.
5. Add 3 cups of water and salt.
6. Bring the water to a boil. Then reduce heat to low, put a lid on the pan, and let it simmer till the barley is cooked. I like the barley to have a little bite to it, so I cook it for about 20 minutes.  If you want the barley to be softer, cook it longer. During cooking, if the khichdi dries up, add water as needed, 1/2 cup at a time.
7. Taste the khichdi and adjust salt if needed. Turn off heat, and add a squeeze of lemon, if using. (Taste the khichdi first before adding lemon juice. If the tomatoes are tart enough you may not need the lemon. This is by no means a lemony dish.)

Serve hot with garnished with cilantro and yogurt on the side.

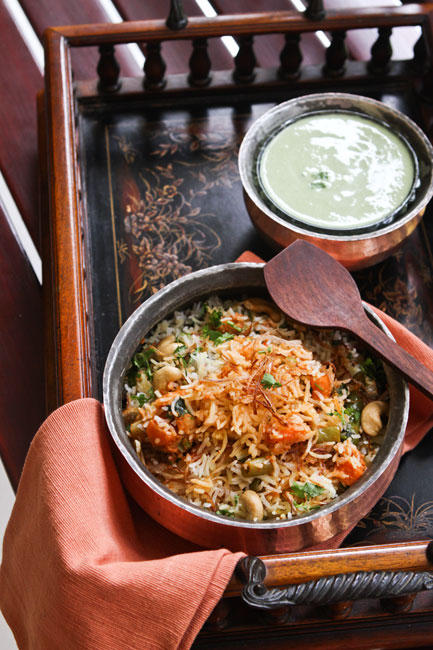
Mughlai Vegetable Biryani Recipe

I imagine that 500 years ago Indian emperors ate like this. Steaming hot biryanis straight from the handi (a cooking vessel), scented with cinnamon, safron and nuts and served with a cool minty raita. Mughlai cooking originated in India around the 16th century, during the Mughal empire. Mughlai cuisine is rich and flavorful. It uses nuts, saffron and whole spices like clove and cardamom. Many Mughlai foods are baked in the oven in sealed pots (handi).

I learned how to make this vegetable Mughlai biryani from Veena aunty, a seasoned, passionate cook, and friend of my mother’s. (Have you seen my post on Veena aunty’s out-of-this-world paneer parathas?!) This vegetable Mughlai biryani recipe takes a bit of time. But all the hard work in the kitchen will be well worth the end result – a biryani that is fragrant, flavorful, and filling.

Mughlai Vegetable Biryani Recipe

Serves about 8
For the rice
Ingredients

2 cups long grain basmati rice
2 tablespoons salt
1 tablespoon lemon juice

Method


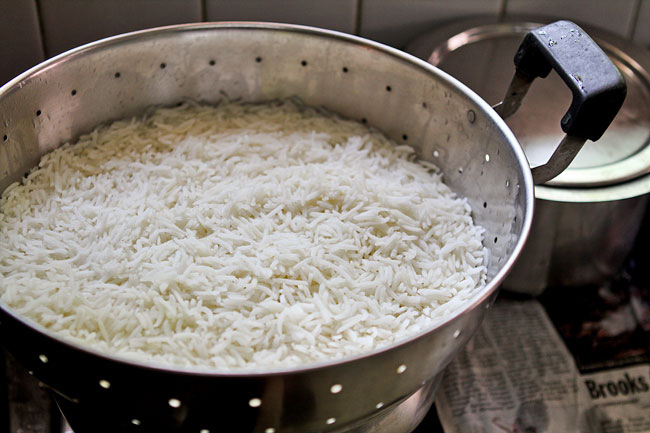
1. Wash and drain the rice. Bring 8 cups of water to a boil in a large saucepan. When the water boils, add the rice, salt and lemon juice. Stir gently. When the water boils again, reduce heat to low. Simmer the rice, uncovered for about 8 minutes, or till the rice is about 3/4th cooked.

The grains must be swollen, but they must still be a little chewy. If the rice is crunchy it needs to cook more. If the rice is soft, you have over cooked it.

Drain the rice in colander. Gently wash it in cold water. Let it drain well. Then spread the rice out on a large platter to cool completely.

For the vegetables
Ingredients

½ cup fresh beans, chopped
½ cup green peas
1 cup carrot, chopped into small cubes
1 cup cauliflower cut into small florets (about 12 small florets)

Method
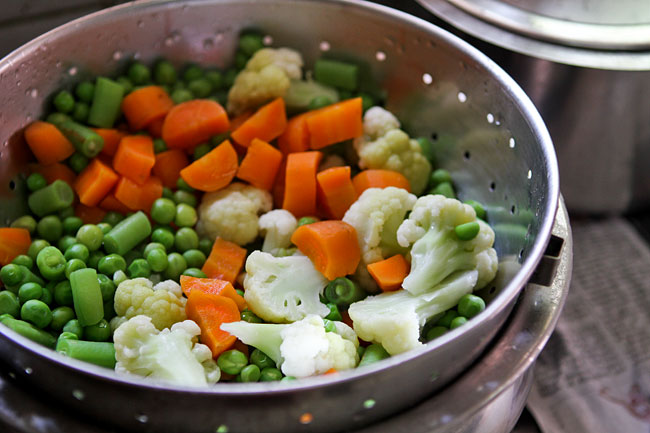
1. Boil plenty of water in a large pan. Add the beans, peas and carrots. Boil for 2 minutes.  Add the cauliflower, and boil 2 more minutes. All the vegetables must be a little crunchy and half cooked.
2. Drain the vegetables well, and wash in cold water to stop the cooking process. Drain again and set aside.  Alternatively, skip using fresh vegetables altogether and use 3 cups of frozen, thawed mixed vegetables instead (no need to boil in water)

For the masala
Ingredients
1 tablespoon cashewnuts
½ tablespoon khus khus (white poppy seeds)
1 tablespoon fresh grated coconut
1/3 cup vegetable oil
2 small onions grated (about ½ cup when grated)
½ bay leaf
1 thin piece of cinnamon
4 cloves
2 cardamom pods
1 teaspoon ginger paste
1 teaspoon garlic paste
2 medium tomatoes, pureed in a blender
½ cup full fat yogurt
1 teaspoon garam masala
2 teaspoons chili powder
¼ teaspoon cumin powder
For layering
½ cup chopped cilantro leaves
½ cup chopped mint leaves
½ teaspoon saffron dissolved in ½ cup warm milk
2 tablespoons ghee

Method
1. Grind the cashew, khus khus and coconut into a smooth paste, using as little water as possible. Set aside.
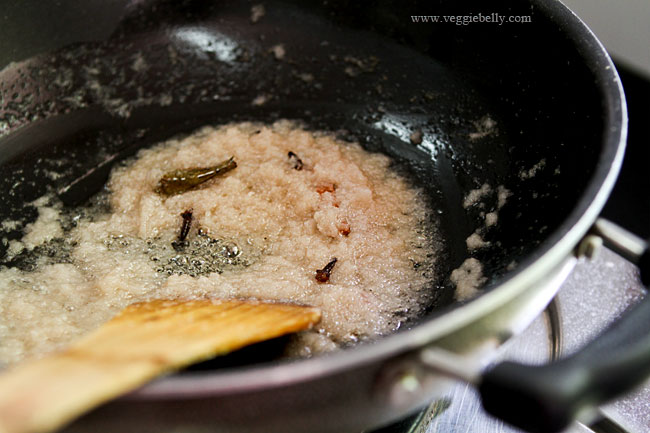
2. Heat oil in a large skillet. Add grated onions, and cook on low heat till the onions are brown, about 10 minutes.
3. To the onions, add the bay leaf, cinnamon, cloves, and cardamom. Crank up the heat to medium and stir for about 1 minute or till fragrant.
4. Add the ginger and garlic pastes. Stir and let it cook for about 30 seconds.
5. Add the coconut, khus khus, cashew paste. Stir another 30 seconds.
6. Add pureed tomatoes and cook for about 4 minutes. Remove the skillet from the heat.

7. Add yogurt and mix well. Moving the skillet away from the heat when adding yogurt will prevent it from curdling.
8. Return the skillet to the stove. Turn heat to low, and add garam masala, chili powder, and cumin powder. Stir for 1 minute.
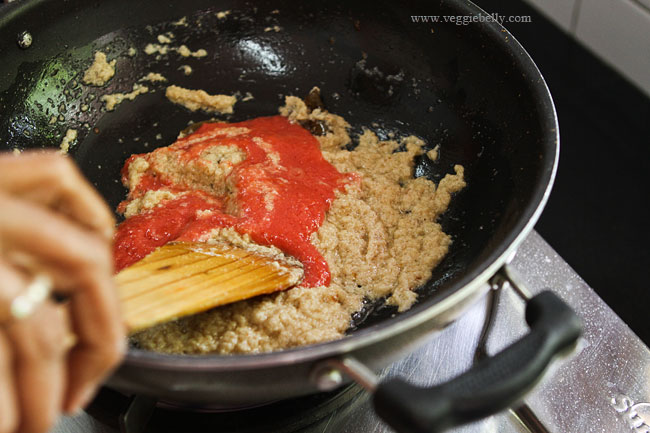
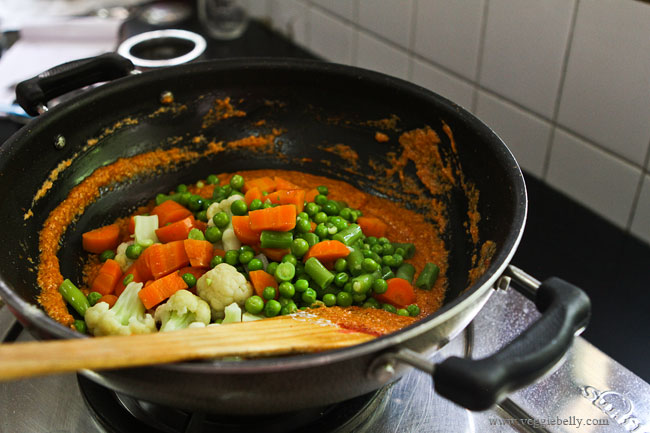
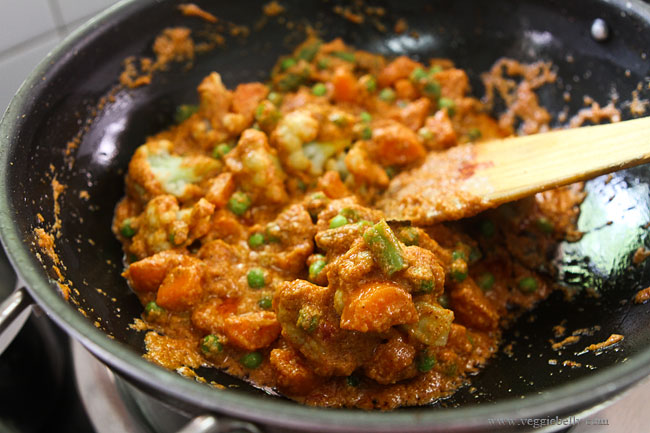
9. Now add the reserved vegetables and salt. Cook for 10 minutes or till the vegetables are almost done. Add ½ cup water, and simmer another 3-5 minutes.


10. Taste the gravy and adjust salt if needed. Remember: this gravy will be spicy, but when you add the rice to it later, everything will balance out.
11. Now you are ready to layer the biryani. Take a large baking dish. Lightly oil the inside.
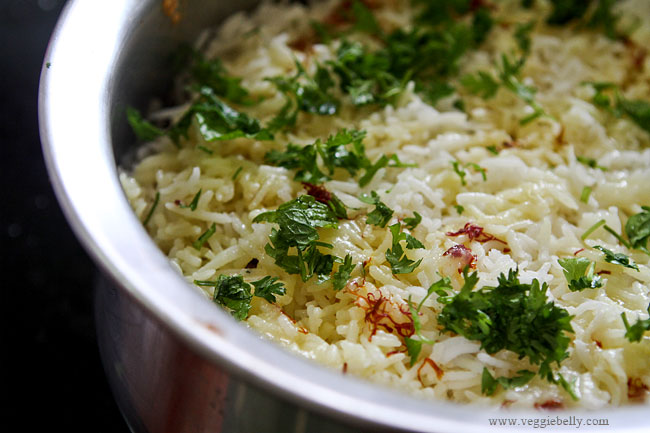
12. Layer everything in this order – half the rice, half the chopped cilantro, half the chopped mint, all the vegetables and gravy, remaining half of the rice, saffron dissolved in milk, remaining half the cilantro and mint. Drizzle the top with ghee.


13. Cover the baking dish and bake in a 350f oven for 15 minutes or till the rice is cooked through but not muchy. Turn the oven off, and let the biryani sit in the hot oven another 10 minutes.

If you dont want to bake the biryani in the oven, layer everything as above in a deep saucepan. Cover tightly with a lid, and set it on the stove top. Cook on low heat for about 10-15 minutes or till the rice is cooked through but not mushy.

For topping
Ingredients
2 medium onions
8 cashewnuts
Oil for deep frying

Method
While the biryani is baking, work on the toppings.

1. Using a mandolin, slice the onions very thinly. If using a knife, make sure the knife is sharp and slice the onions as thinly as you can into strips.
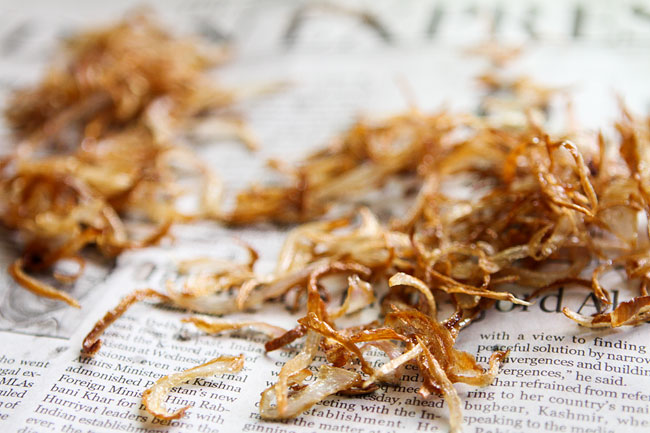
2. Heat oil and deep fry the onion strips, a little at a time. Don’t over crowd the oil. When the onion turns light brown, remove from oil and drain on a paper towel. The fried onion will crisp up as it drains.

3. Then fry the cashewnuts till lightly golden.
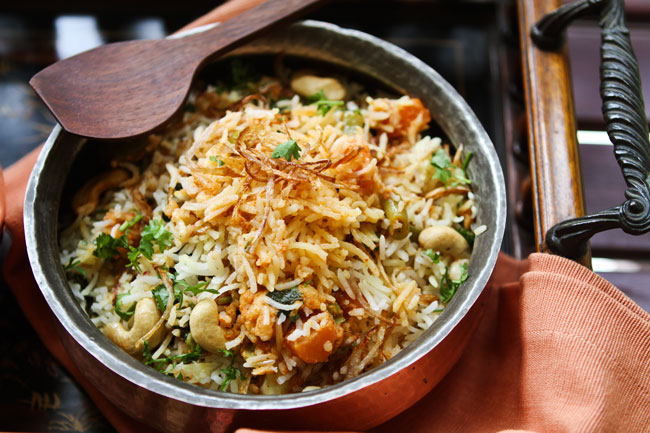
4. When the biryani is done, top with the fried onions and cashewnuts.
Serve biryani hot with raita or yogurt.

White Bean and Porcini Mushroom Soup

Dried porcini mushrooms are a beautiful thing. They have a meaty flavor, and a deep umami taste. Boil dried porcinis in water, and you have yourself the best vegetarian substitute for beef broth.  I always rehydrate extra porcinis, and freeze the stock in ice cube trays. This way I always have a flavorful stock on hand for soups.

Try to buy local porcini mushrooms if you can; they will be cheaper than the imported ones. And remember, fresh porcinis are not the same as the dried ones. Dried porcini mushrooms have a lovely, depth of taste that the fresh ones simply don’t have.

Because dried mushrooms vary in size, its best to weigh them (cup measurements wont work). In case you are in the market for a great kitchen scale, Escali scales are great.

I like to soak and cook my own beans. It’s healthier, cheaper and tastier. Soak beans overnight in water, and drain. Then cover them with fresh water, and bring to a boil. Cover with a lid, and let the beans simmer till done – about 1 to 1 ½ hours. Then drain. I know this sounds like a long time, but you don’t have to baby sit the beans, they pretty much take care of themselves. You can cook any kind of bean this way and save it in the fridge for several days to use in soups, salads, chili etc.

White beans like cannellini or navy are so silky and creamy when cooked, you really dont need to add any milk or cream to this. So this white bean and porcini soup is vegan. However, if you want to make this soup richer and creamier, just add 1/4 cup heavy cream right at the end.

White Bean and Porcini Mushroom Soup Recipe

serves about 4

Ingredients
1 cup dried white beans (cannellini or navy beans)
2 tablespoons olive oil
1 sprig of fresh rosemary
1 small onion, diced
2 cloves of garlic, chopped
¼ cup dry white wine, optional
1 oz dried porcini mushrooms

Method
Soak the dried white beans overnight in water. Then drain them.

In a medium sauce pan, heat the olive oil, and cook the onions on low heat till they are translucent. Don’t let the onions brown. Then add the garlic, rosemary, cracked black pepper, and salt. Cook 30 seconds, or till the garlic is fragrant. Don’t let the garlic brown.

Pour in white wine if using, increase heat to medium-high and let the wine bubble away, till most of it evaporates.

Then add the beans, and 4 cups of water. Bring the soup to a rolling boil on high heat. Then reduce heat to a simmer, cover the pan with a lid, and let the soup simmer till the beans are very soft – about 1 to 1.5 hour.

While the beans are cooking, rehydrate the mushrooms.

Boil 3 cup water in a medium saucepan. When the water boils, add the dried porcinis to the water. Reduce heat to medium or medium-low. Cover the pan, and let it simmer gently for about 20 minutes or till the mushrooms are rehydrated and soft. The mushrooms are done when you prick them with a fork, and they feel soft. If the mushrooms feel leathery, tough or hard, they need to cook more.

Depending on the size of the mushrooms, this may take more or less time, so check on the mushrooms periodically.

Turn off heat, and let the mushrooms sit in the stock for about 10 minutes. This will allow the sandy sediments to settle in the bottom of the pan. Using a slotted spoon, carefully remove the rehydrated porcinis from the liquid. Using a wooden spoon, press on the mushrooms to squeeze out some of the water back into the pan. Reserve the mushrooms.

When the sediment has settled to the bottom of the pan, pour the mushroom cooking liquid into a measuring cup. Do not use the sediment at the bottom. Measure out 2 cups of mushroom stock. Reserve this stock.

When the beans are cooked, add the rehydrated mushrooms, and the mushroom stock and boil for 1 more minute. Turn off heat. If you want a richer soup, add ¼ cup of heavy cream at this point.

Using an immersion blender, puree the soup till it is smooth. You can also use a blender or food processor to puree the soup.
Remember to vent the lid a little when blending hot liquids.

Garnish with chopped rosemary, and a drizzle of olive oil, and serve soup with crusty bread.

Broccoli Paratha – a Step by Step Recipe

I make parathas often – they are a delicious, substantial meal and you can fill them with lots of different things. I usually make the traditional paneer parathas or aloo (potato) filled parathas. But lately I’ve been experimenting with different types of fillings. These broccoli parathas are a recent favorite.

Broccoli Paratha Recipe – a Step by Step

Makes 8 parathas

Ingredients for the dough
2 cups whole wheat flour (atta)
½ teaspoon salt
1 cup warm water. You wont need all of it.
¼ teaspoon oil

Ingredients for the filling
1 lb broccoli crowns (without stalks)
¾ cup finely chopped cilantro leaves
½ teaspoon scant garam masala
1/8 teaspoon ajwain (carom) seeds. Substitute with jeera (cumin) seeds
1 green chili, finely minced. Use more or less according to taste.
Salt

More flour for rolling
Oil for frying the parathas

Method

  1. Place the flour and salt on a clean surface
  2. Make a well in the middle of the flour
  3. Sprinkle water in the well a little at a time, mixing the dough with your fingers after each sprinkle. Soon the dough will start to come together and look somewhat like scrambled eggs.
  4. At this point start kneading using the base of your palm.

5. If the dough is too tight, sprinkle more water while kneading. Gather all the loose flour around while kneading.

6. When the dough forms a slightly soft, elastic, non-sticky ball, stop kneading
7.  Drizzle ¼ teaspoon of oil over the surface of the dough and spread it evenly
8. Cover the dough with a damp kitchen towel, and let it rest for about 30 minutes. Remember – flours differ in their elasticity, and some doughs may need to be rested more than others

9. While the dough is resting, working on the filling. Grate the broccoli using the finest side of a box grater. You need about 2 cups of grated broccoli. Do not grate the stems. If your broccoli is wet, make sure to dry it very well before grating.

10. Place the broccoli in a bowl, and add the cilantro, garam masala and ajwain. Mix gently. Add salt to the broccoli filling only in the last minute, otherwise the filling will become soggy.

Note: There are several recipes that recommend you salt the grated broccoli first and then squeeze out the excess water, before proceeding with adding the spices. I’ve tried this method, and there wasn’t much moisture to squeeze out of the broccoli, so I skip this step in this recipe.

However, if you are not experienced with making parathas, it may get a little tricky to roll out these parathas. This is where salting and squeezing the broccoli will help. The salt pulls out the moisture in the broccoli. When you’ve squeeze out all the water, the filling becomes easier to work with.

But I didn’t salt the broccoli. Instead, I added salt in the last minute, so that the broccoli didn’t have much of a chance to let out water. I also worked quickly while filling and rolling.

11. When the dough has rested, knead it gently once more

12. Divide the dough into 8 equal parts. Roll each one into balls. Keep them covered with a damp towel
13. Pour out about ½ cup flour for dipping and rolling. Take one dough ball, and flatten it with your fingers. Then dip it into the flour
14. Gently roll out the dough into a 3 ½ inch round

15. Add salt to the broccoli filling, and mix well. Taste the filling and adjust salt if needed. Place 2 tablespoons of the broccoli filling in the center of the dough. If you haven’t made parathas before, use less filling, it will make it easier to seal and roll

16. Using both your hands, gently bring up the edges of the dough
17. Then gather the edges over the filling. Compact the filling down with your fingers if you need to
18. Now pinch the edges together to seal

19. Gently flatten the parathas using your fingers

20. Dip it in some flour
21. Using a gentle touch, roll out the parathas, sprinkling more flour if it sticks
22. Roll out the paratha into about a 5 inch round

23. Heat a heavy bottom pan on medium heat. Place the rolled out parathas on the pan. Cook till light brown spots appear on one side. Flip the parathas and let brown spots appear on the other side. Then increase heat to medium-high, drizzle about ¼ teaspoon oil over the parathas and cook till golden, about 30 seconds.

Serve hot with yogurt or raita and pickles.

Need more paratha making tips? See this post.

Eggless Cornflakes Cookies

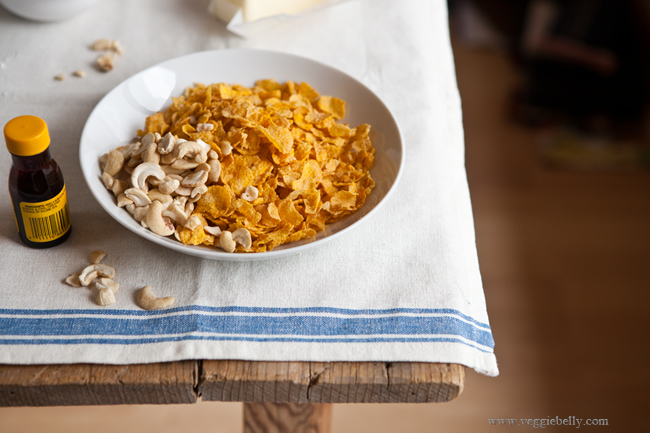
I really shouldn’t have made these cookies. I can’t stay away from them now! These buttery cookies with crunchy bits of cornflakes are an easy, eggless treat that you can make in no time. You can even make the cookie dough ahead of time and bake it when needed.

If you’ve been reading my travel posts, you may know that I am part of the wonderful Couch Surfing community (a network that connects travelers with local hosts all over the world). Now that I’ve returned from my trip to Israel and Bethlehem, I’ve opened up my house once again for hosting travelers.

I recently hosted two French girls, who are backpacking and couchsurfing their way across America. (How cool is that!) When they arrived, I made them a big pot of farfalle pasta with lots of steamed vegetables, all  tossed in garlic, olive oil and fresh basil. For dessert, I made them these addictive cornflakes cookies.

These cornflakes cookies are really easy to make, and you probably have all the ingredients in your pantry right now. Plus, they are eggless! Since there are no eggs in this cookie recipe, I added baking powder as the leavening agent, and it works very well. I also like to chill my cookie dough before baking, this helps with two things:

- Chilled cookie dough will hold its shape better in the oven; the cookies it wont spread out get flat if the dough was chilled

- Chilled cookie dough also makes a flakier more buttery cookie

If you are in a hurry, you can certainly bake the cookies without chilling. Just spread out the cookies farther apart, because they will spread in the oven.

I also like to make these cookies mini sized - just about double the size of a quarter. They cook much faster in the oven.

These eggless cookies are a cross between the Indian Nan Khatai biscuit and the Chinese Cornflake cookies. The cornflakes makes these cookies delightfully crunchy. Feel free to experiment with this recipe and use other types of cereal!

Eggless Cornflakes Cookies Recipe

Makes 32 mini cookies

Ingredients
½ cup softened unsalted butter
½ cup sugar
½ teaspoon vanilla
1 cup flour
¼ teaspoon baking powder
1/8 teaspoon salt
1 cup + 1/2 cup cornflakes
32 cashew halves

Method

Preheat oven to 350f

Make sure the butter is soft. If you are using butter that has been refrigerated, leave it outside till it becomes soft.

Place the softened butter and sugar in a bowl, and beat with a wooden spoon till it is well mixed, about a minute. Then add vanilla and mix well.

Place a sieve over the bowl, and sift the flour, baking powder and salt into the bowl. Stir till everything is combined and the dough comes together.

If the dough is too crumbly and dry, add 1 tablespoon of water, and gently knead. Then form a ball, cover the bowl with a lid, and refrigerate the dough for an hour (or up to 12 hours).

While the dough is in the fridge, prepare the corn flakes. Take 1 cup of cornflakes, place it in a ziplock bag, and roll a rolling pin over it to crush the cornflakes well. You’ll be using these crushed cornflakes to coat the cookies.

Remove cookie dough from the fridge, and add ½ cup cornflakes (uncrushed). Using your hands, gently knead and incorporate the cornflakes into the cookie dough. Its ok if some of the cornflakes get broken up in the process.

(If the cookie dough straight out of the fridge is too stiff, break it up into smaller pieces, add 1 tablespoon water, and knead gently. Then proceed with adding the cornflakes)

Divide the cookie dough into 2 equal halves. Roll one half into a long log. Cut the log in half. Then cut each half again. You will have 4 even sized pieces now. Cut each one into 4 equal parts. You will end up with 16 pieces.

Do the same for the other half of the dough. When you are done, you will have a total of 32 small pieces of cookie dough.

Roll each piece into a ball. Dip it in the bowl with the crushed cornflakes and roll it around to coat. If the crushed cornflakes don’t stick to the cookie dough, take 2 drops of water in your fingertips, and coat the cookie dough ball with water. Then roll in cornflakes.

Repeat for all the cookie dough balls. Then gently press a cashew half into the top of each one.

Arrange the cookies on two parchment (or silpat) lined baking sheets, making sure they are spread out (they need space to expand in the oven; otherwise they will all stick together).

Bake in the in the middle rack of the oven. Cookies are done when they start to get lightly golden, and when you can smell them. This should take about 12 minutes, but cooking time will vary depending on the oven.

If you over bake the cookies they will get too crunchy (but will still taste the same).

When they are done, remove the cookies from the oven and cool on a wire rack. They will still be soft when they come out of the oven, but will firm up once they cool.

Laila’s Arabic Lentil Soup

Have you entered the Herbivoracious cookbook giveaway yet? You only have 2 days left to win Michael Natkin’s brand new vegetarian cookbook, Herbivoracious! Click here to enter the giveaway!

Now on to Laila’s delicious Arabic lentil soup recipe! I was in Bethlehem a few months ago, staying with a Palestinian family. (You can read all about my adventures here!) Laila, my wonderful host taught me how to make this simple, easy Arabic lentil soup. When I first tasted it, I had no idea how easy it is to make. And I was surprised that cumin is the only spice in this soup recipe! And guess what, cumin is all this soup needs. No need for any other funky, fancy flavors. The smokiness of cumin with the earthy lentils work very well together. Laila’s soup is a beautiful example of how simple is sometimes the best.

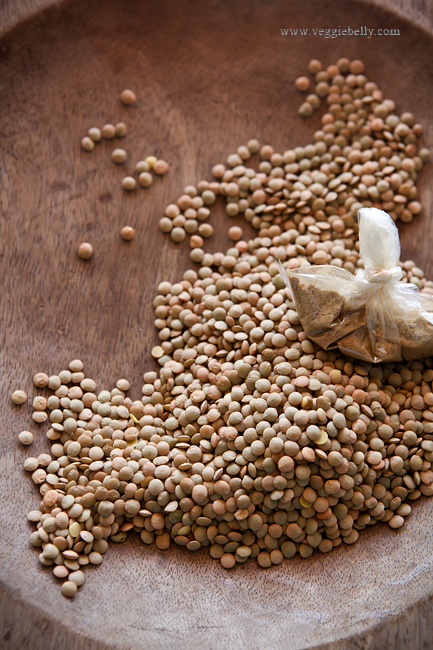
Laila used brown lentils. I used green lentils (pictured above) because I had some left over from making my dal fry mix in a jar for the holidays. You can use either brown or green, but keep in mind that cooking times may vary.

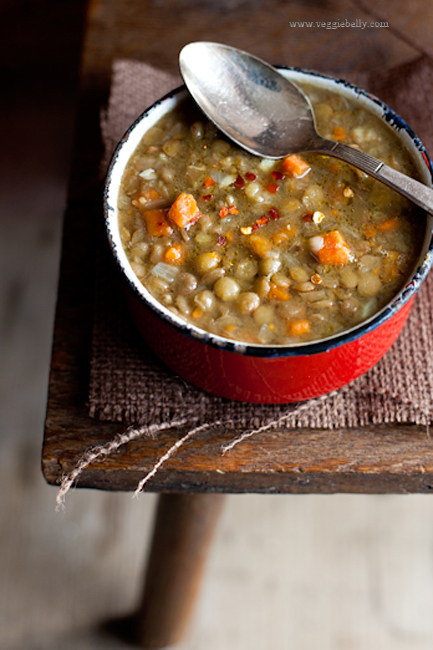
Laila served her soup simple and unadorned. And that’s what I’ve done here too. But if you like, you can garnish your soup with chopped parsley, cilantro, chili flakes or shredded cheese. To make a complete meal out of this soup, serve it with some crusty bread or pita.

Laila’s Arabic Lentil Soup Recipe

serves about 2

Ingredients
1 tablespoon olive oil
1 small onion, peeled and diced finely (1/2 cup when diced)
1 medium carrot, peeled and diced (1/2 cup when diced)
1-2 cloves of garlic, peeled and chopped
½ heaping cup dried green or brown lentils
½ teaspoon ground cumin
Salt to taste

Method
Heat olive oil in a medium heavy bottom sauce pan. Add the diced onions and cook on medium heat till soft and translucent.

Then add carrot and garlic and sauté till garlic is fragrant, about 30 seconds.

Now add the lentils and cumin and stir for 10 seconds.

Pour in 3 cups of water. Bring to a boil. Then reduce heat to simmer, cover the pan, and cook till the lentils are soft. This will take about 30 minutes.

If the soup needs more water while cooking, add more water one cup at a time, letting the soup come to a boil after each addition of water. (I used a total of 5 cups of water). How much water you need, will depend on how thick you like your soup, the lentils you are using and also the type of pot you are using. Just add the extra water one cup at a time till you get the desired consistency. And remember, the soup will thicken up when you mash the lentils.

When the lentils are done, they should be cooked and soft but should still be holding their shape.

At this point, turn off the heat. Using a potato masher, mash some of the lentils. I like to mash a third of the lentils, and leave the rest unmashed. If you want a smoother and thicker consistency, simply mash up more of the lentils.

Serve hot garnished with chopped cilantro or parsley or red chili flakes and some crusty bread or pita on the side.
Triple Smoky Mac and Cheese Recipe from Herbivoracious Cookbook and a Giveaway

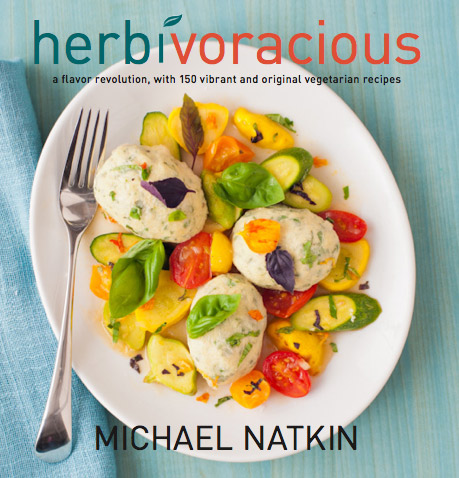
When I received a review copy of my friend Michael Natkin’s new cook book Herbivoracious: A Flavor Revolution with 150 Vibrant and Original Vegetarian Recipes, I was so thrilled and so hungry. Thrilled because Michael is my favorite vegetarian blogger and his site is full of creative vegetarian recipes. Hungry because Michael’s book is one of the best vegetarian cookbooks around, and all the recipes look delicious. Whether you are a vegetarian or an omnivore, you are going to love this book. And it has plenty of vegan and gluten-free recipes as well.

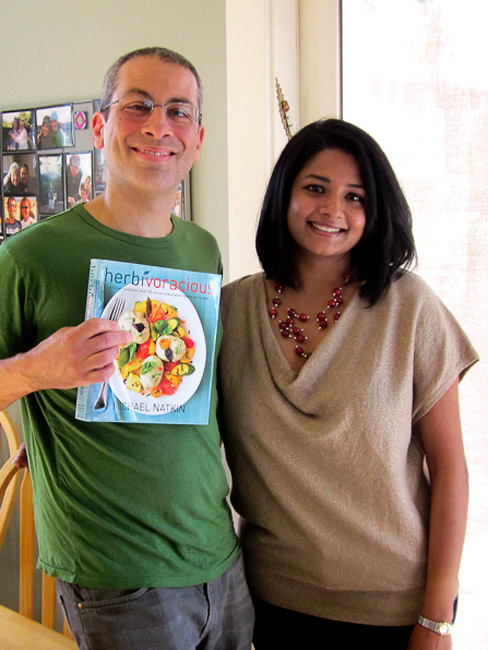
Michael and I, with Michael holding the very first copy of his cookbook! Exciting!

Michael has been a vegetarian since he was 18. When his mother fell sick, he started cooking her macrobiotic meals at home. Since then, Michael has been a devoted vegetarian. And his passion for food is so evident in his uber successful blog, Herbivoracious (same name as the cookbook!).
The blog is an encyclopedia of information, filled with recipes and tips. How does polenta with pan roasted porcini, tomato confit and chevre sound to you?! My personal favorite Herbivoracious blog recipe is the chickpea, spinach and tomato soup – simple yet packed with flavor.

When I received Herbivoracious, the cookbook, I had great trouble deciding what recipe I should make for this post. The chickpea and olive tagine with ras el hanout ( a North African spice mix) sounded yummy. As did the blackbean soup with orange jalapeno salsa, 10 minute chickpea salad with feta and basil, grilled tofu and pepper tacos, red curry delicata squash, and..well..pretty much all the recipes in the book!

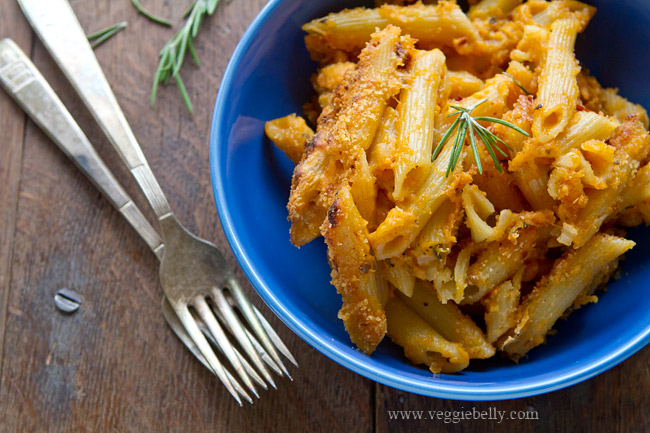
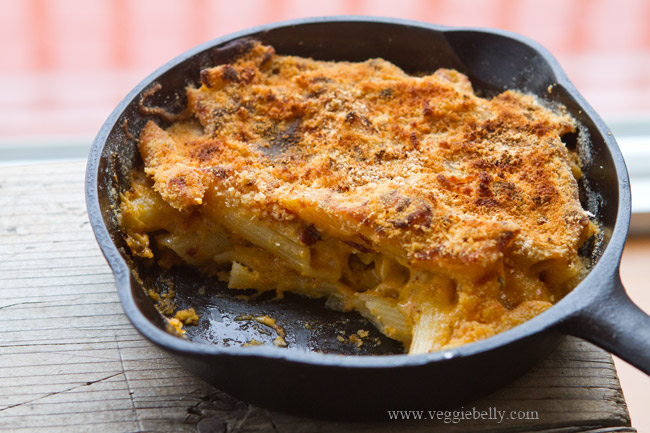
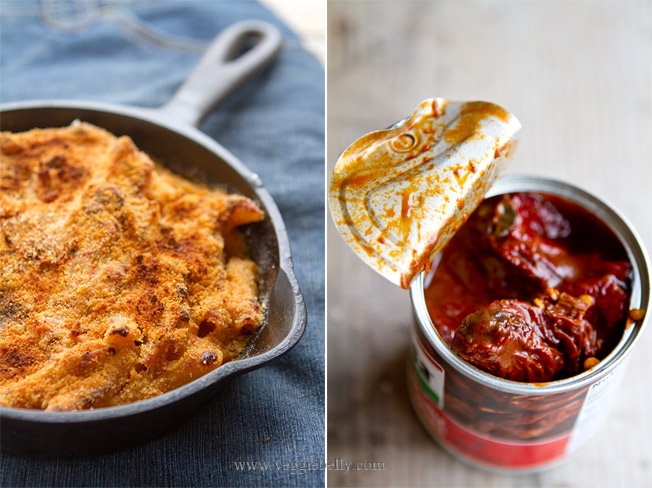
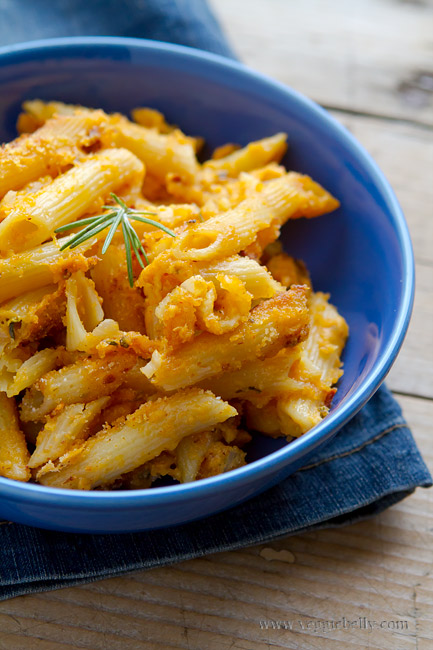
I finally decided to make the triple smoky mac and cheese. Because its cheesy, spicy and comforting – exactly what I needed on a cold, wet Portland evening. It’s the best mac and cheese I’ve had. It was easy to make, and tasted like it came from a high end restaurant. Meat lovers are sure to love this vegetarian mac and cheese. It has so many great smoky flavors going on, my husband thought it had bacon in it! Michael says you can either use smoked cheddar or smoked mozzarella in this recipe. The smoked cheese, plus smoked paprika and chipotle peppers make this mac and cheese wonderfully smoky.

Enjoy Michael’s recipe, and then make sure you enter the giveaway. The book will be out in May and the publisher, Harvard Common Press will send out a copy to one lucky winner as soon as Herbivoracious is published! You can also get your own copy on Amazon through this link Herbivoracious: A Flavor Revolution with 150 Vibrant and Original Vegetarian Recipes

Triple Smoky Mac and Cheese Recipe

A recipe from Herbivoracious Cookbook. Reproduced with permission.
Serves 6 to 8

Ingredients

1 pound elbow macaroni (Sala’s note: I used penne because thats what I had on hand)
6 tablespoons (3⁄4 stick) unsalted butter
1⁄4 cup all-purpose flour
4 cups whole milk
Half an onion, finely diced
1 tablespoon smoked paprika
1 teaspoon fresh rosemary leaves, minced
1 canned chipotle chile in adobo sauce, minced, or
1⁄4 cup Frontera brand chipotle salsa
1 teaspoon dried oregano
1⁄4 teaspoon nutmeg (preferably freshly grated)
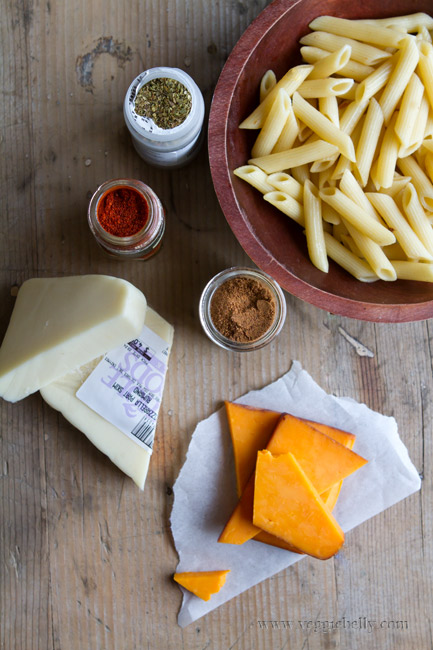
8 ounces smoked cheddar, grated, or substitute regular cheddar if you can’t find smoked cheddar
8 ounces mozzarella (substitute smoked mozzarella if you’re using regular cheddar), grated
Kosher salt
1⁄2 cups Homemade Bread Crumbs made with 2 cloves minced garlic added. Recipe in the book.

Method

1. Bring a large pot of salted water to a boil. Boil the macaroni according to package directions, draining when it is just becoming aldente. This will bake more in the oven, so don’t overcook it. Drain, transfer it to a bowl, and toss with 2 tablespoons of the butter.

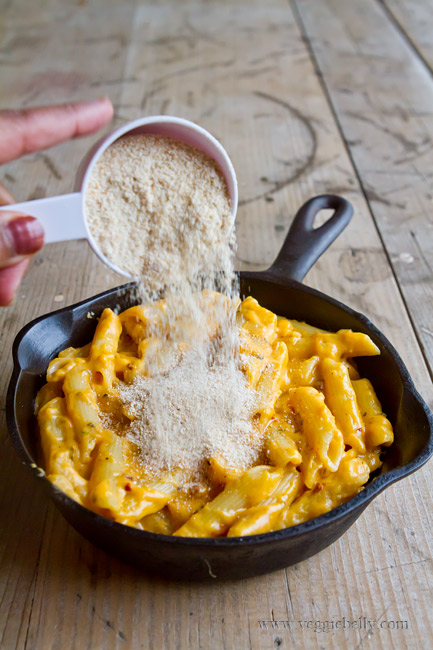
2. Preheat the oven to 350°F and grease a 9 x 13-inch baking dish. (Sala’s note: I baked the mac and cheese in a cast iron skillet instead of a baking dish)

3. Melt the remaining 4 tablespoons butter in a medium saucepan over medium-low heat. Sprinkle in the flour and whisk pretty constantly for 3 minutes. Whisk in the milk. Add the onion, smoked paprika, rosemary, chipotle, oregano, and nutmeg. Bring to a gentle simmer and keep cooking, whisking occasionally, until the sauce begins to thicken, about 5 minutes.

4. Reduce the heat to low. Whisk in the grated cheeses, a handful at a time, stirring each addition of cheese until melted. It is important to do this gradually, to avoid graininess.

5. Taste the sauce and adjust the seasoning to your preference. It will probably need just a little salt, depending on the cheeses. Add more chipotle if you’d like it hotter. Remember that the sauce should be pretty intense, because it needs to flavor a full pound of pasta.

6. Stir the macaroni into the sauce. Pour the macaroni into the baking dish. Scatter the bread crumbs evenly over the top.

7. Bake until you can see bubbling around the sides and the bread crumbs are nicely browned, about 30 minutes. Let the dish rest for 5 to 10 minutes before serving.

***********************

A Chance to Win Michael’s Herbivoracious Cookbook!

Be One of the First to Receive a Copy!

The awesome people at Harvard Common Press are giving away a copy of Herbivoracious to one lucky Veggie Belly reader!

To enter the contest, just leave a comment and tell me why you’d like to be the one to win this book.

Contest ends Wednesday, April 4th 2012. US & Canada shipping only.

One randomly picked lucky winner will receive a copy of this book when it is published in May!

THIS GIVEAWAY HAS ENDED! The randomly picked winner is comment #7, Cat!

Cooking with a Palestinian Grandmother and Christmas in Bethlehem. A Vegetarian Journey Through Israel and Palestinian Territories Part II

My first vegetarian meal in Bethlehem – dinner at Laila’s house.

After a delicious and fun few days in Jerusalem, I headed to Bethlehem for Christmas. (Yes, I am that late with this post, but I’ve finally found the time to write it up!). In Jerusalem, I was already giddy with excitement that I was journeying through the holiest of lands. And spending Christmas with a Palestinian family in Bethlehem just made the trip even more special. I am so grateful and feel incredibly lucky that I could spend Christmas right in the very place where Jesus was born.

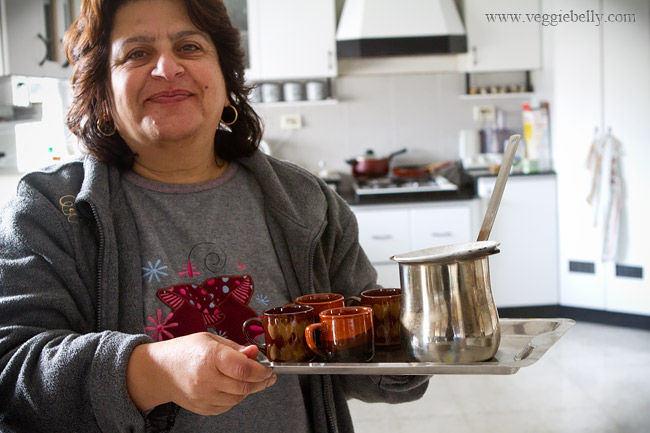
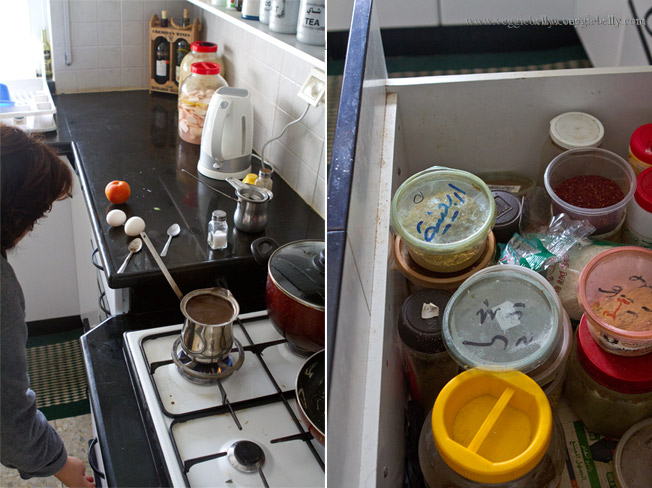
Laila showed me how to make Arabic coffee.

My home stay with Laila’s family was arranged through the Holy Land Trust – an organization that has community outreach and non violence programs in Bethlehem. They also arrange home stays for foreigners – a great way to learn and see for yourself how locals live in Bethlehem. I told Holy Land Trust in advance that I was vegetarian, and they said that would be no problem at all. Laila cooked meatless food especially for me, and her whole family only ate the vegetarian food for the two days I was with them!

Laila, a mother of two sons and two daughters, and a grandmother of three, was a kind and hospitable woman. She patiently taught me how to make some of her simple, Arabic food. Recipes coming soon!

I walked into Laila’s house in Bethlehem on a cold and drizzly Christmas eve. Her family greeted me warmly and with a lot of questions about India and the US. Do you know Amitabh Bachchan? How big is your house in America? What do they eat in India? Does your husband allow you to travel alone? Over fresh mint tea, I answered their questions about my culture and asked them questions about theirs. I knew right away this was going to be a memorable trip.

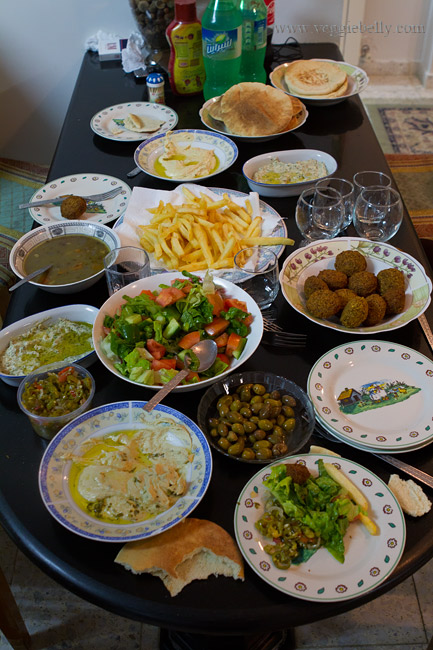
Dinner at Laila’s house consisted of an elaborate spread of Falafels, soft pita bread, hummus, fries, salad, moutabel (and eggplant dip like babaganoush), and olives. There was only one rule at the dinner table – eat with gusto.

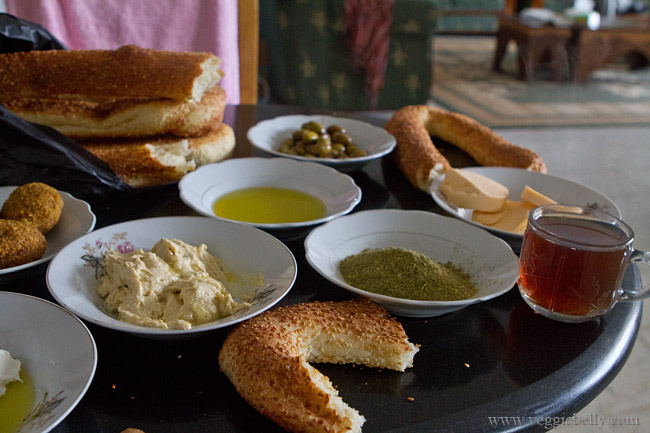
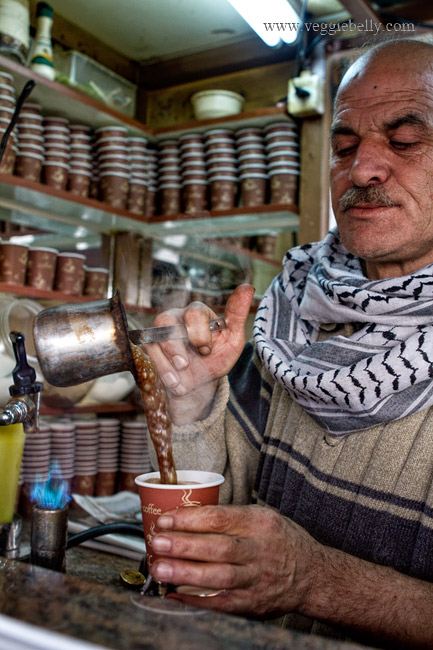
The next morning, Laila served eggs, and more amazing bread. I discovered Kaik that day – an oblong, chewy bread with sesame on top. It was perfect with the Arabic cheeses Laila served that morning! To top it all off, breakfast ended with Arabic coffee – strong, muddy and fragrant.

Next, I went off to explore Bethlehem. Here are some photos.

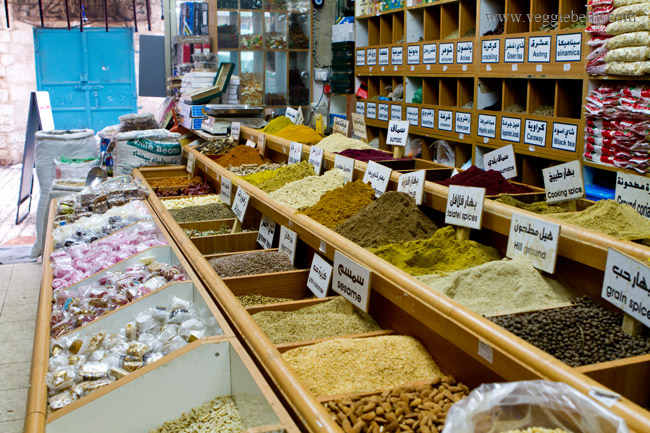
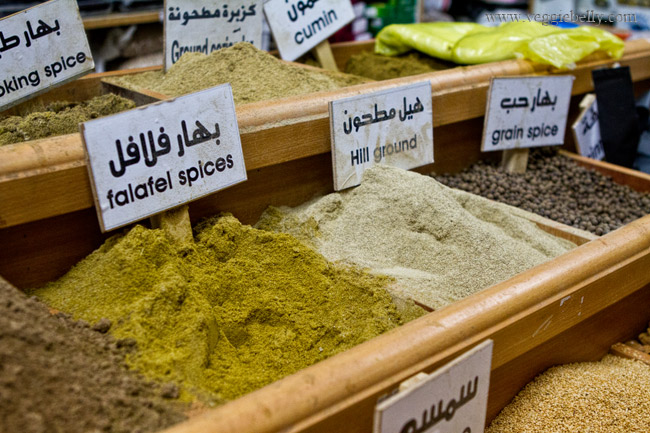
My hosts’ kitchen in Bethlehem. Left – brewing Arabic coffee. Right – sumac, zaatar and other spices.

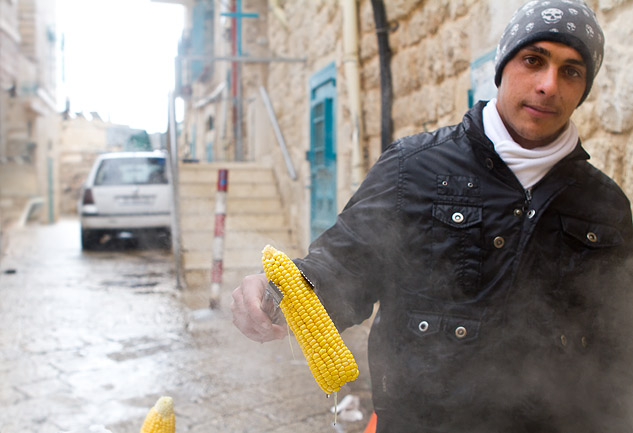
Scenes from Bethlehem at Christmas


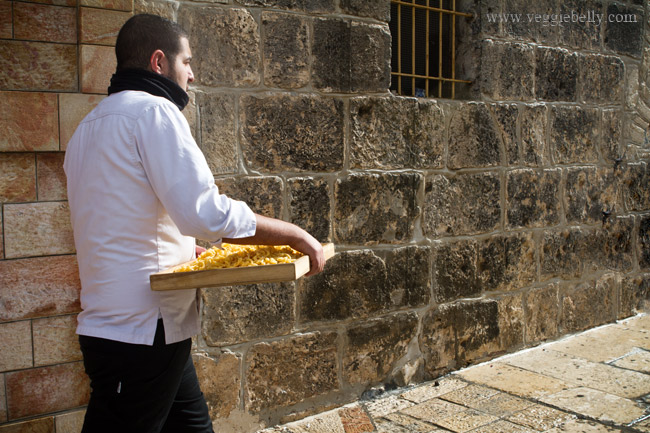
Pasta from the Franciscan Monastery

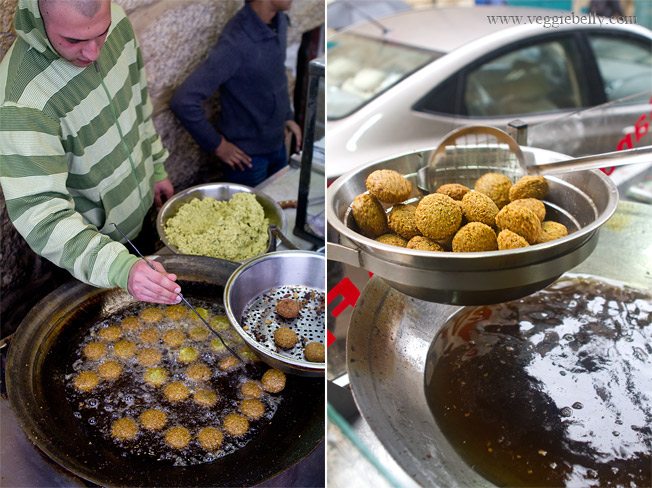
There were falafels being fried everywhere


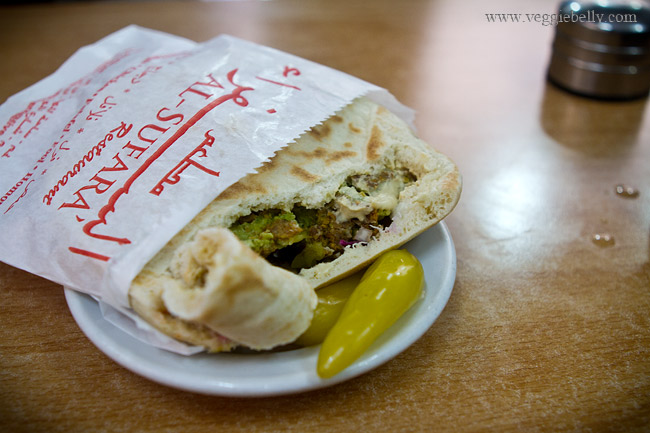
If you are in Bethlehem, grab a falafel  sandwich at Al Sufara – delicious! And the owner gives tourists free dessert!

Church of Nativity, the spot where Jesus is said to have been born

Prayers printed in Arabic at the Church

The ‘security wall’ in Bethlehem. Massive stretches of this wall cut off the West Bank from Israel. The Israelis I met said bombings have decreased since the wall was built and they feel safer. The Palestinians I met say they are prisoners in their own land because of the wall. I had to go through multiple check points to get from Israel to the West Bank. Its a short distance, but takes a long time because of the vehicle searches and passport checks by the soldiers. But despite the wall, the heavy military presence, and the politics, I felt generally safe in Bethlehem.

Bethlehem was an incredible, eye opening experience. Finding vegetarian food was no problem at all. I had plenty of fresh salad, bread, hummus, falafel, nuts and dessert. Laila also made me interesting vegetarian Arabic food. She made rice and vermicelli with nutmeg, a simple peas and carrot dish that she served with smoky shrak (thin bread), and a lovely lentil soup with cumin.

More Photos of Jerusalem

I’ve already written about my Jerusalem experiences in my post, ‘The best hummus I’ve ever had and other stories from Jerusalem’. Make sure you read that post! Here are more photos from Jerusalem.

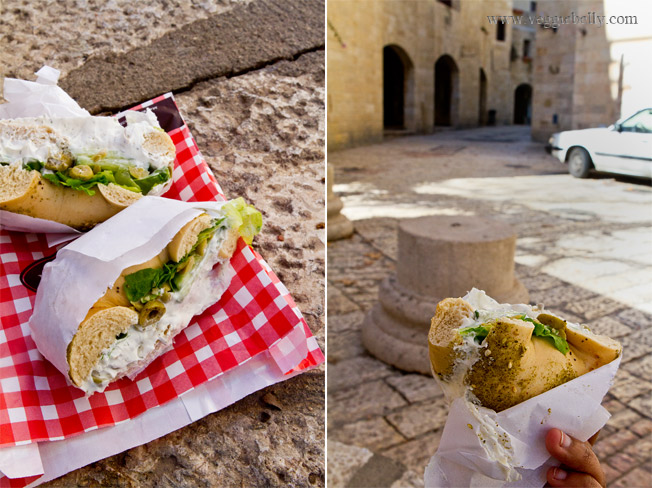
Bagel cart near Jaffa Gate
Arabic coffee
Cheese filled pastries at Mahane Yehuda market

Loved the bagels in Israel! This one was a zaatar (yummy spice mix of sesame, sumac, hyssop or thyme) bagel with lettuce, cucumbers, olives, mushrooms, sweet corn and some kind of cream cheese. Israeli bagels were less dense and more moist that American bagels, which makes them perfect for bagel sandwiches.

Stay tuned for more posts from my Middle East trip, and some great recipes I learned there!

Related Posts with Thumbnails