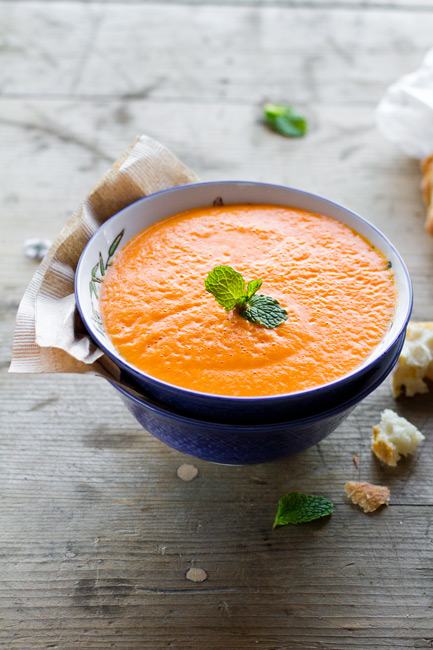
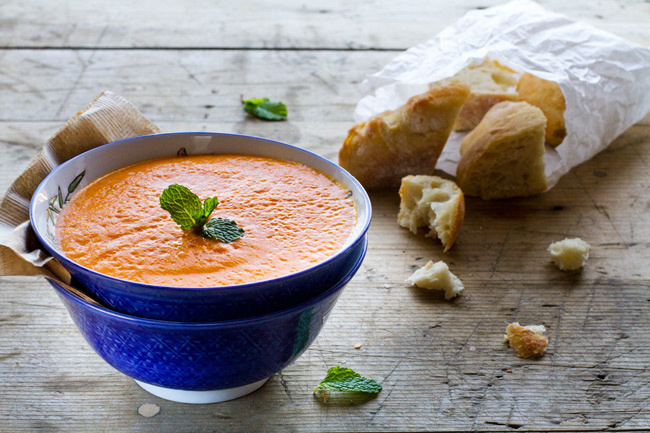
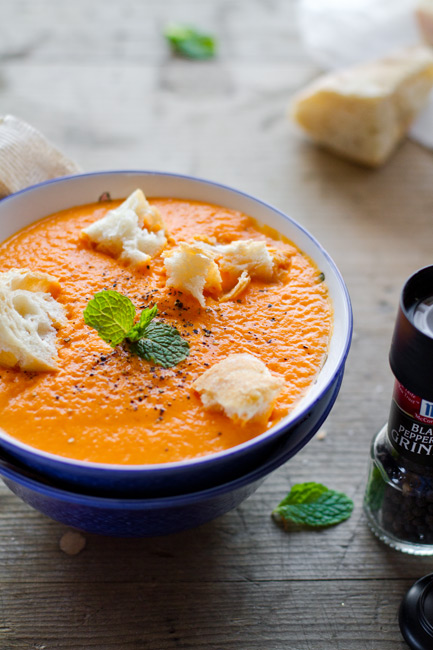
Spinach Mushroom Soup & How to Keep Spinach Green While Cooking

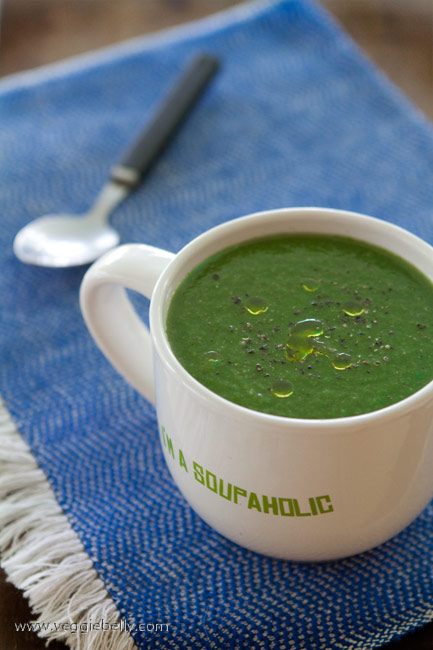
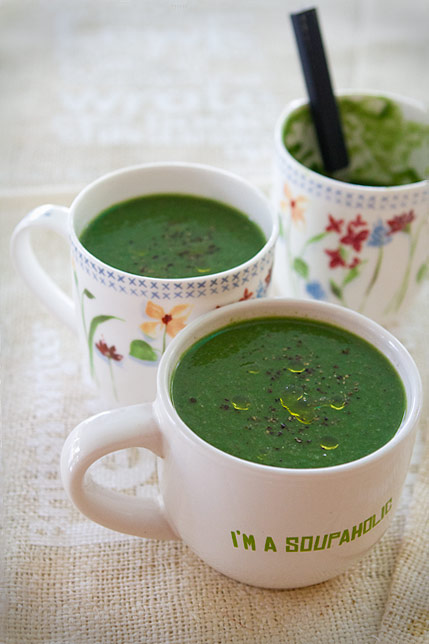
This easy spinach and mushroom soup makes me feel good that I’m eating my vegetables. It’s packed with lots of fresh spinach and the great umami flavor of mushrooms. I allow myself a little butter in this recipe; but you can use olive oil instead and make it a vegan soup.

When I make pureed spinach dishes like this soup or palak paneer (Indian spinach curry with cheese), I like my spinach to remain green. But cooking spinach will turn it a dark color. The solution is easy. Add a pinch of baking soda when cooking spinach in water – it will help retain its green color. And don’t overcook the spinach.

Spinach Mushroom Soup Recipe

Serves about 3

Ingredients
2 tablespoons butter
1/4 cup chopped onions
3 garlic cloves, peeled
1 cup peeled, diced potatoes
3 cups tightly packed fresh, tender spinach leaves
½ teaspoon dried oregano
A pinch of baking soda, optional
10 large button mushroom caps
Salt & freshly ground black pepper

Method
Heat a medium, heavy bottom sauce pan with the butter. Add onions, and sauté on medium heat till translucent.  Add the garlic cloves and cook 30 seconds or till the garlic is fragrant.

Add the mushrooms and sauté on medium heat till they brown a little, about 5 minutes. Then add the potatoes, a pinch of salt and 4 cups water. Bring to a boil. Then reduce heat and simmer till the potato cubes are cooked.

Add washed spinach leaves, oregano and salt to the pot (keeping mind you’ve already added a little salt to the soup in the previous stage). Immediately add a pinch of baking soda to the spinach; this will keep the spinach green when cooking; but this step is optional.

Boil for about 1 minute or till the spinach is wilted.

Turn off the heat. Using a hand/immersion blender, puree the soup till smooth. If you don’t have an immersion blender, pour the soup into a regular blender and carefully puree. If the soup is too thick, add ½ cup water and blend again.

Serve warm, with a sprinkle of freshly ground black pepper.

The Best Hummus I’ve Ever Eaten and Other Stories from Jerusalem. A Vegetarian Journey Through Israel – Part 1

When I left for Israel late last year, I had no idea I would return so in love with the cuisine of this country. The fresh fruits and vegetables, amazing range of grains, and the huge markets are a vegetarian’s paradise.  Israel will easily rank in the top 5 of my best countries for vegetarians list.

The incredibly talented pastry chef cum food guide, Ariella Amshallem took me on a food tour of Jerusalem’s famous Mahane Yehuda market where many of these photos were taken. Ari is a vegetarian herself, and has tons of recipes on her blog, Ari Cooks. If you are ever in Israel, do not miss the interesting and fun food tours that Ari and her friends offer.

Making Pita Bread with Hassan

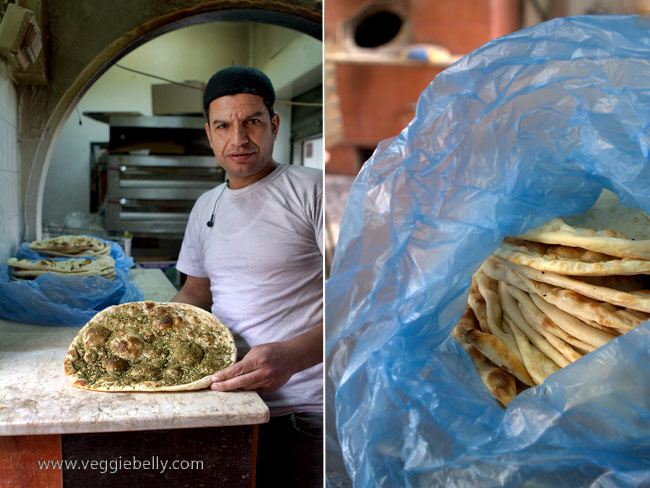
Hassan’s Pitot bakery is on Agrippas st, near the famous Mahane Yehuda market in Jerusalem. It is a little, unassuming store front that you could easily pass by without noticing.  But I’m so glad I did, thanks to my guide Ari, because Hassan’s breads are so fresh and so tasty.
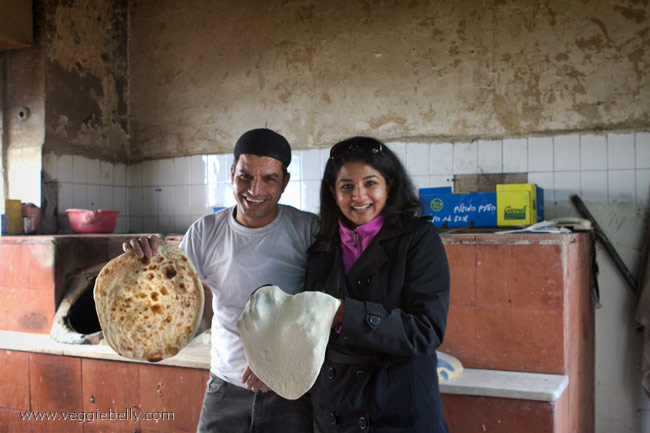
Not only are his breads so good, Hassan himself is such a warm and friendly person. He invited me into his kitchen, showed me how he makes his different breads and spoke passionately about his methods and recipes. Hassan also allowed me to spend several hours in his little shop, even letting me try my hand at the bread; mine turned out ameboid and misshapen, lol!
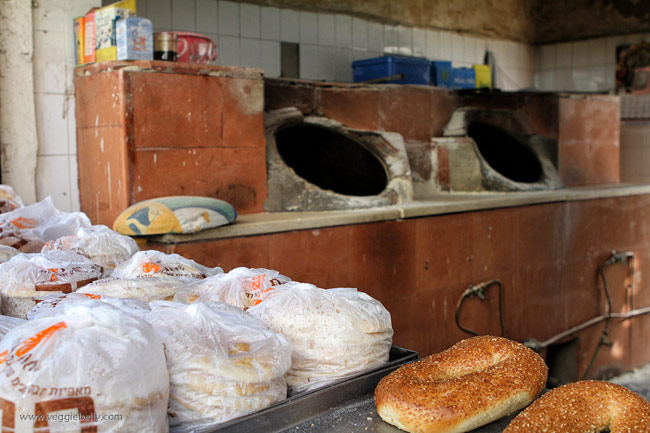
See the two holes in the background? Hassan bakes his bread in there. They are charcoal ovens lined with metal and are round and cavernous. “Like a mother’s womb”, Hassan explained. Interestingly, they call these ovens ‘tannoor’. In India we call them ‘tandoor’!

I  asked Hassan what’s the trick to his superb bread. He said it was his ‘old’ starter dough. He calls his dough ‘old’ because the very first dough was made in 1985. Since then, every day, Hassan saves a piece of the previous day’s dough and incorporates it into to the next day’s dough. This way, he explained, the dough has been ‘continuous’ for the past 27 years. The very first dough he made had some yeast in it. But since then he has never used yeast in his daily dough. Yet, the method of continuing the old dough gives his breads a mild yeasted quality.
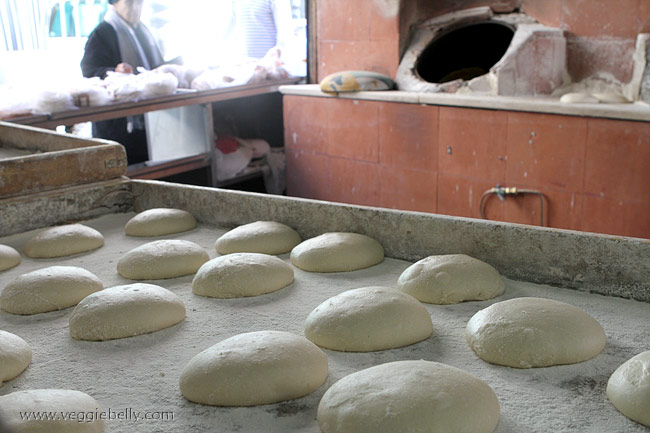
Hassan comes from a line of bakers who make traditional Arab breads.  He is from Ramallah, a Palestinian city in Israel. He works hard, rising at 5am and often working late into the night. Hassan and his assistant Tzion make fresh dough every day using half white flour, half wheat flour, water and salt (plus some of the previous day’s dough).
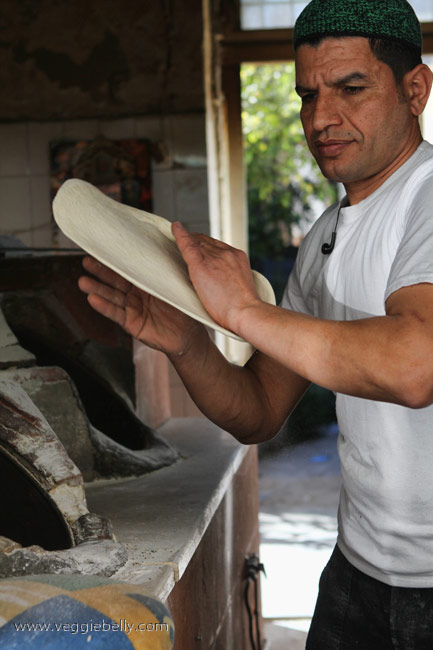
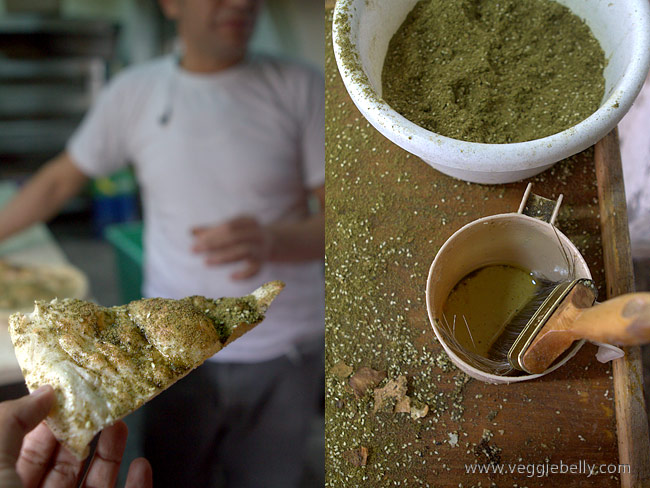
Then they churn out dozens and dozens of large, round pita bread – pleasantly chewy and beautifully cooked in his charcoal oven. They then either dust the bread with black and white sesame seeds, or zaatar (and common Middle Eastern condiment make from sesame seeds, sumac and powdered hyssop or thyme).
For beautiful photos documenting Hassan at work, check out Casperit’s photos on flickr.
Hanukkah Donuts Like You’ve Never Seen Before

Israelis have elevated the donut to an art form. After experiencing the Hanukkah donut, I will never look at a donut the same way again. Hanukkah is an eight day Jewish festival of lights. Israelis eat donuts (sufganiyot) and other deep fried items during hanukkah.

I was lucky enough to be in Israel during Hanukkah and sample some amazing donuts. It was difficult to choose because they came in so many flavors and with hundreds of fancy filling.

During Hanukkah, donut shops were over flowing with people. This man loving selects his donuts :)

My favorites were the ones that came with an injectable syringe filled with sauce! What a cool idea! This one was a chocolate and vanilla custard donut. The syringe had a chocolate espresso sauce in it.

These donuts at the mahane yehuda market were the ‘regular’ type with a jam or jelly filling.

The Best Hummus I’ve Ever Eaten

I am crazy about hummus. I ate so much hummus in Israel, it was coming out of my ears! I wiped down plates and plates of luscious, creamy hummus with soft, puffy pita bread. Finally, I found it..the best hummus I’ve ever had..

It was in a humble little restaurant called Rachmo at the Mahane Yehuda market in Jerusalem. This Kurdish-Iraqi restaurant serves up hearty dishes (tons of vegetarian options!) and the best hummus I’ve ever had.

The hummus at Rachmo was rich, silky and just exquisite. It had just the right amount of salt and lemon. And it was obvious that the restaurant is generous with the tahini (sesame paste) in its hummus lending it the creamiest mouth feel.

Above: the hearty vegetarian meal that my food guide Ari and I shared at Rachmo. Cabbage stuffed with rice and cooked in tomato and paprika sauce, pickles, hummus and pita bread.

A Vegetarian Meal with my Jerusalem Hosts Smadar & Eran

When I travel, I try to couch surf as much as I can. Couch surfing is a (not for profit) network that connects travelers with locals. You can sign up for couch surfing to host and be hosted.

I have hosted travelers in my house in the US many times and I’ve also stayed with couch surfers in their homes in other countries when I’m traveling. There is no money involved – the goal of couch surfing is cultural exchange.  (Yes, couch surfing is safe. Read their safety philosophy).

I have stayed with couch surfing hosts in Latvia, Norway, Fiji, Israel, Argentina, and other countries. Each experience has been unique, and eye opening. By staying with a local person or family, you get a perspective that you otherwise won’t get sitting in a hotel room. In other words, you get more of a non-touristy, realistic experience of a country, which I love.
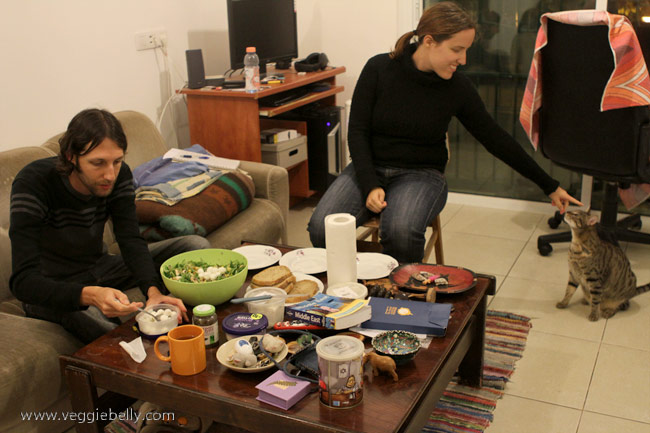
In Jerusalem, I stayed with a young couple via couch surfing. Smadar and Eran were kind and generous hosts and I learned a lot from them about Israeli life, food and culture. Like many Israelis, Smadar and Eran are very health conscious and eat light, fresh meals incorporating a lot of vegetables.

On the last night of Hanukkah, Eran made us a gorgeous salad with sumac for dinner. Sumac is a deep red, tangy tasting powdered spice. We had the salad with multi grain bread and cheese. The salad was light, yet satisfying and a wonderful reminder that even the simplest of meals can turn into a memorable one when you eat it with good people and good conversation.
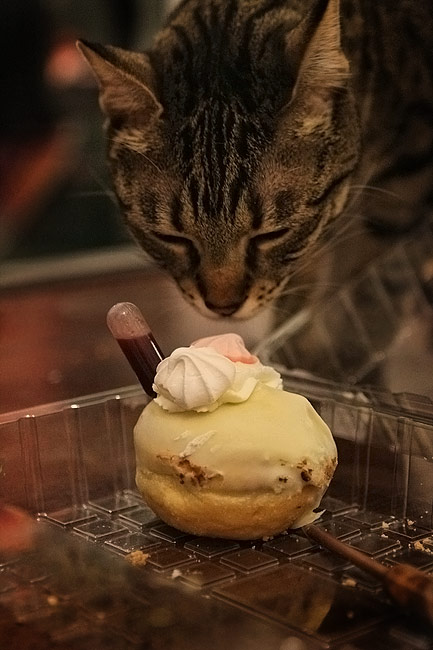
After the sumac salad, we finished our Hanukkah meal with the customary Hanukkah donut. This one came with an injectable syringe filled with raspberry sauce. Eran and Smadar’s cat Cashew, inspects my donut above!
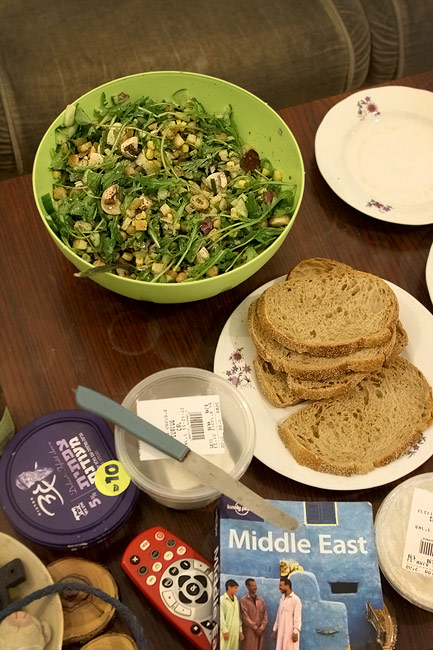
Eran’s Sumac Salad Recipe

For the salad
Arugula leaves
Other salad greens of your choice
Cucumbers, cubed
Red onion, sliced into rings
Mushrooms, sliced thin
Canned sweet corn, drained
Olives
Fresh mozzarella balls

For the dressing
Olive oil
Lemon juice
Sumac (substitute with lemon zest or cumin powder)
Salt & Pepper

Place all salad ingredients in a bowl. Eran eyeballed all the ingredients, so this isn’t an exact recipe. Add whatever vegetables you like to use in a salad.

Whisk together the dressing ingredients in a small bowl. Mix it up to your taste. I generally use 4 tablespoons olive oil + 2 tablespoons lemon juice and a pinch of sumac. If you like your dressing on the sweeter side, add ½ to 1 teaspoon of sugar.

Pour the dressing over the salad, toss and serve immediately.

Ghee and Curry Leaf Pasta Recipe

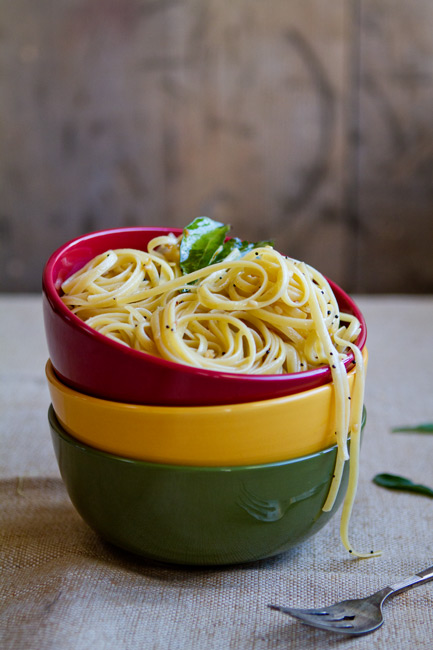
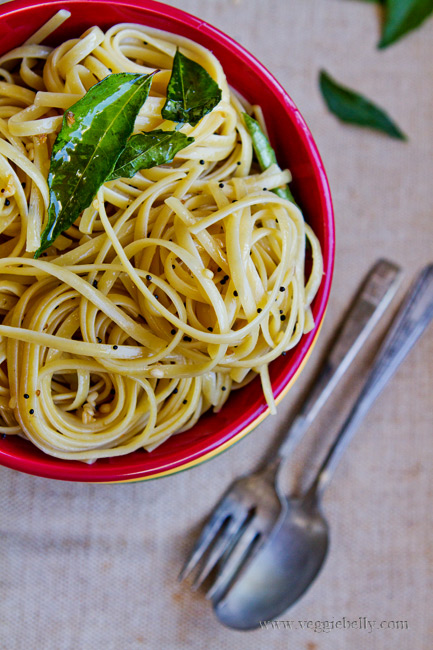
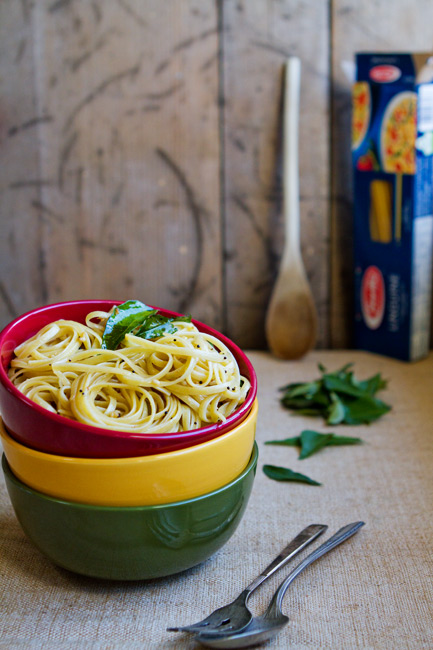
In my last post  I showed you how to make home made ghee. In this post, I share how to use all that delicious ghee – pasta with curry leaf and ghee! I am a pasta lover and a ghee lover, and this is the recipe I created to get my pasta fix and ghee fix all in one recipe.

There is a big difference between making pasta with butter and pasta with ghee. Ghee will give the dish a rich, nutty flavor that butter wont. However, if you don’t have ghee but want to try this recipe, use half butter and half oil instead of the ghee; it wont taste the same as ghee, but it will still be delicious!

This ghee and curry leaf pasta is very mild tasting, and easy to make. Children will love this dish. It also makes a great office lunch to pack, with some steamed vegetables tossed in. For extra flavor, add a teaspoon of ginger garlic paste when tempering the mustard seeds.

You can use any tadka (the whole spices you add to the ghee) items you like – cumin seeds, fennel seeds, green chilis, urad dal, will all taste great.

When I was shooting this dish, I wanted a natural, rustic looking background to offset the colorful bowls with pasta. I didnt have anything large enough that will make a convincing background. So heres what I did..

I have a shabby chic table I picked up at an antique store in Spokane, WA. I’ve enjoyed using it in many of my food photos  like my thanksgiving tofu skin roulade, or in the photos of my dal fry mix in a jar. For these pasta photos, I flipped the table and set it behind my bowl of pasta. This created the natural looking background I wanted.

Ghee and Curry Leaf Pasta

Serves about 4

1 lb dry pasta such as linguine, macaroni, spaghetti or bow tie
3 tablespoons liquid ghee
½ teaspoon black mustard seeds
1/8th teaspoon asafoetida
8 curry leaves
salt

Bring plenty of water to boil in a large pot. Add a generous amount of salt to it. Add the pasta and stir. Cook uncovered, till the pasta is al dente (still has a bite to it; is cooked, but not completely soft), about 8 minutes.

Drain the pasta and set aside.

In the same pot or a large wok (non stick is best), heat the ghee, and add mustard seeds. (For extra flavor, add a teaspoon of ginger garlic paste at this point). When they pop, add asafoetida and curry leaves, and stir 30 seconds or till the curry leaves are fragrant.

Add pasta and salt, and toss well. Serve warm.

How to Make Ghee

Ghee is used widely in Indian cooking. Not only is it deeply flavorful, ghee also has a higher smoke point, so its great for sauteing or frying. Indian herbal medicine (Ayurveda) uses ghee as a base for many of its medications. I spent some time at an Ayurvedic retreat in India last summer and my detox concoction was ghee based – I’ve never had a tastier medicine!

Making ghee at home is easier than you think. Here is a step by step recipe and tis for home made ghee.

Should you use salted or unsalted butter for ghee?
I’ve used both salted and unsalted butter successfully but I prefer unsalted.

Salted butter will foam more when boiling. So if you are using salted butter to make ghee, make sure you use a pan that’s large enough to accommodate the foaming, and be very careful when the ghee begins to boil. When it foams, gently stirring it with a wooden spoon will help it subside. If the butter foams and spills over, it can be hazardous, be very careful.

The milk solids from salted butter will be very salty. If you are making any of the ‘by product’ recipes, you wont need to add any extra salt.

How to Make Ghee

Ingredients
2 sticks (1 cup) unsalted butter

Method
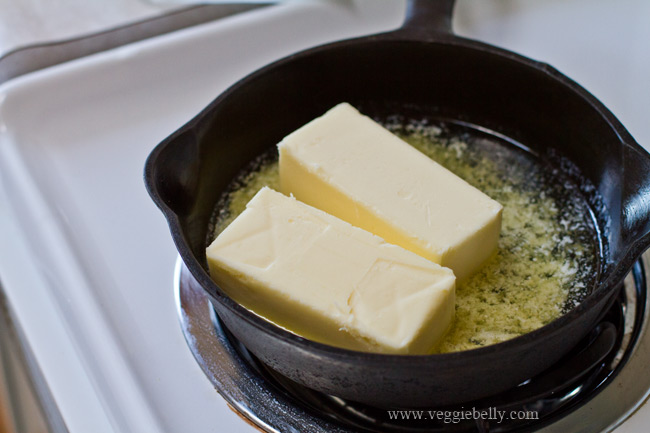
Use a medium sized, heavy bottom sauce pan. Make sure it is dry and clean. Place the butter in the pan, and cook uncovered on medium heat till all the butter melts.

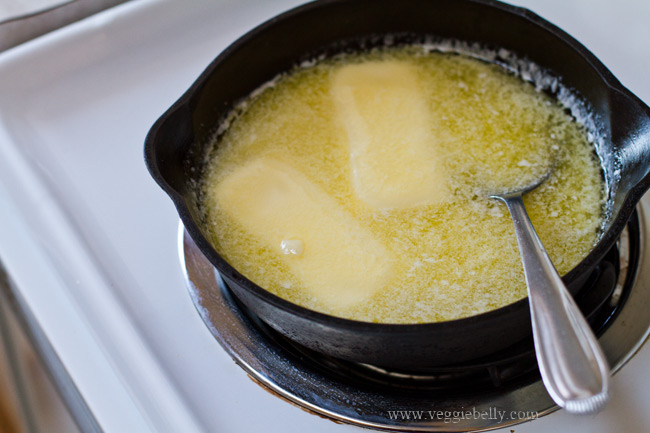
Continue cooking while stirring occasionally till the butter starts to foam and boil. You will hear crackling, this means the butter is boiling.

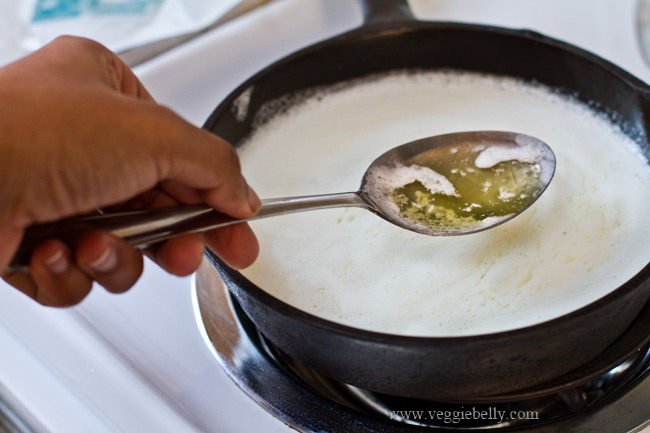
Reduce heat to low, and continue to simmer the butter till it clarifies – when you part the foam on top, you should see the melted butter getting clear.

Continue to simmer the butter till the crackling subsides, about 10 minutes. How soon the ghee is done will vary depending on the quantity of butter you are using. So use the indicators below.

The ghee is done when
-          The crackling subsides. This means most the moisture has been cooked away
-          The ghee becomes a clear golden yellow liquid (part the foam with a spoon to see the ghee). This means the butter is clarified
-          The milk solids separate and settle in the bottom of the pan, and are light brown in color

Be careful not to over cook the ghee and burn the solids. If the milk solids are dark brown, or if the liquid ghee turns dark brown, you’ve over cooked it.

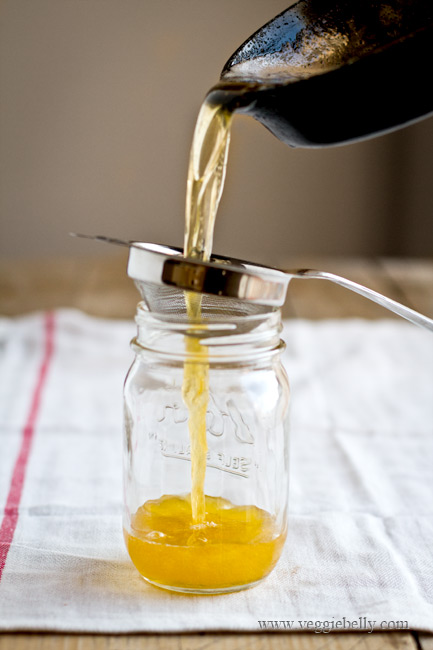
Let the ghee cool for about 20 minutes. Then strain it though a very fine strainer or 2 layers of muslin cloth. Make sure all the milk solids are strained out; strain the ghee twice if needed.

Store ghee is a clean, dry bottle. But don’t put the lid on till the ghee is fully cooled.

Ghee can be kept at room temperature for 2 months. Refrigerating it wont hurt either.

What do to with the milk solids from ghee making

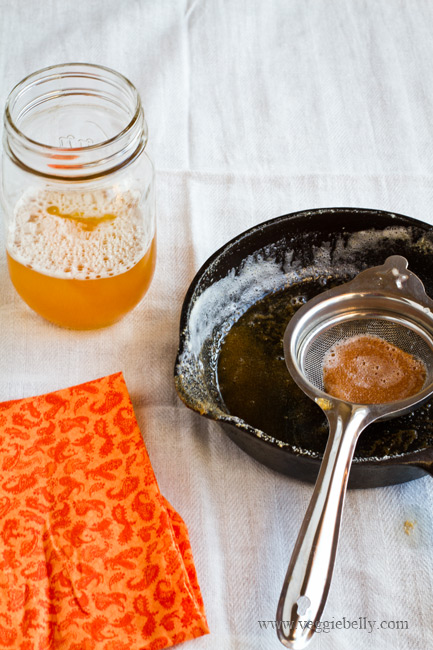
When you clarify butter (by boiling) to make ghee, the milk solids will separate. They will settle in the bottom of the ghee. If the ghee is made properly, the milk solids remaining will be lightly brown, nutty, and very delicious.

Don’t throw away the milk solids. This is delicious stuff. Here are some things you can do with them:

-          Mix 2 tablespoons of milk solids with 1 clove of minced garlic. Heat on low till the garlic sizzles. Add a pinch of salt. Spread this on toasted pita or baguette slices for a rich tasting, yummy snack

-          Heat 2 tablespoons milk solids along with 6 roughly crushed peppercorns. When the peppercorns are fragrant, add 2 cups cooked rice and some salt. Mix well. We call this vennai chatti sadam (butter pot rice) – a recipe specifically created to use up the by product of ghee making.

-          Add sugar and wheat flour to milk solids. Gently cook. Then form the mixture into balls or laddus. See this video at min. 4:40 for ghee laddu recipe

Use ghee for sauteing vegetables or pasta, drizzle over hot rice, in soups, over popcorn, on toast, or in desserts.

Easy Carrot Mint Soup and a Great Tip for Flavoring Milk Based Soups

Let’s start the New Year with a simple, yet delicious carrot mint soup recipe, shall we?! This is my go to recipe when I’m feeling like a soup laden with the freshness of herbs and vegetables. This soup is very easy to make and pantry friendly since it uses only carrots, fresh mint, and milk.

I’ve tried this soup before by pureeing the mint leaves along with the carrots, just like my pea and mint soup. The pureeing method works beautifully for the pea and mint soup, but not so well for the carrot soup. When you puree the mint with the carrots, the soup loses it brilliant carotene tinged orange color. So heres how I infuse the mint flavor into the soup. Read on..

How to flavor milk based soups

If you are making a milk based soup with a herb, this is the best way to infuse the herb flavor into the soup. Mint and basil work particularly well with this method, but you can also use cilantro, parsley, rosemary or chives.

Bring the milk to a gentle simmer, and add the herb (mint in this recipe) to it. Turn off the heat, cover the milk and let the herb infuse for about 15 minutes. Then pull out the herb leaves from the milk, squeeze any milk out, then discard the leaves. That’s it! You have herb infused milk! Puree this milk along with cooked vegetables (carrots in this recipe) and you have a beautiful herb infused soup.

This is a great make ahead recipe. You can make this soup a few days ahead and simple re-heat it in the microwave. I love this carrot mint soup for a work day lunch, packed in a thermos with a paper bag of french baguette. Yum!

Easy Carrot Mint Soup Recipe

Serves 2
Ingredients
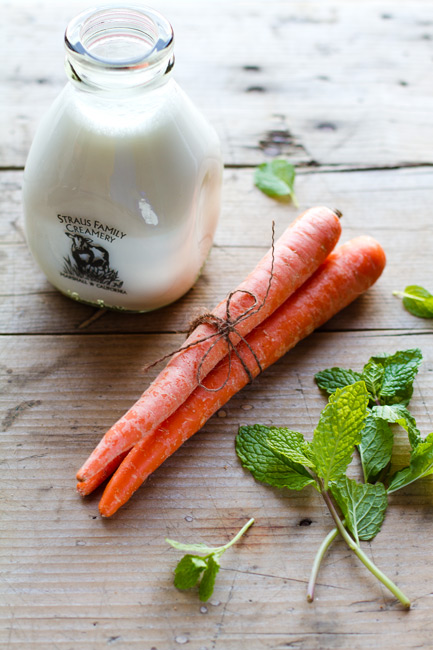
6 medium carrots, peeled and cut into chunks (about 1 ½ cups)
1 1/2 cups water
1 cup milk (Whole milk will taste best, but you can use 2% milk too)
4 sprigs mint (about 20 mint leaves)
Salt
Freshly cracked black pepper
¼ teaspoon sugar, optional

Method
Place the chopped carrots and 1 1/2 cups water in a pan. Bring to a boil. Reduce the heat to medium-low. Cover with a lid and simmer the carrots till they are very very soft, about 40 minutes. When you mash a carrot chunk with the back of a spoon, it must mash very easily. This means the carrots are ready. Alternatively, you can pressure cook the carrots.
While the carrots are cooking, gently heat the milk in a medium saucepan. Just as small bubbles start to appear on the sides, and the milk is about to boil, turn off the heat. Immediately add mint sprigs to the milk and stir. Cover and let it infuse for 15 minutes.

Then fish out all the mint leaves, squeeze the milk out of them, and discard the mint leaves.

When the carrots are cooked, place them in a blender along with their cooking water, the mint infused milk and salt.

Blend to a smooth puree. Add more milk to the blender if needed, to thin out the soup. Be careful when blending hot liquids in a blender, always vent the lid a little.

Taste the soup; if you would like it a little sweeter, stir in the sugar. Some carrots are sweeter than others, so you may or may not need the sugar.

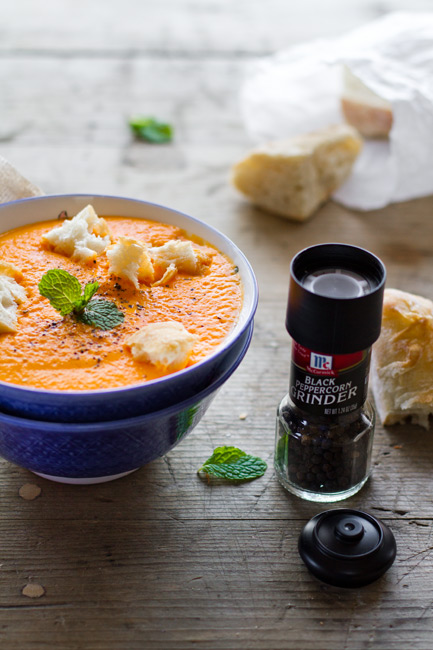
To serve, pour hot soup into bowls, top with cracked pepper and serve with crusty bread.

Baba Ganoush Recipe – a Guest Post from Shulie of Food Wanderings

Hello from Tel Aviv! I am traveling in Jordan and Israel on a business trip, and have taken a few days off to explore the amazing food scene here. I will be posting lots of photos and recipes from my trip when I get back! But right now, please enjoy this Baba Ganoush recipe guest post from Shulie of Food Wanderings. Her blog is full of lovingly created food, recipes (have you seen her mouthwatering India series?) and great photos! Make sure you say hello to Shulie on Twitter and Facebook too! Take it away Shulie..

When Sala asked me to guest post for her while she was traveling, I said yes, of course. You probably remember Sala from her guest post, White Peas Sautéed with Green Mango and Coconut, in the India Series on my site. Sala is a well seasoned traveler and I cannot wait to hear her impressions from her quick couple of days trip to Israel, while she is, for the first time, in the Middle East. Sala, thank you for having me as a guest in your Veggie Belly space.

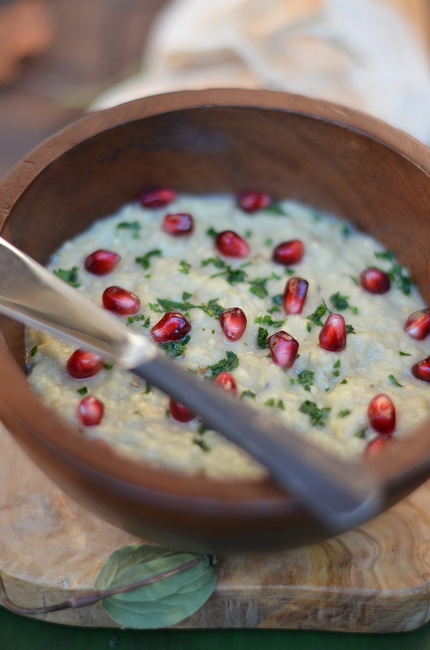
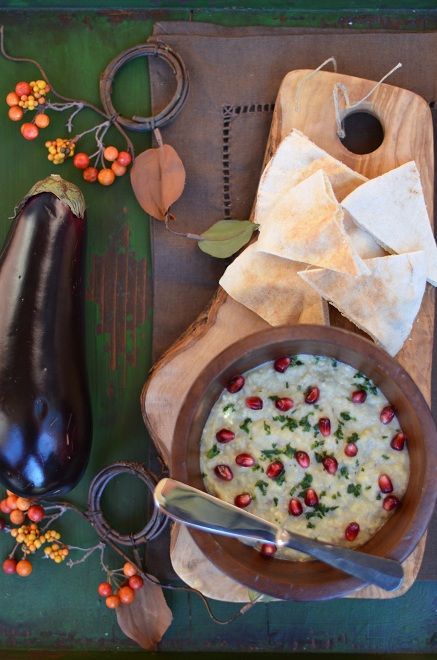
Sala wanted me to make a dish from home and Baba Ghanoush is always at the table whether at homes or restaurants in Israel. Baba Ghanoush, an eggplant dip or salad, more widely known as a Lebanese dish, is wide spread throughout the Levant, Egypt and the Balkans. The Levant is the crossroads between Western Europe, Eastern Mediterranean and Northern Africa.

There are many variations to this eggplant dip/salad that is mostly served in Israel as a mezze, starter, along with many mezzes at the table. We make it the traditional way with olive oil and tahini but some in Israel make it with mayonnaise too.  The grilling and charring of the eggplant, otherwise known as an aubergine, prior to scooping the flesh/pulp  to make the salad lends it a smoky flavor. In Arab homes in Israel and the Middle East, the Baba Ghanoush is made from a variety of an eggplant called Baladi which is probably the best eggplant variety I have ever tasted. This wild variety eggplant is sweeter and the flesh so white and delicate inside.

You can whiz the Baba Ghanoush to a dip or spread consistency with all the other ingredients in the food processor, but traditionally in Israel and to this date, we chop it in a back and forth motion with a cleaver or a sharp knife. Think of mincing meat.  Whiz or chop the eggplant to consistency desired. I add the lemon to the eggplant immediately after being scooped, to avoid oxidizing and then add a bit more, later, to adjust for flavor. Charring of eggplant can be done for five minutes on top of a stove top, outside grill or the oven broiler.

The Baba Ghanoush is a delicious and healthy dish for your Holiday or New Year’s Eve cocktail party as a hors d’oeuvre with pita chip or fresh pita wedges.

Baba Ghanoush Recipe
serves about 2

Ingredients
1 large eggplant (1 lb)
1 large garlic clove, minced
Juice of a 1/2 small lemon
1 teaspoon tahini paste (could you use an extra teaspoon according to taste)
1 tablespoon mild olive oil
1/4 teaspoon salt or to taste


Garnish
Handful pomegranate seeds/arils
1 teaspoon finely chopped parsley

Method
Prick the eggplant with a fork in a few places on its surface. Grill on an out door grill or broil in an oven until charred on all sides, about five minutes.

Halve eggplant and scoop pulp. Add juice of 1/2 lemon to the pulp and stir. Mash the eggplant with a fork, or chop with a knife or whiz in a food processor. Add minced garlic, olive oil, tahini and salt and whiz/mix quickly.

Adjust the salt and lemon juice if necessary.

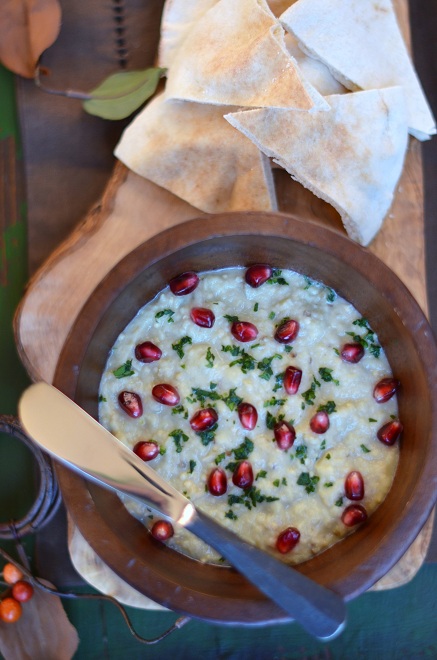
Serve in a bowl garnished with parsley and pomegranates seeds. Serve with pita chips or fresh pita wedges. Bon Appetit!

Dal Fry Mix in a Jar. Homemade Holiday Gift Ideas for Vegetarians

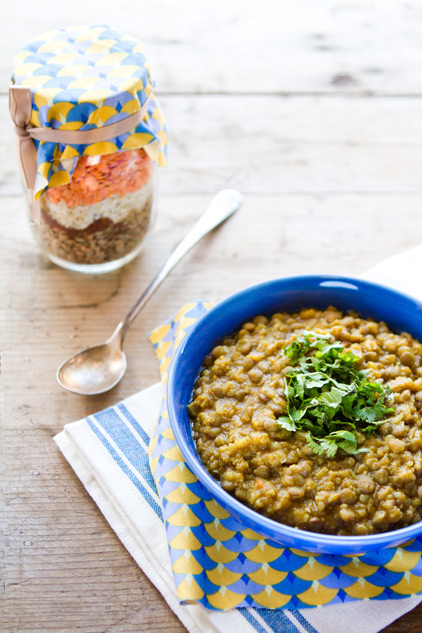
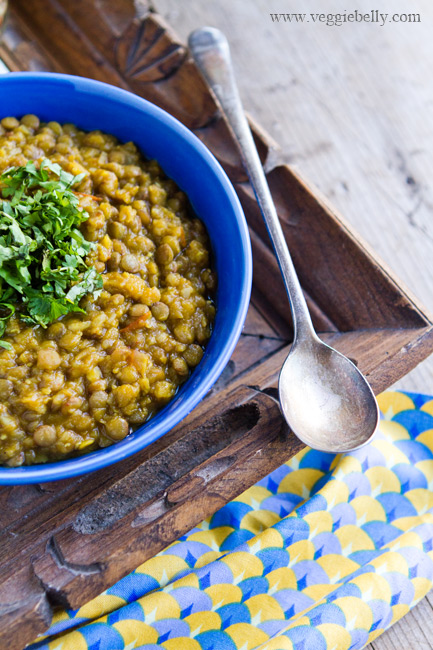
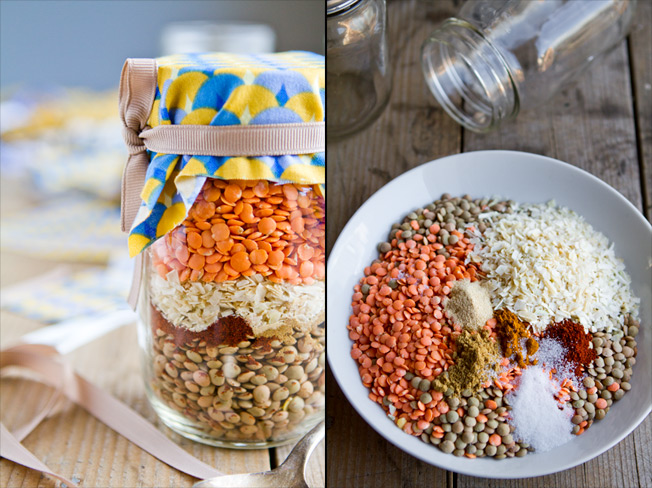
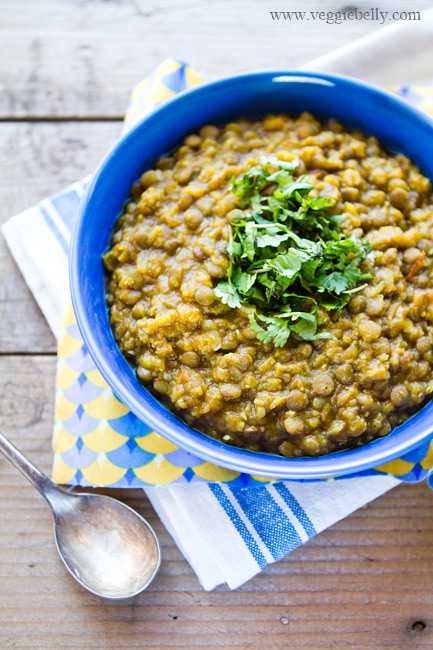
Dal fry is a typical Indian lentil dish (and popular on restaurant menus) made with cumin, turmeric, onion, tomato, garlic and lentils. I’ve simplified the recipe and turned it into a holiday gift mix in a jar. If you have friends and family who are vegetarian or Indian food lovers, they will be delighted to receive this as a Christmas gift! And you will love making this gift – its easy, fun, vegetarian, vegan AND cheap!

This dal fry mix in a jar was my Christmas present for a dear friend S, who is a new mother and is running her own business. You can imagine just how busy she must be! I figured a tasty dal mix in a jar, that she can make with almost no effort at all will be the perfect holiday gift for a busy mom like her.

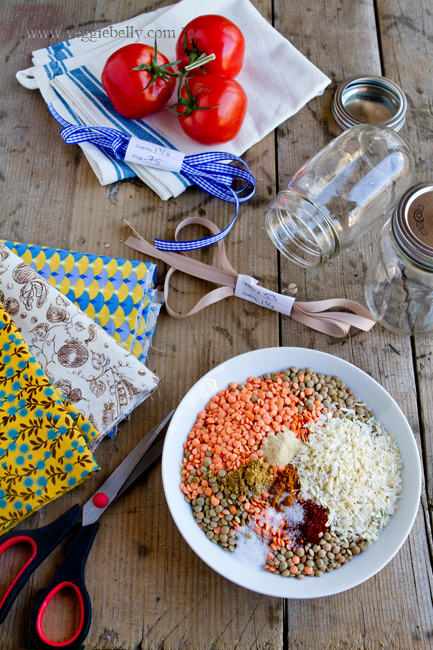
l’ve used a combination of red lentils (masoor dal) and green lentils. Make sure you use the flat round green lentils from the bulk section of the grocery store. Dont use whole Indian green lentils (green moong dal) because it takes longer to cook. You can substitute the green lentils with yellow letils (yellow moong dal).

Caramelized onions is a common flavor base for Indian curries. To emulate some of that flavor, I use dried onion flakes in this recipe. They give the lentils a great, deep, slow cooked taste. You can find dried onion flakes in the spice section of the grocery store or in the bulk section.

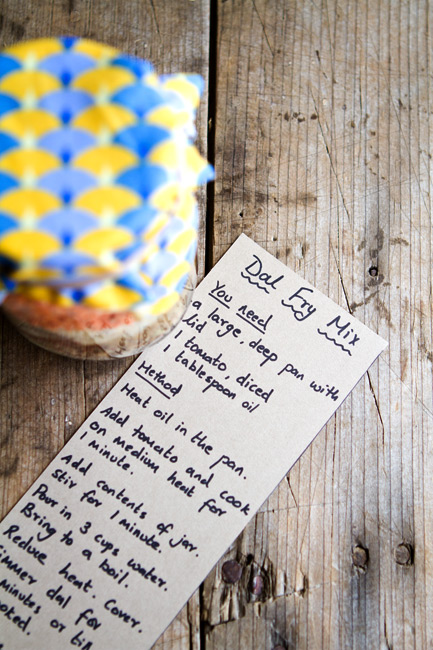
Writing (or printing) out the recipe/instruction card for this mix is your chance to really personalize the gift. I like to make my instruction cards humorous – like adding inside jokes, cartoons etc. The point is to get funny and creative with the instruction cards!

For another homemade holiday gift idea for vegetarians, take a look at my cajun dirty rice mix in a jar.

Dal Fry Mix in a Jar Recipe

makes 1 jar

For the gift jar
One 1 pint jar
a 5″x5″ piece of fabric
a thin rubber band
some ribbon
Cardstock or any thick paper for writing instructions

Ingredients
¾ cup green lentils (not green moong dal)
¾ cup red lentils
4 tablespoons dry onion flakes
1 ¼ teaspoon garlic powder
¼ teaspoon turmeric powder
1/2 teaspoon chili powder
½ teaspoon cumin powder
½ teaspoon salt

Pour the green lentils into the jar first. Then add onion flakes, garlic powder, turmeric, chili powder, cumin, and salt. Then pour in the red lentils.

If there is a gap between the top layer and the lid, crush a kitchen towel and stuff it into the gap. This will prevent the lentils and spices from moving around, and will preserve the pretty layers in the jar.

Seal jar tightly. Cover the lid with the fabric square. Place a rubber band over the fabric to secure it around the neck of the jar. Tie a ribbon in a bow around the neck of the jar, hiding the rubber band.

Write or print out these instructions on a thick piece of paper and attach to gift jar:

“You will need:
A large, deep skillet with a lid
1 medium tomato, chopped
1 tablespoon oil

Heat the oil in the skillet. Add tomatoes, and sauté on medium heat for about a minute. Add the contents of the jar, and stir for 2 minutes.

Pour in 3 cups of water. Bring to a boil. Reduce heat to low and cover the pan. Simmer the dal for about 20 minutes, or till cooked. Add more water while cooking, if needed.

Serve hot with steamed rice.

Serves 4″

Pierce a little hole in the upper corner of the instructions paper, and tie it to the ribbon. Or place the instructions against the jar, and tie it around the jar using ribbon or a rubber band.

Cajun Dirty Rice Mix in a Jar. Homemade Holiday Gift Ideas for Vegetarians.

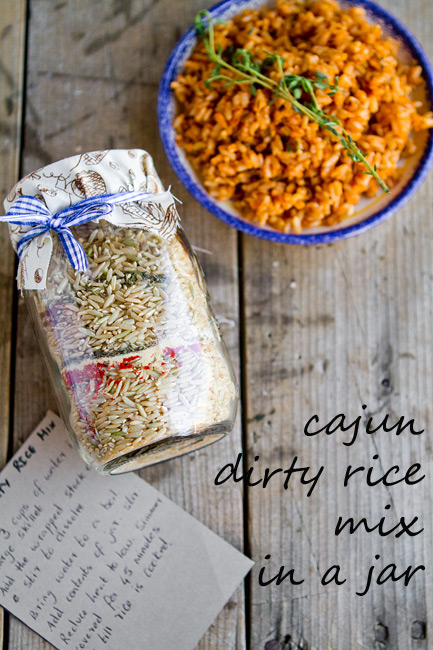
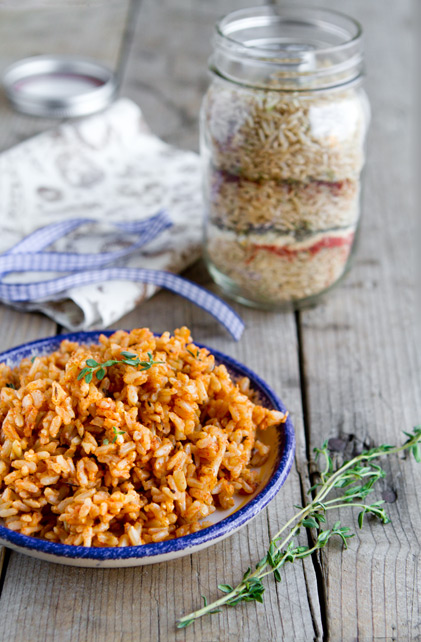
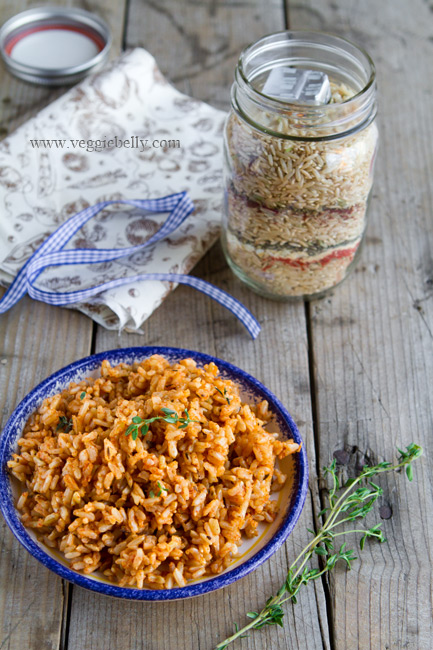
Do you love giving homemade holiday gifts? Do you have friends or family who are vegan or vegetarian? If you answered yes, this is the perfect vegetarian friendly, homemade Christmas food gift idea for you! This cajun dirty rice mix in a jar takes just minutes to put together, and is very affordable too!

I sent a jar of this cajun dirty rice mix to my friend Mahi, who is a vegetarian and fellow foodie. Make sure you visit her new blog Bite Out of Life for easy recipes, restaurant reviews and passionate food commentary.

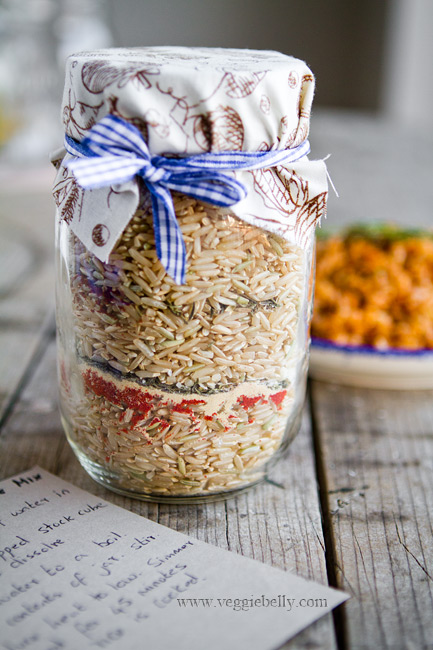
Its a lot of fun to make this mix-in-a-jar-gift. Pick whatever fabrics you like for the jar, and match it with a cute ribbon. Any piece of scrap fabric lying around will do. But if you are making a lot of these gift jars, then a trip to the fabric store will be well worth it.

If you buy the rice for this recipe from the bulk aisle, it will work out pretty cheap. I use brown rice in this recipe, but white will work just as well. But remember that white rice will cook sooner, so you will have to change the cooking time to 10-15 minutes in your recipe card.

If you plan ahead, you really dont have to go buy new jars. Just save up jars of pasta sauce, jams etc. All you need is a jar with a tight fitting lid. Wash the jars well, and soak them in soapy hot water to remove the labels. I prefer to use glass jars because they are clear and show off the contents well.

Cajun Dirty Rice Mix in a Jar Recipe

For the gift jar
one 1 pint jar with a tight fitting lid
a 5″x5″ piece of fabric
a thin rubber band
some ribbon
Cardstock or any thick paper for writing instructions

Ingredients
1 cup brown rice. (You can also use white rice, but reduce cooking time to 10-15 mins in the instructions)
2 teaspoons paprika
3/4 teaspoon garlic powder
1/2 teaspoon dried oregano
1/2 teaspoon dried thyme
1 large stock cube with its wrapping, I like knorrs

Cut a rectangle piece of paper (about 4×3 but doesnt have to be exact). Place the paper in the mouth of the jar to form a funnel. Pouring the ingredients through the funnel into the jar will be easier and less messy.

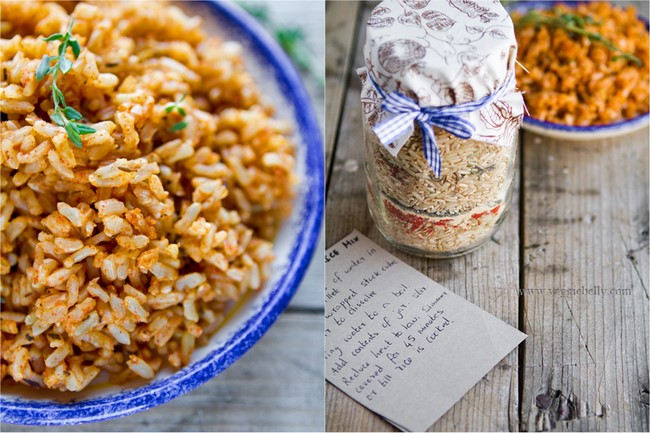
Layer the ingredients one at a time into the jar in this order – half the rice, paprika, garlic powder, oregano, thyme, remaining half of rice, wrapped stock cube.

Fit the lid on the jar and screw it on tight. Cover the lid with the fabric square. Place a rubber band over the fabric to secure it around the neck of the jar. Tie a ribbon in a bow around the neck of the jar, hiding the rubber band.

Write or print out these instructions on a thick piece of paper and attach to gift jar:
“Bring 2 cups of water plus the stock cube to a boil in a large sauce pan. Stir so the stock cube dissolves. When the water boils, add remaining contents of the jar. Stir. Reduce heat to low. Cover the pan with a lid. Simmer for 30 minutes or till the rice is cooked, but not mushy.

Serves 4 as a side dish.”

Pierce a little hole in the upper corner of the instructions paper, and tie it to the ribbon. Or place the instructions against the jar, and tied it around the jar using ribbon or a rubber band.

Related Posts with Thumbnails