Ghee and Curry Leaf Pasta Recipe

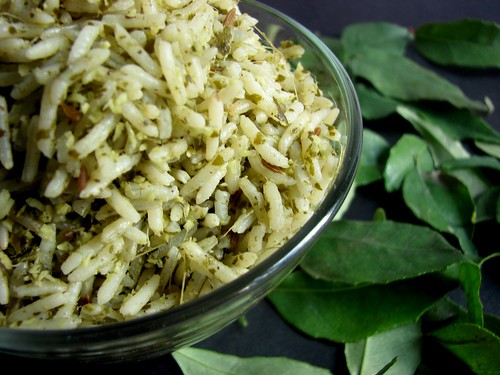
In my last post  I showed you how to make home made ghee. In this post, I share how to use all that delicious ghee – pasta with curry leaf and ghee! I am a pasta lover and a ghee lover, and this is the recipe I created to get my pasta fix and ghee fix all in one recipe.

There is a big difference between making pasta with butter and pasta with ghee. Ghee will give the dish a rich, nutty flavor that butter wont. However, if you don’t have ghee but want to try this recipe, use half butter and half oil instead of the ghee; it wont taste the same as ghee, but it will still be delicious!

This ghee and curry leaf pasta is very mild tasting, and easy to make. Children will love this dish. It also makes a great office lunch to pack, with some steamed vegetables tossed in. For extra flavor, add a teaspoon of ginger garlic paste when tempering the mustard seeds.

You can use any tadka (the whole spices you add to the ghee) items you like – cumin seeds, fennel seeds, green chilis, urad dal, will all taste great.

When I was shooting this dish, I wanted a natural, rustic looking background to offset the colorful bowls with pasta. I didnt have anything large enough that will make a convincing background. So heres what I did..

I have a shabby chic table I picked up at an antique store in Spokane, WA. I’ve enjoyed using it in many of my food photos  like my thanksgiving tofu skin roulade, or in the photos of my dal fry mix in a jar. For these pasta photos, I flipped the table and set it behind my bowl of pasta. This created the natural looking background I wanted.

Ghee and Curry Leaf Pasta

Serves about 4

1 lb dry pasta such as linguine, macaroni, spaghetti or bow tie
3 tablespoons liquid ghee
½ teaspoon black mustard seeds
1/8th teaspoon asafoetida
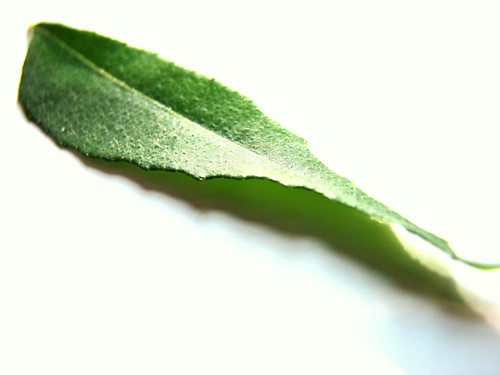
8 curry leaves
salt

Bring plenty of water to boil in a large pot. Add a generous amount of salt to it. Add the pasta and stir. Cook uncovered, till the pasta is al dente (still has a bite to it; is cooked, but not completely soft), about 8 minutes.

Drain the pasta and set aside.

In the same pot or a large wok (non stick is best), heat the ghee, and add mustard seeds. (For extra flavor, add a teaspoon of ginger garlic paste at this point). When they pop, add asafoetida and curry leaves, and stir 30 seconds or till the curry leaves are fragrant.

Add pasta and salt, and toss well. Serve warm.

Indian Spiced Potato Chip Sticks. Baked, not Fried!

I love how simple this oven/microwave baked potato chips recipe is. All you do is cut a russet potato into think sticks, toss it in oil, salt, cayenne or chilli powder, and turmeric. Add a fer curry leaves for aroma. Bake or microwave. Yes, I said microwave! So much easier and healthier than deep fried potato chips!

You could spice up the potato chip sticks in many ways; I love the turmeric, chilli powder or cayenne powder, curry leaf combination. The curry leaves get crispy and so fragrant

Serve Indian spiced potato chips as a side or a snack, in a newspaper cone. They go well with my brown rice and black bean  burgers.

Cut the potato sticks really thin, this way they bake very quickly in the oven. Use either a mandoline or a large sharp chef’s knife to cut the potatoes into 1/8th inch slices. Stack up the slices and cut them into thin sticks. The sticks should be thinner than a pen or french fry.

More oven baked or microwaved potato chip recipes
Martha Stewart’s baked potato chips recipe
Oven fried potato chips recipe  on Simply Recipes
Spicy baked potato chips recipe on Chow vegan
5-spice potato chips recipe on the Hungry Mouse
Uncle Bill’s microwave potato chip recipe  on Food.com
Microwave potato chips recipe  on Eating well
Homemade microwave potato chips recipe  on Sweet Savory Life

Indian Spiced Baked Potato Chip Sticks Recipe

serves about 2

1 large russet potato (about 10 oz)
1 tablespoon vegetable oil or ghee
¼ teaspoon ground turmeric
¼ teaspoon or to taste chili powder pr cayenne powder
10 curry leaves
1/2 teaspoon salt

Wash and dry the potato. Peel the potato if you like. I leave the skin on because I like the texture of potato skin in my chips.

Slice the potato into 1/8th inch thick slices lengthwise using a mandoline or a large, sharp knife. Stack up the slices, and cut them lengthwise to form thin sticks, about 1/4th the thickness of a French fry.

Place the potato sticks on a kitchen towel, and gently pat dry.

In a bowl, whisk together the ghee or melted butter or oil, turmeric, chili powder, curry leaves and salt. Add the potato sticks to the bowl and toss well. Now follow one of the below methods.

Oven method – pre-heat oven to 400f. Place the seasoned potato sticks on a non-stick baking sheet or a regular baking sheet lined with parchment paper or silicone non-stick mat. Spread the potato sticks so that they are in a single layer and don’t overlap. You may need to do this in batches. Make sure they are in a single layer, this is what makes them crisp! Bake for 10 minutes or till the chips are golden and crisp. Halfway through baking, check on the chips, and remove any pieces that are already crispy and golden. Rotate the baking sheet and continue baking.

Microwave method – take a microwaveable plate and coat with a few drops of oil. Place the potato chips that have been coated in the turmeric chili ghee/oil. Spead them out into a single layer. You may need to do this in batches. Microwave on high for 2-4 minutes or until the chips are golden and crisp. Cooking time will vary depending on the microwave, so check on the chips periodically.

******************

Are you a fan of Chef Sanjeev Kapoor?

Join me at his book signing event in Washington DC!

Tickets and details are here – http://sanjeevkapoor-indiqueheights.eventbrite.com/

*******************

Paella Style Spiced Tomato Rice

If you’ve been reading my blog for sometime, or you have been following me on twitter, or facebook, you know I have a great love for traveling.  Travel opens up the mind, gives me different perspectives and squashes prejudice. I learn so much through the things I see and the people I meet my travels.

One such person was Monika, whom I met in Melbourne. (More about my Australia, New Zealand, Fiji trip in later posts!). Both Monika and I were staying with a host family for the weekend. Our lovely hosts were Hungarian, lived in New Zealand, and then moved to Australia. Monika is Polish, grew up in Germany, and studied in Spain. Then there was me – grew up in India, studied in the UK and now live in the US. We were all representing at least 3 countries each, and combined, have traveled to over a 100. So you can imagine all the international conversations we had!

Monika and I were roommates for the weekend. We chatted through the night, lying on our bunk beds, discussing life, love, marriage and men in our respective countries. We both learnt so much from each other that weekend.

I decided to cook an Indian meal for Monika and our hosts. I was more than thrilled to find out that our amazing Hungarian hosts had a pantry full of Indian ingredients, including asafoetida and curry leaves!

When I finished making tomato rice (which Monika loved!) and pumpkin curry, the aroma of curry leaves, turmeric and fragrant basmati filled the kitchen. I was nearly transported back home. Only, I was in Australia, happily finding curry leaves in a Hungarian fridge!  

This is for you Monika ♥

A good paella always has a crusty bottom called socarrat. To me, thats the best part of the dish. I’m always scraping up the delicious crusty rice! This dish is tomato rice, not paella, so we wont call its crust soccarat. But in any case, the bottom layer of caramelized basmati rice is just wonderful.

First, cook onions, garlic, and tomatoes, along with a little turmeric and paprika.

The tomatoes will break down, and the sauce will thicken and reduce to about half its original volume. Now add rice.

Stir the rice and let it toast a little. Then add water, cover, and simmer.

caramelized bottom layer – the best part!

How to get a paella style crust (socarrat) – when the rice is done, crank up the heat to high just for about a minute. This will make the rice in the bottom toasted and crispy. Thats it! Be careful not to burn the rice, you just want it browned a little.

You must use a wide skillet, preferably non stick, to achieve the crispy bottom layer. If you dont plan on creating the crust, a saucepan will do.

Tomato Rice with a Paella Style Crust: Recipe

serves 2-3

2 tablespoons vegetable oil
1/4 teaspoon mustard seeds
1/4 teaspoon cumin seeds
6 curry leaves
1 medium onion, chopped fine
3-4 cloves garlic, peeled
4 medium tomatoes (1 lb) chopped fine (about 2 cups when chopped)
1/4 teaspoon turmeric powder
1/2 teaspoon paprika or chilli powder (adjust according to taste)
1/2 teaspoon sugar, optional
1 cup bastmati rice
1 cup water
3/4 teaspoon salt (adjust according to taste)

Use a 10 inch non-stick skillet thats about 1 1/2 inches deep and has a lid. Heat oil in the skillet, and add mustard seeds. When they pop, add cumin seeds and let sizzle for a few seconds. Then add curry leaves and chopped onion. Cook on medium heat till the onion is lightly brown. Add garlic cloves to the oil, and stir for about a minute. Dont let the garlic brown.

Now add chopped tomatoes, turmeric and chili powders to the skillet. Add sugar if using (I like to use a little sugar if the tomatoes are too sour).

Cook on medium high heat, stirring occasionally, till most the liquid is gone, the tomatoes have broken down, and the sauce reduces to about half its original volume. This will take 10-15 minutes. You will land up with just over one cup of tomato-onion sauce.

To the reduced sauce, add rice, and salt. Stir on medium-high heat for about 4 minutes. Add water to the rice and bring to a boil. Reduce to low, cover the skillet and simmer for about 15 minutes, or till the rice is cooked and fluffy. Start checking the rice after 12 minutes to ensure it doesnt over cook.

When the rice is done, increase the heat to high. Let the rice sit on high heat for about one minute. This will form a tasty rice crust on the bottom, much like in a paella.

Serve tomato rice with my grandmother’s multi coloredvegetable raita.

Optional garnishes for tomato rice - roasted cashews, roasted peanuts, crispy fried onions, or chopped cilantro

Mor Kuzhambu or South Indian Yogurt Coconut Curry

Mor kuzhambu or moor kulambu, however you spell it, is a satisfying south Indian dish made with yogurt and fresh coconut. Mor is buttermilk in Tamil and kulambu is gravy or curry. I use yogurt to make this dish (instead of buttermilk) because it makes the gravy thicker. Peppercorns are wonderful in this dish. You don’t actually eat them, but they impart great flavor. These peppercorns are from my dear friend and fellow food blogger, Nandini’s plantation in India.

Tips

- Use freshly grated coconut or fresh-frozen coconut. Please, none of the dried or dessicated stuff!
- For a lighter version of this dish, use buttermilk instead of yogurt
- Do not let the curry boil once you’ve added the yogurt. Use low heat and stir constantly to prevent boiling
- Remember to only gently re-heat this dish
- Serve mor kuzhambu with steamed rice or curry leaf rice. See this post for my curry leaf rice recipe

A note on what vegetables to use for Mor Kolambu
You can use any vegetable you like, here are some favorites and suggestions*

- Long squash(sorakkai or lauki). Peel the skin, scoop out the seeds and cut into cubes. (This is what I used in this recipe)
- Winter melon(ash gourd, neer poosanikkai or petha). Peel skin, scoop out seeds and membrane and cut into cubes
- Ripe mango. Peel skin, remove pit and cut into cubes
- Corn on the cob. My favorite. Remove husk and cut the whole corn into 1 inch rounds. Will need more water to cook
- Orka(vendakkai or bhindi). Cut into pieces. Make sure you saute okra in oil till it is no longer slimy

Mor Kuzhambu or South Indian Yogurt Coconut Curry Recipe

serves about 6

Grind to a paste
3/4 cup fresh grated coconut
1 tablespoon minced fresh ginger
1/2 tablespoon cumin seeds
2 green chillies (use more or less according to taste)
1/2 cup water

For the gravy
1 tablespoon oil
1 teaspoon black mustard seeds
1 teaspoon whole black peppercorns
a pinch of asafoetida
a few curry leaves
1 teaspoon turmeric powder
2 cups of cubed vegetable (see suggestions in the post above)*
water
salt
a 32 oz tub of plain yogurt
Cilantro for garnishing

Place the ingredients for grinding in a blender and grind into a smooth paste. Set aside.

In a deep pot, heat oil, and add mustard seeds and peppercorns. When the mustard starts to pop and splutter, add the asafoetida, curry leaves, turmeric, and cubed vegetable (see note in the post above for what vegetables to use). Cook on medium heat for about 3 minutes. Then pour about 1 cup water, cover and simmer till the vegetable is cooked; about 7 minutes.

Add the ground coconut mixture, and cook on medium-high for about 2 minutes. Reduce heat to low. Beat the yogurt with a spoon or whisk and add it to the coconut-vegetable mixture. Stir gently and constantly on low heat for about 2 minutes. Do not let the gravy boil once you’ve added the yogurt. Add more water if the kuzhambu is too thick. Garnish with chopped cilantro. Serve with white rice or curry leaf rice.

Curry Leaf Rice

I have known my friend, S for nearly 17 years. But it was only a few months ago that I found about about his love of curry leaves. S visited us from New Mexico a few days ago. He came bearing all sorts of goodies from New Mexico – Pinon nuts, jalapeno peanut brittle and red chile. In return, I decided to make him a dish featuring his favorite curry leaves. In fact, S was supposed to sleep in one morning, but woke up early and came down to the kitchen when he smelled the curry leaves cooking! Who can resist the rich, earthy aroma of curry leaf! This is an easy recipe, and fresh curry leaves add a lot of flavor to the rice. You can try it with cilantro too. We had this curry leaf rice at our wedding dinner. I fell in love with the flavors at the tasting and the caterer was kind enough to give me the recipe. His had a ton of butter (or was it ghee?) and fried cashew nuts. I cut out both and just used oil. I also added the coconut meat.

Ingredients

Long Grain Rice – 2 1/2 cups (I used Basmati)
Curry Leaves – 1 1/2 cups loosely packed
Coconut – 1/4 cup
Onion – 1 large
Ginger-Garlic Paste – 1 tbsp
Cumin Seeds – 1 tsp
Cloves – 4
Green Chili – 1
Lemon Juice – 2 tbsp
Oil – 4 tbsp
Salt

Heat one tsp of oil in a non stick saute pan, add the curry leaves and coconut and saute for 1 minute or until the curry leaves are fragrant. Let it cool slightly and then blend into a paste using about 1/2 cup water

Dice the onion. Heat another pan with the remaining oil. Add the chili, cumin seeds and cloves, after 30 seconds, add the onions. Saute till the onions are transcluscent. Now add the the ginger garlic paste. Saute another 30 seconds. Add the rice and stir for about 4 minutes on medium heat.

Then add the curry leaf paste, salt, lemon juice and 2 cups of water. Turn heat to high and let the rice come to a boil. Then reduce heat to low, and cover with a lid. Rice should be done in about 10 minutes. Turn off heat and let the rice sit for another 5 minutes.

Spread the rice on a large plate or platter and let it cool. This will ensure that the rice doesn’t turn mushy.

Related Posts with Thumbnails