10 Minute Lemony Rice Noodles (Lemon Idiappam)

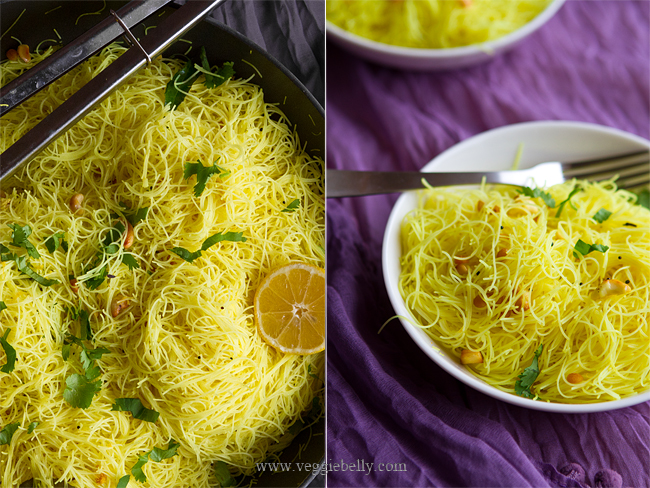
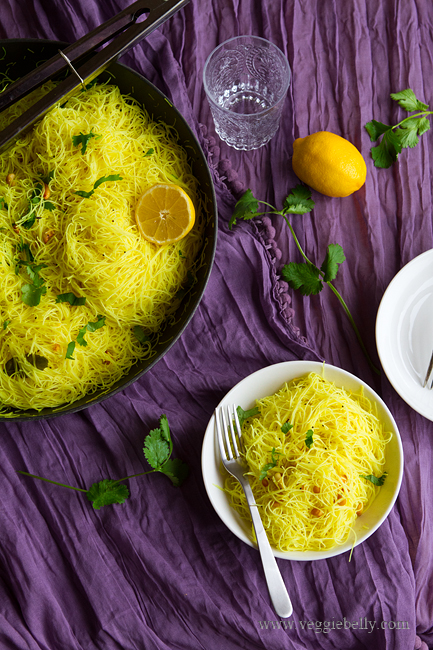
lemon rice noodles I love rice noodles in any form and this lemony rice noodles recipe is one of my quick and easy favorites. In India we make a similar dish using fresh string hoppers (rice noodles) called lemon idiappam. I use store bought dry rice noodles (also called rice sticks or rice vermicelli) as a shortcut. The rice noodles only need a quick soaking in hot water. And while the noodles are soaking you can prepare the tadka (tempered spices). So you can make this dish in just 10 minutes.

You can find rice noodles in the Asian aisle of the grocery store, or at Asian markets where there is usually more variety and brands. Make sure the only ingredient listed on the packet is rice or rice flour. Some brands will list water and salt, besides the rice as ingredients and thats ok.
lemon, ginger, rice noodles, curry leaves
 The seasoning for these lemon rice noodles is simple and easy. Its the standard Indian “tadka” – a tempering of whole spices in oil. I then add freshly squeezed lemon juice and turmeric to the tadka before throwing in the rice noodles.
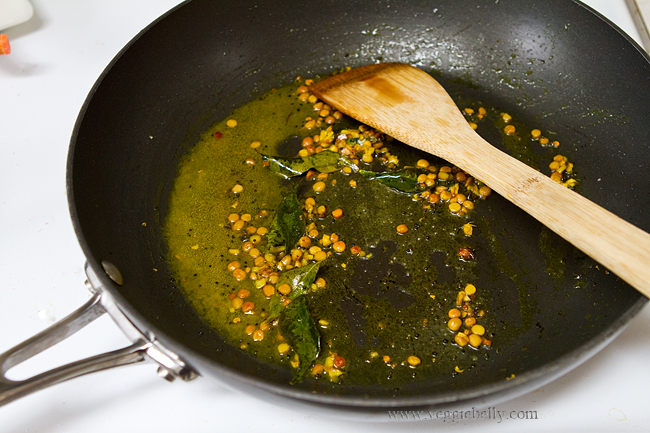
tadka of chana dal, curry leaf, mustard seeds, turmeric This is a crowd pleasing recipe, easy to make, and keeps well so you can take it for pot lucks and picnics. Kids will also love it. Serve it with a simple coconut chutney, pumpkin spinach curry, or my cashew nut curry. Make it a complete meal by throwing in some steamed broccoli or sautéed vegetables on top of the noodles.
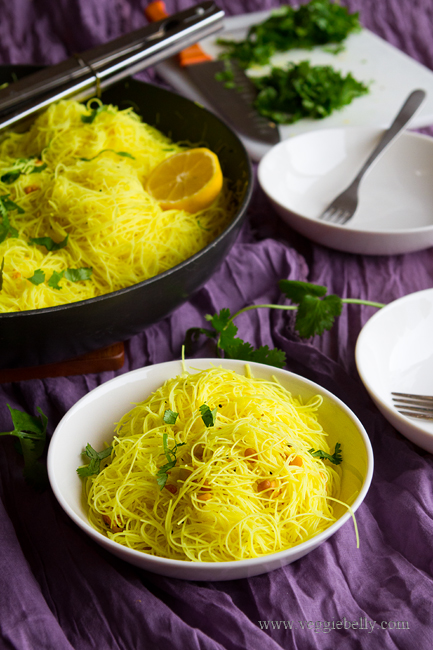
lemon rice noodles

Lemony Rice Noodles (Lemon Idiappam) Recipe

serves about 4

Ingredients
8 oz rice sticks
1 tablespoon oil
1/4 teaspoon black mustard seeds, optional
1/4 teaspoon cumin seeds
1 tablespoons chana dal, optional.
1 tablespoon cashewnuts
1 tablespoon minced ginger
1 green chili slit. Use more if you like it hot.
6 curry leaves
a pinch of asafoetida, optional
1/4 teaspoon turmeric
2 tablespoons fresh lemon juice
1/2 teaspoon lemon zest, optional
2 tablespoons finely chopped cilantro

 Method
1. Soak the rice noodles according to package directions. Drain and set aside.

2. Heat a large wok with the oil. Add the mustard seeds if using. When they pop, add the cumin seeds, chana dal, cashew nuts, ginger, chili, curry leaves and asaf0etida. Stir on medium-low heat till fragrant and the chana dal and cashews are golden.

3. Add turmeric, lemon juice, salt and 1 tablespoons water. Bring to a boil.

4. Immediately dd the soaked rice noodles to the wok. Using tongs, gently toss till everything is well combined. Mix in the lemon zest if using. Garnish with cilantro.

Serve hot with Sri Lankan Cashew curry, pumpkin curry or just on its own.


Potato Kurma with Fried Onion. Remembering my grandmother through her favorite recipes.

To commemorate my paternal grandmother’s first year death anniversary, I am posting a series of my grandmothers favorite recipes. This potato kurma recipe is second in the series. Read my first post in the series here.

My grandmother with my father

My grandmother with me

Of everyone in our family, I think I spent the most time with with my grandmother. She raised me, I shared a room with her, and went with her every where. I was always by her side. And I learnt a lot from this amazing woman just from tagging along. “Don’t depend on anyone. You must learn to do things yourself”, she’d say again and again. Every time I traveled with her, which was a lot, she would teach me again and again how to be independent. Through her, I experienced the joy that comes from not depending. As early as 10 years old, she’d make me check in at airports. There I’d be, not even reaching the counter, checking in for the two of us. It made my 10 year old self feel empowered and confident.

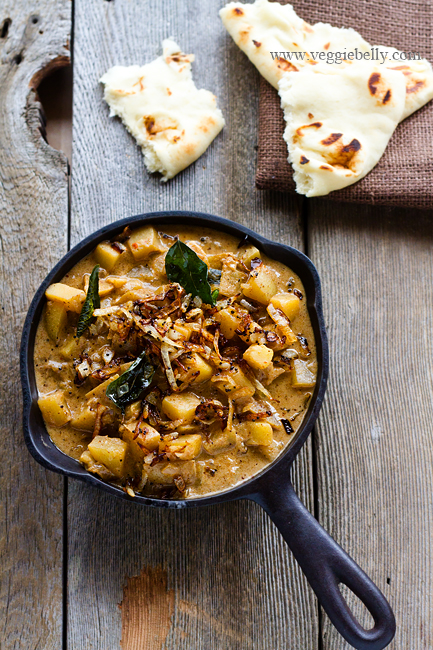
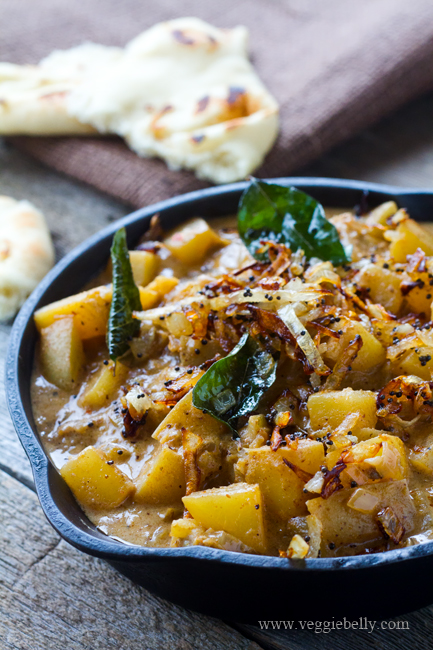
My grandmother also often said it was important to learn to cook and I think its one of there reasons I took an interest in cooking early one. (Ironically, she never cooked herself!). She relished this potato kuruma, often having her cook make it for dinner with fresh chappatis. This kurma, made with coconut milk and topped with fried onions, is rich and comforting. And the home made masala which is the flavor base of this kuruma is well worth the effort.

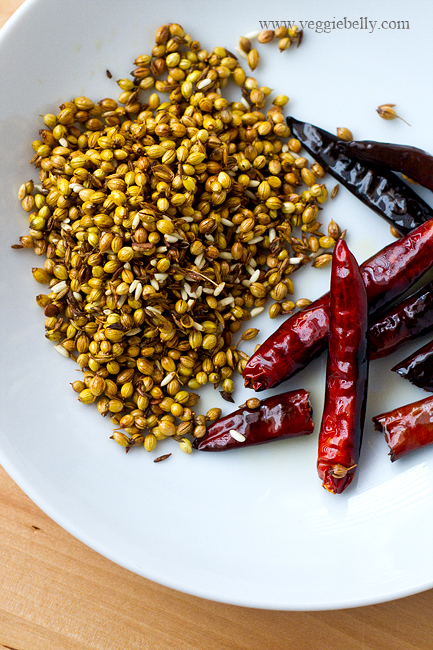
Take care not to overly brown the chills and the spices in the masala. If you over toast the spices, the kuruma will taste bitter. The trick is to stir constantly so the spices toast evenly. Remove the spices from the heat as soon as they smell fragrant.

Potato Kurma with Fried Onion Recipe

serves about 4

Ingredients
For the Masala
1 teaspoon oil
6-8 dried red chilis
2 tablespoon coriander seeds
1 teaspoon cumin seeds
1/4 teaspoon uncooked rice, optional

For the Kuruma
1lb yukon gold potatoes
1/4 cup oil
3/4 cup finely diced yellow onion
6 curry leaves
Salt
1 cup coconut milk

For the topping
2 tablespoons oil
1/4 teaspoon mustard seeds
1/2 cup thinly sliced onions or shallots
1 dried chile
6 curry leaves

Method
1. First make the masala. Heat oil in a small skillet, and add chilis. Cook them on medium heat just till they turn color, about 45 seconds. The chills should still be fairly red in color, not black. Remove the chiles and place on a plate.
2. To the same pan, add the remaining masala ingredients. (No need to add extra oil). Fry till they are fragrant and lightly browned, about 45 seconds.
3.Using a spice grinder, grind the chiles and spices using a little water, into a thick paste. Set aside.
4. Now make the kuruma. Peel and cube the potatoes. You should have approximately 5 handfuls of cubed potatoes.
5. In a large wok or saucepan, heat the oil and add onions and curry leaves. Cook on medium heat till the onion is soft, about 1 minute.
6. Add the potato cubes and cook, stirring for about 5 minutes.
7. And the ground masala paste and salt. Stir well.
8. Add enough water to cover the potatoes (about 2 cups). Bring to a boil. Then cover the wok with a lid, and let the potatoes cook on a lively simmer till the potatoes are soft but still holding their shape. Then remove the lid, and continue cooking till most the water is absorbed.
10. Now pour in coconut milk. Stir and turn off heat.
11. While the potatoes are cooking, work in the topping – heat oil in a small saucepan, add mustard seeds and let them pop. Then add all remaining topping ingredients and sauté on medium heat till the onions are browned.
12. Top kurma with the fried onion topping. Serve kuruma with rotis or naan.

Tomato Coconut Stew. Remembering my grandmother through her favorite recipes.

My paternal grandmother passed away a year ago this month. My grandmother raised me, and taught me a great deal. In her memory, I will be posting a series of her favorite recipes. The first in the series is this tomato stew with coconut milk. My grandmother relished this dish, often eating it with steaming hot idlis for dinner.

I’ve already written a little about my grandmother and what an accomplished woman she was in this post. In this series, I will share more memories of her through her favorite recipes. My grandmother was far ahead of her times. She pursued higher education, a career and a public life – something very few Indian women did during her time. She was a PhD in philosophy and literature, a public speaker, author of many books and an educationalist. And she spent a life time championing womens’ education in India.

Not only was she a career woman, she also enjoyed hosting and entertaining guests in her home..

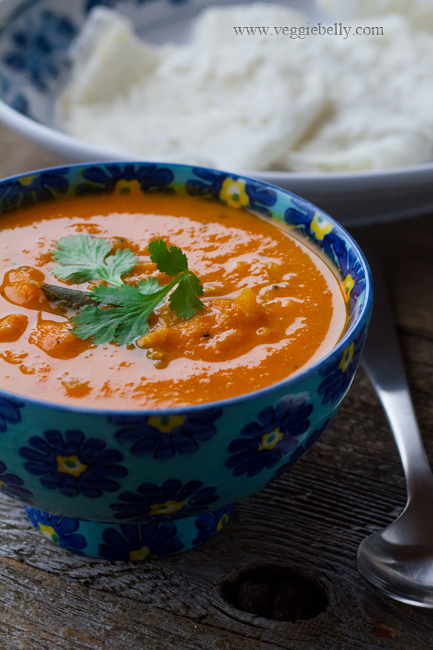
Tomato stew with coconut milk - one of my grandmother's favorites.

My grandmother playing with my iPhone on Pongal day 2013. This was the last picture taken of her.

Diwali, 2002

Getting ready for bedtime, 1982

My grandmother’s dinner parties were legendary and her hospitality impeccable. Although she never took an interest in cooking, she had a keen palate and a great love of hosting and feeding people. She would give her cook, Mariappan detailed instructions before the dinner parties. She would have the coconut trees in her lawn decorated with strings of light bulbs. She took care of every detail – the decoration, neatly folded napkins, extra large sized silver plates, polished cutlery, and a lovingly curated menu.

A typical menu made by the talented cook Mariappan would include tomato rasam and rice wafers for dipping, green pea rice scented with cumin, plump vegetable cutlets coated with golden bread crumbs, fried puris, fragrant garlicky cauliflower masala and delicate sweet polis made with lentils, cardamom and drenched in ghee. As a child, I looked forward to those balmy evenings when my grandmother would regale her guests, laughing, quoting poetry, and coaxing them to eat more. Nobody ever went home hungry after visiting my grandmothers house!

Even in her passing she found an opportunity to entertain people. Let me explain. Where I come from in India, it is customary to host a lunch in the honor of the deceased a few days after the funeral. My grandmother must have known intuitively that her death was near. So one week before her passing she wrote out the menu for the post funeral lunch, along with detailed instructions on how it should be served. Thats right, my grandmother made the menu and gave instructions for her own funeral lunch!

As per my grandmother’s wishes, my family organized a multi course lunch, with four desserts (she had quite the sweet tooth!) served on the largest, freshest banana leaves on the very same lawn where she had regally presided over dinner parties for fifty years. It was the best send off we could have given to a woman who was so passionate about food, people and life.

It is an honor to have been raised by a woman who was so intelligent, beautiful and exuberant. Her life was grand and her love was abundant. This post is the first in a series of recipes I will be posting as a tribute to my grandmother. These recipes have all been tried and tested over decades. Every single recipe I will be posting was a favorite of my grandmother’s. Each one brings back a flood of memories.

In creating these posts, I am filled with tremendous pride to have been part of this incredible woman’s life, and at the same time I am filled with great grief that she is no more.


Tomato Coconut Stew

serves about 4 as an accompaniment/curry

Ingredients
1 lb ripe tomatoes
1 tablespoon oil
1/4th teaspoon mustard seeds
1/4th teaspoon urad dal
1 small onion, minced
5 cloves garlic, chopped
6 curry leaves
1/2 teaspoon tumeric
1 teaspoon chili powder
1 cup coconut milk
1 tablespoon chopped cilantro

Method
1. Bring plenty of water to boil in a saucepan. Drop the tomatoes into the water. Let them boil till their skins blister, about 2 minutes. Then drain.
2. When tomatoes are cool enough to handle, peel and discard the skins. Then puree the tomatoes without any water. Set aside.
3. Heat oil in a medium saucepan. Add the urad dal, and mustard seeds.
4. When the mustard seeds pop, add the onion, garlic, curry leaves and cook for about 2 minutes.
5. Pour in the tomato puree, chili and turmeric powders, salt, and 1 cup water. Bring to a boil.
6. Then reduce heat, and cook on medium-low heat, uncovered, till the sauce becomes thick. About 15 minutes.
7. Add the coconut milk, stir, and turn off heat.
8. Garnish with cilantro. Serve with roti, idlis, dosa, or neer dosa.

Garlic Rasam Recipe

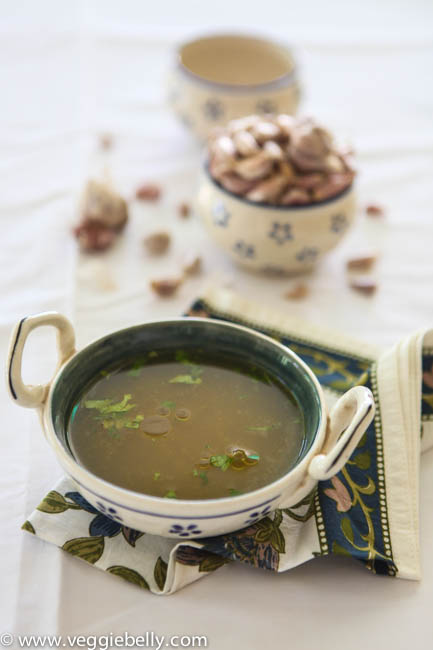
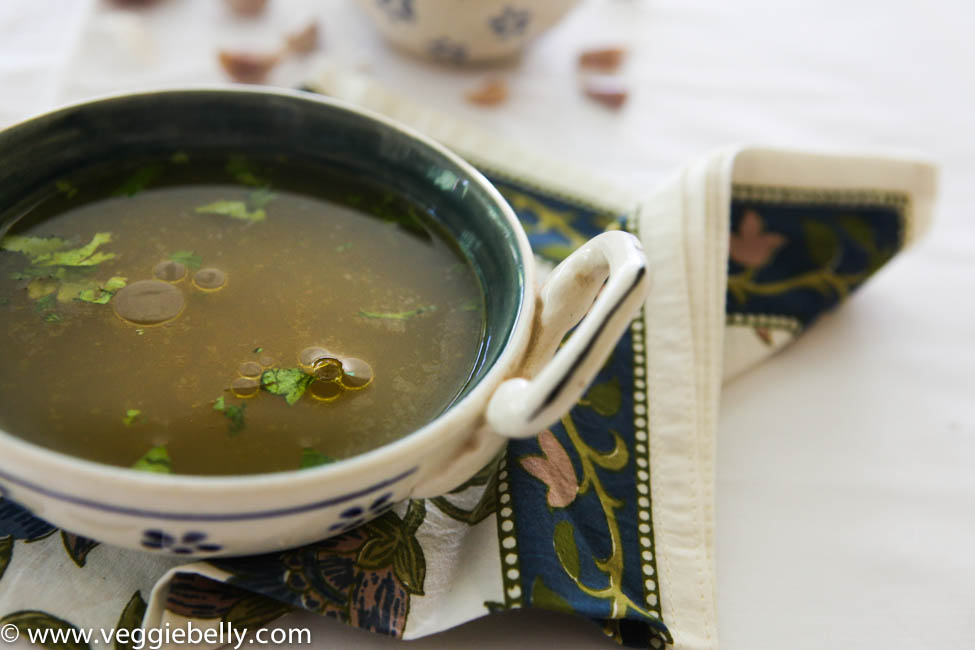
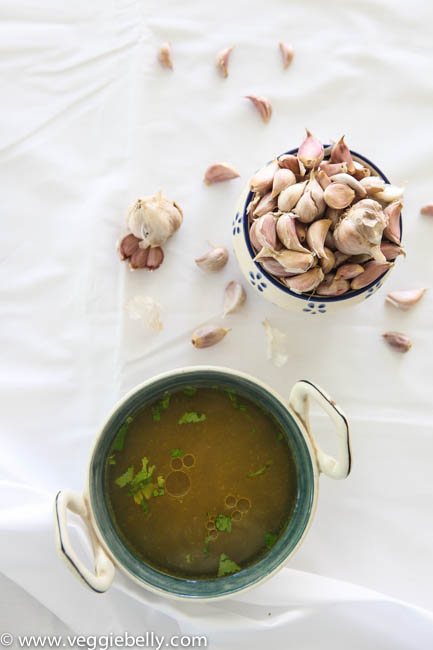
Every home cook must have a good rasam recipe under their belt. This light, tangy and spicy south Indian dish is usually served as a main dish with rice and potato curry. But my favorite way of serving it is in cups, like a soup, along with some crisp potato chips. Perfectly warming for a cold day!

There are probably as many rasam recipes as there are cooks. Everyone does it differently. And you can flavor the rasam with a number of things, not just garlic. For variation try Chef In You’s lemon rasam, or Mahanandi’s coriander rasam, or my grandmother’s killer pineapple rasam.

Garlic Rasam Recipe

serves about 4

Ingredients for Rasam Masala
6-8 garlic cloves with skin on
8 curry leaves
1 red chili
3/4 tablespoon black pepper corns
1 tablespoon cumin seeds

 Method
1.Using the back of a wooden spoon, crush each garlic clove and set aside.
2.Coarsley grind everything else, except garlic. Mix the ground masala with garlic (skin an all) and set aside.

Ingredients for Rasam
a small gooseberry sized ball of tamarind (about 1 tablespoon)
2 small tomatoes, roughly chopped
1 tablespoon oil or ghee
1 red chili, broken
a few curry leaves
1/4 teaspoon mustard seeds
1/4 teaspoon urad dal
a pinch of asafetida
1/4 cup chopped cilantro

 Method
1. Mix and dissolve the tamarind in 2 cups of water. Then strain and extract the water.
2. Place tomatoes in a bowl, and either using your hands or a potato masher, mash and squish the tomatoes till a coarse pulp forms.
3. Place the tamarind water, add tomatoes in a saucepan, and boil for 5 minutes.
4. While its boiling, heat oil in another saucepan and add the chili, curry leaf, mustard seeds, urad dal and asafetida. Stir till fragrant and the mustard seeds pop.
5. Add in the rasam masala. Stir 15 seconds.
6. Add tamarind tomato water, salt, plus 2 cups water.
7. Cook on medium-high. As soon as the rasam starts to foam and just before it comes to a boil, turn it off.
8. If you want a clear rasam, you can strain it at this point, but straining is optional.
9. Garnish with cilantro and serve with steamed rice or in cups, as soup.

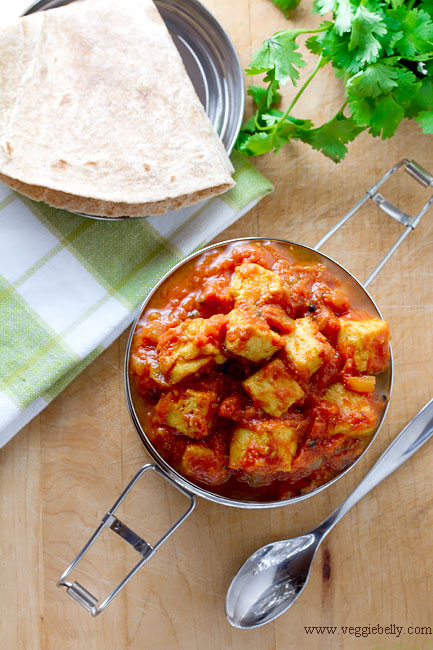
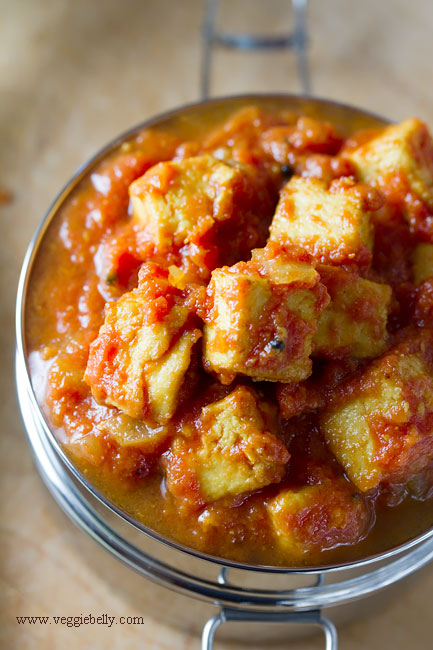
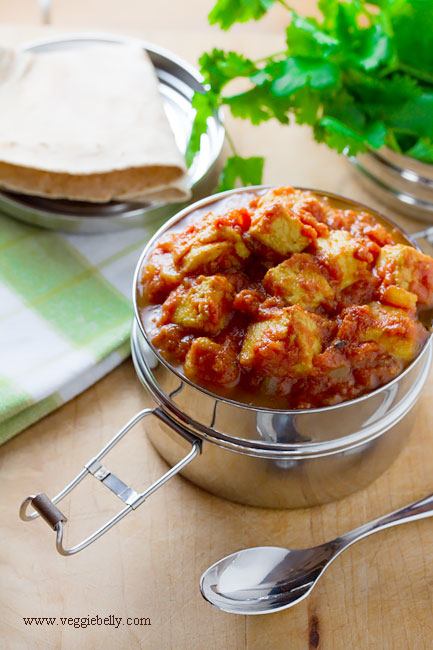
Paneer and Tomato Curry

What an amazing weekend it was! Three childhood friends visited me, and we spent the weekend chatting, catching up and having a great time (N, I am still thinking of your amazing  lychee martinis!).

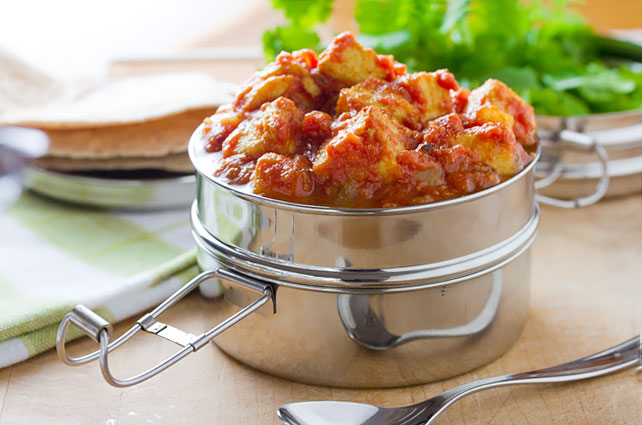
When my dear friend Santha wrote to me requesting this paneer tomato curry recipe, I was flooded with memories of school lunch times and all the wonderful food we used to share from our little tiffin carriers. I was somewhat famous for this curry back in school. I’d take this dish and rotis for lunch every Friday. And I always had to take extra because it was so popular with my classmates. So I decided to make this curry for my friends for our ‘reuinion’ weekend. 

Santha, this is for you ♥

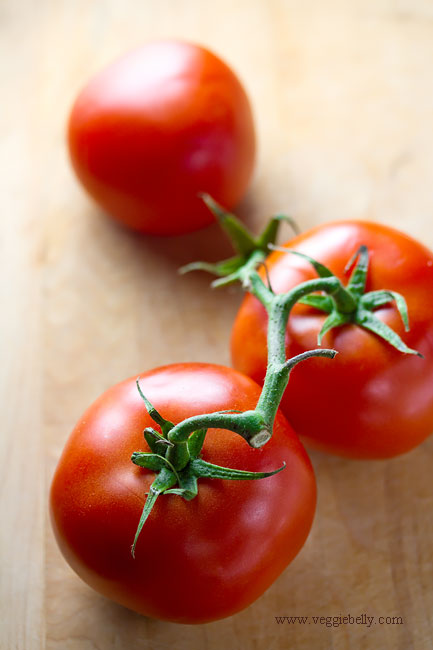
Make sure you use ripe, juicy tomatoes. Canned tomatoes are ok, but you will get the best results if you use high quality canned tomatoes like Muir Glen or San Marzano.

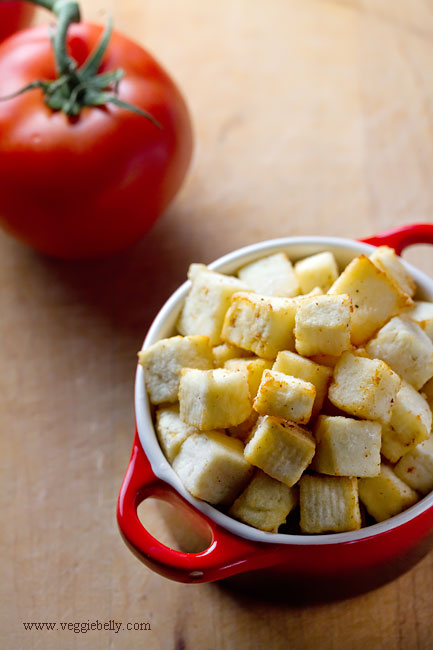
Paneer is an Indian cottage cheese, easily available at Indian stores. For this recipe, you can buy raw paneer and shallow fry it yourself, or you can buy pre-fried packaged paneer (which what I use). Nanak brand paneer is quite good.  Store bought paneer can be quite compacted and hard, so you need to soak it in hot water to soften it a bit.

Daily meals has a tomato paneer curry recipe using garam masala. Mahanandi blog has a paneer tomato recipe as well. Be sure to checkout Local eater blog’s delicious tomato paneer curry recipe from Madhur Jaffrey’s world vegetarian cookbook.

Paneer Tomato Curry Recipe

Serves about 10

For the tomato gravy
6 large, ripe, juicy tomatoes
1 tablespoon oil
¼ teaspoon black mustard seeds, optional
1/2 teaspoons cumin seeds
1 medium onion, chopped fine
½ teaspoon turmeric powder
1 teaspoon cumin powder
½ teaspoon or to taste, chili powder
Salt
1 tablespoon tomato ketchup. Use less if you want a less sweet gravy.

For the fried paneer
2 cups cubed paneer*
A large bowl filled with very hot, salted water

Make the gravy
Remove the core of the tomatoes. Quarter the cored tomatoes and place in a blender, along with 2 cups of water. Puree until the tomatoes have become a very smooth sauce. You should have about 8 cups of puree. Set this aside.

In a large saucepan, heat the oil. Add mustard and cumin seeds. When the mustard starts to splutter, add the chopped onion. Cook on medium-low heat till the onion is soft. Add turmeric, cumin and chili powders. Stir for a few seconds.

Then carefully pour in the pureed tomatoes. Bring the gravy to a boil. Then reduce heat and let the curry simmer on low heat for about 20 minutes or till the curry has reduced a little and you can no longer smell raw tomatoes. Add more water if needed.

Fry the paneer
While the tomato gravy is simmering, work on the paneer.

Fill a large bowl with very hot water. Add salt to the water, and set the bowl near you.

Heat oil in a pan and shallow fry the paneer cubes in batches.Flip the the paneer around so that all sides are lightly golden. Remove paneer cubes from the oil using a slotted spoon and place the fried paneer in the hot salted water. Be careful when doing this, the oil in the paneer will splutter when it hits the water.  Repeat this with all the paneer cubes. Let the fried paneer sit in the hot water for about 15 minutes.

*Use the above method if you are frying your own paneer. Alternatively, you could use store bought, pre-fried paneer. Simply open up the package and dunk it in the bowl with hot salted water. Let it sit for 20 minutes; then proceed with the recipe.

If you are using homemade paneer, soak it in the hot water after frying for only 10 minutes. (Store-bought paneer is harder and needs to soak longer).

When the tomato gravy is ready, drain the paneer cubes from the water, and add to the gravy.  Add salt to taste. Increase heat to medium, and let it cook for about 5 minutes.

Then stir in ketchup and turn off heat. Garnish with chopped cilantro.

Serve paneer and tomato curry with rotis or chapatis.

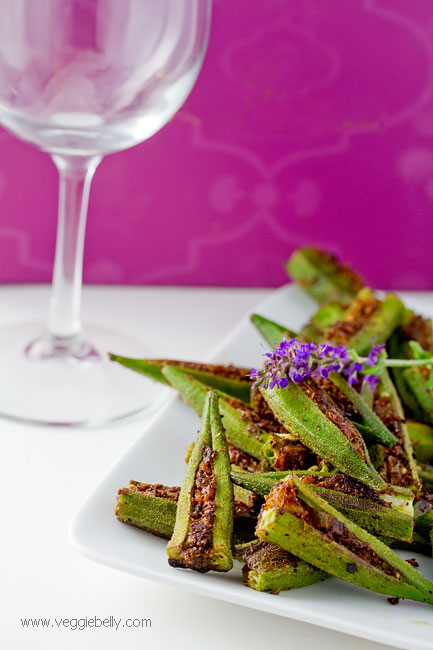
Masala Stuffed Okra

Documenting recipes was a big deal in my family. (That’s probably where I get my interest in food blogging from). Every family recipe was carefully tested and documented on paper. It was a huge, and ongoing project in my parents’ house. As kids, my siblings, any visiting cousins and I were constantly put to work, writing and re-writing recipes in notebooks.

There is a mountain of old notebooks at my parents’ house in India, their yellowing pages full of hand written recipes. When I moved out, I photocopied every single page of every single notebook. I take my photocopied family recipes everywhere I go. No matter what country, state, city or house I am moving to, the first thing I pack is my huge stack of photocopies.

About 10 years ago, my mother decided to go hi-tech. She hired a starving college kid to type out, catalogue and save the thousands of family recipes on CDs. I was given a copy of all these CDs.

The CDs are better organized and much easier to use. But somehow, I keep going back to my Xerox copies of the notebooks. I like shuffling through my stacks of paper. The fading ink, the dog eared edges, all remind me of a sweltering childhood kitchen filled with the aromas of Tamil Nadu and Kerala.
This is one recipe that will take me right back there. Served with rice and dal, it is my sister’s favorite.

A very small portion of my family recipes collection

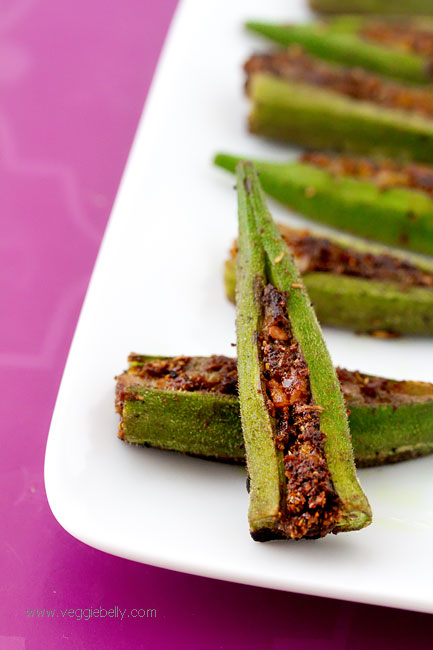
We call this dish ‘nool katti vendakkai masala’ or string tied okra. The stuffed okra was tied with string and then deep fried. Tying the okra kept the stuffing inside it. My version of this recipe is a little easier. I don’t string tie the okra.

Notes

- Make sure you dry the okras very well before stuffing them
- Searing the stuffed okras on high heat initially will make sure they dont get slimy
-For a quicker version of this recipe, skip the roasting and grinding of spices; instead use chili powder, coriander powder and cumin powder

Stuffed okra is a common dish in India, but recipes vary from region to region. Aayi’s Recipes has a Konkan stuffed okra recipe using coconut. Hungry Desi’s stuffed okra boats recipe uses tomatoes. Sindhi Rasoi’s stuffed okra or dhaas bhindi or bharwan bhindi recipe uses spice powders.


Masala Stuffed Okra Recipe

serves about 4 as a side dish

For masala
½ teaspoon oil
3 red chilies
1 tablespoon coriander seeds
1 teaspoon cumin seed
1 teaspoon fennel seeds
½ small onion, minced
1 clove garlic, peeled and minced
¼ teaspoon turmeric
A pinch of asafetida
Salt

For the okra
½ lb fresh, tender Okra (about 30)
1-2 tablespoons oil

In a small skillet, heat the oil for masala and add red chilies, coriander seeds, cumin and fennel seeds. Fry on low heat just till the spices turn color and get fragrant. Remove the spices to a spice grinder and grind finely.

Wipe the skillet clean. Add a few drops of oil and fry the onions and garlic till onion is soft. Turn off heat. Add ground spices, turmeric, asafetida and salt to the onion mixture. Mix well. This is your stuffing masala.

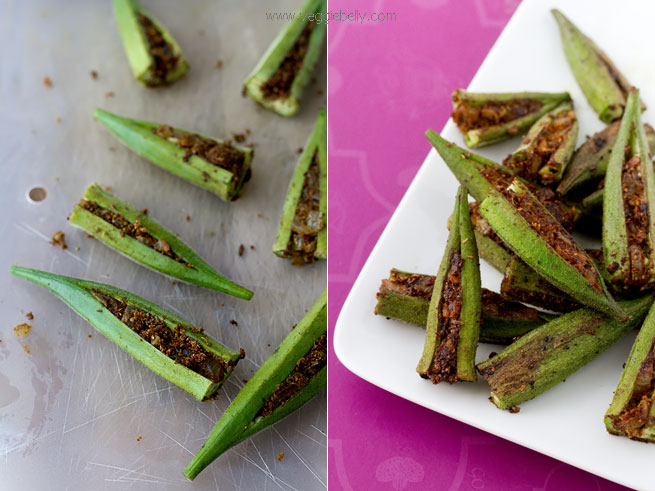
Wash and dry the okra. Cut the tops off. Using a sharp knife, make an incision in the okra, starting from the top and stopping just before the tail. Do not cut all the way through the orka, it has to be one whole piece.

Place okra on a work surface. Using one hand, gently pry open the okra at the slit. (Careful not to tear it). Using your other hand, gently stuff a little masala into the slit and pack it down. Repeat for all okra pieces.

In a large, shallow non stick skillet, heat the oil. Add the stuffed okra, one at a time, stuffed side facing up, in a single layer. Cook on medium-high heat till the bottom sides of the okra are brown. Reduce heat to low, place a lid on the skillet, venting it a little, and cook for about 7 minutes or till the okra is tender. Then remove lid, carefully flip the okras over and cook 2 more minutes. Sprinkle salt all over. Serve hot with rice and dal.

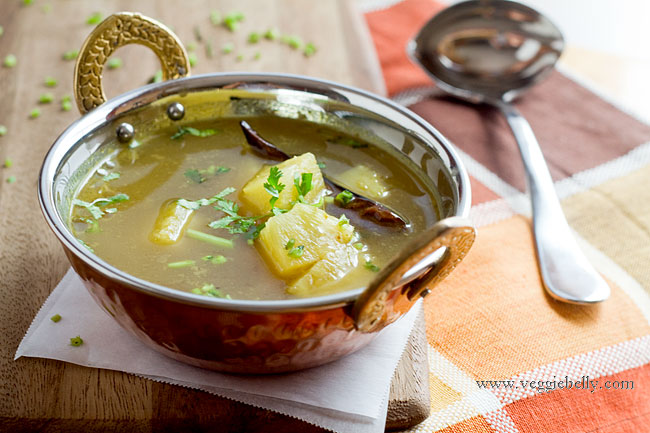
Pineapple Rasam and Tender Coconut Rasam (South Indian Soup)

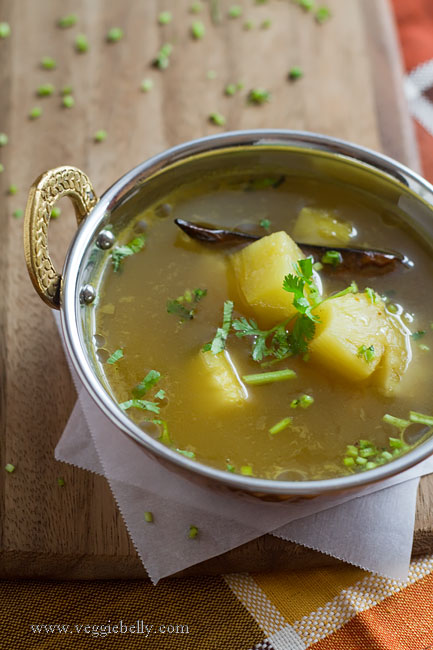
When I called my grandmother to get a pineapple rasam recipe, the culinary genius she is, suggested that the same recipe will also work with tender coconut. So here you have it – a pineapple rasam recipe and a tender coconut rasam recipe.

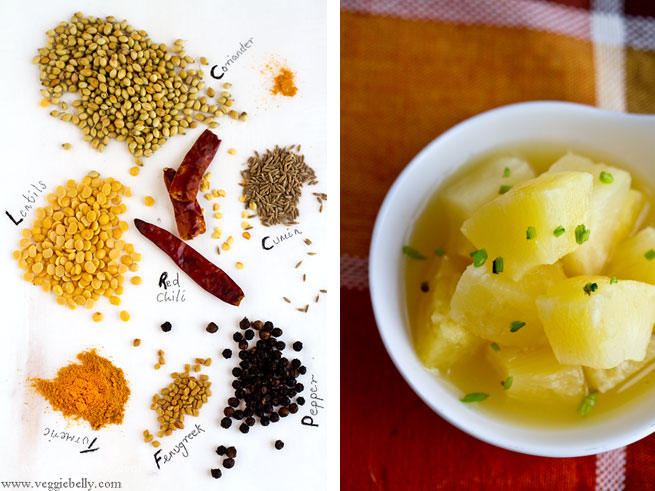
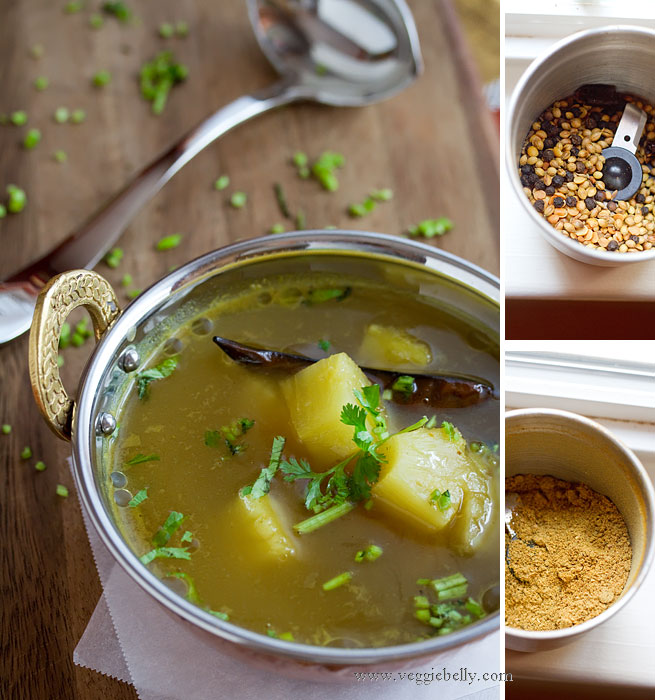
Roast and grind these ingredients for rasam spice powder & cook with sweet juicy pineapple

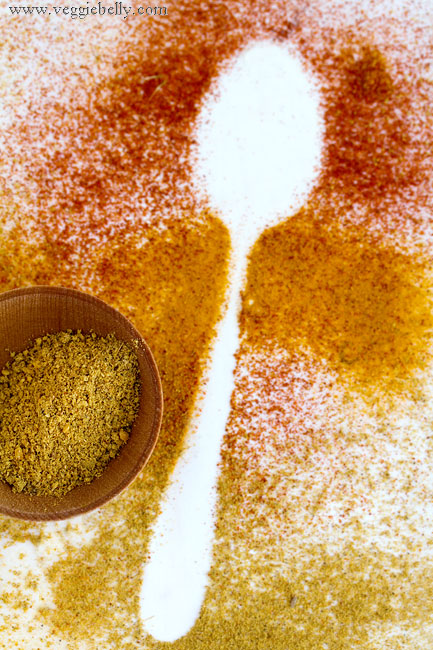
Rasam, also called charu or saaru, is a spiced, thin soup from South India. You can buy rasam powder at any Indian store; but I like home made rasam podi or powder better. Once you’ve made it, it will keep for months in an airtight container.

Serve rasam with rice or in cups like soup. There are several rasam recipes on the internet, the basic spices are the same, proportions and other additions vary according to family and region. This pineapple rasam recipe on Jugalbandi looks great, as does this pineapple rasam recipe on Veg Inspirations, Samayal Arai blog also has a pineapple rasam recipe.


If I want a sweet and savory rasam, I always turn to pineapple. I havent tried my grandmother’s idea of adding tender coconut pulp and coconut water to rasam; but I love the idea and if any of you try the tender coconut variation (see below) I’d love to hear how it turned out.


Pineapple Rasam Recipe

Serves about 4

for tempering
½ teaspoon ghee or clarified butter or oil
¼ teaspoon black mustard seeds
1 dried red chili
A pinch of asafoetida
A few curry leaves

for rasam
a small lime sized ball of tamarind pulp (about a tablespoon)
5 cups water
1 ½ tablespoons rasam powder (recipe below)
1 cup pineapple chunks (I used canned; make sure you buy pineapple chunks in 100% pineapple juice)
½ cup pineapple juice (from pineapple chunks can)
2 tablespoons chopped cilantro
Salt

Heat ghee or oil in a deep pot. Add mustard seeds. When they start to pop, add all other tempering ingredients. Cook for about 30 seconds.

Soak tamarind in 1 cup hot water for 5 minutes. Squeeze the tamarind with your hands, extracting the juices.

Add tamarind juice, 5 cups water and rasam powder to the pot. Boil for about 7 minutes. Add pineapple chunks, pineapple juice, cilantro and salt and boil another 5 minutes.

Serve hot with rice or drink like soup.

Rasam Powder or Rasam Podi Recipe

makes about ¼ cup

for dry roasting
2 tablespoons whole coriander
½ tablespoon cumin seeds
½ tablespoon peppercorns
¼ teaspoon fenugreek seeds
1 tablespoon toor dal or yellow lentils

for oil roasting
Few drops of oil
1 dried red chili, torn into small pieces (this will yield a mild rasam powder, use more chillies if you want it hot)

other ingredients
1/8 teaspoon asafoetida
1/2 teaspoon turmeric powder

In a small skillet on low heat, roast all the dry roasting ingredients one by one for about 1 minute each or till the spices are fragrant and turned color slightly. Place each ingredient in a coffee grinder as you finish roasting.

In the same pan, heat a few drops of oil, and roast the red chili for about 30 seconds. Add to the coffee grinder.

Add asafoetida and turmeric to the coffee grinder. Grind everything to a fine powder. Store in an airtight container. Rasam powder will keep for several months.

Tender Coconut Rasam Recipe

Use the pineapple rasam recipe above. But instead of pineapple chunks, use tender coconut pulp. Instead of pineapple juice, use tender coconut water. Add these right at the end of cooking.

My Grandmother’s Multicolored Mixed Vegetable Raita


My two grandmother’s could not be more different.  One has a PhD, was a career woman and takes pride in the fact that she ‘cant boil a kettle of water’. She is a connoisseur of fine food, but never enters the kitchen herself. My other grandmother works miracles in the kitchen. She can effortlessly turn out simmering pot after pot of the most delectable sambars, kuzhambus, rasams, poriyals, and kootus. She instilled in me a love for cooking; and not a week goes by when I’m not on the phone with my grandmother asking for recipes, techniques or clarifications. As different as they are from each other, both my grandmothers are remarkable women, and I continue to learn so much from them.

 My grandmother (the non-cooking one!), grandfather,  father and aunt. Late 1950s
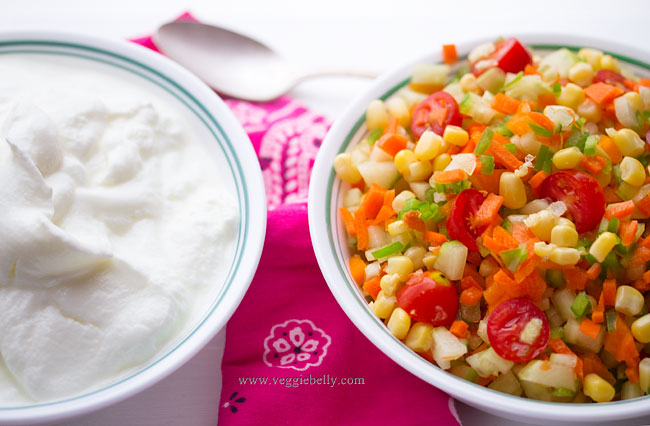



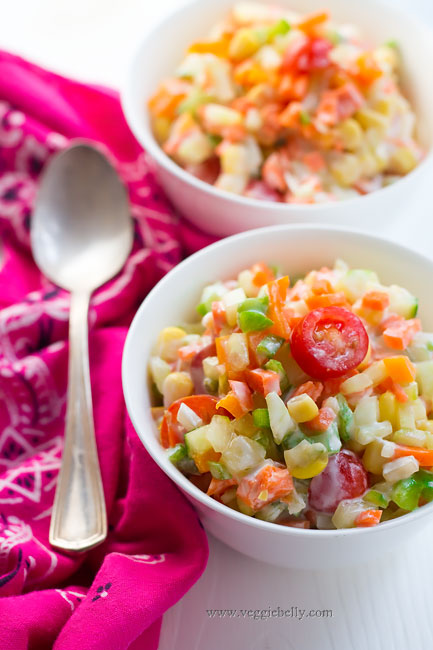
 When its too hot to cook, I always turn to this mixed vegetable raita. Its cool, refershing and there is no cooking involved. I am happy just eating a huge bowl of this for dinner. But this colorful raita will be a great accompaniment to and Indian dinner of rice, roti and curry.

Its easy to remember this recipe – just remember the 6 Cs- cucumber, capsicum, corn, carrot, curd, cherry tomato. Then add pomegranates. Thats it! I didnt use pomegranate seeds in this recipe because I couldnt find any; but I highly recommend you use them!

My grandmother adds salt to the raita only just before serving. If you add salt any sooner, it will draw out the moisture from the vegetables and make your raita watery. And make sure you let the raita sit in the fridge overnight, it tastes much better than eating it right away.

My Grandmother’s Multicolored Mixed Vegetable Raita Recipe

serves about 10 as a side dish

1 large seedless cucumber, the kind with the plastic wrap or 4 small cucumbers (about 3 cups when chopped)
3 medium carrots (about 1 1/2 cups when chopped)
1 small green pepper (about 1/2 cup when chopped)
1 small orange pepper (about 1/2 cup when chopped)
1 cup cherry tomatoes
2 cups drained canned sweet corn
1/2 cup pomegranate seeds (I didnt use, because I couldnt find them)
3 cups yogurt
salt

Peel the cucumber and carrots, and chop into very small pieces. Chop the peppers into tiny pieces as well. Cut each cherry tomato into 2 or 3 pieces.  Mix all ingredients together in a large bowl, except salt. Place the raita in the fridge. Raita tastes better if it sits over night. Add salt just before serving and stir well. Serve chilled.

Related Posts with Thumbnails