Masala Coated Corn Cobs

masala coated corn cobs
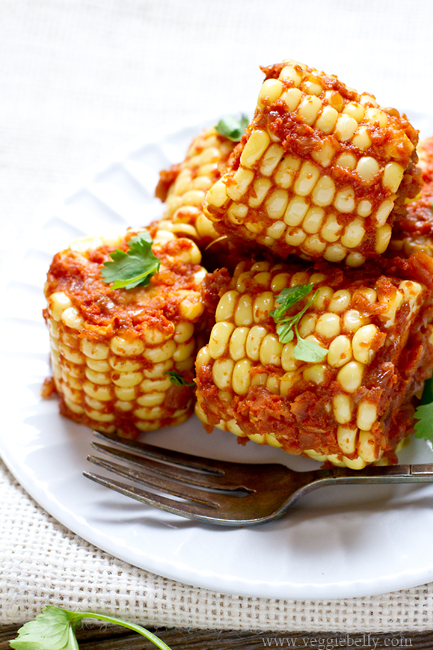
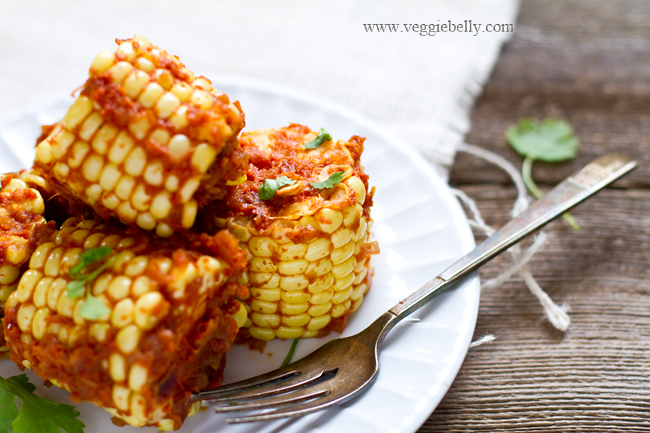
I look forward to the fresh, sweet corn cobs in the summer. I usually roast them on a grill and slather them with butter and chili powder or with miso butter. But this time, I wanted something different – like a corn cob curry. So I decided to make a masala paste with browned onions, tomato, cumin, coriander and chili powder and then toss the corn cobs in it. This recipe will be a perfect summer accompaniment to an Indian meal.
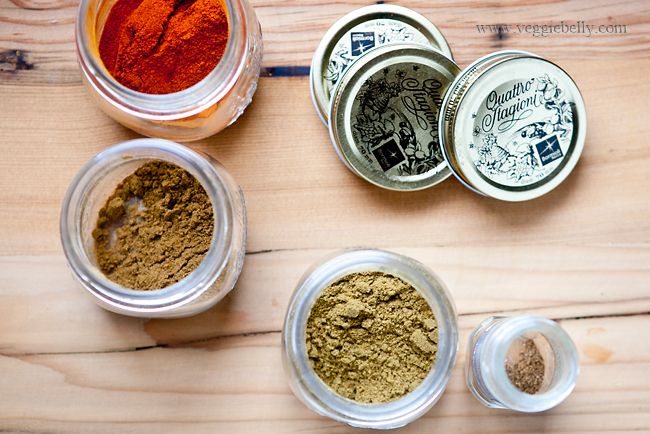
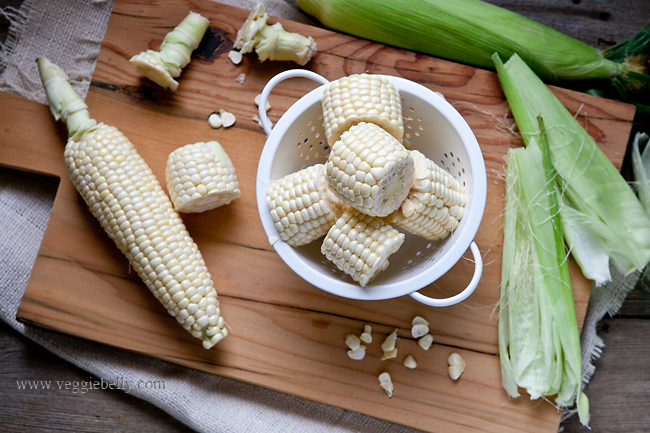
spices for corn cob masalacorn cobs for corn cob masalaUse a sharp knife to cut the corn cobs into chunks, and be very careful that the corn cob doesn’t slip when you are cutting it. I like to cut it into large chunks. But if you prefer smaller corn cob chunks, go ahead and cut it smaller. But however you cut it, this corn cob masala is best eaten with your hands!
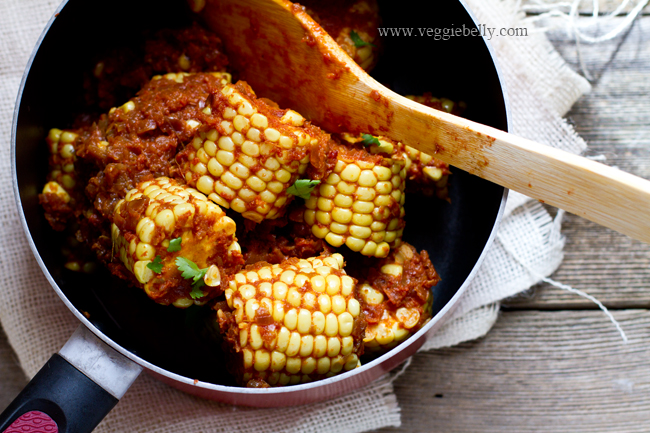
corn cob masala in a potServe this masala corn cob as an accompaniment to an Indian meal.
I suggest rice or roti, dal and raita.
masala coated corn cobs

Masala Coated Corn Cobs

Serves 4-6 as an accompaniment

Ingredients
4 roma tomatoes
4 tablespoons oil
1 small red onion, minced
3/4 tablespoon ginger paste, or grated ginger
3/4 tablespoon garlic paste, or grated garlic
1/4 of a cinnamon stick, optional
1 small bay leaf, optional
1 teaspoon garam masala
2 teaspoons ground coriander
1 teaspoon chili powder or according to taste
3 corn cobs

Method
1. Core the tomatoes and puree them along with 1/2 cup water. Set aside.
2. Heat the oil in a large sauce pan. Add the minced onion and cook on medium heat until golden brown, about 15 minutes. Now add the ginger and garlic pastes, and cook until fragrant, about 2 minutes.
3.Add the cinnamon stick, and bay leaf if using and cook for another minute.
4. Now sprinkle the garam masala, coriander powder and chili powder. Stir for 10 seconds. Pour in the pureed tomatoes and simmer for 5 minutes.
5. Remove the husk and silk from the corn cobs. Trim off the top and bottom ends. Using a sharp knife, carefully cut each corn cob into 3 or 4 chunks.
6. Add the cut corn cobs, salt and 1/2 cup water into the sauce pan. Stir well. Let the corn cobs cook, stirring occasionally, until all the water boils away and the masala paste coats the corn cobs. Fish out the bay leaf and cinnamon stick. Pinch off a corn kernel and test it for doneness. If it isn’t fully cooked, add a little more water and continue cooking until the corn kernel are cooke through.
Serve hot with rice or rotis.

Blueberry Lime Lassi Popsicles

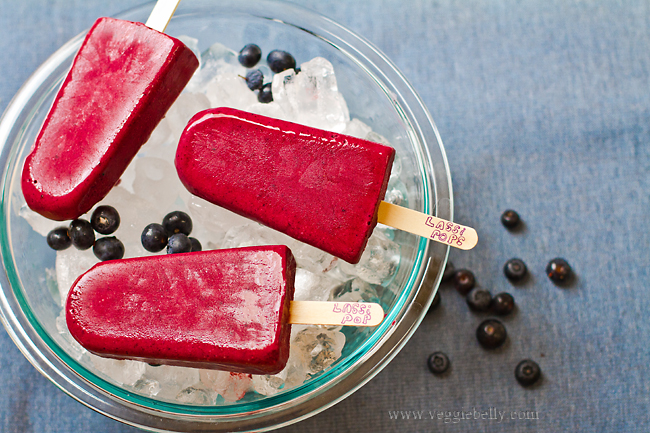
blueberry lime lassi popsLast week, we went blueberry picking in Blue Bee Farms in Sauvie Island, Portland. It was a wonderful, relaxing evening picking blueberries with friends and enjoying the Portland summer. Before we knew it we had picked 50 pounds of blueberries! Blueberry recipes were already starting to pop up in my head! I thought I should make lassi, an Indian fruit and yogurt drink, with a batch of blueberries before I froze them for later use. Then I got a better idea. Blueberry lime lassi popsicles! They are easy to make and a unique frozen treat for a warm day.
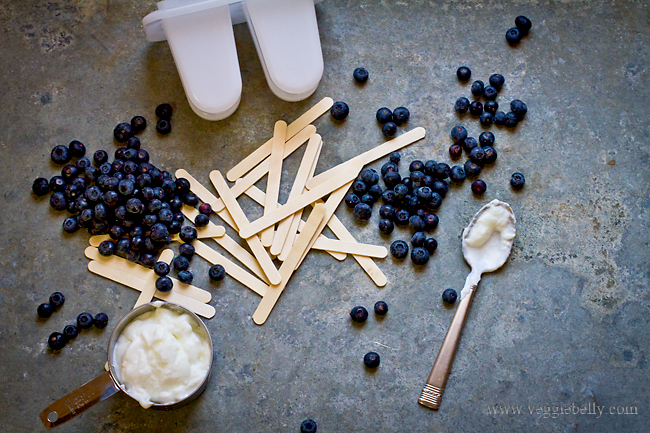
ingredients for blueberry lassi popsIf you don’t have popsicle molds, you can still make these popsicles. Simply the pour the lassi into paper cups and freeze them. Then when they are half frozen, stick a spoon in the middle. When you are ready to eat, tear away the paper cup, and wrap the spoon in a paper towel so it doesn’t get too cold to hold.
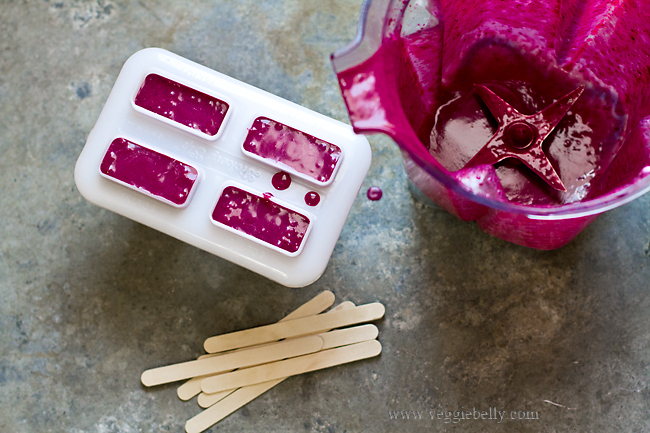
Blueberry lime lassi popsible in moldsI cooked the blueberries in sugar briefly. But this step is optional. You can also simply puree all ingredients, uncooked, and feeze them. See the recipe below for the no-cook variation. I’ve tried a dairy-free version of this recipe, using coconut milk instead of yogurt and that was very tasty as well.
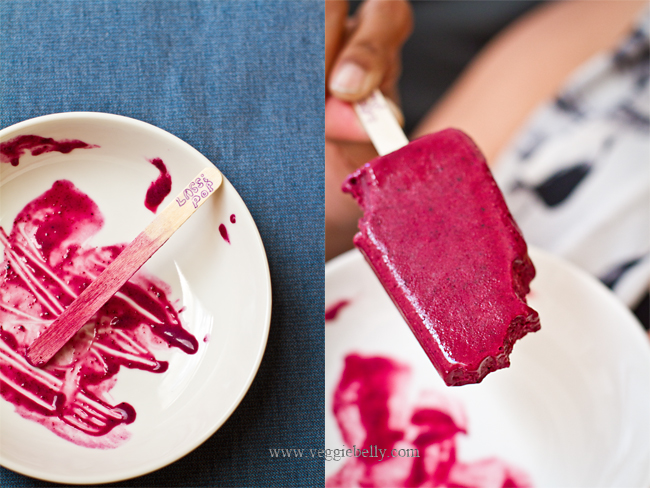
blueberry lime lassi popsblueberry lime lassi popsicles

Blueberry Lime Lassi Popsicles Recipe

makes 4 popsicles

Ingredients
1 cup fresh blueberries
1/4 cup sugar
1/16 teaspoon (tiny pinch) ground cardamom, optional
A pinch of salt
1 cup full fat yogurt
Juice of 1 lime

A popsicle mold that can hold 4 popsicles
4 wood popsicle sticks

Method
1. Place the blueberries, sugar, salt and cardamom if using in a heavy bottom pan. Cook on medium heat until the berries are soft and mash easily, about 4 minutes.
2. Let the berry mixture cool to room temperature. Then pour it into a blender, along with the lime juice and yogurt. Blend until very smooth.
3. Pour the lassi into popsicle molds and freeze until semi-solid, about 1 hour. Now insert the popsicle sticks half way into the mold. Return to the freezer and let the popsicles freeze solid, about 4 hours.

No-Cook Version
1.Blend all ingredients in a blender until very smooth. Pour the lassi into popsicle molds and freeze in the freezer.
2.When the popsicles are semi-frozen, about 1 hour, insert the popsicle sticks half way. Freeze until the pops are solid, about 4 hours.

Grilled Naan Salad with Mint Raita Dressing

grilled naan salad with mint raita dressing

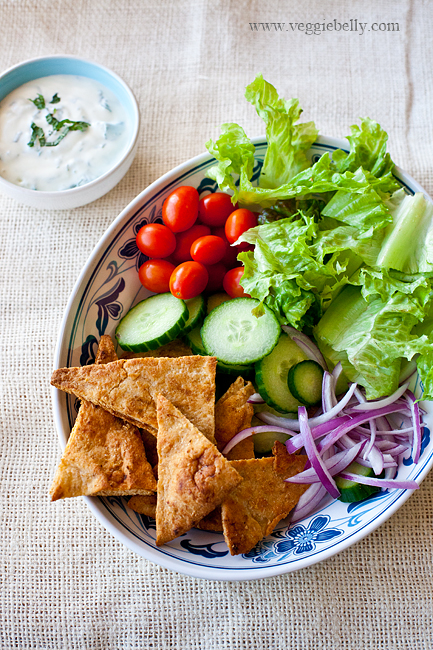
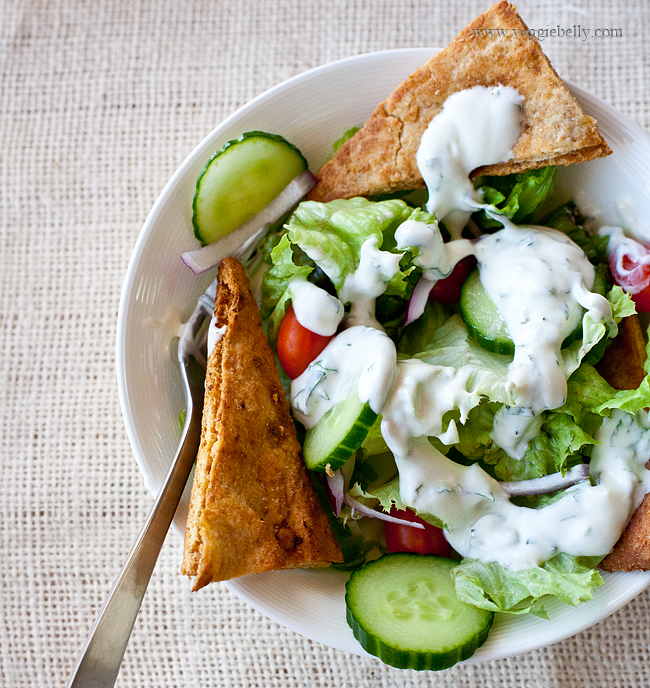
A friend of mine was telling me about how she loves Indian food but finds restaurant Indian food too heavy for hot weather. Just because its summer doesn’t mean you need to give up on Indian food! Here’s a grilled naan salad with raita dressing that is both light, and cooling for a hot summer day.

When Stonefire flatbreads approached me to be their spokesperson in Portland, I simply couldn’t refuse. I love a good flatbread, especially naan – an Indian flat bread made in a special clay oven called a tandoor. Stonefire makes a variety of naans, including garlic which is absolutely delicious! I used their regular/plain flavored naan for this recipe and it was very good. But wait, there is a way for you to try this naan salad! Read on..

grilled naan salad with mint raita dressing

The Stonefire Food Truck will be touring the country from April-August, 2014 serving up some truly scrumptious fare, all involving flatbreads ofcourse! I will be serving this yummy naan salad at Stonefire’s food truck in Pioneer square on June 26th at lunch time - only one day, only in Portland!

Stop by the food truck for free samples, giveaways and recipe tips!

WHEN:       Thursday, June 26, 2014. 11am-4pm
WHERE:     First stop at SW Morrison St and SW Broadway, followed by SW 3rd Avenue and SW Morrison St and SW Washington St & SW Park Ave

Follow the food cart tour on Facebook and Twitter

Don’t miss it, its going to be fun!

Grilled Naan Salad and Raita Dressing

Serves 2 as an entree

For the salad
1 naan cut or torn into 12 bite size pieces
1/2 tablespoon olive oil
1/2 teaspoon ground cumin
salt
4 cups chopped iceberg or romain lettuce
1/2 cup cherry tomatoes
1/2 cup cucumber slices
1/4 cup red onion slices, optional

For the dressing
3/4 cup plain greek yogurt
2 tablespoons finely chopped mint leaves
2 tablespoons olive oil
2 tablespoon fresh lemon juice
4 tablespoons water
Salt and pepper

Method
Pre-heat oven to 400f.
1. Place the naan pieces on a baking sheet. Whisk the olive oil, cumin and salt together. Pour on top of the naan. Toss well. Arrange the naan pieces in a single layer on the baking sheet. Bake the naan at 400f for 10 minutes or till the naan is golden brown. Remove from oven and set aside.

Alternatively, you can also grill the naan on an outdoor grill – brush the whole naan with the oil and cumin mixture. Cook on an outdoor grill till grill marks appear on both sides and it. Let the naan cook slightly and then tear it into pieces.

2. While the naan is baking, work on the salad dressing. Combine all dressing ingredients in a bowl and whisk till well combined. If the dressing is too thick, add water 1 tablespoon at a time until the desired consistency is reached. It should be thick like ranch dressing. Refrigerate till you are ready to assemble the salad.

3. In a large bowl, toss the toasted naan, other salad ingredients. Serve the yogurt raita dressing on the side. Serve immediately.

10 Minute Lemony Rice Noodles (Lemon Idiappam)

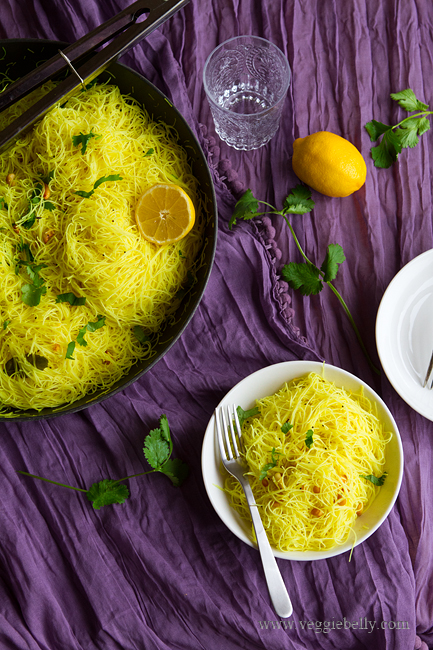
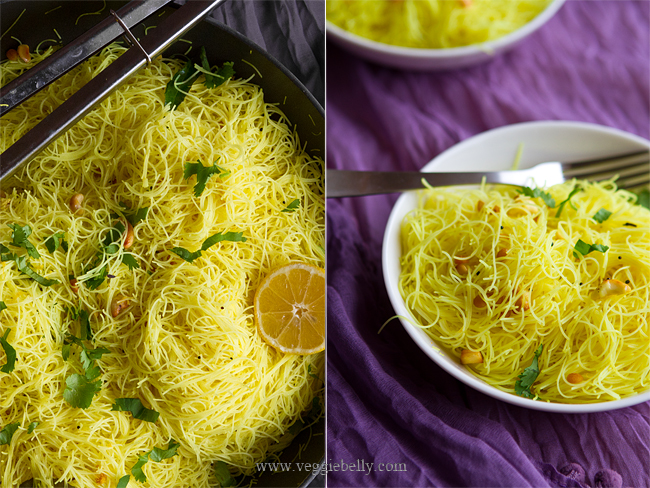
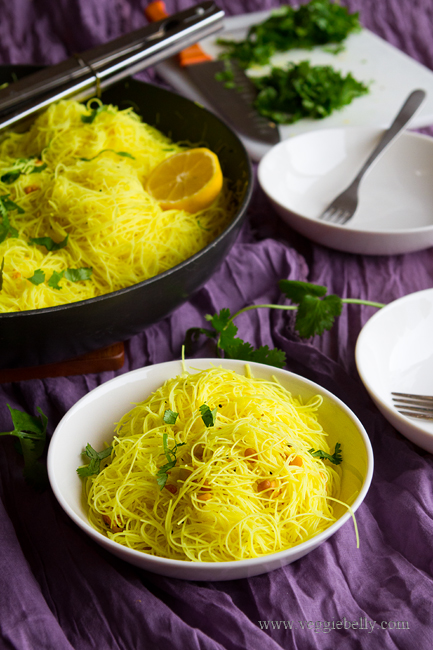
lemon rice noodles I love rice noodles in any form and this lemony rice noodles recipe is one of my quick and easy favorites. In India we make a similar dish using fresh string hoppers (rice noodles) called lemon idiappam. I use store bought dry rice noodles (also called rice sticks or rice vermicelli) as a shortcut. The rice noodles only need a quick soaking in hot water. And while the noodles are soaking you can prepare the tadka (tempered spices). So you can make this dish in just 10 minutes.

You can find rice noodles in the Asian aisle of the grocery store, or at Asian markets where there is usually more variety and brands. Make sure the only ingredient listed on the packet is rice or rice flour. Some brands will list water and salt, besides the rice as ingredients and thats ok.
lemon, ginger, rice noodles, curry leaves
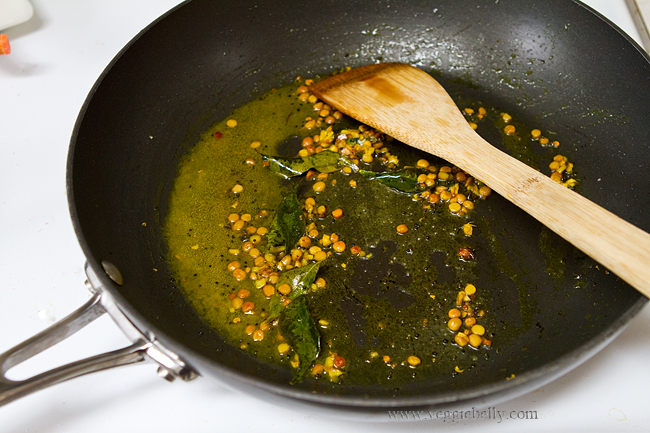
 The seasoning for these lemon rice noodles is simple and easy. Its the standard Indian “tadka” – a tempering of whole spices in oil. I then add freshly squeezed lemon juice and turmeric to the tadka before throwing in the rice noodles.
tadka of chana dal, curry leaf, mustard seeds, turmeric This is a crowd pleasing recipe, easy to make, and keeps well so you can take it for pot lucks and picnics. Kids will also love it. Serve it with a simple coconut chutney, pumpkin spinach curry, or my cashew nut curry. Make it a complete meal by throwing in some steamed broccoli or sautéed vegetables on top of the noodles.
lemon rice noodles

Lemony Rice Noodles (Lemon Idiappam) Recipe

serves about 4

Ingredients
8 oz rice sticks
1 tablespoon oil
1/4 teaspoon black mustard seeds, optional
1/4 teaspoon cumin seeds
1 tablespoons chana dal, optional.
1 tablespoon cashewnuts
1 tablespoon minced ginger
1 green chili slit. Use more if you like it hot.
6 curry leaves
a pinch of asafoetida, optional
1/4 teaspoon turmeric
2 tablespoons fresh lemon juice
1/2 teaspoon lemon zest, optional
2 tablespoons finely chopped cilantro

 Method
1. Soak the rice noodles according to package directions. Drain and set aside.

2. Heat a large wok with the oil. Add the mustard seeds if using. When they pop, add the cumin seeds, chana dal, cashew nuts, ginger, chili, curry leaves and asaf0etida. Stir on medium-low heat till fragrant and the chana dal and cashews are golden.

3. Add turmeric, lemon juice, salt and 1 tablespoons water. Bring to a boil.

4. Immediately dd the soaked rice noodles to the wok. Using tongs, gently toss till everything is well combined. Mix in the lemon zest if using. Garnish with cilantro.

Serve hot with Sri Lankan Cashew curry, pumpkin curry or just on its own.


Everyday Mixed Vegetable Curry Recipe


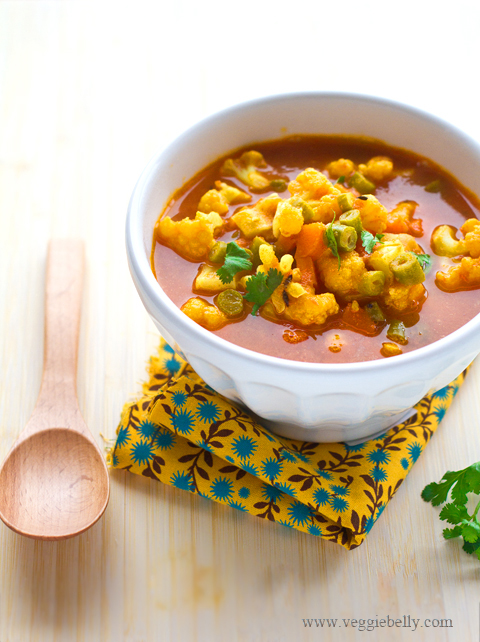
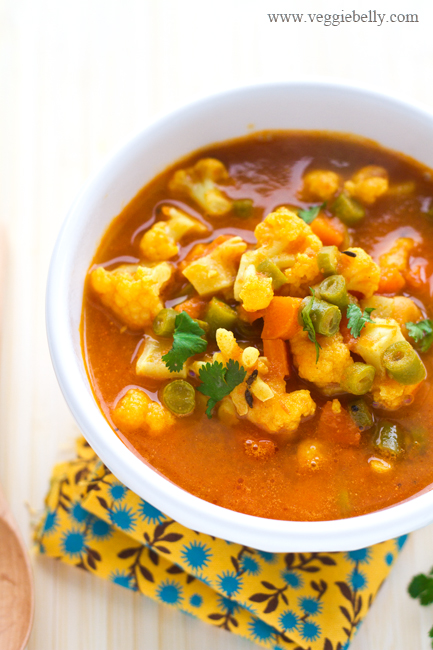
I’ve been a serious cook for over 15 years. I cook all kinds of recipes (vegetarian ofcourse!) – international recipes, quick and easy recipes, rich and complex recipes. But the kind I enjoy eating the most are the simple curries that remind me of home. This everyday mixed vegetable curry is one such recipe. Its fuss free, bursting with flavor and wonderfully comforting.

Everyday Mixed Vegetable Curry Recipe

serves about 4
Ingredients
2 large ripe tomatoes
1 tablespoon oil
1/2 teaspoon cumin seeds
1 green chili, slit, optional
1/2 teaspoon turmeric powder
1 teaspoon ground cumin
1 heaping teaspoon ground coriander
1/8th teaspoon chili powder, or more according to taste
1/2 cup diced carrot (small cubes)*
1/2 cup chopped green beans*
1 cup chopped cauliflower florets*
Salt
2 tablespoons chopped cilantro

*Chop all the vegetables small, and keep them the same size so they cook evenly

Method
1. Core the tomatoes and puree them in a blender, using as little water as possible. Blend into a very smooth puree and set aide.
2. Heat oil in a saucepan. Add the cumin seeds. When they sizzle, add the green chili and cook for 10 seconds. Turn the heat down to low.
3. Sprinkle the turmeric, cumin, coriander and chili powder on the oil. Immediately pour in the pureed tomatoes plus 2 cups of water. Bring to a boil. Then reduce heat enough to maintain a lively simmer. Cook till the sauce thickens just a little, and gets glossy, about 7 minutes.
4. Now throw in the vegetables and salt and cook covered till vegetables are soft.
5. If the sauce is too thick, add up to one cup of water to thin it down and boil for another minute. This is not a thick curry, it should be a little thin.
6. Garnish with cilantro. Serve with rotis.

Potato Kurma with Fried Onion. Remembering my grandmother through her favorite recipes.

To commemorate my paternal grandmother’s first year death anniversary, I am posting a series of my grandmothers favorite recipes. This potato kurma recipe is second in the series. Read my first post in the series here.

My grandmother with my father

My grandmother with me

Of everyone in our family, I think I spent the most time with with my grandmother. She raised me, I shared a room with her, and went with her every where. I was always by her side. And I learnt a lot from this amazing woman just from tagging along. “Don’t depend on anyone. You must learn to do things yourself”, she’d say again and again. Every time I traveled with her, which was a lot, she would teach me again and again how to be independent. Through her, I experienced the joy that comes from not depending. As early as 10 years old, she’d make me check in at airports. There I’d be, not even reaching the counter, checking in for the two of us. It made my 10 year old self feel empowered and confident.

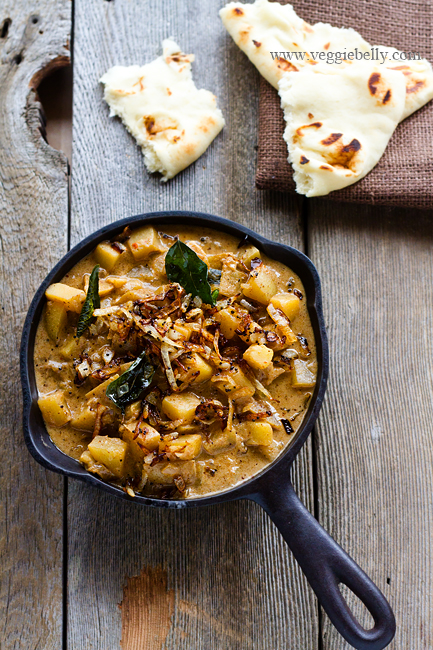
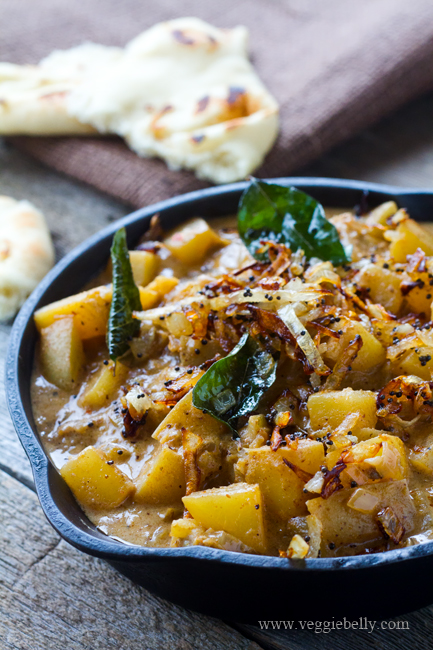
My grandmother also often said it was important to learn to cook and I think its one of there reasons I took an interest in cooking early one. (Ironically, she never cooked herself!). She relished this potato kuruma, often having her cook make it for dinner with fresh chappatis. This kurma, made with coconut milk and topped with fried onions, is rich and comforting. And the home made masala which is the flavor base of this kuruma is well worth the effort.

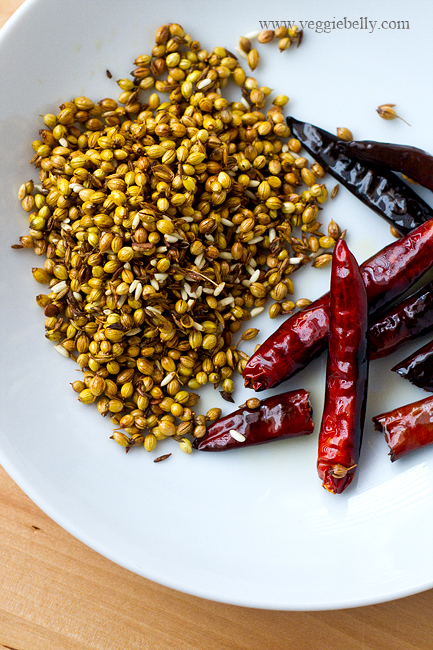
Take care not to overly brown the chills and the spices in the masala. If you over toast the spices, the kuruma will taste bitter. The trick is to stir constantly so the spices toast evenly. Remove the spices from the heat as soon as they smell fragrant.

Potato Kurma with Fried Onion Recipe

serves about 4

Ingredients
For the Masala
1 teaspoon oil
6-8 dried red chilis
2 tablespoon coriander seeds
1 teaspoon cumin seeds
1/4 teaspoon uncooked rice, optional

For the Kuruma
1lb yukon gold potatoes
1/4 cup oil
3/4 cup finely diced yellow onion
6 curry leaves
Salt
1 cup coconut milk

For the topping
2 tablespoons oil
1/4 teaspoon mustard seeds
1/2 cup thinly sliced onions or shallots
1 dried chile
6 curry leaves

Method
1. First make the masala. Heat oil in a small skillet, and add chilis. Cook them on medium heat just till they turn color, about 45 seconds. The chills should still be fairly red in color, not black. Remove the chiles and place on a plate.
2. To the same pan, add the remaining masala ingredients. (No need to add extra oil). Fry till they are fragrant and lightly browned, about 45 seconds.
3.Using a spice grinder, grind the chiles and spices using a little water, into a thick paste. Set aside.
4. Now make the kuruma. Peel and cube the potatoes. You should have approximately 5 handfuls of cubed potatoes.
5. In a large wok or saucepan, heat the oil and add onions and curry leaves. Cook on medium heat till the onion is soft, about 1 minute.
6. Add the potato cubes and cook, stirring for about 5 minutes.
7. And the ground masala paste and salt. Stir well.
8. Add enough water to cover the potatoes (about 2 cups). Bring to a boil. Then cover the wok with a lid, and let the potatoes cook on a lively simmer till the potatoes are soft but still holding their shape. Then remove the lid, and continue cooking till most the water is absorbed.
10. Now pour in coconut milk. Stir and turn off heat.
11. While the potatoes are cooking, work in the topping – heat oil in a small saucepan, add mustard seeds and let them pop. Then add all remaining topping ingredients and sauté on medium heat till the onions are browned.
12. Top kurma with the fried onion topping. Serve kuruma with rotis or naan.

Tomato Coconut Stew. Remembering my grandmother through her favorite recipes.

My paternal grandmother passed away a year ago this month. My grandmother raised me, and taught me a great deal. In her memory, I will be posting a series of her favorite recipes. The first in the series is this tomato stew with coconut milk. My grandmother relished this dish, often eating it with steaming hot idlis for dinner.

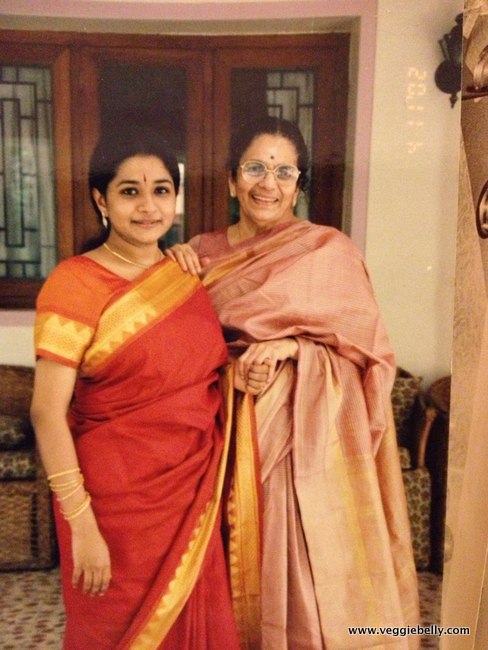
I’ve already written a little about my grandmother and what an accomplished woman she was in this post. In this series, I will share more memories of her through her favorite recipes. My grandmother was far ahead of her times. She pursued higher education, a career and a public life – something very few Indian women did during her time. She was a PhD in philosophy and literature, a public speaker, author of many books and an educationalist. And she spent a life time championing womens’ education in India.

Not only was she a career woman, she also enjoyed hosting and entertaining guests in her home..

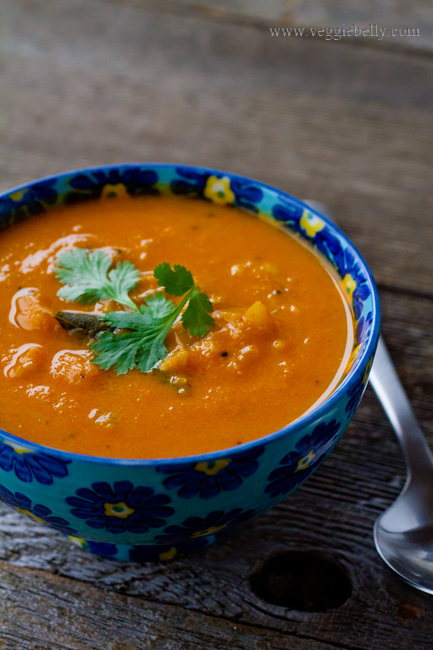
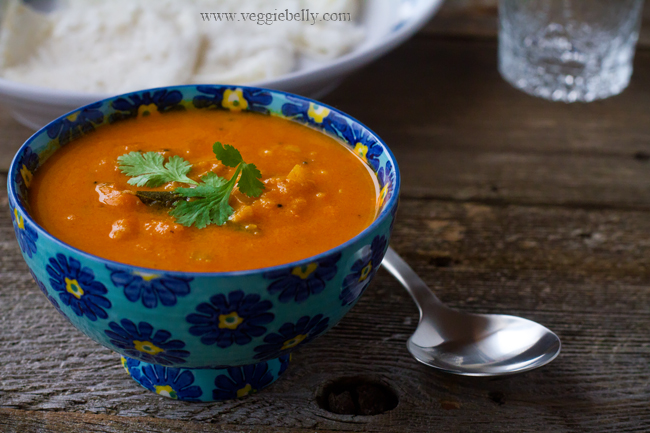
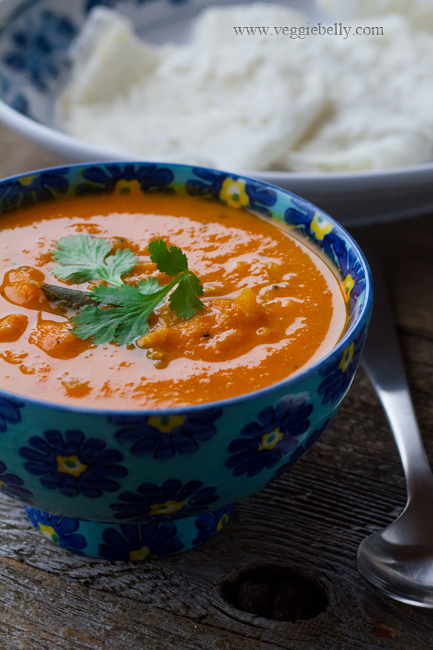
Tomato stew with coconut milk - one of my grandmother's favorites.

My grandmother playing with my iPhone on Pongal day 2013. This was the last picture taken of her.

Diwali, 2002

Getting ready for bedtime, 1982

My grandmother’s dinner parties were legendary and her hospitality impeccable. Although she never took an interest in cooking, she had a keen palate and a great love of hosting and feeding people. She would give her cook, Mariappan detailed instructions before the dinner parties. She would have the coconut trees in her lawn decorated with strings of light bulbs. She took care of every detail – the decoration, neatly folded napkins, extra large sized silver plates, polished cutlery, and a lovingly curated menu.

A typical menu made by the talented cook Mariappan would include tomato rasam and rice wafers for dipping, green pea rice scented with cumin, plump vegetable cutlets coated with golden bread crumbs, fried puris, fragrant garlicky cauliflower masala and delicate sweet polis made with lentils, cardamom and drenched in ghee. As a child, I looked forward to those balmy evenings when my grandmother would regale her guests, laughing, quoting poetry, and coaxing them to eat more. Nobody ever went home hungry after visiting my grandmothers house!

Even in her passing she found an opportunity to entertain people. Let me explain. Where I come from in India, it is customary to host a lunch in the honor of the deceased a few days after the funeral. My grandmother must have known intuitively that her death was near. So one week before her passing she wrote out the menu for the post funeral lunch, along with detailed instructions on how it should be served. Thats right, my grandmother made the menu and gave instructions for her own funeral lunch!

As per my grandmother’s wishes, my family organized a multi course lunch, with four desserts (she had quite the sweet tooth!) served on the largest, freshest banana leaves on the very same lawn where she had regally presided over dinner parties for fifty years. It was the best send off we could have given to a woman who was so passionate about food, people and life.

It is an honor to have been raised by a woman who was so intelligent, beautiful and exuberant. Her life was grand and her love was abundant. This post is the first in a series of recipes I will be posting as a tribute to my grandmother. These recipes have all been tried and tested over decades. Every single recipe I will be posting was a favorite of my grandmother’s. Each one brings back a flood of memories.

In creating these posts, I am filled with tremendous pride to have been part of this incredible woman’s life, and at the same time I am filled with great grief that she is no more.


Tomato Coconut Stew

serves about 4 as an accompaniment/curry

Ingredients
1 lb ripe tomatoes
1 tablespoon oil
1/4th teaspoon mustard seeds
1/4th teaspoon urad dal
1 small onion, minced
5 cloves garlic, chopped
6 curry leaves
1/2 teaspoon tumeric
1 teaspoon chili powder
1 cup coconut milk
1 tablespoon chopped cilantro

Method
1. Bring plenty of water to boil in a saucepan. Drop the tomatoes into the water. Let them boil till their skins blister, about 2 minutes. Then drain.
2. When tomatoes are cool enough to handle, peel and discard the skins. Then puree the tomatoes without any water. Set aside.
3. Heat oil in a medium saucepan. Add the urad dal, and mustard seeds.
4. When the mustard seeds pop, add the onion, garlic, curry leaves and cook for about 2 minutes.
5. Pour in the tomato puree, chili and turmeric powders, salt, and 1 cup water. Bring to a boil.
6. Then reduce heat, and cook on medium-low heat, uncovered, till the sauce becomes thick. About 15 minutes.
7. Add the coconut milk, stir, and turn off heat.
8. Garnish with cilantro. Serve with roti, idlis, dosa, or neer dosa.

Rice and Coconut Crepes (Neer Dosa) Recipe


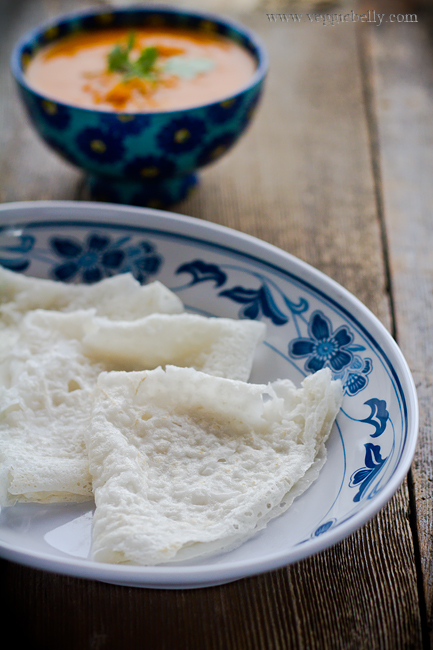
Neer dosa is a savory rice and coconut crepe from southern India. I first had neer dosa when my mother’s best friend Jayanthi Aunty, took me to Mathsya, an Udipi style restaurant in Chennai, India. She insisted I get these delicate, coconutty dosas. But I was hesitant at first. I like my dosas big, golden and crisp. These were quite the opposite – soft and delicate. But still, I let Jayanthi Aunty order neer dosas for me. Now, I’m usually super picky and particular about what I order in restaurants. But with Jayanthi Aunty, its different. I trust her. She’s known me since childhood, and knows what I like and don’t like. Besides, she has impeccable taste in everything from clothes to jewelry to furniture to food. So I wasn’t surprised when the neer dosas arrived. They were fluffy, soft and melt-in-your-mouth delicious.

Thankyou, Jayanthi Aunty for making me get that very first neer dosa. It was love at first site!
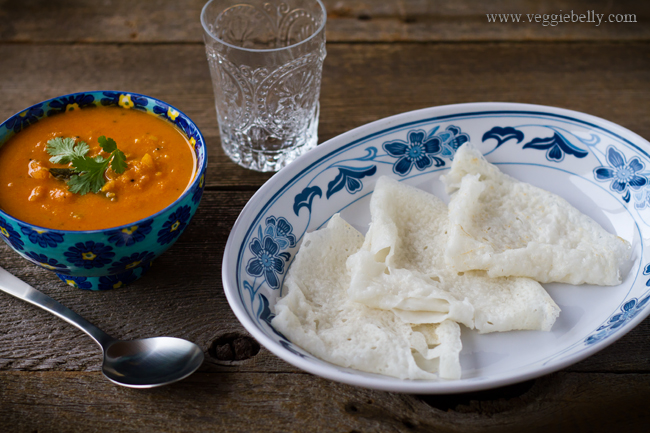
After I had my first neer dosa, I set out to perfect the making of neer dosa at home. I don’t live in Chennai, and can’t go to Mathsya for my neer dosa. So I had to figure this out at home. I’ve arrived at this recipe after a lot of trial and error, and I have to say its fabulous. I’ve now been making this neer dosa recipe at home at least once a week!
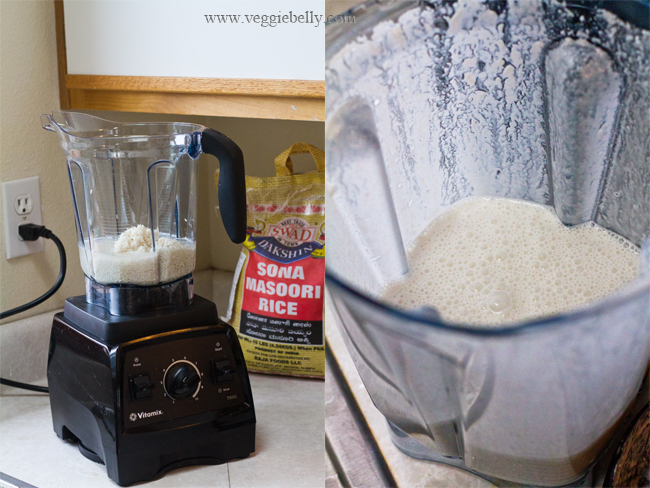

Like all dosa and idli batter, you need a good solid grinder. In my kitchen thats either my Ultra wet grinder or my Vitamix. For this recipe I used the Vitamix. Its easier to clean up after you are done blending and the Vitamix can easily grind the neer dosa batter to the super fine consistency that is key. Don’t have a Vitamix or similar powerful blender? I am giving away a Vitamix to one lucky Veggie Belly reader! Go to this post to enter for a chance to win!
Tips for the perfect Neer Dosa

- Consistency. Batter consistency is important. The batter must be a little thicker than whole milk. Also, grind the batter very finely. If you dip your thumb and index fingers in the batter and rub them together you should feel no grit or grain.

- Hot skillet. Your skillet must be very hot before you pour the batter over it. Sprinkle a few drops of water on your skillet. If the water sizzles and bubbles away within 5 seconds, your skillet is hot enough. A hot skillet is also what makes the holes form in the dosa and makes it lace-like.

- Work quickly. Because you are working with a hot skillet, you must pour and spread the batter very quickly so that a perfectly round dosa forms. The whole process of pouring the batter and swirling the pan so the batter coast it, should take about 10 seconds.

- Practice. Watch the video I’ve included below and practise making a few dosas, you will be an expert in no time.

http://youtu.be/Q8USFqvi9hQ

Neer Dosa Troubleshooting

Neer Dosa sticks to the pan – Your batter might be too thin or too cold. If the batter is too thin, you will have to start over. The ideal consistency of batter is slightly thicker than whole milk. If you are using refrigerated batter, let it come to room temperature first; cold batter will stick to the pan. An under seasoned pan will also make neer dosas stick. Usually the first 2 dosa will stick, and then they will start to come off the pan easily as the pan gets seasoned. A non-stick pan always helps.

Neer Dosas are cracking – Soak the rice longer if dosas are cracking. Adding a little extra cooked rice (1 tablespoon extra cooked rice per cup on raw rice soaked) to the batter will also help bind the batter and prevent neer dosas from cracking.

Neer dosas batter doesn’t coat the pan well – If your batter is too thick, it may not move around the skillet and coat it well to form a proper round. Dilute the batter with water till it is slightly thicker than whole milk. Cold batter also won’t glide and coat the pan, so make sure the batter is at room temperature.

Neer dosas are too brown – Your pan is either too hot or you’ve used too much coconut. But browned neer dosas are still tasty!

Neer Dosa Recipe

makes 16 eight inch dosas

Ingredients

1 cup sona masoori, or any other short grain raw rice
1/4th cup fresh grated or frozen coconut*
1 tablespoon cooked rice, optional
1/2 teaspoon salt
Vegetable oil

*You can vary the coconut quality according to taste. Use as little as 2 tablespoons and up to 1/3rd cup.

Method
1. Soak the rice in plenty of water for at least 4 hours and upto 8 hours (over night). Then drain the water.
2. Place the soaked rice, grated coconut, cooked rice if using, and 1 cup water in a Vitamix or similar powerful blender. Blend on medium speed for about 1 minute. Then crank up the speed to medium high and blend till the batter is very smooth, without grains or grit. If the batter gets hot during blending, throw in one or two ice cubes.
3. Add 1 more cup of water and salt and blend for a few seconds. The batter should be a little thicker than whole milk. If its too thick, add water to dilute it. You should have approximately 4 cups of batter.
4. Let the batter rest, covered for 1 hour. This is optional. You can also use the batter right away.
5. Heat an 8 inch non stick skillet on high heat. When you sprinkle a few drops of water on the skillet, it should bead up and sizzle away in under 6 seconds.
6. Dip a wad of paper towel in oil, and wipe the skillet. This will season the skillet.
6. Mix the batter well, and keep it near you. Pour 1/4th cup of batter into the center of the skillet. Immediately, shake back and forth and swirl the skillet so that the batter coats the bottom of the skillet completely and holes start to form on the surface. (See video above)
7. Drizzle a few drops of oil around the dosa. (If you are using a good non stick skillet, you can get away with not using any oil at all if you wish).
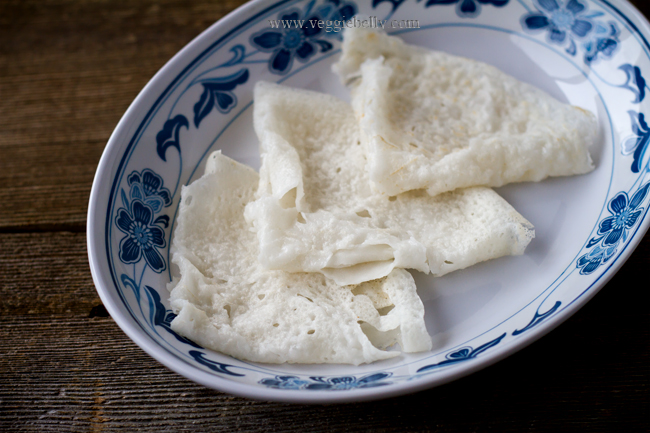
8. Now cover the skillet, reduce heat to medium and cook for about 30 seconds. The neer dosas should not brown. Remove lid, and cook another 30 seconds or till the dosas are no longer liquidy, come off the skillet easily and are still fairly white in color.
9. Fold the dosa into a semi circle and then again in half to form a triangle.
10. Bring the pan back up to high heat, and repeat for the remaining batter.

11. Serve neer dosas with chutney, podi or crushed jaggery

Related Posts with Thumbnails