Grilled Portobello Mushroom, Roasted Red Pepper and Mozzarella Sandwich or Burger

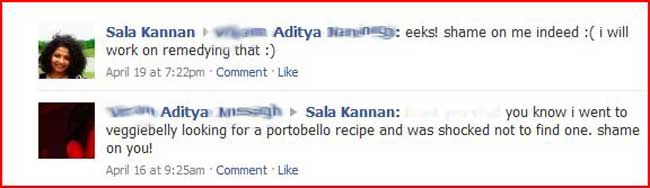
I received the below facebook message one day from my friend, Aditya. Being the great mushroom aficionado that I am, how could I have posted all  but one portobello recipe on this site?!  Ive featured other mushrooms on Veggie Belly, like the shitake mushroom soup, morel mushrooms over polenta, beech mushroom flat bread, and my recent morel mushroom pasta with fiddleheads. But the mighty, meaty portobello has been in all but one recipe on veggie belly. I defenitely had to remedy that!

Aditya, this one is for you  ♥ 

These portobellos were larger than the palm of my hand! But they turned out to be the perfect size for these sandwiches/burgers; they shrunk just enough while cooking on the grill, to fit in the kaiser roll. Portobello or portabella mushrooms are delicious in burger style sandwiches because they are meaty in taste and texture. They are often called the ‘steak of all mushrooms’! They also take to grilling very well. I used beefsteak tomatoes in this sandwich, again, for their meaty texture. But any tomato will do.

Grilled Portobello Roasted Red Pepper and Mozzarella Sandwich/Burger Recipe

makes 4 sandwiches

4 large portobello mushrooms
2 tablespoons olive oil
1-2 tablespoon balsamic vinegar
1/2 teaspoon italian seasoning
salt & pepper
4 kaiser rolls or burger buns or 8 slices of any other loaf bread
2-4 tablespoons mayonnaise or my white bean asparagus hummus
2 tablespoons chopped fresh basil
4 slices beefsteak tomato
4 slices fresh mozzarella (or whatever cheese you like)
4 large pieces of store bought, jarred roasted red pepper
1 cup salad leaves or lettuce of your choice

Heat an outdoor grill to 400f.

Wipe the mushrooms clean. Using a spoon, scrape off the gills from the mushrooms. Whisk together olive oil, vinegar, italian seasoning, salt and pepper. Brush the olive oil and vinegar mixture all over the mushrooms.

Place the mushroom caps on the grill and grill about 2-3 minutes on one side. Flip the mushroom caps, and grill another 2-3 minutes. (If you like your cheese melted, place cheese slices on portobello caps (gill side) after you have flipped them). Remove grilled mushrooms to a plate, and cover to keep warm. If you are not using an outdoor grill, broil the mushrooms in the oven; about 3-4 minutes (or till browned a little) per side.

Cut the bread roll in half. Spread some mayonnaise or my white bean asparagus hummus  on both halves. Sprinkle some basil on top. On the bottom half of the bread roll, arrange the grilled portobello mushroom, tomato slice, mozzarella slice, and roasted red pepper. Top with lettuce or salad greens. Place the other bread slice on top. Secure sandwich with a toothpick. Serve with a side of soup or salad and fries or chips.

Fiddlehead Fern and Morel Mushroom Pasta


Fiddleheads are young, coiled fronds of the Ostrich Fern. They appear during a short window in the spring and are usually foraged. They have a very mild flavor and a pleasant crunch. To me, they taste somewhat like broccoli stems. Fiddleheads taste great with morel mushrooms. Both fiddleheads and morels come into season at the same time; so it makes sense to use them together. The bright delicate flavor of fiddleheads paired with the earthiness of morels is just exquisite.

Fiddleheads remind me of the beauty of natures creations. These are bright green coils of fern with the delicate flavors of spring tucked into their gorgeous spirals. Dont add too many herbs or spices to fiddlehead dishes; just let their flavor shine through.

How to cook and store fiddleheads

- Remove any brown stuff and dirt on the fiddleheads. Trim the ends

- Wash them throughly in cold water

- Fiddle heads taste best when blanched in salted waterfor 2-4 minutes or until they are tender but crisp. Use blanched fiddleheads in pasta or lightly saute them in butter

- Instead of boiling, fiddleheads can also be steamed till they are crisp-tender

- Blanched/steamed fiddleheads can be patted dry and frozen

- Don’t eat fiddleheads raw, they can make you sick!

- Consume fiddleheads immediately after your purchase or foraging trip. They don’t keep very well

- If you must store fiddleheads, wrap them loosely in a plastic bag and refrigerate them. Use within one day

Fiddlehead Fern and Morel Mushroom Pasta Recipe

serves about 3-4

1/2 oz dried morel mushrooms
3 oz fiddlehead ferns (about 18-20 pieces), washed well
1/2 pound pasta
3 tablespoons butter or olive oil
2 cloves of garlic, chopped
2 sprigs of thyme
1/4 cup heavy cream (recommended) or milk
salt and pepper

Boil water in a small pot, add dried morel mushrooms to boiling water. Immediately turn off heat. Cover and let the mushrooms soak for about 15 minutes. After 15 minutes, drain and squeeze excess liquid from the mushroom. Reserve about 1/4 cup of the mushroom soaking liquid.

In another pot, boil more water, add fiddlehead ferns and boil for about 2 minutes. Then remove from water and submerge in a bowl with cold water and ice cubes. This will stop the cooking process and keep the fiddleheads crisp and green.

Cook the pasta in plenty of salted water till pasta is al-dente. Don’t overcook pasta.

While pasta is cooking, heat a skillet and add butter or olive oil. Add chopped garlic, thyme, and drained morel mushrooms. Cook till morels are soft. Add drained fiddleheads, cream, and 2 tablespoons of mushroom soaking liquid. Cook on low heat for about 1 minute. Add salt and pepper. For a thinner sauce, add more mushroom soaking liquid. Add the boiled pasta and toss.

White Bean(Cannellini), Asparagus and Basil Hummus or Dip

We have a lot of Salvia plants in our garden. I particularly love the ones around our mail box. Come spring, and the Salvia erupt into a glorious bloom. This year, our Salvia are particularly lush and gorgeous, probably because of all the rain. Nothing makes me happier than coming home to these purple tufts of Salvia, buzzing with bees.

Just as the blooming of Salvia flowers remind me of the joys of spring, so do the stalks of asparagus at the farmers market. I made a healthy, vegan dip or hummus with fresh asparagus stalks and some white beans. This dip come together in no time and is a lighter alternative to creamy store bought dips. I also like using this as a spread for sandwiches.


White beans or cannellini beans add a nice creaminess to this dip/spread without the added fat. I used asparagus because it is now is season. Broccoli or spinach would also work.  

Basil and lemon juice add a fresh, bright taste. If you like it more lemony, stir in some lemon zest.

Here are some other white bean/ cannellini bean based dips around the web

Giadas white bean dip. Gotta love Giada!
Cannellini bean dip with sage and rosemary by Andrea Meyers
Easy white bean dip on cheap healthy good blog

White Beans (Cannellini), Asparagus and Basil Hummus Dip Recipe

makes about 1 1/2 cups

6-8 stalks of asparagus
one 15 oz can white beans/cannellini beans, washed and drained well
1 garlic clove, peeled
1/4 cup olive oil
1/2 cup basil leaves
2-3 tablespoons lemon juice
salt and pepper

Chop off and discard the tough ends of the asparagus stalks. Chop the asparagus into pieces. Boil asparagus in some water, till asparagus is tender. Drain well and place asparagus in a blender. Place all other ingredient in the blender as well. Puree as smooth or as chunky as you like. Serve chilled with vegetable crudites, chips or pita bread.

Shaved Carrot Salad with Pecans and Tangy Honey Vinaigrette

Here’s an easy, simple carrot salad that will be a great side dish. I love packing this for a summer picnic. Sweet, tangy, crisp yumminess! I like shaving the carrots into ribbons or strips using a vegetable peeler. If you wish, you could grate or julienne them.

Tips

- For extra crisp carrots, place the shaved carrots in a bowl of water with ice cubes.  Pat dry before dressing
- When you measure the ingredients for the vinaigrette, measure out the olive oil first. Then use the same measuring cup or spoon to measure the honey. They honey will slip out of the olive oil coated measuring spoon easily
- The vinaigrette will keep for a few weeks in the fridge, so its a great make ahead item!
- I used white wine vinegar for the salad dressing. Apple cider vinegar or balsamic vinegar will also work well. For a citrus touch, try adding lemon or orange juice and zest 

I love serving salad dressing in this mini creamer jug I brought back from my trip to Thailand.

Shaved Carrot Salad with Pecans and Honey Vinaigrette Recipe

serves about 2

3 medium carrots
3 tablespoons chopped pecans
Honey vinaigrette, recipe below

Peel the carrots. Using a vegetable peeler, shave the carrots into long ribbons (see photos above). Lightly toast pecans in a skillet. Sprinkle pecans over shaved carrots. Serve chilled, with honey vinaigrette (recipe below).

Honey Vinaigrette Recipe
Whisk together 2 tablespoons each of olive oil, honey, and white wine vinegar. Add salt to taste.

Mor Kuzhambu or South Indian Yogurt Coconut Curry

Mor kuzhambu or moor kulambu, however you spell it, is a satisfying south Indian dish made with yogurt and fresh coconut. Mor is buttermilk in Tamil and kulambu is gravy or curry. I use yogurt to make this dish (instead of buttermilk) because it makes the gravy thicker. Peppercorns are wonderful in this dish. You don’t actually eat them, but they impart great flavor. These peppercorns are from my dear friend and fellow food blogger, Nandini’s plantation in India.

Tips

- Use freshly grated coconut or fresh-frozen coconut. Please, none of the dried or dessicated stuff!
- For a lighter version of this dish, use buttermilk instead of yogurt
- Do not let the curry boil once you’ve added the yogurt. Use low heat and stir constantly to prevent boiling
- Remember to only gently re-heat this dish
- Serve mor kuzhambu with steamed rice or curry leaf rice. See this post for my curry leaf rice recipe

A note on what vegetables to use for Mor Kolambu
You can use any vegetable you like, here are some favorites and suggestions*

- Long squash(sorakkai or lauki). Peel the skin, scoop out the seeds and cut into cubes. (This is what I used in this recipe)
- Winter melon(ash gourd, neer poosanikkai or petha). Peel skin, scoop out seeds and membrane and cut into cubes
- Ripe mango. Peel skin, remove pit and cut into cubes
- Corn on the cob. My favorite. Remove husk and cut the whole corn into 1 inch rounds. Will need more water to cook
- Orka(vendakkai or bhindi). Cut into pieces. Make sure you saute okra in oil till it is no longer slimy

Mor Kuzhambu or South Indian Yogurt Coconut Curry Recipe

serves about 6

Grind to a paste
3/4 cup fresh grated coconut
1 tablespoon minced fresh ginger
1/2 tablespoon cumin seeds
2 green chillies (use more or less according to taste)
1/2 cup water

For the gravy
1 tablespoon oil
1 teaspoon black mustard seeds
1 teaspoon whole black peppercorns
a pinch of asafoetida
a few curry leaves
1 teaspoon turmeric powder
2 cups of cubed vegetable (see suggestions in the post above)*
water
salt
a 32 oz tub of plain yogurt
Cilantro for garnishing

Place the ingredients for grinding in a blender and grind into a smooth paste. Set aside.

In a deep pot, heat oil, and add mustard seeds and peppercorns. When the mustard starts to pop and splutter, add the asafoetida, curry leaves, turmeric, and cubed vegetable (see note in the post above for what vegetables to use). Cook on medium heat for about 3 minutes. Then pour about 1 cup water, cover and simmer till the vegetable is cooked; about 7 minutes.

Add the ground coconut mixture, and cook on medium-high for about 2 minutes. Reduce heat to low. Beat the yogurt with a spoon or whisk and add it to the coconut-vegetable mixture. Stir gently and constantly on low heat for about 2 minutes. Do not let the gravy boil once you’ve added the yogurt. Add more water if the kuzhambu is too thick. Garnish with chopped cilantro. Serve with white rice or curry leaf rice.

How I shot the floating cranberry photo

Many of you wrote to me asking how I shot this floating/suspended cranberry photo that appeared in this post.

Did I drop the cranberry into the bowl and shoot while it was falling?

Did I hold the cranberry up using a skewer or something similar and then photoshop the skewer?

Was this two photos that were merged together?

No, no, and no!

Its really very easy to do. No photoshopping, no fancy camera tricks. You just have to elevate the single cranberry from the rest, using a tooth pick. Take a look..

One tooth pick didn’t elevate the cranberry enough. So I taped two tooth picks together for extra height. Because of the short distance between the elevated cranberry and the rest of the bowl, I decided to use a macro lens.

A Macro lense, along with a wide aperture setting, will give the image a shallow depth of field. This means the background (in this case, the bowl full of cranberries) will be thrown out of focus. More background  blur means the more the floating cranberry will stand out.

The set up is simple..

I placed the bowl with cranberries on a white foam core board. I placed two ego lights on the foam core; one at 2 o’clock and one at about 10 o’clock. (It was a winter night, so I couldn’t make use of natural sunlight, which is my first choice for food photos).

Then I took the shot from top down so that the tooth pick was directly under the floating cranberry. It took a few tries before I could position myself so that the tooth pick was not visible under the cranberry. And voila, the money shot!   

EXIF info

Camera: Canon Rebel XTi

Lens: 60mm macro

Aperture: f/2.8

Shutter speed: 1/125

ISO: 100

Exposure mode: Manual

Lighting: 2 Ego lights

Rhubarb Raspberry Polenta Cake

Its rhubarb season! Grocery store shelves are brimming with these beautiful red stalks. I couldnt let spring roll around and not make anything with rhubarb! Usually, rhubarb is used along with strawberries in pies (because rhubarb and strawberry seasons coincide). This recipe features rhubarb, along with raspberries in a polenta or cornmeal cake. If you like corn cakes, you’ll certainly love this dessert version!

Andrea, from Cooking Books blog says its the Scandinavians who know how to best enjoy the tartness of rhubarb. Andrea says,

“I’m not sure anyone appreciates rhubarb the way the Scandinavians do. In the US, it seems like you rarely find rhubarb without strawberry to mellow it’s tartness. But in Norway, rhubarb stands very much on its own. In fact, R remembers as a child being given stalks of raw rhubarb with a small bag of sugar for dipping and munching.”

Tart rhubarb, tart raspberries, in a sweet, cornmeal cake. Just delicious! And I love the ‘corny’ taste and texture of this cake too.

I adapted the recipe from this recipe for raspberry and lemon polenta cake  by Jane Hornby. Jane’s recipe is for a layered polenta cake, filled with a cream cheese filling. I left out the filling all together and simply made a single cake, adding rhubarb.

Add most the fruit to the batter and bake half way. Then sprinkle more berries on top of the half-cooked cake and continue baking.

Ever baked a cake with fruits in it and all the fruits sink to the bottom? Jane has the solution! Its a great trick for getting this cake to look beautiful too. Reserve some of the berries and then sprinkle them on top of your cake half way through baking. The cake should still be jiggly when you do this. Gently press the berries into the batter like the picture above and return cake to the oven. The batter will bake around the berries and when its done, you’ll have a perfect, berry studded cake!

You can store this cake covered at room temperature for about 2-3 days or wrapped tightly in the fridge for about 4-5 days. Serve with icecream or homemade rhubarb-raspberry compote.

Rhubarb Raspberry Polenta or Cornmeal Cake Recipe

adapted from this recipe  by Jane Hornby
serves about 8

8 oz or 225 grams sugar
8 oz or 225 grams butter, at room temperature
4 large eggs
1/2 teaspoon vanilla extract
6 oz or 175 grams fine cornmeal or polenta
1.75 oz or 50 grams flour(I used cake flour)
1 1/2 teaspoons baking powder
a pinch of salt
zest of 1 lemon
1 cup chopped rhubarb
1 cup raspberries
1/2 cup sugar
1 tablespoon lemon juice

Pre-heat oven to 375F. Butter a 9 inch cake tin or baking dish and line the bottom with parchment paper.

In a standing mixer, cream the sugar and butter together for about 3 minutes. Then add the eggs to this mixture one by one. Beat on high speed till the mixture is fluffy. Add vanilla and turn off the mixer.

Sift together the cornmeal/polenta, flour, baking powder and salt. Fold this into the egg mixture in 2 batches. Stir in lemon zest. Pour this batter into the baking dish or cake tin.

Reserve about 1/8 cup of the rhubarb and 1/8 cup of raspberries. Sprinkle the rest of the rhubarb and raspberries on top of the cake batter. Smooth out the top. Bake in the oven for about 20 minutes. The cake should still be jiggly, but risen. At this stage, take out the cake from the oven. In a small bowl, combine 1/2 cup sugar with 1 tablespoon lemon juice. Sprinkle the lemon juice-sugar mixture all over the top of the cake.

Then arrange the reserved rhubarb pieces and raspberries on top of the half cooked cake. Gently poke them into the batter (but dont poke them all the way in — see picture in post above).  Return cake to the oven and bake another 10 minutes. Cool cake slightly before removing it from the pan.

South African Bunny Chow – my vegetarian version with Chickpeas

South African cuisine is a titillating mix of Indian, British, Malay, Portuguese and Indonesian food. Every group of settlers has left its own mark on the country’s cuisine. Bunny Chow, also called ‘bunny’ is one of the Indian community’s contributions to South African cuisine. Indian immigrant laborers are credited with inventing this dish nearly 200 years ago. They used hollowed out loaves of bread to put their curries in – an easy way to transport their curries while working in sugar cane plantations. The concept of bunny chow is not unlike India’s own pav bhaji – bread eaten with curried vegetables.

Camps Bay in Cape Town

When I first heard about Bunny Chow from a taxi driver in Cape Town, I was intrigued. But this African street food is usually made with meat, and I couldn’t find a vegetarian version while I was in South Africa (I should have searched harder because the original bunny chow was vegetarian!). I was disappointed to say the least. When Meeta announced South Africa as the theme for her monthly mingle, I jumped at the opportunity to make a vegetarian bunny chow.

I used chickpeas as the filling. I also decided to go with a more elegant presentation and used mini ciabatta rolls, instead of the traditional white bread loaf. The mini rolls worked well, they looked cute, were easy to eat and reminded me of panera style bread bowls! The bread ‘bowls’ soaked up all the curry and got finger licking good!

Intrigued? Want to read more?

Cook Sister’s bunny chow recipe
Afar blog’s bunny chow recipe
Bunny chow etiquette

If you dont want to bother hollowing out bread or dont want use as much bread, you could serve the chickpea filling on top of slices of crusty bread – tapas style! But ofcourse, it wont be bunny chow anymore ;)

South African Bunny Chow with Chickpeas Recipe

makes about 6 mini bunnies

2 tablespoons vegetable oil
1 onion, finely chopped
1 tablespoon garlic paste
1 tablespoon ginger paste
1 carrot, diced (1/2 cups when diced)
1 small green pepper, diced (1/2 cup when diced)
1 large tomato, diced
1 tablespoon curry powder ( may need more or less depending on the brand)
1/2 teaspoon turmeric, optional
1/2 teaspoon paprika, optional
1 cup canned chickpeas, drained
2 teaspoons tomato paste
1-2 cups water
1-2 teaspoons lemon juice
salt
cilantro for garnish

6 mini ciabatta or other bread rolls (or 1-2 regular sized loaves of white or crusty bread)

Heat oil in a pan. Add chopped onions and cook on medium heat till the onions are brown. Then add ginger and garlic paste and saute 30 seconds. Add carrot, green pepper, and tomato and cook till the vegetables are soft. Now add salt, curry powder, turmeric and paprika if using, cook 1 minute on medium-high heat.  Add chickpeas, tomato paste, 1 1/2 cups water and bring to a boil. Stir to make sure tomato paste has dissolved. Boil for about 2 minutes. Add more water if the curry it too thick. Turn off heat. Taste,and add lemon juice according to taste.

Cut the tops off the mini bread rolls and gently scoop out the bread inside. Fill the bread ‘bowls’ with the chickpea filling. Garnish with chopped cilantro. Serve along with the scooped out bread for dipping.

If using larger sized loaves of bread, halve or quarter (depending on the size) the bread loaf. Scoop out the bread to form a bread bowl. Fill with chickpea filling. Be careful not to scoop out too much bread, your filling might leak out!

Related Posts with Thumbnails